In the first part of our series on building a plugin, we kicked things off with some general background information on plugins, then cobbled together a very basic Hello World example to prove that creating a functioning plugin of some sort is within everyone’s grasp.
Eagle-eyed readers may have spotted that our initial approach to making a plugin was a little on the slapdash side. We simply wanted to see something on the screen, and weren’t too concerned about what was happening behind the scenes.
This time around we’ll get a bit more organized, employing a handy piece of kit called the WordPress Plugin Boilerplate to keep things on the straight and narrow from the start. We’ll use it to get the bare bones of our project up and running, then take some exploratory steps into the files it generates.
Before we dive in, let’s quickly outline why we’re taking this approach.
The Need For Structure
As Daniel Pataki points out in his excellent WordPress Plugin Boilerplate 101 piece over on CodeinWP, there’s a lot of room for letting things slide when you’re putting together a plugin:
“Since the inception of WordPress plugins about 10 years ago not a lot has changed in the way we write them. There’s a main plugin file with a header followed by the Wild West basically. Apart from using hooks, there is no standardized way of making plugins.
This isn’t necessarily a problem. There are many simple plugins that don’t need a governing framework, and there are some people who can write perfectly coherent procedural code. That said, the quality of code in plugins is generally not the best, a framework or methodology would go a long way in raising it,” Daniel Pataki said.
The official Plugin Handbook gives us a great jumping-off point in many respects, and plenty of solid documentation about best practices to lean on — but it doesn’t actually enforce getting things right from the get go.

By using a framework such as the WordPress Plugin Boilerplate, we get two things straight out of the box:
- A carefully thought out structure that incorporates best practices in terms of coding standards and gets us off to a solid start generally.
- A useful learning environment that enables us to easily poke around without having to reinvent the wheel too much.
In the context of developing a plugin for the very first time, this is pretty much exactly where you want to be starting from. Let’s move on to actually getting our framework installed.
Getting Up And Running With The WordPress Plugin Boilerplate
The WordPress Plugin Boilerplate is aimed largely at intermediate developers, but also works nicely as a set of training wheels for those just starting out. More advanced users will probably want to start from the project’s official Github repository, but we’re looking to keep things a little more drag-and-drop, so we’ll be taking another approach.
A handy online generator exists, which enables us to avoid a lot of manual fiddling by simply filling in some details, then downloading the resulting files to a local directory. Our first port of call, therefore, is the snappily named WordPress Plugin Boilerplate Generator.
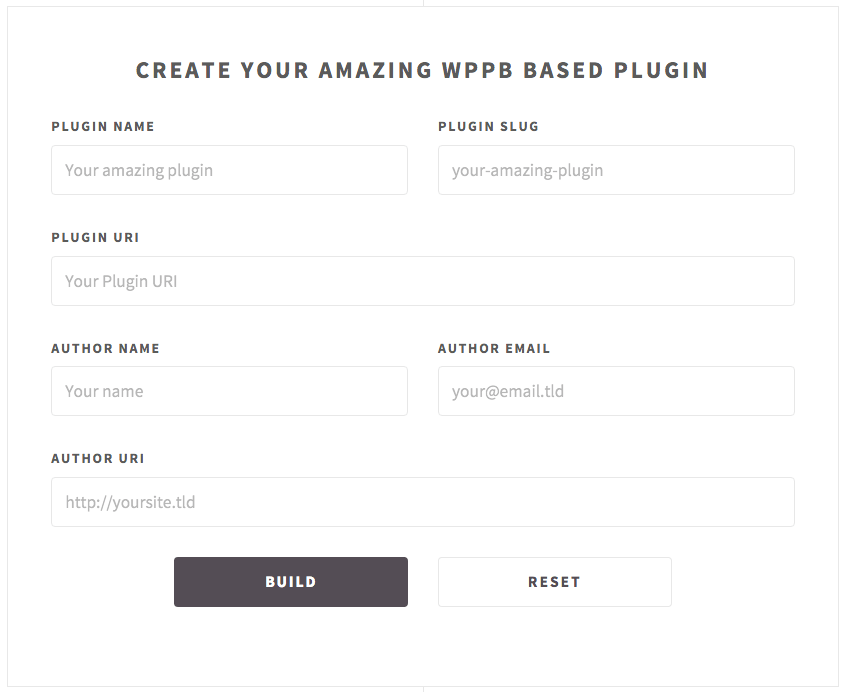
As you can see in the screenshot above, we just need to submit some basic details to generate a downloadable package nicely pre-prepared for our needs. All we need to do now is unzip our generated file, and move it into the /wp-content/plugins folder of our local WordPress install. In this case, we’ve created a site called www.randomquote.dev, quickly set up using the magic of DesktopServer. We’ve called the plugin My Random Quotes with a slug of my-rdm-quotes.

If we now navigate to Plugins on the back end of our local site, we’ll see that the bare bones of our future random quote plugin have magically been created:
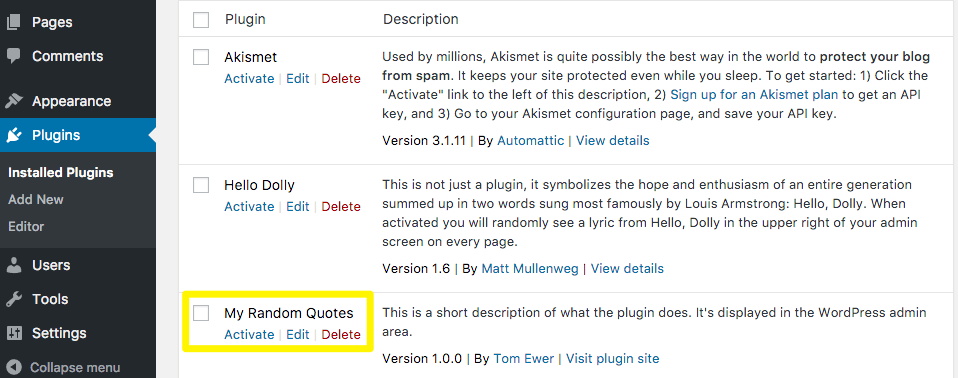
There’s obviously some heavy lifting going on behind the scenes here. Let’s start looking under the hood and see what we just got for free in our downloaded files and folders.
Stepping Through Our Plugin Folder Structure
Once we actually look inside the /plugins/my-rdm-quotes folder locally, it’s instantly apparent that we’re off to a more structured start than in our previous attempt.
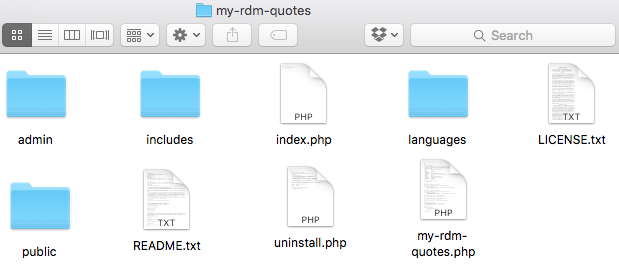
The first things that catch the eye are the four main top-level folders. These offer a useful separation of concerns straight out of the box:
- admin: As you’d expect from the name, all admin-related code will be living in here. Click inside and you’ll see folders already created to house CSS and JavaScript.
- includes: This folder is going to contain much of the functionality for setting up and tearing down our plugin. A number of handy files are included there by default. We’ll step through them in a minute.
- languages: This folder contains a pre-made .pot file to help with internationalization down the line.
- public: This is where public user facing functionality should be housed. Again, you’ll notice folders already existing for CSS and JavaScript if you poke around inside.
Ok, now that we have a rough idea of the lay of the land, let’s pick out some key files to be aware of from the outset.
Examining Some Key Plugin Files
Let’s take things from the top here. In the primary directory of the plugin folder, there are two main files you’ll be altering:
- README.txt: Pop this open in a text editor and you’ll see handy boilerplate already in there to help you with putting together the perfect readme when the time comes.
- plugin-name.php: In our case, that’s my-rdm-quotes.php. This is where your plugin header lives. If you open that file and scroll down a tad, you’ll see it’s also registering important hooks for activating and deactivating your plugin, and including what will be our main plugin class.
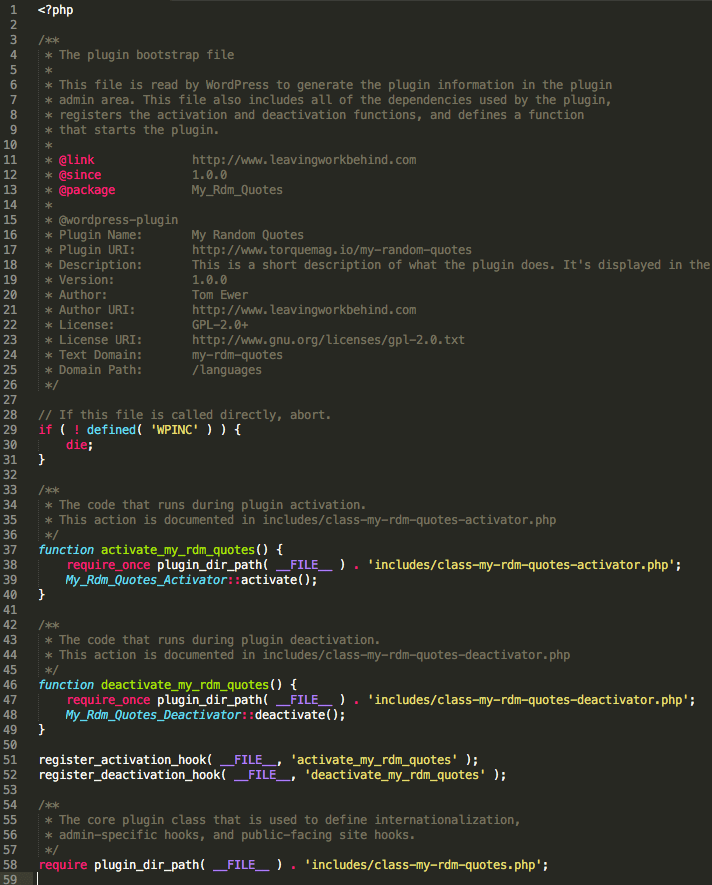
Sifting through the my-rdm-quotes.php file, it’s obvious there are a lot of important items being referenced directly in that includes folder, so let’s go through the main ones:
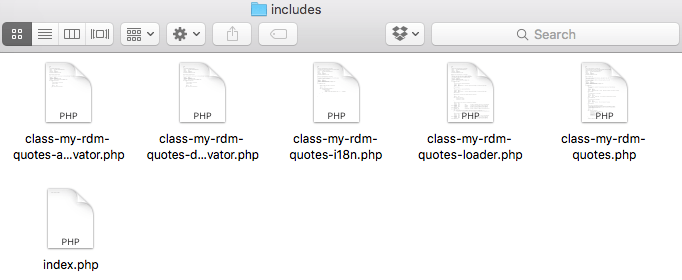
As you can see in the image above, we’re dealing with five key default files straight off the bat, each of which define their own classes. Each one will include the plugin name (in our case my-rdm-quotes) within the file name:
- class-plugin-name-activator.php: This is where you isolate things that need to happen upon plugin activation.
- class-plugin-name-deactivator.php: Here’s where you can clean up after yourself when deactivating your plugin.
- class-plugin-name-i18n.php: This is where internationalization functionality will be handled down the line.
- class-plugin-name-loader.php: This is a key file, but you probably won’t be tampering too much with it directly. It’s what manages the registration of actions and filters defined by your plugin’s hooks behind the scenes.
- class-plugin-name.php: This is where much of the action happens. The main thing we need to be aware of here is that the class gives you two methods, each of which are used to handle adding hooks on the front and back end.
Let’s briefly step into that last class in a little more detail.
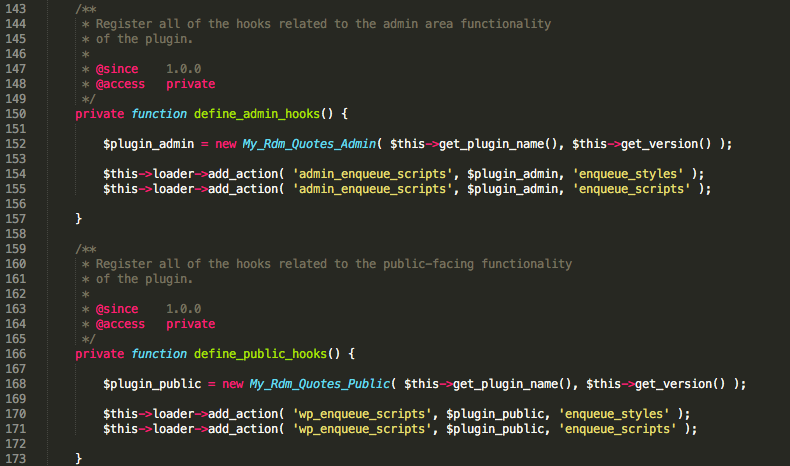
As you can see, the two methods we alluded to above exist here in the form of define_public_hooks() and define_admin_hooks(). As long as we add our own hooks correctly in here later on, we should be able to work on their actual functionality nice and neatly in the public and admin folders respectively.
Okay, we’ve covered a fair bit of ground so far – it’s time to wrap things up for today before we get lost in too much detail!
Conclusion
We haven’t yet dived in with any of our own code, but a number of major boxes have already been ticked. Perhaps most importantly, we can be certain we’re starting off with a solid base to build upon that should keep us in line with general best practices.
Though we stepped through quite a lot of detail above, the way the framework we’re using works really boils down to three key concepts:
- We’ll be working on anything to do with admin code in the admin folder.
- Public facing functionality will be going in the public folder.
- We’ll be dipping in and out of the includes folder to tie everything together from time to time.
We’re curious to hear if any of you out there have already gone down the boilerplate road on previous projects? Get in touch via the comments section below and let us know!
Featured image: Dyanap.

2 Comments