Every once in a while I review my personal blog publishing process to analyze what I’m doing so that I can ensure maximum levels of productivity and limited amounts of waste.
I do this for the obvious reasons as just listed but also because I’m generally curious as to not just what I’m doing but also why. I often question the very things that I do so that I might gather a new perspective or see if I can better myself incrementally.
I’ve learned do this quite instinctually – in fact, I’ve done something fairly dramatic this past weekend with my iPhone that I challenge you to do, although that might get you sidetracked, so don’t click that link quite yet.
What’s fascinating is that most people don’t actually review their own internal processes and as a natural result they don’t get much better – they may try a new GTD system or some other productivity app, but nothing seems to change; surprise, surprise.
What I want to share with you is the soup-to-nuts process that I take to create most of the blog posts that I write. There is certainly a lot of flexibility built-in here and I’m willing to break my own rules on command, but this is the general top-level process.
1. Start with the Physical
The first thing I do is I capture most of my blog post ideas into something physical. I use both my Action Method Journal, which is one of my top writing notebooks or I use #Notes, which is a small product that our team here at WP Daily created a while ago to help capture those ideas into some workable framework.
I don’t prefer one over the other although I do really enjoy my larger notebook as I have more than just blog post ideas – I have sketches for apps that I’m interested in exploring as well as notes for design and development for 8BIT or WP Daily.
I capture the initial idea there and save it for later. The reason I use something physical is because I feel there’s something uniquely intimate about the process of putting pen to paper (and make sure you use pen!). It crystalizes much more and I find the idea matures in real-time as I write it down.
It’s somewhat magical, if I’m completely honest.
2. Draft in the Cloud
The next part of my process is drafting the actual blog post in a cloud-based solution. I’m completely in love with iA Writer and the opportunity to save my work in the cloud means that I have access to it everywhere. With it’s ability to save in real-time as well I never have to hit any “save” button.
What’s beautiful about iA Writer is the fact that it focuses on the meat and bones of a great blog post – the content. There is no time to waste for hyperlinking or adding images – just write to my heart’s content.
With a dramatically clean area to write on I feel just free to do just that – write:
Once the core draft is done I’m ready for the next stage.
3. Finding and Optimizing Media and Collateral
The next segment is simply finding the right images and attached media that I will need for the post. I do my best to follow my own guide for using images on blog posts and collect all these images to be used for the actual post.
If it’s a video or audio clip I put this link in the button of the draft in iA Writer – otherwise, I simply collect them in a folder on my desktop.
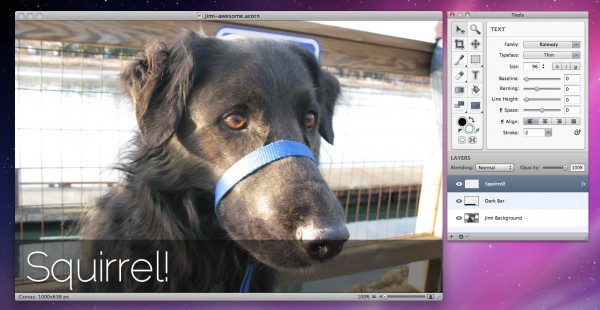
I may also take two additional steps in optimizing my media as well, first using my image editing software Acorn app to crop the image or make slight adjustments:

Secondly, I’ll use ImageOptim, which is a free image optimizer which creates optimized (smaller sized) images with lossless quality:

Now my images are ready for publishing!
4. Moving to WordPress, Finalizing
I do not use any desktop publishing application although there are a ton of them out there. Instead, I’m very comfortable with using WordPress via the web interface.
I’ll copy and paste my text via iA Writer right into the blog drafting area and then begin to clean up any carriage returns and content that I want.
Here I’ll go about adding the Featured Image, the images that I’ve optimized, any related media, as well as choosing the categories and tags that are appropriate.
Finally, at the very end, I’ll add the necessary hyperlinks that are needed for the blog post to go live. There’s nothing flashy or sexy about this part of the process but it’s obviously crucial to get me toward publishing!
5. Publish and Share
The last part is simply hitting the publish button as well as sharing the blog post across all the various social networks and sites that will contribute to the blog post being read.
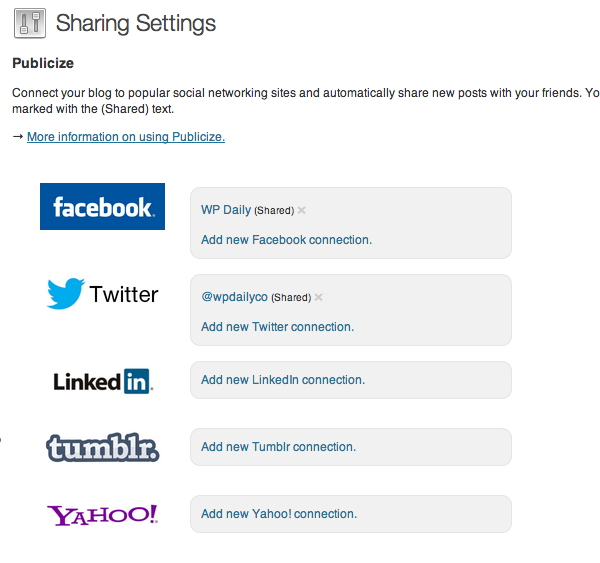
Jetpack enables a lot of this through their Publicize Options:

As well as their Sharing Services section:

I’ll publish and then begin to click the relevant links that make sense for this post for publication.
Then, I sit back, and watch the traffic come right on in (sometimes I actually do this through Real-Time Google Analytics).
That, my friends, is my core blog publishing process from start to finish. As I mentioned before, I’m very open and willing to break my own rules, so to speak, and occasionally I will, but this is the bare minimum that happens.
Again, the point of reviewing such a process is in the hopes of optimization – perhaps there might be a better tool, a better method to publish a post faster, better, and more smartly. At this time I’m not sure that I can, but I’m willing to try anything once.
Have any tips or tricks that you use to get your blog posts published? I’d love to hear them!


5 Comments