Anyone looking to grow a successful online business is well aware of the pitfalls of becoming too dependent on the search engines as a source of traffic. Months of hard work can be undone, literally overnight, as Google constantly tweaks its algorithm.
An important alternative source of traffic for most websites comes from the social media websites: Twitter, Facebook, and Google+ being the most important right now.
Most of you will already have your social media logos prominently placed on your website to encourage social shares, but could you be doing more to encourage your readers to like, tweet, or share your content?
One method that is often completely overlooked is the use of a content locker.
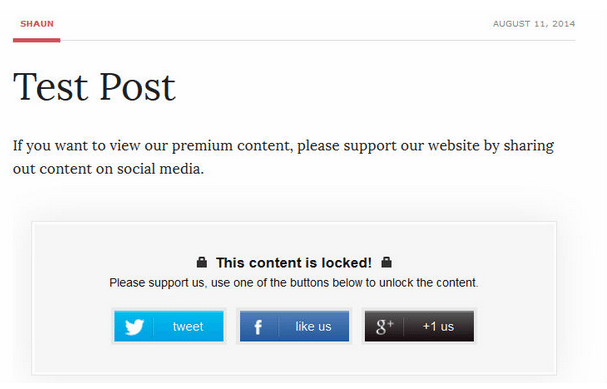
Now, in general, content lockers have a bad rep, and it’s easy to see why. Let me get one thing clear: in no way am I advocating using content lockers for spammy, black hat methods to make a quick buck, as seen in the screenshot below.
But actually, when used correctly, they can be quite an effective way to grow your website, or even monetize certain posts.
Types of Content Lockers
There are two types of content lockers we’ll be looking at today: social lockers and paywall content lockers.
Social lockers simply require a user to share your article on one of the major social platforms in order to gain access to the locked content—it could be a new article, an extra section to an article, or a different format to consume the article, for example in audio or PDF form.
With the paywall content locker, users are instead asked to pay a nominal fee for access, usually between $0.50 and $3.
If you are consistently providing value to your user-base, asking them to jump through this small “hoop” to access your premium content is perfectly acceptable, and will meet very little resistance. After all, most viewers will be happy to support you if they like what you’re doing.
In this case, everyone’s a winner: users are able to access premium content, while you get more social traffic to grow your website—or an extra revenue stream—which allows you to keep producing the top-quality material.
Obviously, this is a tactic that should not be overused, but the important thing is that the content behind your locker represents good value for what you’re asking in return. For example, an in-depth 5,000 word guide would be well worth a simple social share, in most people’s eyes at least!
It’s a similar tactic to the incentive offered to lure people into signing up for their mailing lists—perfectly acceptable to most Internet users. However, unlike a mailing list incentive, locking content is a tactic that can be employed multiple times, and also generate additional exposure for your website, as you get free advertising across social media networks.
In this sense, content lockers are a fantastic complement to growing your mailing list, but a tactic that virtually no websites are taking advantage of.
Adding Content Lockers to Your Website
If you’re considering adding a content locking function to your website, there are a number of fantastic WordPress plugins available. Here are some of the best.
Free Social Locker Plugin: OnePress Social Locker
The most popular free plugin for social locking is OnePress Social Locker.
The plugin supports Twitter, Facebook, and Google+, and allows you to create a clean-looking social locker box, complete with customizable text and headings.
To add the social locker, all you have to do is insert the URL of the page you want shared, then place the content you want to lock inside shortcodes in the visual editor.
And voila! Your content is locked, and only accessible after someone has clicked on one of your social sharing buttons.
Your locked content is still accessible by the Google bots, meaning anything locked still contributes towards SEO. The plugin also remembers who has already shared your content, meaning a user will only have to click share once to re-read your locked content.
Premium Social Locker Plugin: OnePress Social Locker ($24)
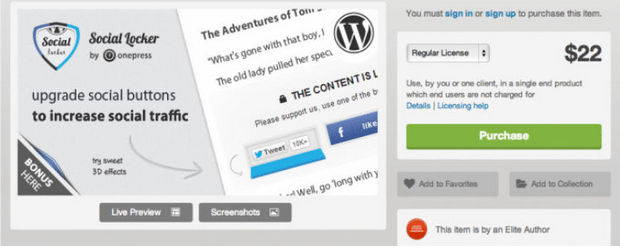
As it happens, the best premium social locker plugin is the upgraded version of the aforementioned plugin, available for $24 from CodeCanyon.
The plugin works in the same way as the free version, unsurprisingly, but has a few extra options available to you.
First, the plugin allows you to gain access to the locked content by following, rather than just sharing your link. It also supports LinkedIn sharing, which is ideal if your website has a more professional user base.
The plugin also has a more aesthetically pleasing set of themes for your content locker box, and a variety of different buttons to choose from. There are a number of 3D effects that can be added, which are played when a reader clicks one of your buttons.
Finally, there is an in-built analytics tool which allows you to track the social impact of your content locker, which allows you to spot whether content lockers are more effective when used on a particular type of content—all very useful stuff.
Paywall Content Locker Plugin: Tinypass
Tinypass refers to itself as eCommerce for content. That’s actually a really good way to look at it, as it allows you to charge for accessing certain content.
Tinypass is free to set up, but does charge you a fee on each successful payment. For transactions less than $1.99, the fee is 18%; for transactions more than $1.99, the fee is 2.9% + $0.30.
You will require a Tinypass account, as this is where all your funds will be paid into, and you’ll need to specify the domain you want to use your paywall on—you can only activate the Tinypass plugin after you’ve specified your domain from within your Tinypass account.
Creating a paywall content locker for an individual article is actually somewhat tricky. For one, the latest version of the plugin, v3, doesn’t actually support this function! You’ll need to install it, then downgrade it to v2. This sounds complicated but is actually quite straightforward, and is explained in full here, and v2 is still fully supported.
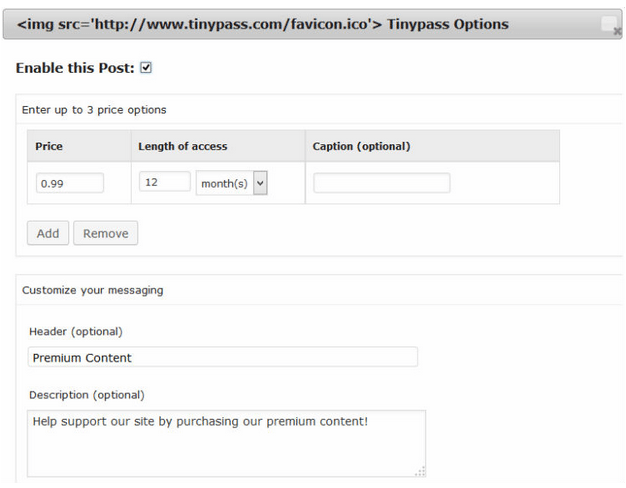
Now, when you create a new post, you’ll see a Tinypass box to the right of the visual editor.
Clicking on this will bring up a lightbox, which allows you to set up a paywall content locker for this particular post.
You can set any price you want, starting as low as $0.02 per article, and you can also customize the message your visitor will see regarding the paid content. When you’re happy, check the box to enable the content locker, then click save.
You then insert a simple Tinypass shortcode in the visual text editor. Anything before the shortcode is available for free, anything after it is locked and a user will need to pay for access.
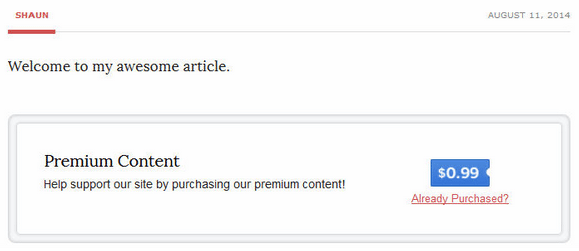
When you’re done, publish as usual, and users will be able to see something that looks like this:
Final Thoughts
Using content lockers is a simple way to encourage your readers to support your site, either financially or by giving you some free promotion via social channels.
Remember, it’s a two-way street, though. Users will only be happy to do this if the content you are locking is valuable!
Have you used content lockers on your website? Share your thoughts and experiences in the comments section below!
 Shaun Quarton is a freelance blogger from the UK, with a passion for online entrepreneurship, content marketing, and all things WordPress.


5 Comments