Like colors, images, and other structural elements, typography is an important part of web design. It communicates brand and personality, spices up content and can overall greatly improve the aesthetics of a WordPress website (except Comic Sans, which I strongly recommend not using).
Thankfully, in recent years free fonts and typekits have become more readily available. Designers and website owners alike can now draw on a great number of resources to include beautiful typeface on their online presence.
In this article we will look at two ways to get custom fonts on your WordPress website, via the two services Google Fonts and Adobe Edge Web Fonts. Both are large libraries of web fonts readily available to be integrated on your site.
However, before we dive into how to do it, let’s quickly discuss why typography is important to your website.
Why You Should Use Custom Fonts
Correctly using typography in web design is an art in itself. Not only is there the matter of choosing the right font, but thickness, slant, and size also play a huge role.
On the other hand, when done correctly, typography can greatly change the look and feel of your site and show off what you are all about. Conservative businessman? Playful hipster? The font on your website is an important factor for visitors to make such calls.
As a matter of fact, in this article, Social Triggers’ Derek Halpern talks about an experiment that showed restaurant guests making assumptions about the chef’s level of skill based on the font used in the menu. Fascinating, isn’t it?
Apart from that, there is the matter of user experience. While we all know that content is king, the way you present your content is just as important. You can write the most thought-out articles in the world, but if they are an illegible mess, nobody will stick around to notice.
In fact, the same article cites another experiment. Here participants were asked to judge how long it would take them to complete a given set of instructions. Astoundingly, when the instructions were printed in a more complex font, estimates for how long it would take to complete them almost doubled.
In light of these findings, do you think fonts could play a role in how people perceive your website? Me too. In fact, choosing the right font is critically important for a website’s success! They have direct influence on bounce rate, conversions, and other important factors.
Plus, would you look at this list of typography-centered WordPress themes. Aren’t they just gorgeous? I know, I couldn’t agree with you more.
Installing Fonts from Google Fonts
Alright, now let’s get to the meat and potatoes of this whole article: How to actually get custom fonts on your site. As mentioned earlier, we will look at two services that can help you achieve this.
The first one is Google Fonts. Its library houses hundreds of open-source fonts ready to be displayed on your website. Getting them there is simple, as you will see in this step-by-step guide.
1. Find the Right Font
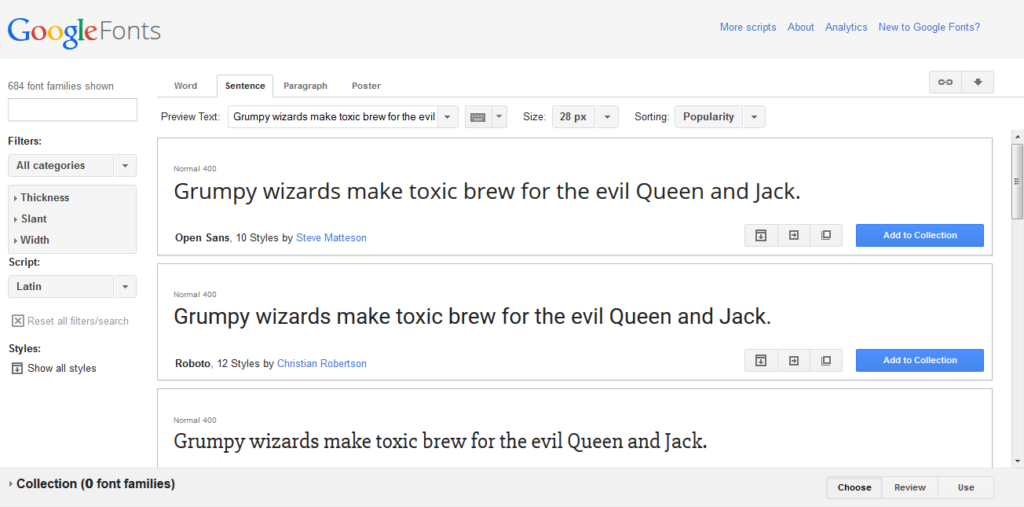
First we need to pick whichever font we would like to add to our page. If you know exactly which one you are looking for, you can simply search for any font by name.
For those who are undecided or who want to browse around a little, Google provides a number of filter options:
Category
- Serif (Fonts that little lines at the end of their strokes, e.g. Times New Roman)
- Sans-Serif (Simple fonts without extra lines, like Torque is using)
- Display (To be used in larger sizes, such as for headings)
- Handwriting (Fonts that imitate handwriting)
- Monospace (All characters have the same spacing
)
Style
- Thickness (Very thin to very thick)
- Slant (Straight to slanted)
- Width (Narrow to wide spacing between characters)
Script (for other than the Latin alphabet)
- Cyrillic
- Cyrillic Extended
- Devanagari
- Greek
- Greek Extended
- Khmer
- Latin
- Latin Extended
- Vietnamese
In my case, I am simply going for the name search option, since I want to install “Advent Pro,” which is a font I really like.
2. Select your font
Next, add the font in question to your collection by clicking the blue button on the lower right. This will open up a bar at the screen bottom where all selected fonts are saved. Note: You can add more than one font family.
Once you are satisfied with your selection, click on “Use” in the upper right corner of your font collection.
3. Choose Font Styles
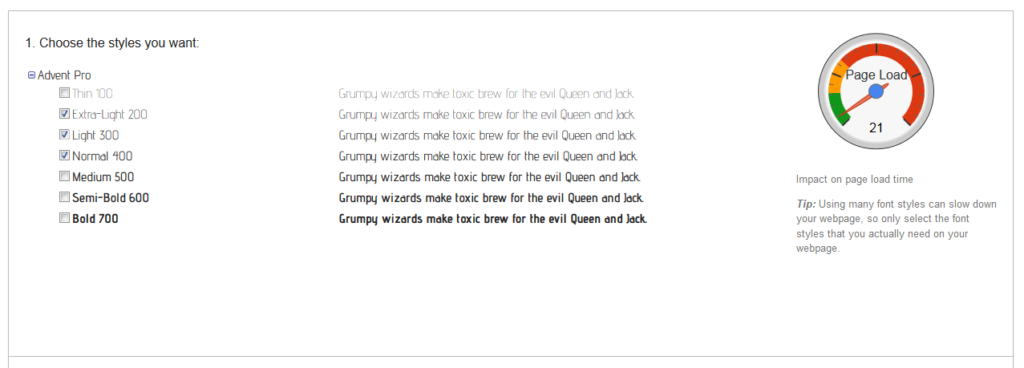
Now we will select the different font styles. Most fonts come in various levels of thickness. Since loading custom fonts results in extra page loading time (notice the dial gage on the right), you should only add those you really need. In my example, I opt for “normal,” “light,” and “extra light.”
4. Select Additional Character Sets (Optional)
If you are planning to display your site in a language with a different alphabet, and if your chosen font supports this, in the next section you can choose the subset you need. Since I plan to do neither of these things, I just leave it as it is.
5. Copy the Code and Add it to Your WordPress Site
From your choices above, Google Fonts will generate the necessary code to load the fonts onto your page. You have three choices to do so: HTML, CSS, or Javascript.
If you go for HTML or Javascript, the provided code goes into your header.php document, preferably right after the <head> tag. In case you opt for CSS, the call needs to be added at the beginning of your style.css file.
6. Call the Font in Your CSS
Now the font is fully integrated on your site. All that’s left to do is actually calling it somewhere. To display your custom font, you have to assign it to an element on your site via CSS, e.g. like this:
h1 {
font-family: ‘Advent Pro’, sans-serif;
font-weight: 400;
}
Now you’re all done. That wasn’t so hard now, was it? Yet, WordPress wouldn’t be WordPress if there wasn’t a plugin out there to achieve the same task.
Easy Google Fonts is a plugin that lets you install Google Fonts on your site without any coding. It is also integrated with the WordPress Customizer to let you preview font changes on your site in realtime. So, if you are looking for a way to add custom fonts to your site without touching any files, this is a viable option.
Installing Custom Fonts to WordPress from Adobe Edge
Our second contender on the list is Adobe Edge Webfonts. It is a service by—you guessed it—Adobe, the maker of Photoshop (and that pesky Flashplayer that always wants to be updated).
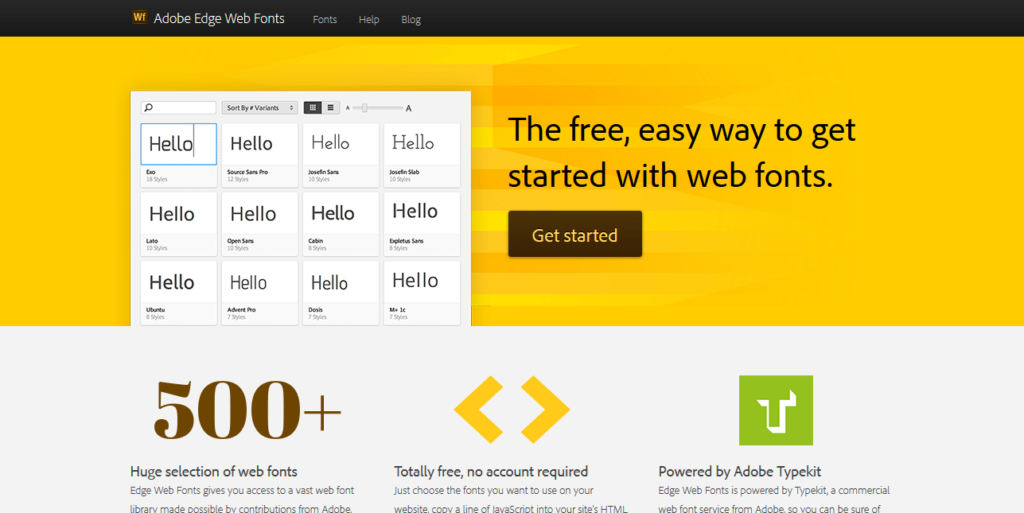
Like Google Fonts, Edge Web Fonts is a directory with 500+ completely free typefaces. The services is arguably even easier to use than Google’s solution. Click on “Get started” on the main page or go to this address to begin.
1. Find Your Font
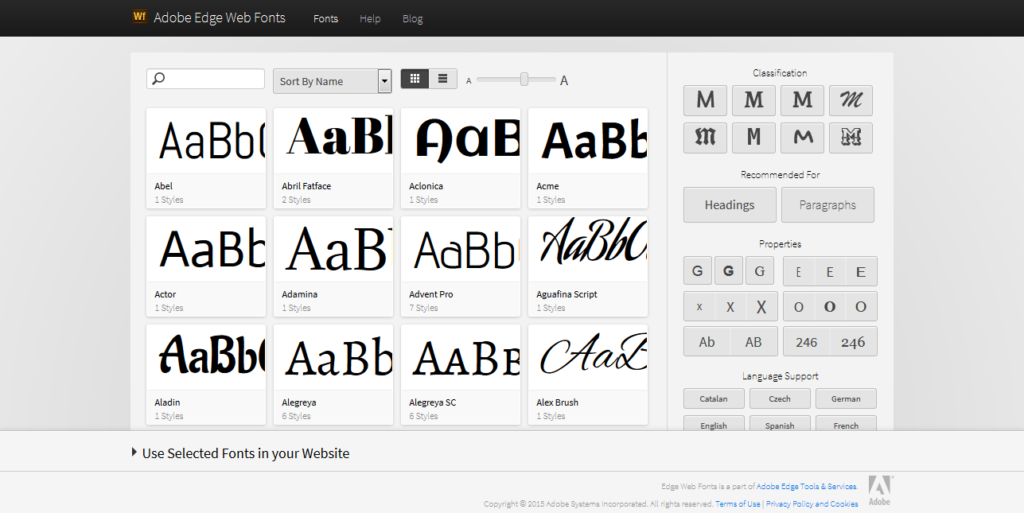
To get to the font of your dreams, you can either search directly by name or filter the available fonts by a number of classifications and properties. Adobe provides even more options than their competitor.
- Classifications (Sans-serif, Serif, Slab Serif, Script, Blackletter, Monospaced, Handmade and Decorative)
- Recommended for headings or paragraphs (very nice idea!)
- Font weight, Height, Width, Uppercase/Lowercase, Contrast, Oldstyle/Lining figures (the last point refers to the number style)
- Language support for foreign languages and alternative alphabets such as Cyrillic, Catalan, German or Swedish
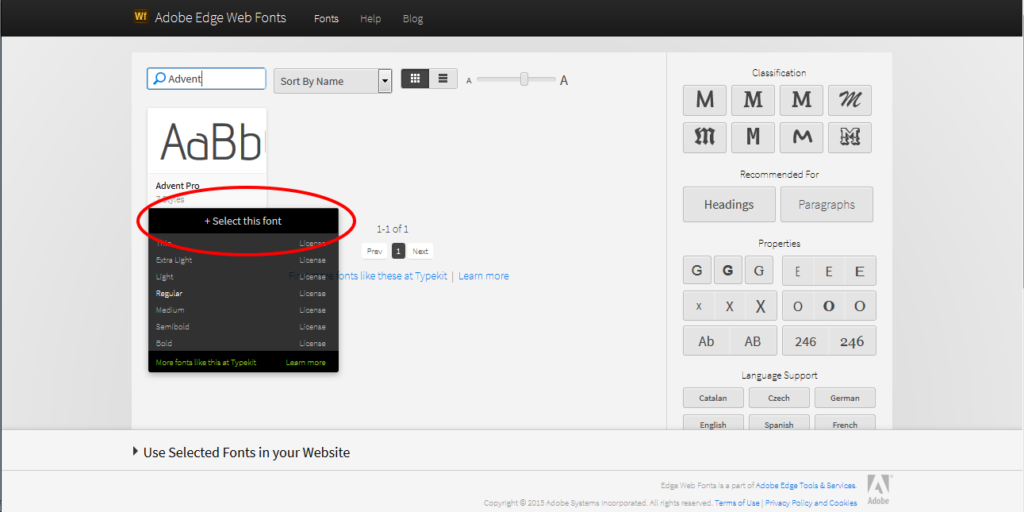
My choice of “Advent Pro” is also available here, so I don’t have any problems finding it via name search.
2. Add to Your Selection
When you hover over a font you like, a new window will pop up showing all available styles and their licenses. Click on the license links to see if the font is available for your intended usage. To proceed in getting it on your site, click ‘Select this font’ at the top.
3. Configure the Font
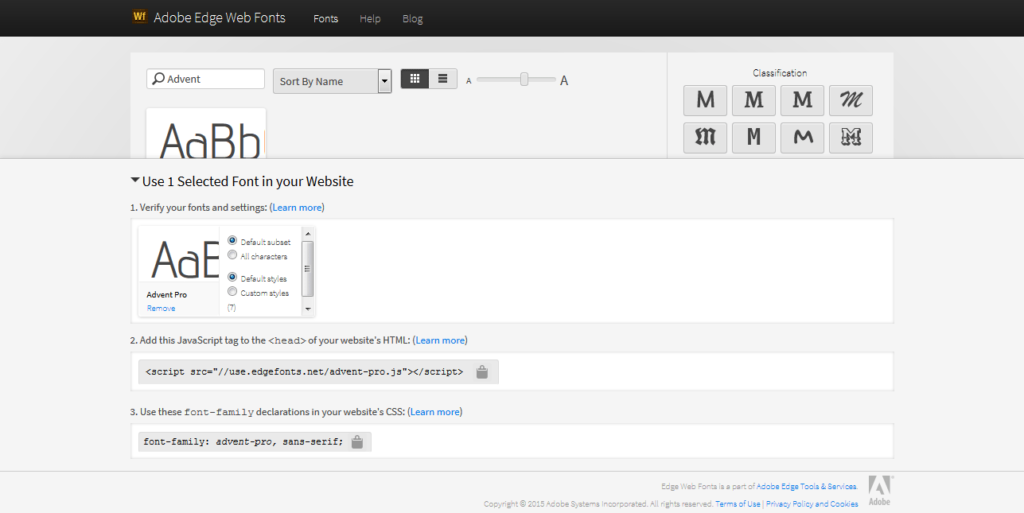
A menu at the bottom will open up where you can further configure your font. First choose if you want to use the standard subset or all available characters. Standard includes all Latin-1 characters plus some useful typography marks. The second option consists of all characters available in this font. Again, this is a loading issue.
Next choose your desired styles. Only include those you really need. If you are just going to use semibold and regular on your site, there is no need to load the rest.
4. Include the Code in Your Site
Once you are done with the configuration, copy the code at the bottom. Unlike Google Fonts, Adobe Edge Web Fonts only provides a JS script. As I already mentioned earlier, this needs to be included in the <head> section of your website, preferably right after the starting tag.
Note: When you pick more than one font, all of them will be included in the same line of code so you can add them to your site at once. No need to go through the same process several times and add multiple lines of code.
5. Call the Font in style.css
Now all that’s left to do is call the font somewhere in your stylesheet. To make this easier, Adobe Edge Web Fonts will give you sample CSS at the bottom of the screen including a fallback font for non-supportive browsers.
Use this to make the font show up on your site, for example in your headers:
h1,
h2,
h3 {
font-family: advent-pro, sans-serif;
}
Easy peasy, wasn’t it?
Custom Fonts for WordPress in a Nutshell
Adding custom fonts to your WordPress website can make a huge difference. They are a great design tool, convey personality, and let you further develop your branding. Apart from that they also determine the legibility of your content and directly influence the user experience.
Using web fonts is a convenient way to get custom typography onto your site. Two great alternatives to do so are the services offered by Google and Adobe.
Both libraries are well stocked and free to use for anyone. With only a few clicks, you can choose between hundreds of different fonts and easily put them on your website to make let your content shine even more.
Do you use custom fonts for WordPress? Which method is your favorite? Let us know in the comments!





7 Comments