The ability to set up and use local development is an important one in any WordPressers skill set.
A local WordPress installation enables you to work independently of an online connection, test site changes, themes, and plugins without the risk of breaking your live site, and overall makes your workflow more efficient.
So much so that I recently wrote an entire article on how to install WordPress locally with XAMPP.
Your site won’t do any good, however, if it’s just lying around on your hard drive. Once you are done with the work, you need to figure out how to move WordPress from localhost to live server.
After all, that’s where it’s supposed to end up so people can see it.
So, in this article, I will show you how you can make this transition from local install to live environment — posts, pages, pictures, plugins, themes, and more.
To do so, we have three different methods at our disposal:
- Use built-in WordPress tools for moving content
- Manually move the entire site plus database
- Move from local WordPress install to live site via plugin
Are you ready for this? Then let’s get going.
First Things First: What You Will Need
You will need a couple of things: First and foremost, naturally, a finished site in your local development environment.
Next up is a web hosting account with the provider of your choice with a working FTP account and access to some sort of database management system (typically phpMyAdmin). Of course, you will also need an FTP client (I recommend Filezilla).
Using Built-in WordPress Tools To Move The Content
In case you only need your content such as posts, pages, and media moved and nothing much else, a really easy way to do this is by using the tools already baked right into WordPress.
As a first step, just set up a fresh and empty WordPress install in your live site’s location.
These days, many hosting providers offer one-click installs for this, which would be a good option. However, you can also do it manually.
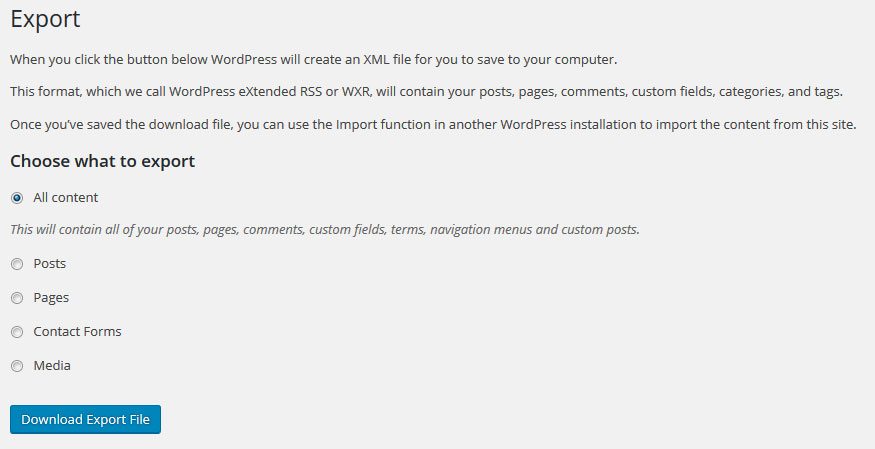
After that, log into your local development site by going to Tools > Export.
Make sure All Content is checked and then hit Download Export File. This will give you an XML file with all of your site’s content.
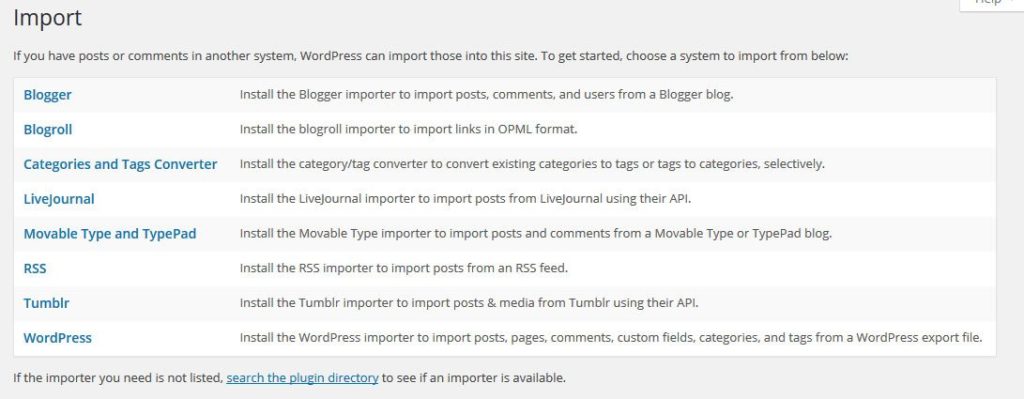
After that, it’s time to hit the live site and go to Tools > Import. If prompted which system to import from, choose WordPress. Install the importer plugin and activate it when it’s done.
Next up, use the Browse button to find the XML file you downloaded before and import it.
When the process is finished, all posts, pages, categories, tags, media, and custom fields should have been transferred to your live website.
All that’s left to do is to manually reconfigure themes, plugins, menus, widgets, and other site elements so the online version reflects your local site.
While the built-in import/export option provides a quick and easy method, you can probably see how it can be cumbersome. Especially if you frequently move WordPress websites back and forth.
Therefore, it might be a smarter idea to make a one-to-one copy of your local site on the live server instead.
That’s exactly what I will show you now.
Moving WordPress From Localhost To Live Server Manually
As I mentioned in the introduction, I will first go over the process of getting WordPress from local install to live site and then later do the same with a plugin.
While the plugin route is generally easier, going through the manual process at least once will let you understand the mechanics behind it better.
Step #1: Export The Local Database
First off, we will download the database of our local WordPress installation. This is usually done via phpMyAdmin.
If you are completely new to this database tool, I recommend that you check this beginner guide on the topic.
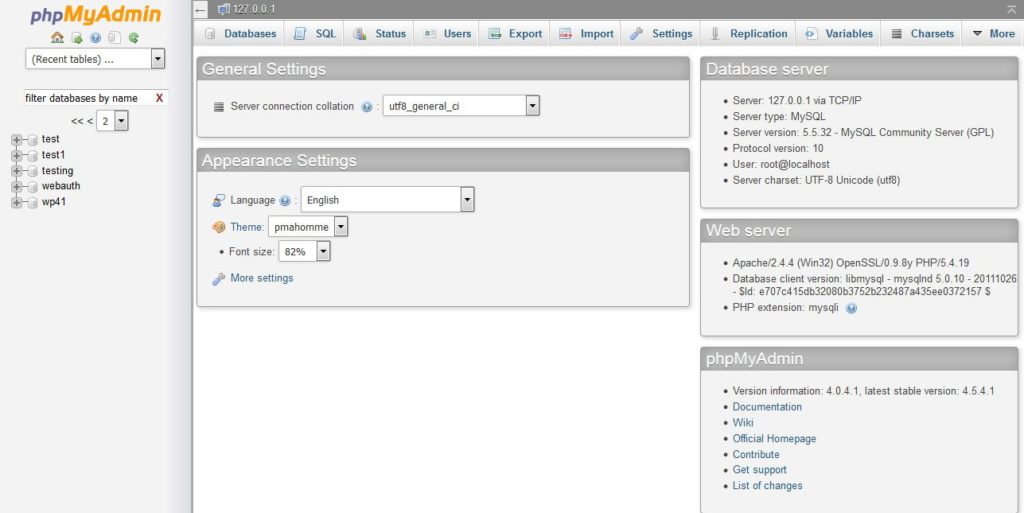
To get there in a local environment, you usually just need to type in http://localhost/phpmyadmin/. Do that and you should land on the following screen.
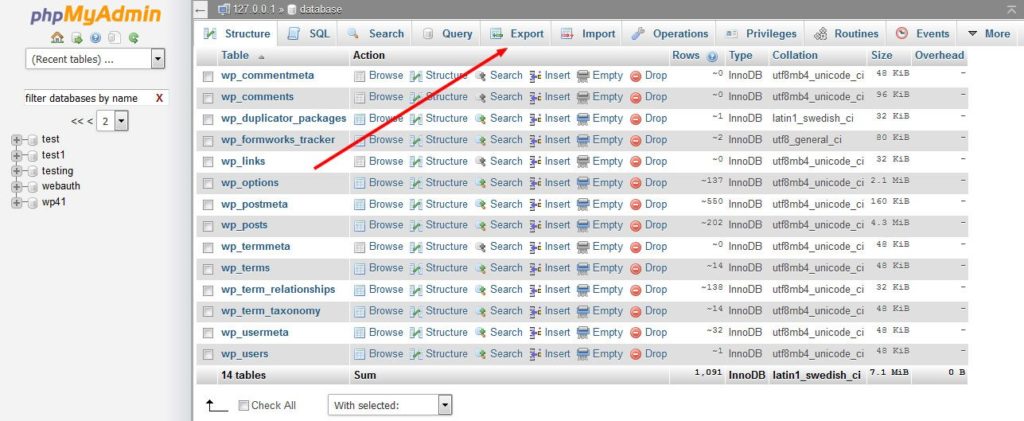
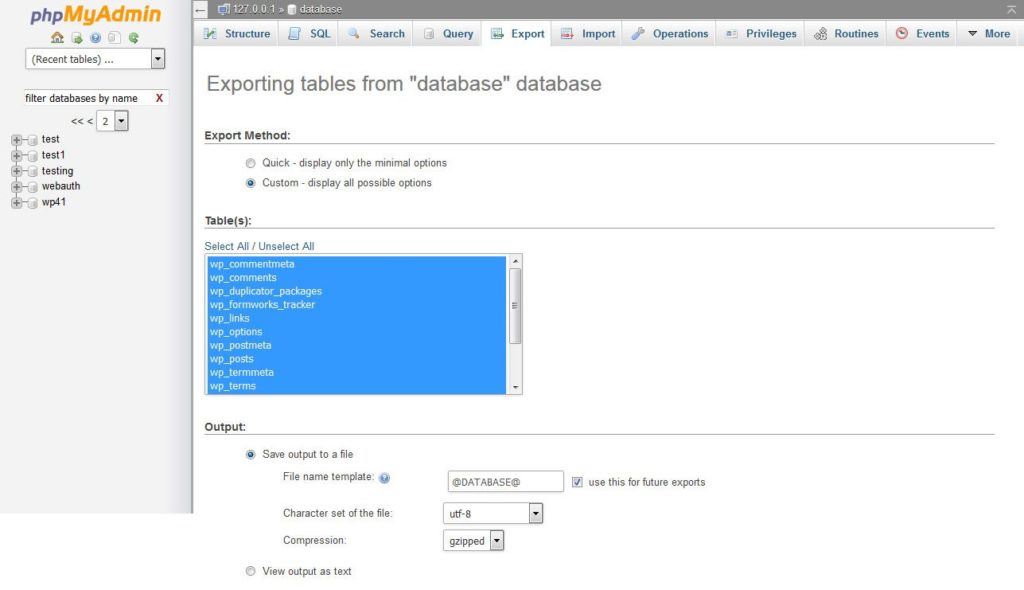
The next step here is to open the WordPress database in question on the left side of the screen and then find the Export button at the top.
Here, choose the Custom export method. Make sure all tables are selected as well as gzip compression, especially for larger databases.
Under Format-specific options, select structure and data and also tick the following boxes:
- Add DROP TABLE / VIEW / PROCEDURE / FUNCTION statement
- IF NOT EXISTS
- AUTO_INCREMENT
- Enclose table and column names with backquotes
Once you are done, click Go to download the database file.
Step #2: Upload Your WordPress Files To The Live Server
In this step, it’s time to fire up the FTP client. Browse to the root directory of your live server and upload all files inside your local WordPress install to that destination.
You can do so by opening the folder on your hard drive, marking everything in it and then dragging and dropping it in there.
Another option is to use the FTP client interface to find the files on the drive, mark them up and then right click and select Upload.
Well done. This may take a bit.
Step #3: Create a New Database for the Live Site
While the FTP is performing the upload, we can move on to the next step. Here, we will import the database we saved to our hard drive in the first step.
Hosting providers offer different ways of doing so. Again, most providers use phpMyAdmin for this kind of operation and we will do so as well.
If your company uses a different tool, don’t worry, the steps will be very similar.
First up, we are going to need a new and empty database. We can create one by simply clicking Databases in the top menu.
Next, input a name and choose the right UTF-8 collation for your language region or go with utf8_general_ci.
Hit Create to set up an empty database.
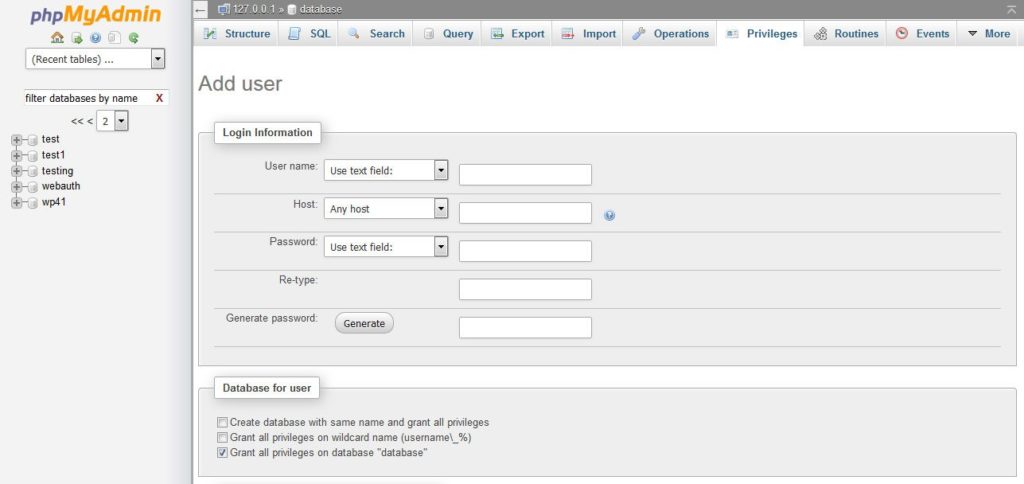
However, before we are done, we also need a user. Click on the new database and then find Privileges > Add User (at the bottom of the screen).
Type in a username and password. The host is usually localhost but check with your provider to be sure.
Also, see that the checkbox is active which grants the new user all privileges on the database, then hit Go.
Now all that’s left to do is note down the database information. You will need it soon.
Note: On some hosting providers, things like database name, user or password might be set up automatically. If that’s the case, make sure you get the right information. Should you be unable to find this information, your provider should be more than happy to help you out.
Step #4: Import The Local Database
While we are already in phpMyAdmin, we might as well continue by importing the database from our local site to the live environment.
For that, click on the database you created earlier. It should be completely empty at this point.
Hit Import at the top, choose the Browse button and select your gzipped database file. Press Go to start the import. Done.
Step #5: Replace The URLs Inside The Database
Now comes the tricky part. The problem with the imported database is that all the links contained inside are still pointing to the old site location.
That means none of the links on the live site will work yet. It’s time to change that. We have several ways to do so:
- Find and replace all instances via a text editor
- Opt for a plugin like Velvet Blues
- Run a MySQL query in phpMyAdmin
- Use the Find and Replace script by Interconnect IT
The fourth is my preferred method and I will show you in detail how it works. However, let’s quickly mention the other ones.
For the first option, open the downloaded .sql file with any good text editor (e.g. Notepad++). You can then use its search and replace function to exchange all mentions of the local file path with that of the live server.
Make sure not to change anything else and then import the file as usual.
For number two, you would use a plugin like Velvet Blues or Better Search Replace. They can update strings in the database from the WordPress back end. However, to make them work you need to be able to at least access the dashboard of your site.
If you feel comfortable with it, you can also run a MySQL query inside phpMyAdmin to replace strings inside an existing database.
You can find this option under Query inside your database in phpMyAdmin and the query would look a little something like this:
UPDATE wp_posts SET post_content = REPLACE(post_content, 'localhost/yoursite/', 'www.yoursite.com/');
However, as mentioned, my favorite method is to use Interconnect IT’s search and replace script. You can download it for free from the link (don’t worry, it’s super small).
After that, extract the files and rename the folder from Search-Replace-DB-master to something else like secret-sauce.
The latter is a security measure. Since this is a powerful script that – in the wrong hands – can completely mess up your database, you don’t want anyone to stumble upon it by accident.
(That’s also the reason why you should never forget to delete it from your server once you are done.)
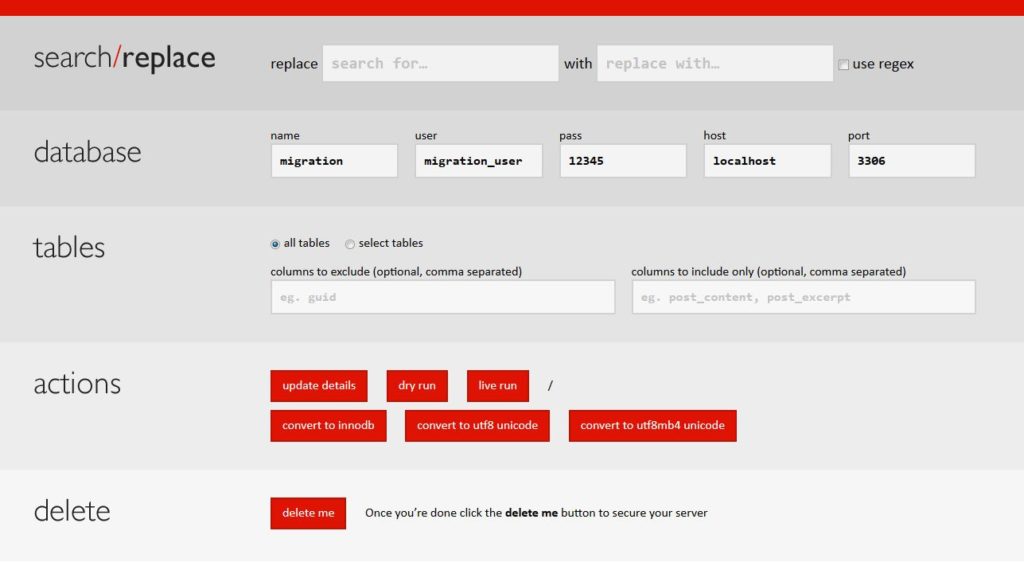
Next, upload the folder to your root directory via FTP and access it via your browser (in this case through http://yoursite.com/secret-sauce/). You will be met with this screen:
At the top, you can input any strings you want to replace and also what to replace them with, for example http://localhost/wordpress with http://yoursite.com.
The second row holds your database information. The program will try to automatically populate these areas and I have never seen it fail.
Below that, choose which tables to update. Usually that will be all tables, but make adjustments as needed.
After that, it’s go time.
Should you be unsure about your configuration, you can do a dry run first. In that case, the script will simply scan your tables for the provided search string without making any changes.
This can help you make sure you used the right string.
When all goes well, you can then hit Live Run to get to the actual action. Choose Ok when asked for confirmation and wait for the process to finish.
Afterward, don’t forget to either use the Delete Me button at the bottom of the screen or to manually erase the script folder via FTP. Either way, make sure it’s gone!
Step #6: Configure wp-config.php On Your Live Site
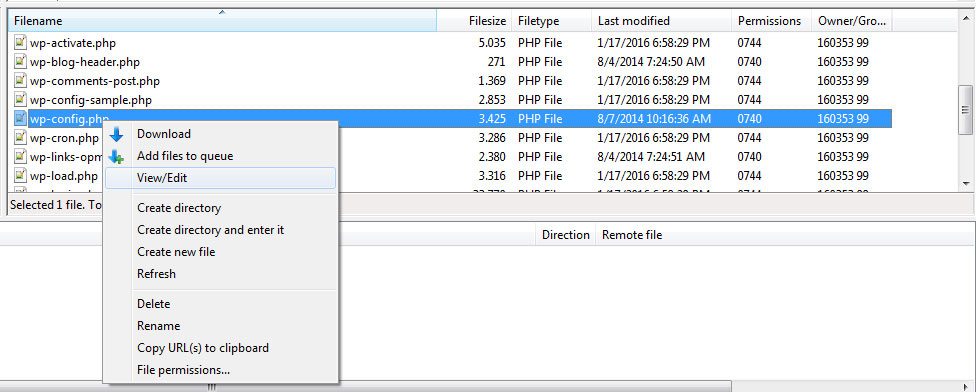
Alright, it’s time to get your FTP on again and find wp-config.php in your live site’s folder. Right click and choose View/Edit.
You are looking for the following information:
- define(‘DB_NAME’, ‘your_database_name’);
- define(‘DB_USER’, ‘your_database_user’);
- define(‘DB_PASSWORD’, ‘your_database_password’);
- define(‘DB_HOST’, ‘localhost’);
Input the database name, user, and password you created on the live server in the earlier step. With some providers you will also have to change the host name from localhost to something else, so make sure to check this.
After that, save the file and upload it back to the server. Your website should now be online so you can log in.
Note: You can also change the values inside wp-config.php before uploading your site data, however, then you will have to change the local file back to the original values in order for your local install to continue working.
Step #7: Finalize Move
You made it! Very nice. Just one more step before we are completely done.
On the transferred site, go to Settings > Permalinks, choose your preferred URL structure and save it to ensure all permalinks are updated.
That’s it. Congratulations!
How To Move WordPress From Localhost To Live Site — The Plugin Route
Manually is not the only method to move a local WordPress website online. You can do the same via plugin and I will show you how using Duplicator.
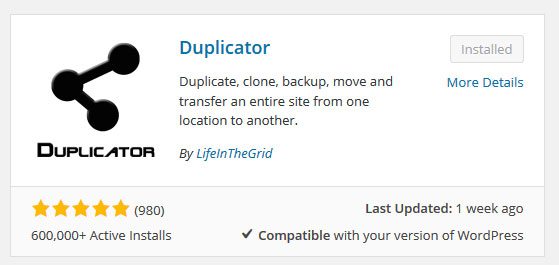
Duplicator is a free plugin in the WordPress directory and a very popular one with more than 600,000 installs and a solid 4.9-star rating (almost 1000 five-star reviews!). It cuts many of the steps above shorter and makes the entire process much easier.
All you need for this method is working FTP access. There is no need to even install WordPress in the new location, Duplicator takes care of that.
Step #1: Install Duplicator On Your Local Site
This step is easy. Just hit Plugins > Add New and search for Duplicator.
Click Install Now and don’t forget to activate once it’s done.
Step #2: Create A Site Package
You will now find a new Duplicator menu item in the WordPress dashboard. A click here will take you to the Package menu.
The word package refers to two files: A zip archive of your site (files plus database) and an executable installer file. Both together enable us to easily move WordPress from one server to another.
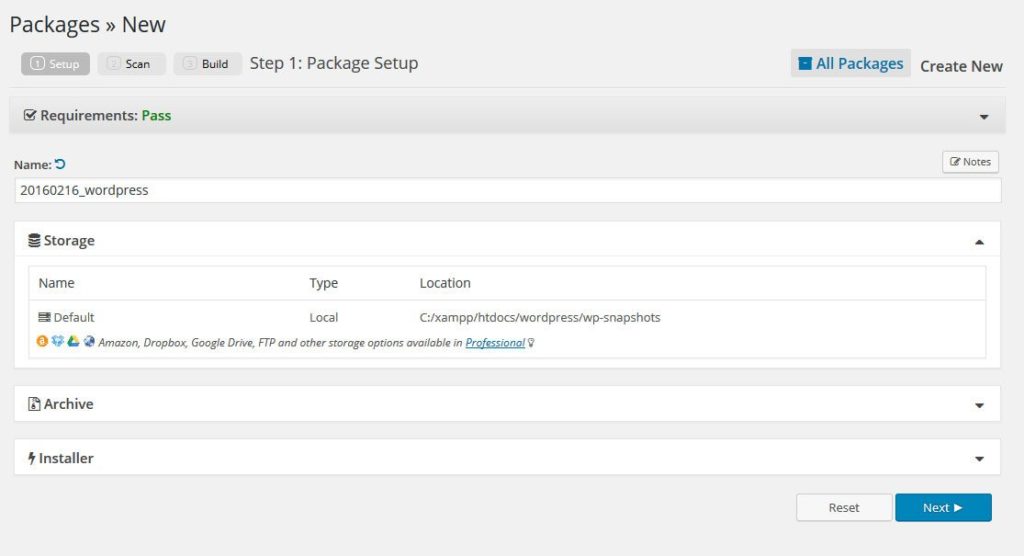
However, for that, we first need to create a package, which can be done via the Create New button in the upper right corner. Upon click, you will see this screen:
Enter a name (which one is not really important unless you plan on making several packages) and notes if you want.
You can leave the rest of the options as is, however, for completion’s sake, here is what they contain:
- Storage — Pick where your package will be saved. Unless you have the Pro version, this will be the wp-snapshots folder.
- Archive — Exclude files, directories or database tables if necessary.
- Installer — Input the new site’s database credentials and new URL. You can also do this during the installation process.
Click Next to move on.
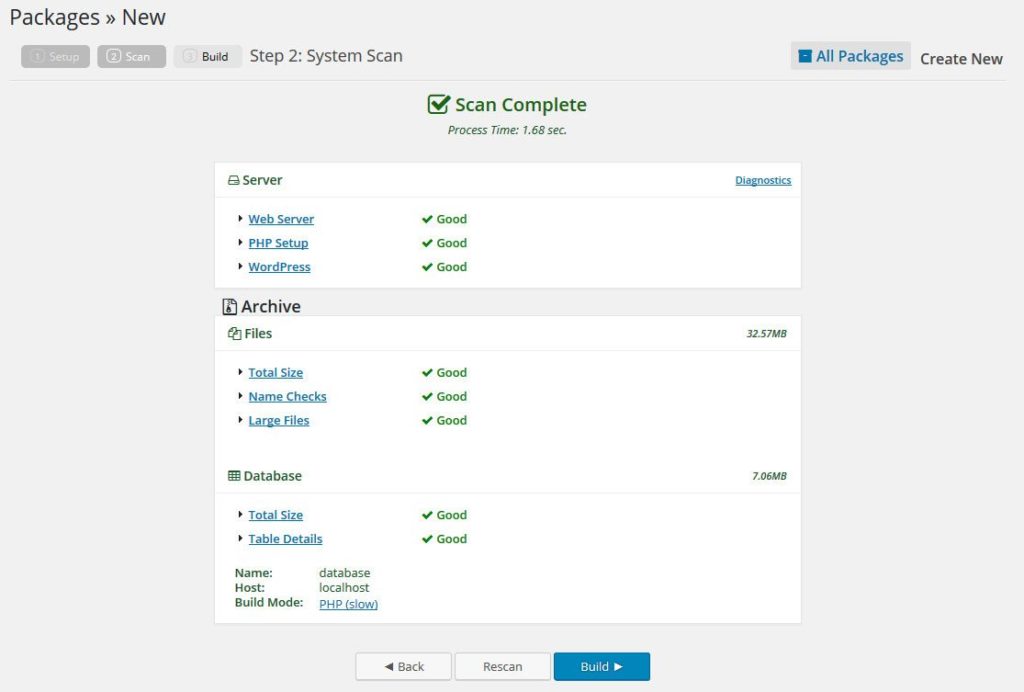
The plugin will now run a system scan to see if there are any issues that will keep it from doing its work.
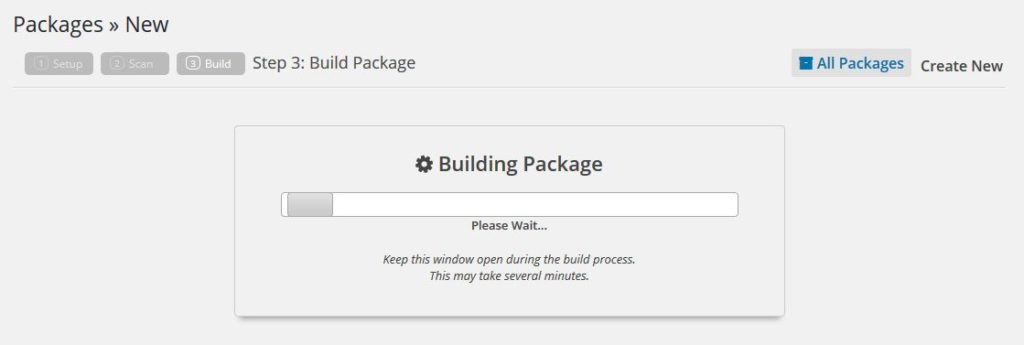
Unless there are major ones, you can move on to creating the package by hitting Build. The plugin will then begin backing up your site.
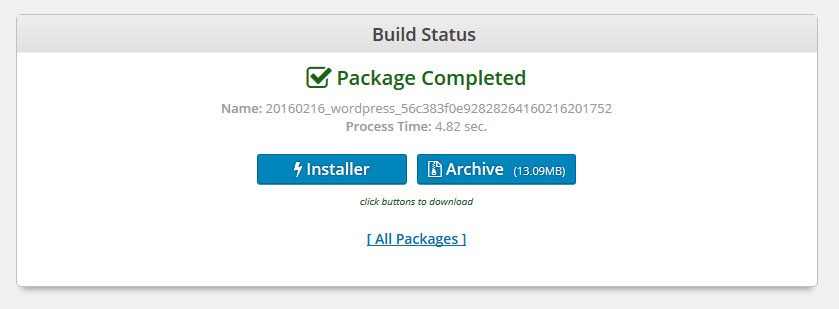
As mentioned, this will produce two files: the archive (a .zip file) and an installer (which is a .php file). Download both of them with a click on the respective buttons.
Step #2: Upload Both Files To Your Live Site
In order to set up your site in the new location, we now have to transfer both files we just downloaded to the live server.
Just connect to your FTP account, browse to the home directory and upload.
Depending on the size of your site, this may take a little, so get a coffee or something in the meanwhile.
Step #3: Install The Site On Your Live Server
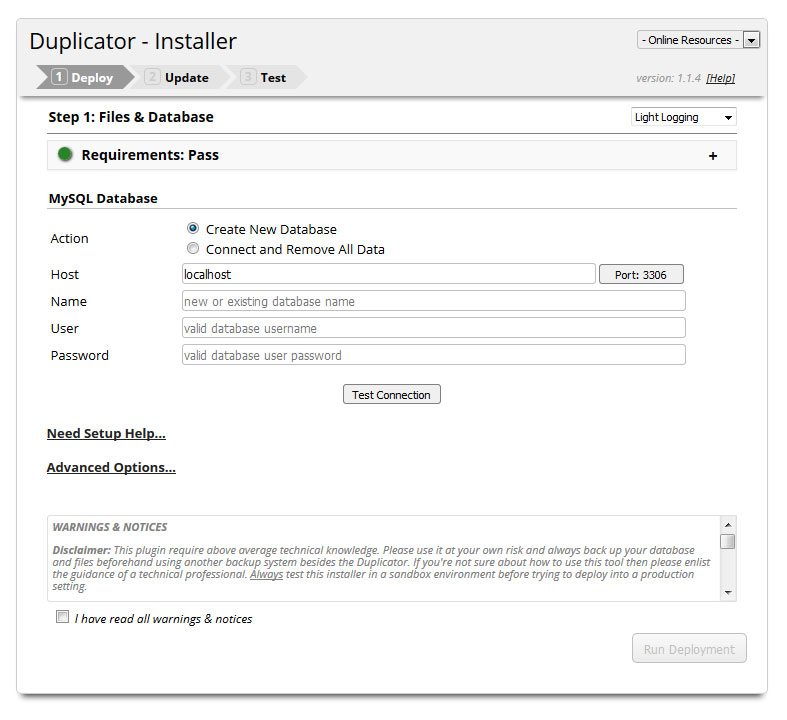
What follows is the (extremely easy) installation process. All you need to do is access http://yoursite.com/installer.php via your browser to get started.
In the first step, enter your MySQL database details (host name, database name, username, password).
The plugin can both create a new database (if your host allows this) or connect with an existing one.
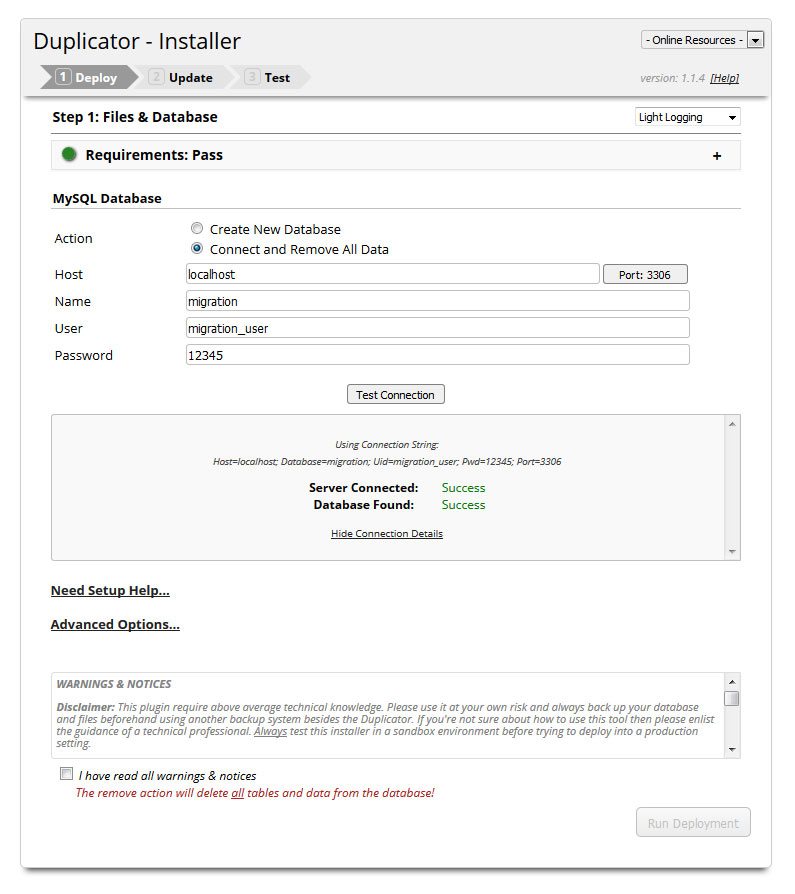
For the latter option, you have to set up a database manually. Check the above tutorial if you don’t know how that’s done. Also, Duplicator will erase all data in that database, so be sure you pick the right one.
Once you have entered the details, hit Test Connection to see if everything works fine.
You should get a success message for both Server Connected and Database Found before you can move on.
For that, check I have read all warnings & notices and hit Run Deployment. The installation will begin and you can lean back and wait. Maybe get another coffee?
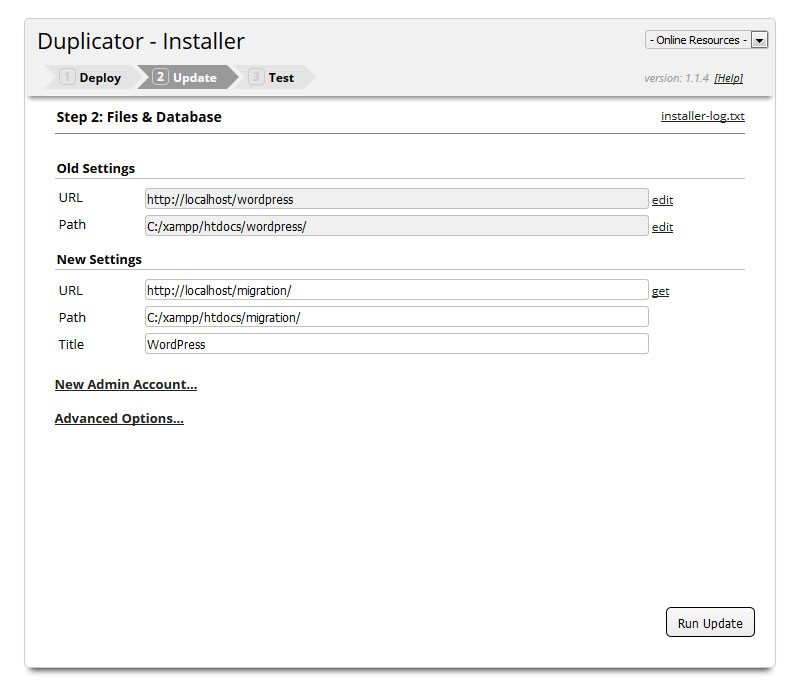
However, at some point, you have to spring back into action and confirm your old and new site details so Duplicator can replace them.
Make sure everything is correct and Run Update.
Step #4: Final Steps
Before Duplicator is finished, there are a few more small, yet important steps to take care of:
- Review Install Report — Check for errors encountered in the install (if any) as well as the number of database tables, rows and cells created, scanned and updated.
- Save Permalinks — A click on this link will take you to your site’s permalink options so you can update them just like in the manual method.
- Test Site — Will take you to the front end of the site so you can make sure everything is as it should be.
- File Cleanup — This option automatically deletes the installer files from your server, which should definitely happen for security reasons.
Apart from that, that’s it. You have successfully moved your WordPress site from local environment to live site via a plugin! Nice job!
Other Available Migration Plugins
Of course, Duplicator is not the only solution out there for this. We have other (free and paid) plugins for this at our disposal:
- All-in-One WP Migration
- BackupBuddy
- VaultPress
- WP BackitUp
- blogVault
- WP Clone
- UpDraftPlus
- WP Migrate DB Pro (my favorite)
Ready To Get A Move On?
Local development environments are an important tool in the WordPress toolbox. They provide a risk-free way for site testing and make development much easier.
However, to use them effectively you also need to be able to move WordPress from a local install to a live server. The article above has provided you with a workflow to do so.
Let’s quickly review the steps:
- Export the local database
- Create a new database on the live server
- Import the local database
- Replace the old URLs with the new location
- Upload WordPress files
- Reconfigure wp-config.php
- Update permalinks
As you have seen, there are many different ways to achieve this.
While for casual users, the manual way will be enough, developers who do this kind of thing all the time are better off choosing a plugin solution which can make things quicker and easier. It’s up to you.
What do you use to move WordPress from localhost to live server? Any additional tips, plugins are hacks? Let us know in the comments!



24 Comments