
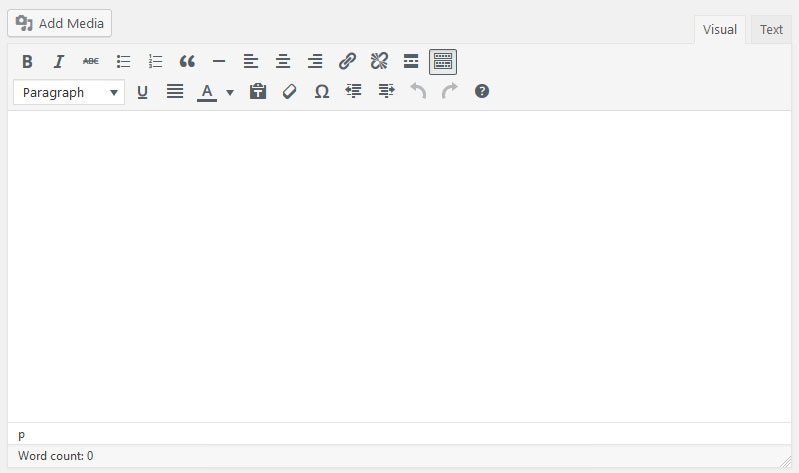
A large part of WordPress’ success is the fact that it makes creating web content very easy. Nothing symbolizes this more than the visual editor. It’s a powerful tool that enables users to create blog posts and web pages with the ease of using a word processor.
To make things easier, the editor offers WordPress users and website owners plenty of styling options. Whether you want to make your content bold, italicized, underlined, or struck through, you can do so at the touch of a button. And there are plenty more formatting options to choose from.
However, there are times when even those aren’t enough. If you have ever found yourself wishing for custom styling options like content boxes, CTAs, or buttons inside the WordPress editor, you are not alone. It’s quite a common request.
One way to get some custom styling is to use the text editor and add it via HTML code and inline CSS. This works on occasion, however, it’s not the best solution if you need to add extra formatting regularly. In that case, you are better off making your custom styles a permanent part of the WordPress editor.
How do you do that? Well, that’s exactly what this article is about.
In the following, you will learn how to add custom styles to the WordPress editor as a drop-down menu. We will first look at how to do this manually and then via a plugin. After that, we will also look at a few examples and ideas how to use this feature, so stay tuned until the end.
Be aware, however, that styling web content happens via CSS. Therefore, a working knowledge of CSS operators is useful in order to follow along and create your own styles. You can still use this tutorial if you are a beginner, but might have to put in some extra time to understand the CSS code below.
Ready to go? Then let’s get cracking.
How To Add Custom Styles To The WordPress Editor Manually
Alright, as promised first we will have a look at how to add new styles to the editor by hand. For that, we will have to edit some theme files. For that reason, the first task is to back up your WordPress theme.
Better yet, if you haven’t done so yet, set up a child theme in order not to lose your changes to a theme update. Of course, if you already have a child theme, make a backup of that as well.
All good? Then let’s get started.
Create the Custom Style Drop-down menu
In order to make our custom styles available in the WordPress editor, we will first have to create a new drop-down menu inside the editor. That way, we can apply our formatting with a few simple clicks.
To create the menu, just add the following piece of code to your theme’s functions.php. If you want, you can also add the code to your site in form of a custom plugin. Whichever option you choose, the importance is just that the code gets on there.
function add_style_select_buttons( $buttons ) {
    array_unshift( $buttons, 'styleselect' );
    return $buttons;
}
// Register our callback to the appropriate filter
add_filter( 'mce_buttons_2', 'add_style_select_buttons' );
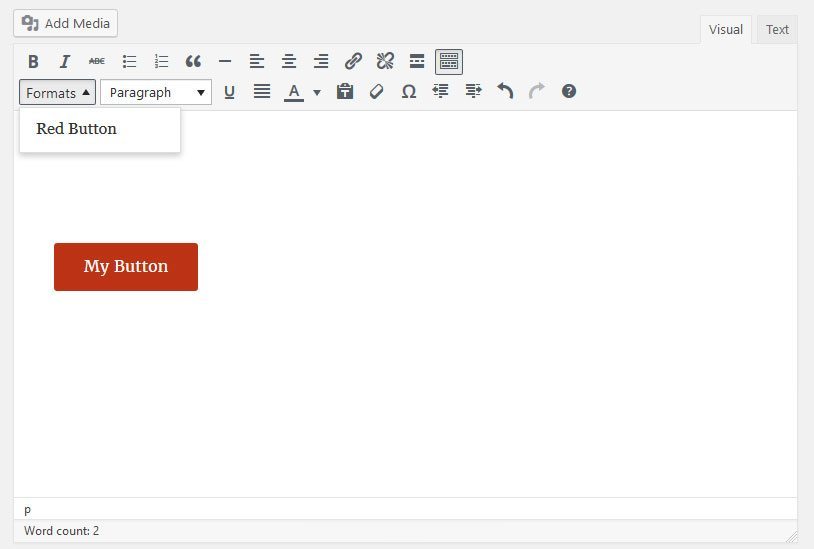
This code adds a button for a drop-down menu called Formats to the WordPress editor. It comes with a number of new formatting options. Once we have created our own custom styles, they will also appear here.
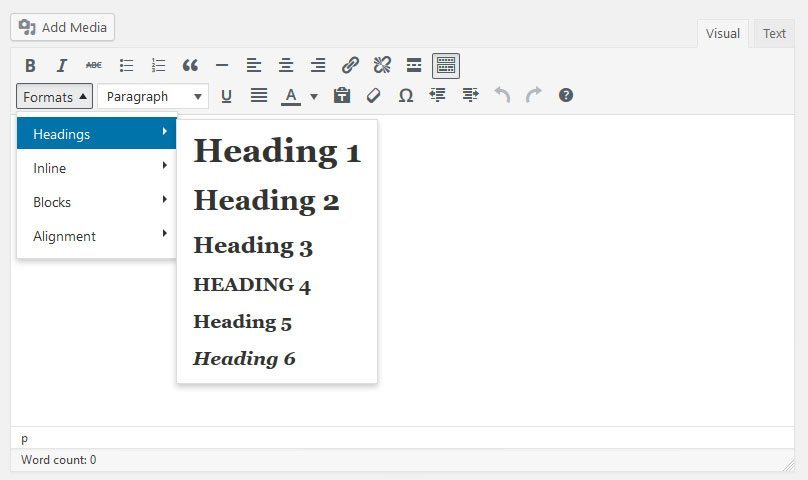
With the current code, you need to open the so-called “kitchen sink” to see the menu. That’s because we hooked it into mce_buttons_2. If you want to place the menu in the first row, you may change the hook to mce_buttons_1. It’s even possible to place it in a new, third row with mce_buttons_3.
Fill Menu With Options
Now that we have our menu, it’s time to fill it with options. This, again, is done with a handy piece of code:
//add custom styles to the WordPress editor
function my_custom_styles( $init_array ) {

    $style_formats = array(
        // These are the custom styles
        array(
            'title' => 'Red Button',
            'block' => 'span',
            'classes' => 'red-button',
            'wrapper' => true,
        ),
        array(
            'title' => 'Content Block',
            'block' => 'span',
            'classes' => 'content-block',
            'wrapper' => true,
        ),
        array(
            'title' => 'Highlighter',
            'block' => 'span',
            'classes' => 'highlighter',
            'wrapper' => true,
        ),
    );
    // Insert the array, JSON ENCODED, into 'style_formats'
    $init_array['style_formats'] = json_encode( $style_formats );

    return $init_array;

}
// Attach callback to 'tiny_mce_before_init'
add_filter( 'tiny_mce_before_init', 'my_custom_styles' );
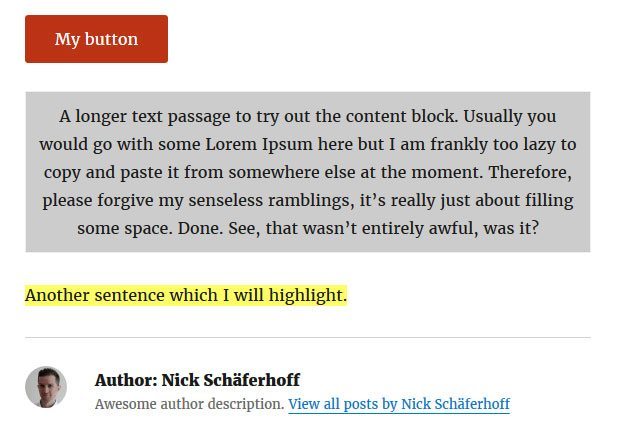
Let’s take a moment to understand what is going on here. In the code snippet above, we are creating three different custom styles. In particular, we are adding options to create a red button, a content box, and a highlighter for text passages.
You can find them in the arrays in the middle. As you can see, we are assigning each option its own title, block, classes, and wrapper. Here’s what each of them means:
- Title — The title sets the name under which our custom style will appear in the drop-down menu.
- Block – Defines which kind of block element to produce around the highlighted text, such as <p>, <span>, <h1>. Existing block elements within the selection will be replaced with the new element.
- Classes – Assign one or several classes to the selected elements. Classes are used to apply CSS styles to elements.
- Wrapper – Defines whether to add a container format for block elements such as a <div> wrapper or blockquote.
There are also more parameters you can use (find them in the WordPress Codex):
- Inline – Name of the inline element to add to the selection. Similar to block.
- Selector – CSS 3 selector pattern to apply classes to specific elements or complex things like odd rows in a table. Useful for more nuanced styling applications.
- Styles – Can be used to directly add CSS styles inline. We are doing this with CSS classes and the style sheet instead.
- Attributes – Used to call new HTML attributes and apply them to the selected elements or the new inline/block element.
- Exact – Disables the feature to merge similar styles when used. Can come in handy for some CSS inheritance issues.
After adding the code above, the custom styles should be visible in the WordPress editor and you can already start assigning them to elements.

However, it won’t change much until we define the corresponding CSS styles. Luckily, that’s exactly what we will be doing in the next step.
Add CSS Styles To Style Sheet
In order to see any effects from your custom styles, you first need to add some CSS to your theme’s style sheet. In our case, it will look like this:
.red-button {
    background-color:#bc3315;
    -moz-border-radius:3px;
    -webkit-border-radius:3px;
    border-radius:3px;
    border:none;
    color: #fff;
    display:inline-block;
    cursor:pointer;
    padding:10px 30px;
    text-decoration:none;
}

.red-button:hover {
    background-color: #e53f19;
}

.content-block {
    border:1px solid #eee;
    padding:10px;
    background:#ccc;
    float:left;
    margin-bottom:1.75em;
    text-align:center;
}

.content-block:after {
    clear:both;
}

.highlighter {
    background-color:#ffff66;
}
As you can see, these styles correspond exactly to the classes we have previously assigned to our custom elements. After adding them to the style.css file of our current theme, they will show up on the site’s frontend.
That’s basically it. Our work of adding custom styles to the WordPress editor is pretty much done. However, to really put the cherry on top, we will need to take one additional step.
At the moment, we will always have to go back and forth between the editor and the page or the page preview to see our custom styles in action. Wouldn’t it be great if instead we could also see their effects in the editor itself? I mean, after all, it is called “What-you-see-is-what-you-get editor,” isn’t it?
To make it stay true to its name, all you need to do is add the CSS styles from before to a file called editor-styles.css. As you can guess, this is the stylesheet of the editor itself. More and more themes are using it to give users a better impression of what their content is going to look like without going to the frontend.
If yours doesn’t have this functionality yet, you can always implement the file by yourself. All you need to do for that is create a new text file, change its name to editor-styles.css, and copy your custom CSS styles in there. Then, save and upload it to your theme’s or child theme’s root directory.
Now all that’s left is add the following code to your functions.php file in order to get your theme to use the new file:
function custom_editor_styles() {
	add_editor_style('editor-styles.css');
}

add_action('init', 'custom_editor_styles');
After that, you should be able to see the effects of your new custom styles directly in the WordPress editor.
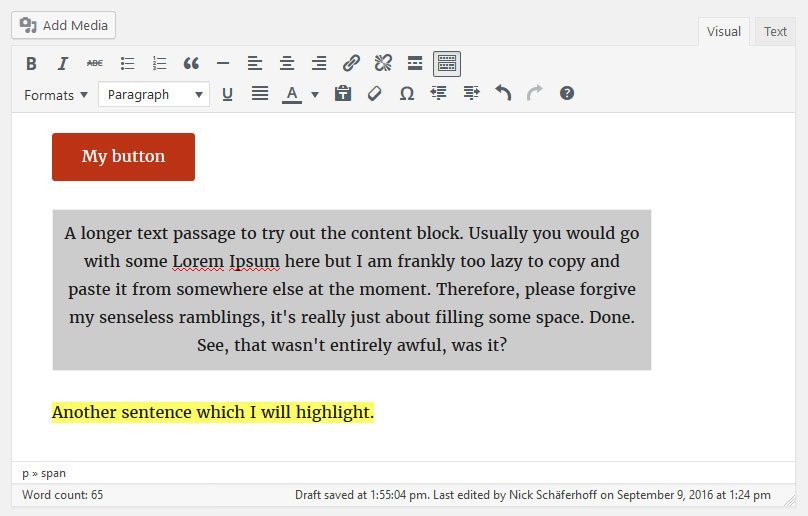
That’s it. You can now officially add custom styles to the WordPress editor. Of course, there are more ways to use this feature (and we have more examples below), so feel free to experiment.
For further tips, also don’t forget to check our article on how to customize the WordPress WYSIWYG editor. Here, you also learn how to make the entire content in the WordPress editor look like your frontend.
However, if you found the above a little too complicated, you are in luck: There are also plugin options for adding custom styles to the editor. Naturally, that’s what we will be looking at next.
Plugin Solutions For Custom Formatting Options
We also have several plugins for adding custom styles. One of the easiest to use is TinyMCE Custom Styles. It basically gives you a graphical interface that enables you to do the same thing we did manually above. Here’s how to use it.
Install The Plugin
As a first step, we need to install the plugin on our site. This happens like for any other plugin. Just go to Plugins > Add New and search for “TinyMCE Custom Styles.”
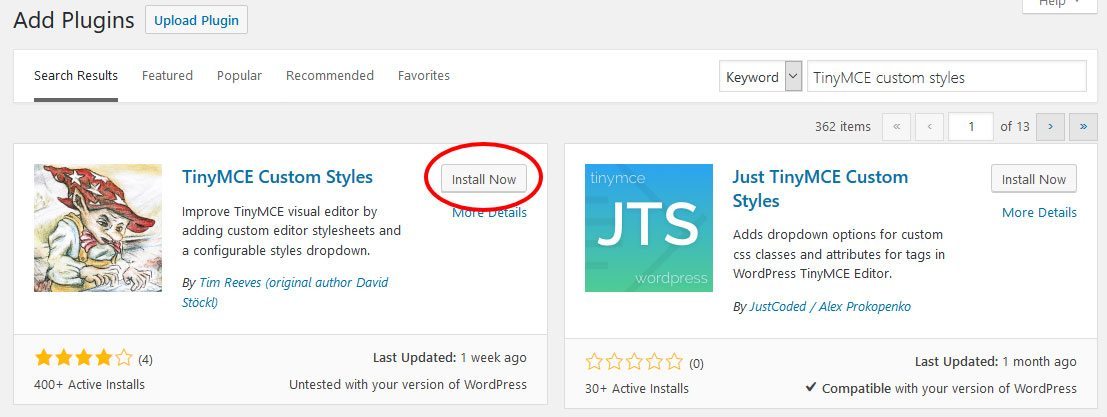
The plugin you are looking for should be the first available option. Click Install Now to download and install it on your site. Don’t forget to activate it when it’s done!
Configure Style Sheets
After that, it’s time to configure the plugin. You can do so under Settings > TinyMCE Custom Styles.
As a first step, we need to configure where our style sheets will be located. We can either place them inside the theme or child theme folder or in a custom folder. The latter option is recommended in order to not lose the files to a theme update.
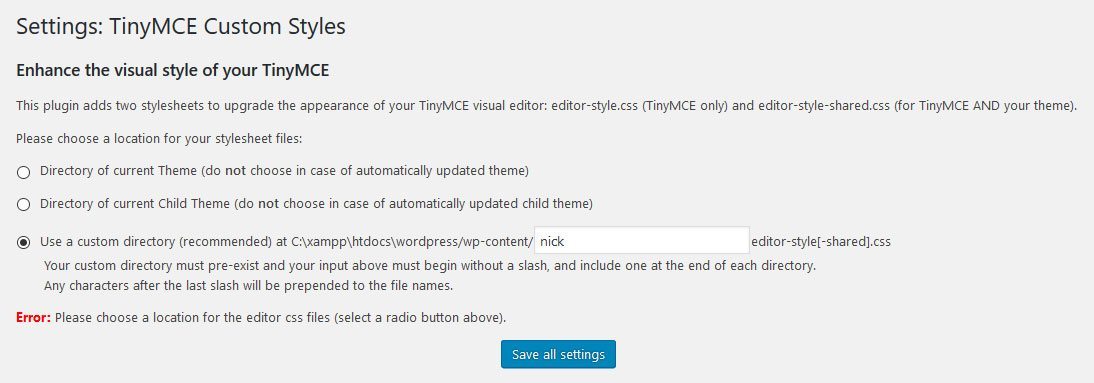
Once you make your choice and save the settings, the plugin will create two stylesheets named editor-style.css and editor-style-shared.css. This is where it will place the custom styles to use in your theme and in the WordPress editor, which we will create in the next step.
Configure Styles
To create custom styles, you first need to click Add new style at the bottom of the screen. This will give you a number of options to define your custom styles. It’s basically the same thing we did via code earlier but with a visual editor.
 Most of the options are self-explanatory:
- Title — The name under which the custom style will show up in the WordPress editor.
- Type — Here you can pick whether you want to create an inline, block or selector element.
- Type value — Which value to use for the element such as span, div or something else.
- CSS classes — The classes associated with your custom styles.
- CSS styles — Styling that is directly assigned to the element (without the use of classes).
- Attributes — HTML attributes to apply to selected elements.
- Exact — As before, used to disable merging similar CSS tags.
- Wrapper — Turns current format into container for block elements like divs.
- Remove — Remove formatting from selected elements.
The plugin also offers detailed explanations for each setting. Once you are done, click on Save all settings at the bottom of the page. After that, you will find your new custom styles in the WordPress editor just like before and are ready to use them. Easy peasy.
Other plugins
As mentioned, there is more than one plugin for this kind of functionality. Here are a few more candidates to add custom styles to the WordPress editor:
- WP Edit — Adds additional formatting options to the editor such as creating tables. Also lets users create buttons and columns. While you can’t create your own styles the plugin gives you additional options.
- TinyMCE Advanced — Similar to the plugin above. Comes with options to change fonts, font sizes, background colors and more but you can not create your own.
- Just TinyMCE Custom Styles — Another option to add your own custom styles to the WordPress editor.
- Forget About Shortcode Buttons — If all you need in terms of custom styles are buttons, this is the plugin for you. Create buttons right inside the editor and customize them at will.
Possible Use Cases for Custom Styles
Alright, now that we know how to add custom styles, let’s take a quick look at what we can use them for. Here are a few ideas for the type of extra formatting you might add to the editor:
- Content boxes — Good for advertising products, styling long quotations, displaying prominent calls to action, warning boxes and providing frames for your content.
- Buttons — Buttons can function as their own calls to action, let users download documents from your site, move them to a shop page and more.
- Highlight — We already showed you how to do this above. With the highlighter function you can stress passages like on paper.
- Testimonials — If you plan on addition testimonials to your site, why not make them stand out with their own custom styles.
In short, anything that can be changed via CSS can be applied to your content via custom styles. That also means, if you know CSS, there is very little you can’t do.
Summing Up
While the WordPress editor is a powerful and convenient tool by itself, it can’t fulfill every possible need and be everything to every person. Sometimes you can’t get around some custom styling.
Fortunately, adding your own formatting options to the WordPress editor is very easy. Whether you need the option to add content blocks, buttons, calls to action or anything else, it can be done in just a few steps — whether manually or via WordPress plugins is up to you.
The code in the tutorial above can be a great starting point to create your own custom styles. Modify as needed and experiment until you are satisfied. The possibilities are only limited by your proficiency in CSS. Beyond that, the sky’s the limit.
Do you use custom styles on your site? How do you implement them? Any tips, plugins or anything else to add? Let us know in the comment section below!
67 Comments