
In the second part of our series, we got ourselves off to a structured start by using the WordPress Plugin Boilerplate to erect some sensible scaffolding around our future code. By taking this approach, we were able to kick things off with a substantial amount of best plugin practices baked in for free.
This time around, we’ll look at giving some of our future user-created content a home of its own in the back end by using a custom post type. This will give us an opportunity to take some baby steps in actually using the WordPress Plugin Boilerplate itself, and get some test content into the system to play with.
Before we roll up our sleeves and start creating custom content types, however, let’s clear up some potential confusion about terminology.
Some Background on Custom Post Types
Regardless of your level of previous WordPress experience, you’ve almost certainly come across the concept of posts somewhere along the line. Most likely, you’ve quickly grokked the basic differences between posts and pages and then moved on with your life. There’s some potential confusion lurking in the background, however, once we delve in a little further.
As Justin Tadlock pointed out in his excellent introductory article on the topic all the way back when custom post types were introduced in 2010, the term “post” covers several potential bases in WordPress – we’re not simply talking about blog posts versus pages here.
Posts in WordPress are actually a generic term used to refer to various different content types. The software comes with five different types of posts ready for use straight out of the gate:
- Posts (these are what you’re probably used to thinking of as blog posts)
- Pages
- Attachments
- Revisions
- Menus
The actual content for all of these is stored in the posts table of the database, which goes a long way to explaining the mystifyingly large amount of data that’s typically in there when you get around to looking at it for the first time.
We’ve also got the option of creating our own custom post types. This gives us a nice clean way of isolating our primary content as developers, and gives our potential users a simple and intuitive way of entering content in the back end. It’s an approach that’s at the heart of both a huge number of popular plugins and the core of the platform itself.
Let’s move on to look at setting one of these bad boys up.
Getting Ready to Register Our Own Custom Post Type
As with most things plugin-related, it’s always worth consulting the official Plugin Handbook when working out first steps. In this case, we’re jumping straight to the section on registering custom post types. A few things become immediately obvious upon reviewing the relevant documentation:
- We’ll be using the register_post_type() function to get the basic job done here. (Fans of extensive lists of arguments are in for a treat when following that particular link.)
- The init hook looks like the stage of proceedings at which to kick things off.
- We’ll need to have a proper think about naming.
- We need to work out how to fit all this into the WordPress Plugin Boilerplate setup we’re using.
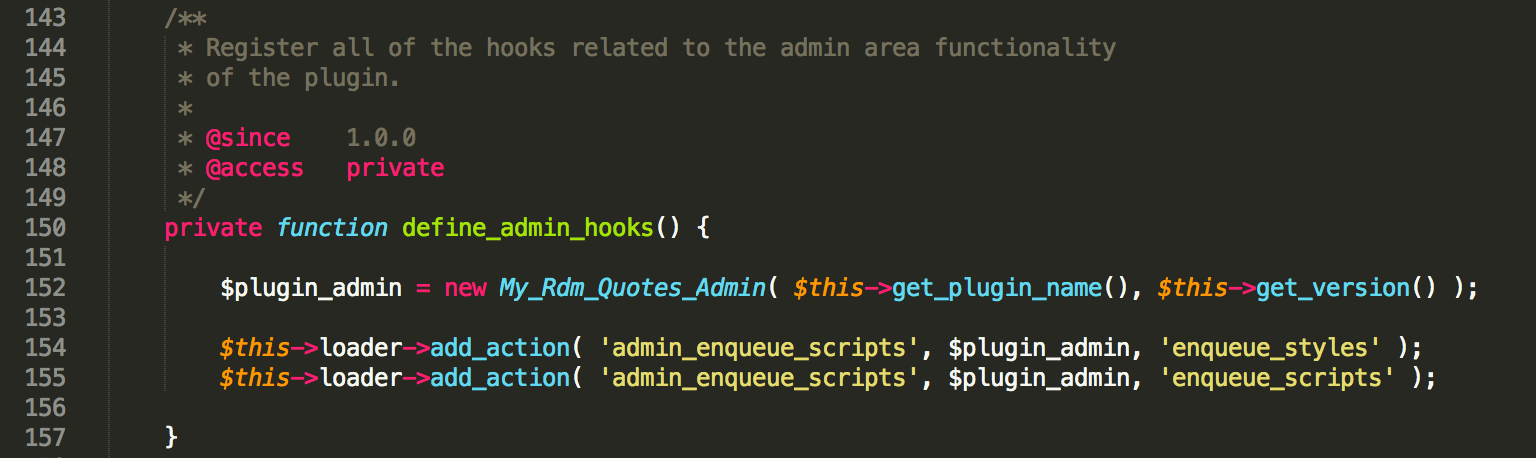
Let’s start with the last item first. Referring back to the plugin folder structure section of our previous piece, you may remember that the local includes folder of our plugin is where much of the action is taking place. More specifically, the file we generically refer to as class-plugin-name.php in that includes folder offers some handy entry points for doing things on both the front and back end.
In our particular case, the plugin’s name is my-rdm-quotes, which gives us a full local path of /plugins/my-rdm-quotes/includes/class-my-rdm-quotes.php. If we pop into that file, we’ll see the define-admin-hooks() method sitting there just waiting to be used:
Actually Registering Our Custom Content Type
We’ve got a rough idea of where to dive in around now, but it’s always worth standing on the shoulders of others when it comes to trying something for the first time. Chris Wilcoxson’s recent presentation on using the WordPress Plugin Boilerplate is not only an entertaining and informative talk in its own right, it also arrives with some handy, fully documented, working code to explore on Github.
Popping into the main class file, we can see that the register_post_type() function is being inserted into proceedings where we suspected it might be, albeit via a custom function:
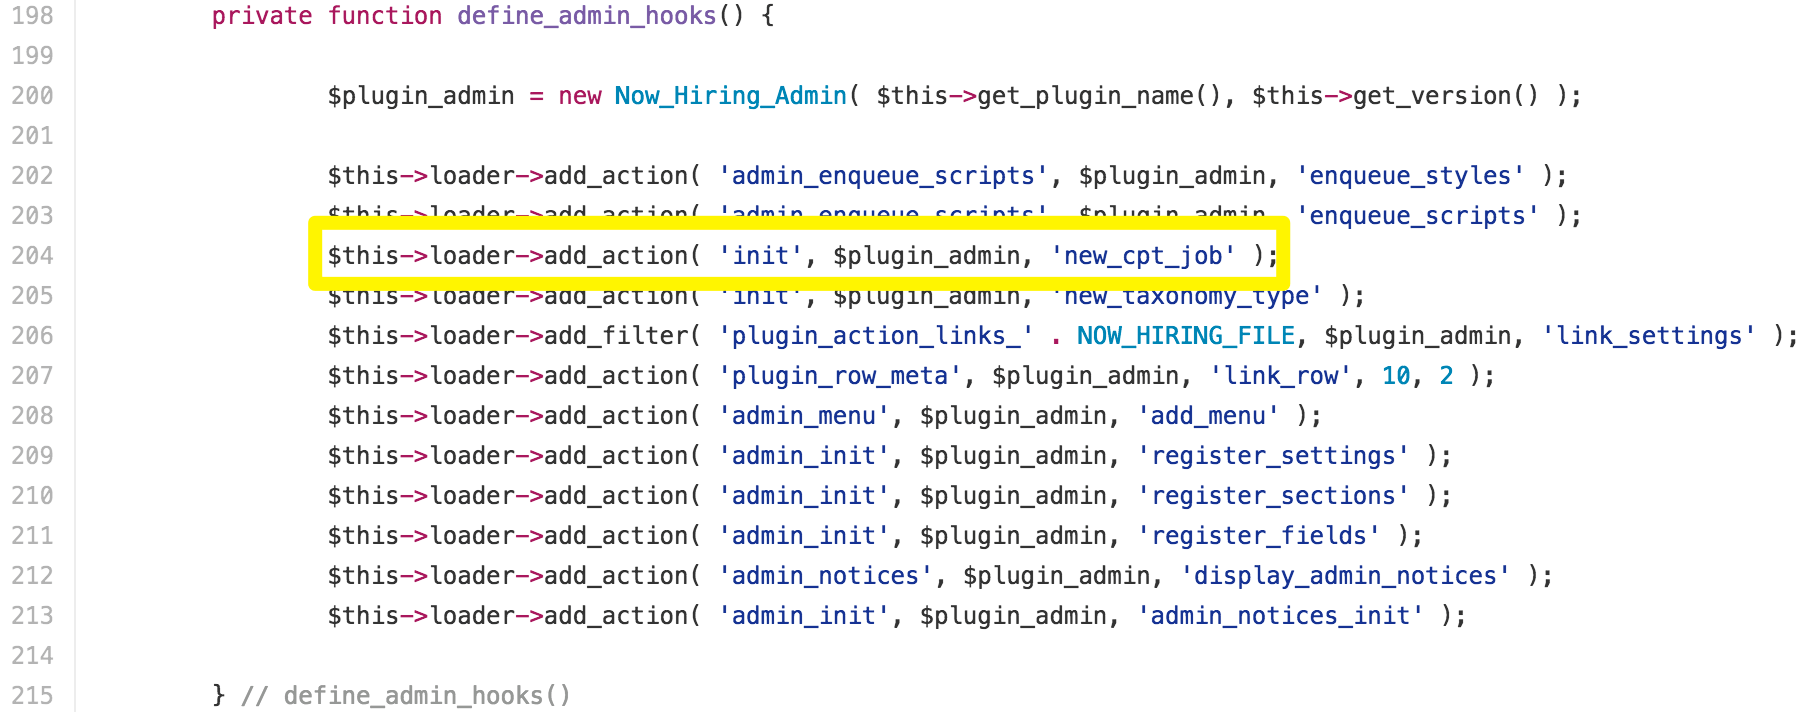
This, in turn, leads us back up to the admin folder and the main admin class where register_post_type() is actually implemented in all its argumentative glory:
Taking a similar approach in our local files, we’ll kick things off in /includes/class-my-rdm-quotes.php:
private function define_admin_hooks() {

$plugin_admin = new My_Rdm_Quotes_Admin( $this->get_plugin_name(), $this->get_version() );

$this->loader->add_action( 'admin_enqueue_scripts', $plugin_admin, 'enqueue_styles' );
$this->loader->add_action( 'admin_enqueue_scripts', $plugin_admin, 'enqueue_scripts' );
$this->loader->add_action( 'init', $plugin_admin, 'new_cpt_rdm_quote' );

}
This is simply telling WordPress to look for a custom function called new_cpt_rdm_quote() in the relevant part of the admin folder. We’ll then actually add that function inside /admin/class-my-rdm-quotes-admin.php. In our case below, we’ve gone for a slightly stripped down version cobbled together from Chris Wilcoxson’s original code:
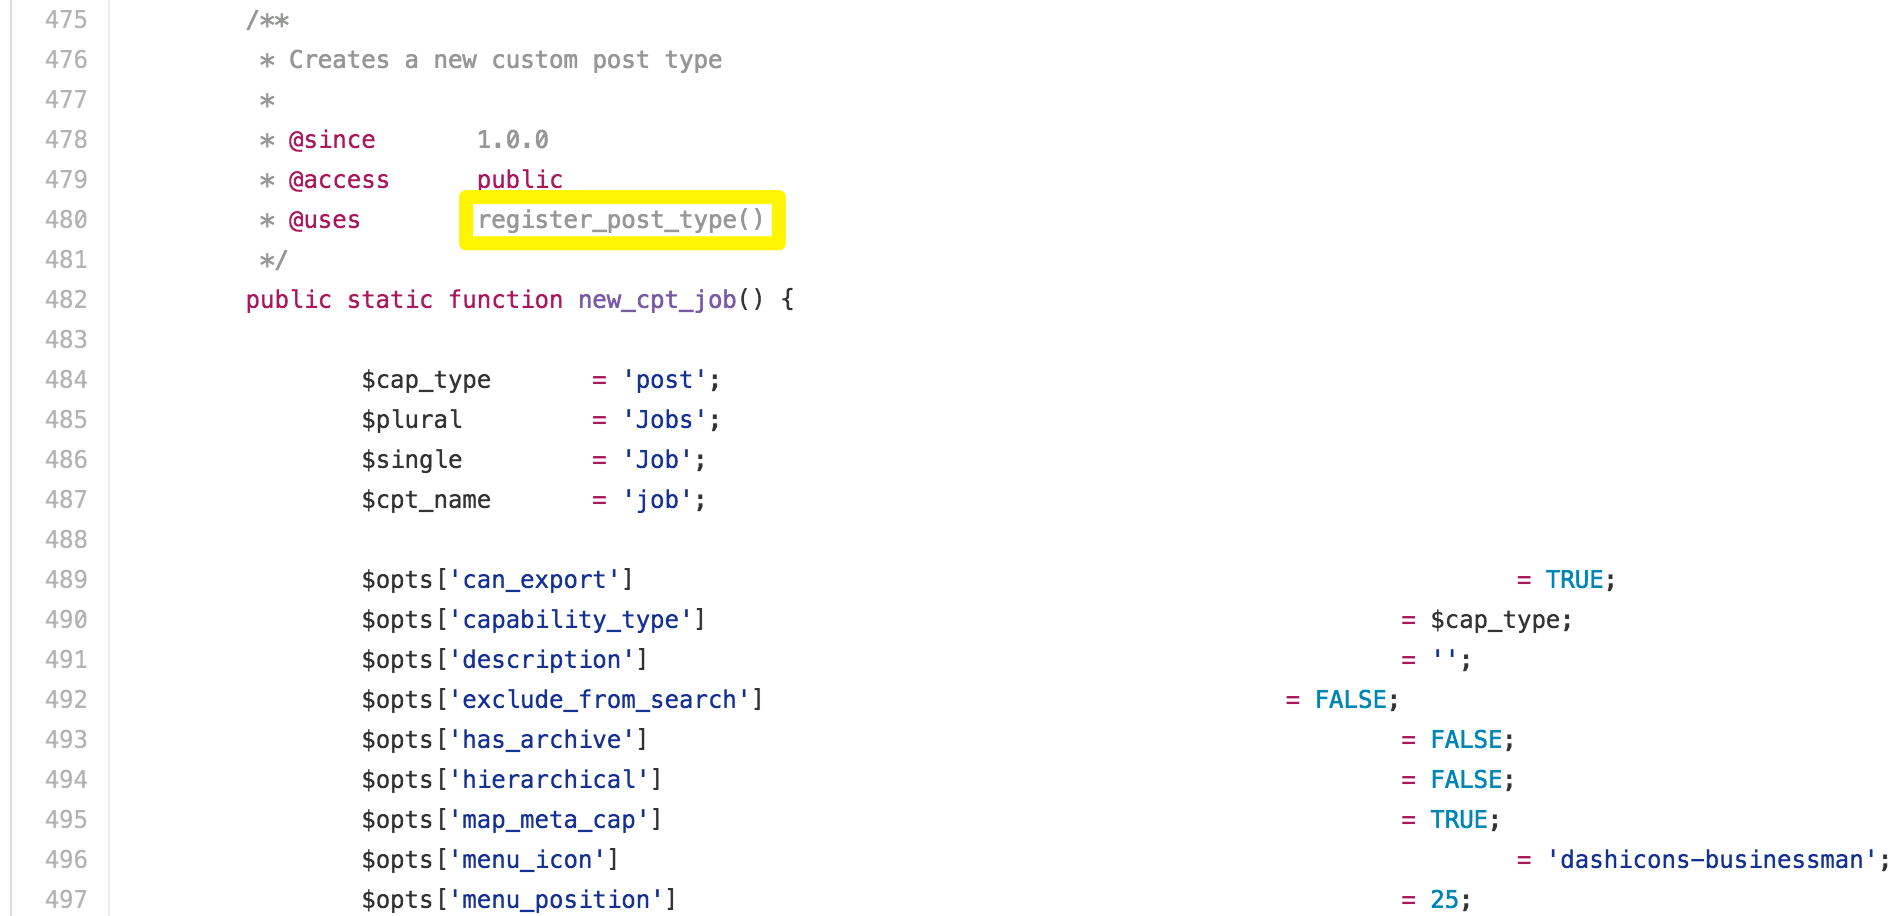
/**
* Creates a new custom post type
*
* @since 1.0.0
* @access public
* @uses register_post_type()
*/
public static function new_cpt_rdm_quote() {
$cap_type = 'post';
$plural = 'Random Quotes';
$single = 'Random Quote';
$cpt_name = 'rdm-quote';
$opts['can_export'] = TRUE;
$opts['capability_type'] = $cap_type;
$opts['description'] = '';
$opts['exclude_from_search'] = FALSE;
$opts['has_archive'] = FALSE;
$opts['hierarchical'] = FALSE;
$opts['map_meta_cap'] = TRUE;
$opts['menu_icon'] = 'dashicons-businessman';
$opts['menu_position'] = 25;
$opts['public'] = TRUE;
$opts['publicly_querable'] = TRUE;
$opts['query_var'] = TRUE;
$opts['register_meta_box_cb'] = '';
$opts['rewrite'] = FALSE;
$opts['show_in_admin_bar'] = TRUE;
$opts['show_in_menu'] = TRUE;
$opts['show_in_nav_menu'] = TRUE;

$opts['labels']['add_new'] = esc_html__( "Add New {$single}", 'wisdom' );
$opts['labels']['add_new_item'] = esc_html__( "Add New {$single}", 'wisdom' );
$opts['labels']['all_items'] = esc_html__( $plural, 'wisdom' );
$opts['labels']['edit_item'] = esc_html__( "Edit {$single}" , 'wisdom' );
$opts['labels']['menu_name'] = esc_html__( $plural, 'wisdom' );
$opts['labels']['name'] = esc_html__( $plural, 'wisdom' );
$opts['labels']['name_admin_bar'] = esc_html__( $single, 'wisdom' );
$opts['labels']['new_item'] = esc_html__( "New {$single}", 'wisdom' );
$opts['labels']['not_found'] = esc_html__( "No {$plural} Found", 'wisdom' );
$opts['labels']['not_found_in_trash'] = esc_html__( "No {$plural} Found in Trash", 'wisdom' );
$opts['labels']['parent_item_colon'] = esc_html__( "Parent {$plural} :", 'wisdom' );
$opts['labels']['search_items'] = esc_html__( "Search {$plural}", 'wisdom' );
$opts['labels']['singular_name'] = esc_html__( $single, 'wisdom' );
$opts['labels']['view_item'] = esc_html__( "View {$single}", 'wisdom' );
register_post_type( strtolower( $cpt_name ), $opts );
} // new_cpt_job()
You’ll notice that it actually calls register_post_type() at the bottom of the function, and passes in various arguments and labels that have been defined along the way. All being well, we should now be able to pop into the back end and see a new home for our content:
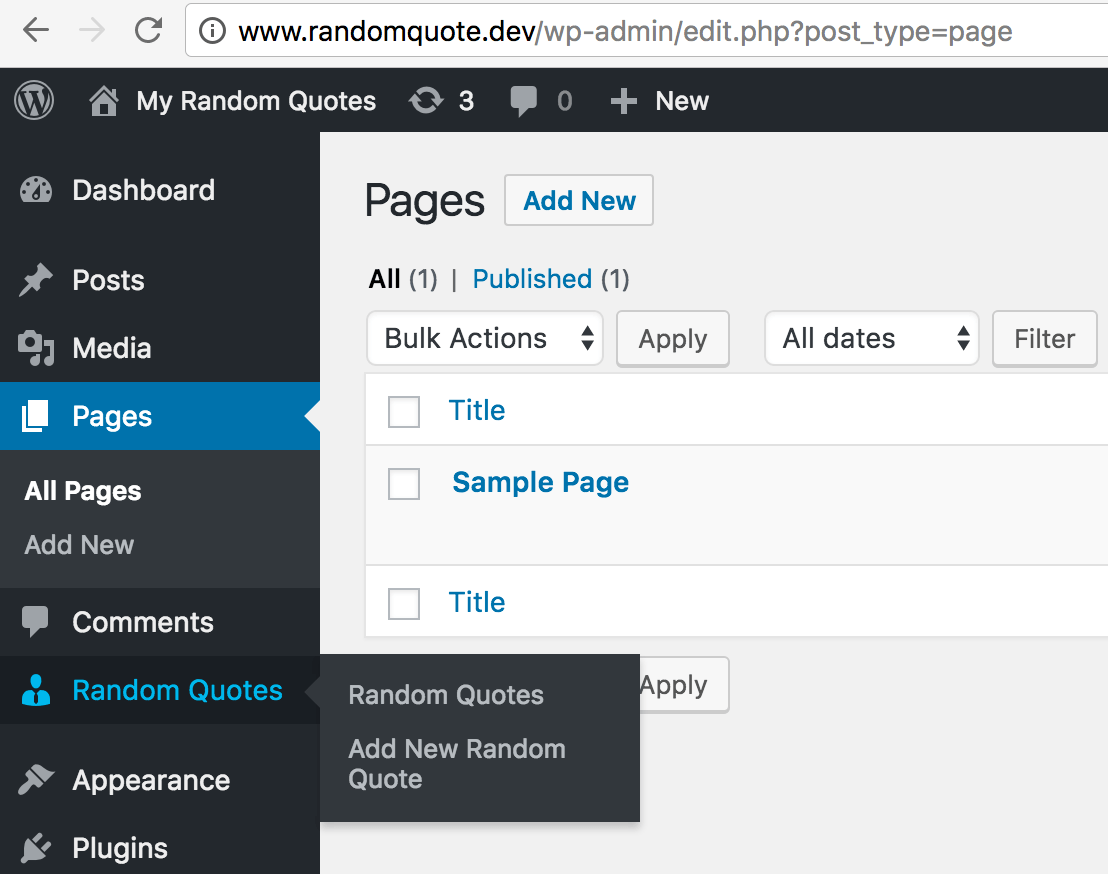
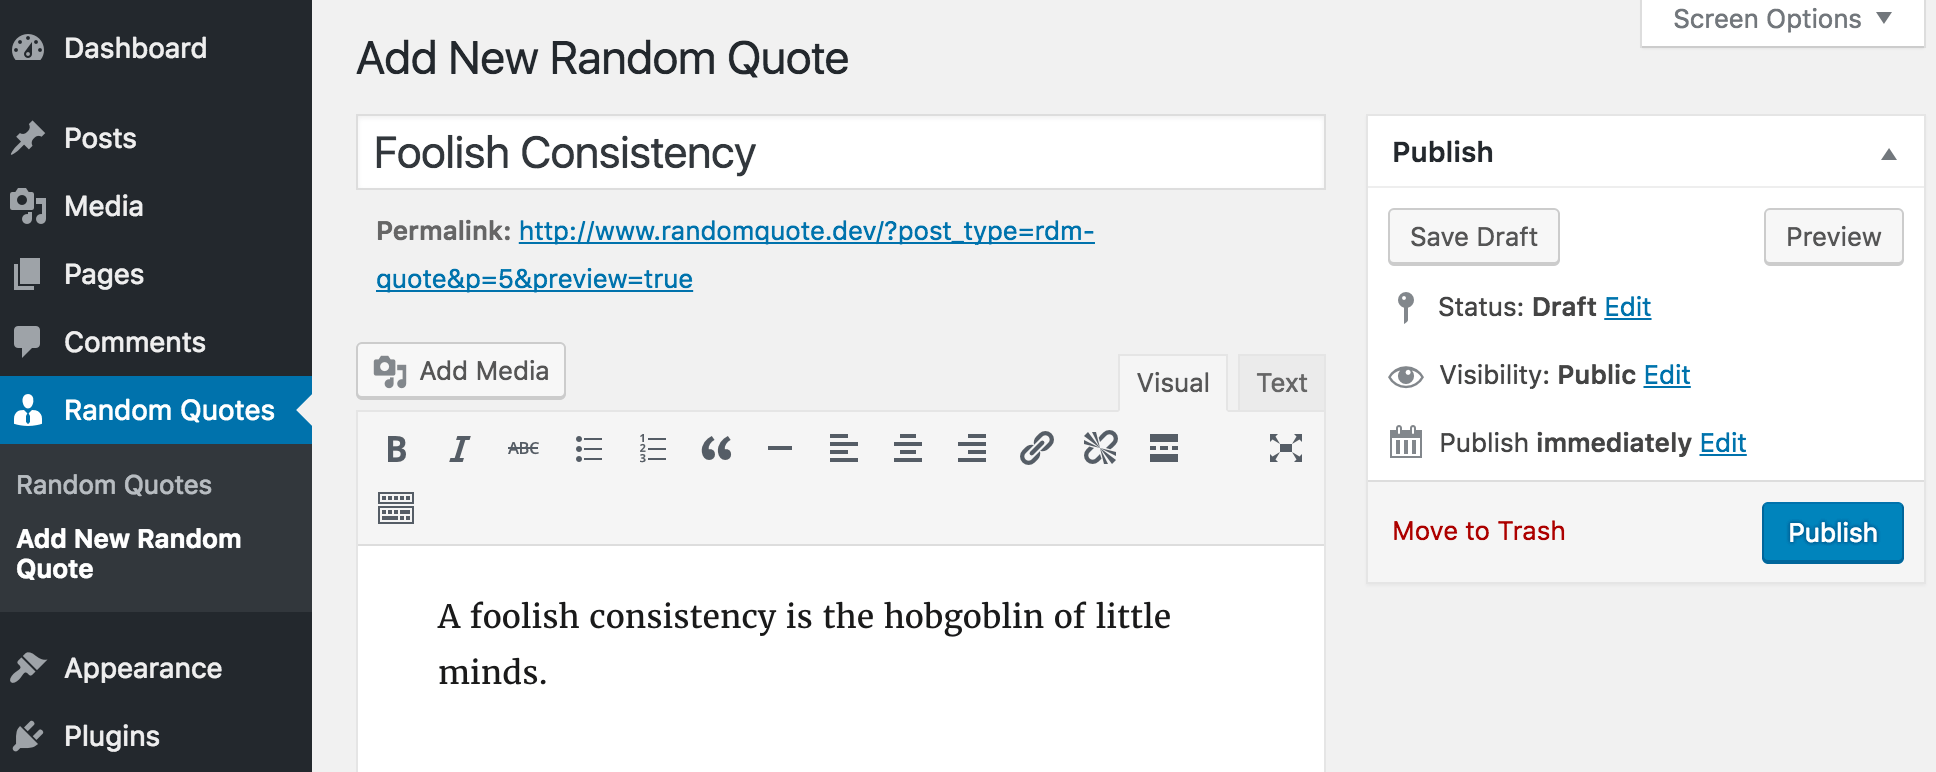
If we pop into Add New Random Quote, we should have a familiar looking interface for entering quotes:
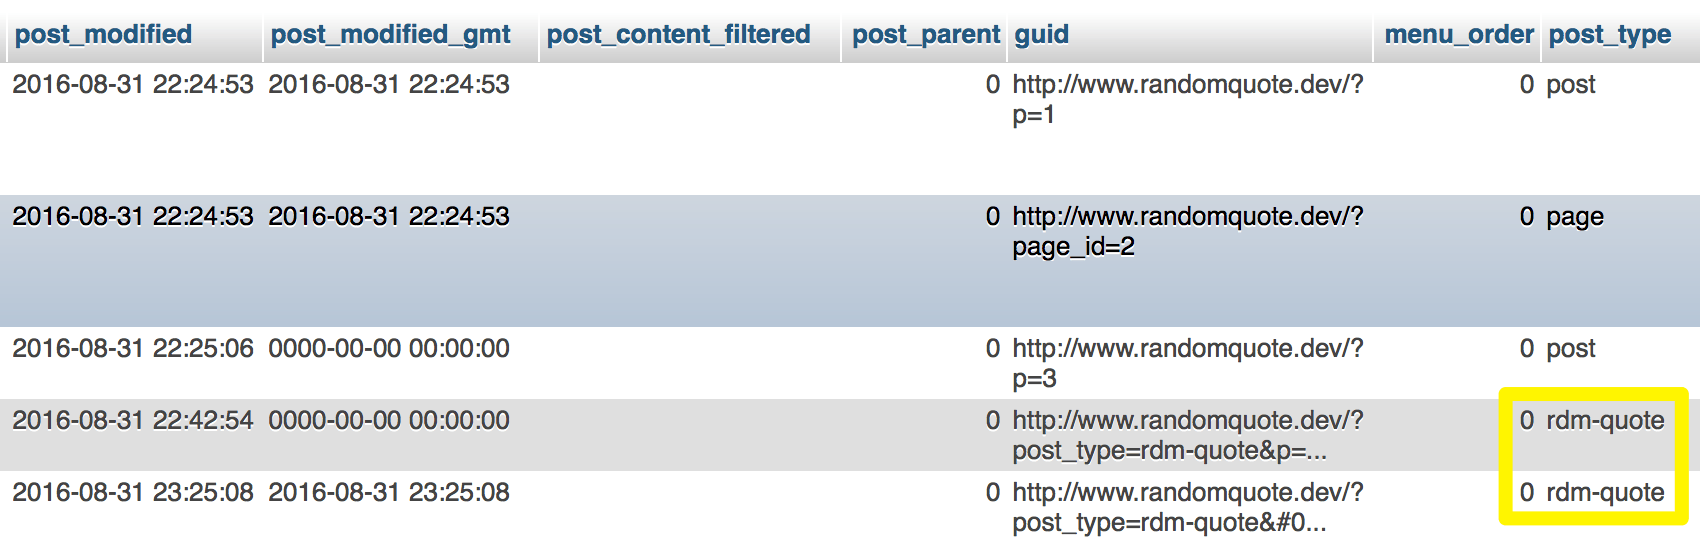
A quick trip into the database, and we should see our quote being stored with the correct custom post type:
There are all sorts of further minor tweaks and changes we could make at this point, but that just about wraps things up for this instalment of the series. There hasn’t been an enormous amount of code deployed, but we’ve just completed another key stage of our overall plugin development. And, crucially, the WordPress Plugin Boilerplate has once again proved its value by giving us handy code samples to refer to and a solid structure to work within.
Conclusion
As we turn the corner towards the back nine of our series, we continue to make steady, structured progress along our merry way. We’ve ticked off a number of important boxes so far with solid scaffolding to guide us, and are well poised for future instalments.
Let’s recap the main points we hit this time around:
- We introduced the concept of custom post types in WordPress.
- We then worked out the basic steps we’d need to take to implement our own custom type.
- Finally, with some existing code to guide us, we slotted the registration of a custom content type into our existing setup, and checked that it was working.
Stay tuned for the next part of the series where we’ll start looking at different ways to actually display our content now that we have somewhere it can live. As always, if you have any questions or thoughts, feel free to get in touch via the comments below and share them!
Featured image: geralt
5 Comments