Domain Authority (DA) is a strong ranking factor with search engines, but many site owners don’t take the time to set themselves apart as industry leaders and increase their own DA. As such, you may not be ranking as highly as you could be, which could impact traffic, income, and more.
Creating a custom knowledge base with WordPress is a good way to increase your DA. This can improve your Search Engine Optimization (SEO), while also benefiting your customers by offering vital self-help. Overall, it’s a win-win situation, which can complement your existing content marketing strategy.
In this article, you’ll learn how to use WordPress to build a custom knowledge base. Of course, you’ll need to provide the knowledge, but WordPress plugins such as WP Knowledgebase can help you set everything up. Let’s get started!
What a Knowledge Base Is (And Why You Need One)
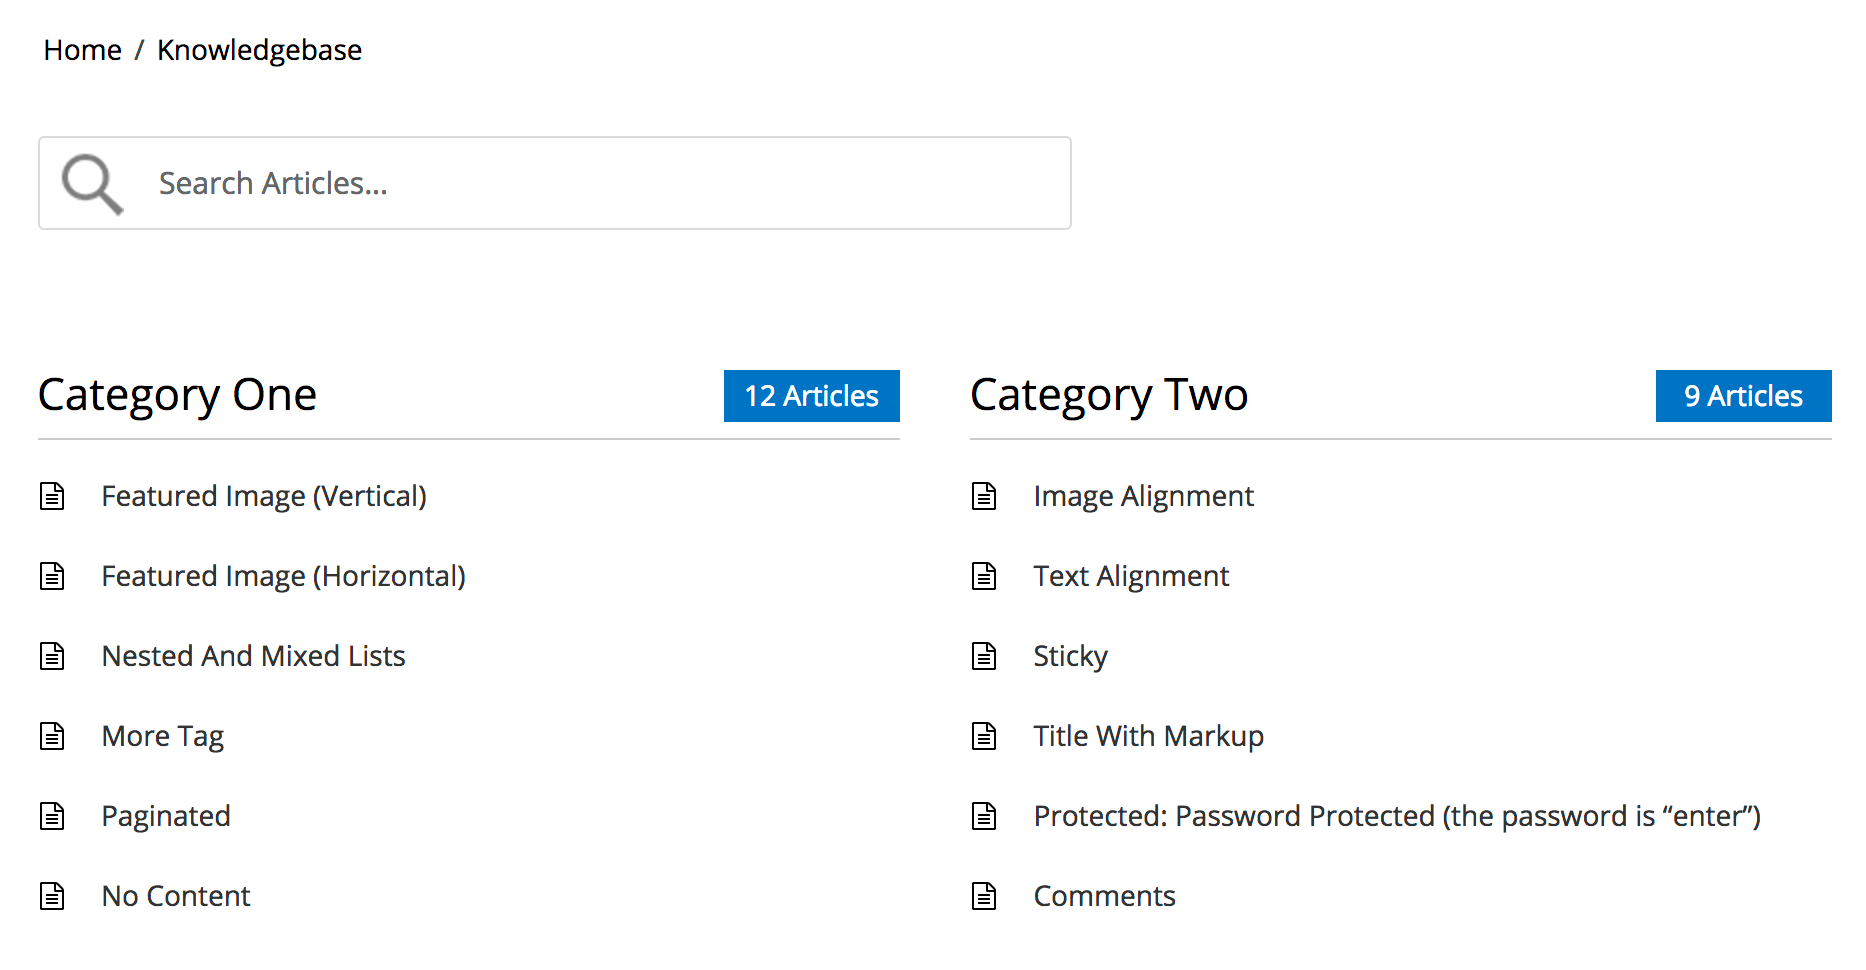
A knowledge base is a repository of expert information that you can browse at will. The contents are typically related to a product or service, but can also be based on a particular company department, or something else entirely. For example, they could constitute Frequently Asked Questions (FAQs), step-by-step guides, or other detailed pieces of information a visitor may need or want to know about a product or service.
Implementing a knowledge base has many benefits, such as providing your customers with round-the-clock self-serve support, and enabling search engines to recognize the definitive authority of your content, which can increase your rankings in search results.
If you’re still not clear about what we mean by the term ‘knowledge base’, check out these real world examples:
- Asana offers a knowledge base that guides you through a series of common sense steps depending on how experienced you are with their platform.
- Loco2 breaks down information into three action-based sections, then logical categories beneath each one.
- Yoast categorizes by product first, then offers all the information available for that product at once.
As you can see, there’s no single way to design a knowledge base. Each of these companies has likely experimented with different formats to discover the version that works best for their customers. Of course, you’ll need to do the same for your own, but at first you should implement some tried-and-true best practices to get started.
5 Key Tips for Designing a Knowledge Base
Before actually building your knowledge base, it’s important to understand how to design an effective one. This enters the territory of ‘information architecture’, which you may not have experience with. In short, it’s important to follow fundamental guidelines in order to create a good experience for your website’s visitors.
With that in mind, consider the following five tips while designing your knowledge base:
- Include a prominent search bar, to compel the user to look for their desired page.
- Ensure fast access to the most popular FAQs with quick links at the top of every page.
- Give your knowledge base articles short titles that include major keywords.
- On the main pages of your knowledge base, divide the articles into clear categories based on common sense topics.
- Always offer access to additional help, typically through a contact form.
As you can see, none of this is particularly ground breaking. In fact, most of these are fairly common sense! Even so, bearing them in mind when creating your knowledge base will likely pay off in the long run.
How to Build a Custom Knowledge Base With WordPress (In 5 Steps)
Now that you’re up to speed on what a knowledge base is, why it’s important, and its essential design fundamentals, it’s time to build one. WordPress offers several plugin options, which make this process a cinch. We’ll also assume that you’ve already written your knowledge base content. Once you’re ready, let’s get started!
1. Select a Suitable WordPress Plugin
While there are a lot of contenders, we recommend using the WP Knowledgebase plugin. It’s popular and easy to use, although close runners-up include Knowledge Base for Documents and FAQs and Ultimate FAQ.
WP Knowledgebase is packed with features, such as predictive search capabilities, integrated breadcrumbs for usability and SEO, sidebar widgets, and customizable catalogue organization. What’s more, it’s completely responsive out of the box, so users can view your knowledge base regardless of their browsing device.
Additionally, WP Knowledgebase provides a template for fully customizing the output on the front end. In the following sections, we’ll be walking you through how to use this plugin, but the steps should translate well to the solution you ultimately choose.
Before moving onto the next step, make sure you’ve installed and activated the WP Knowledgebase plugin.
2. Choose Relevant Subject Categories
Once the plugin is installed, your first task is to select your categories. The categories making the most sense will depend on your company and the goals of your knowledge base. For example, you can group articles together by product or service, or based on your central goals.
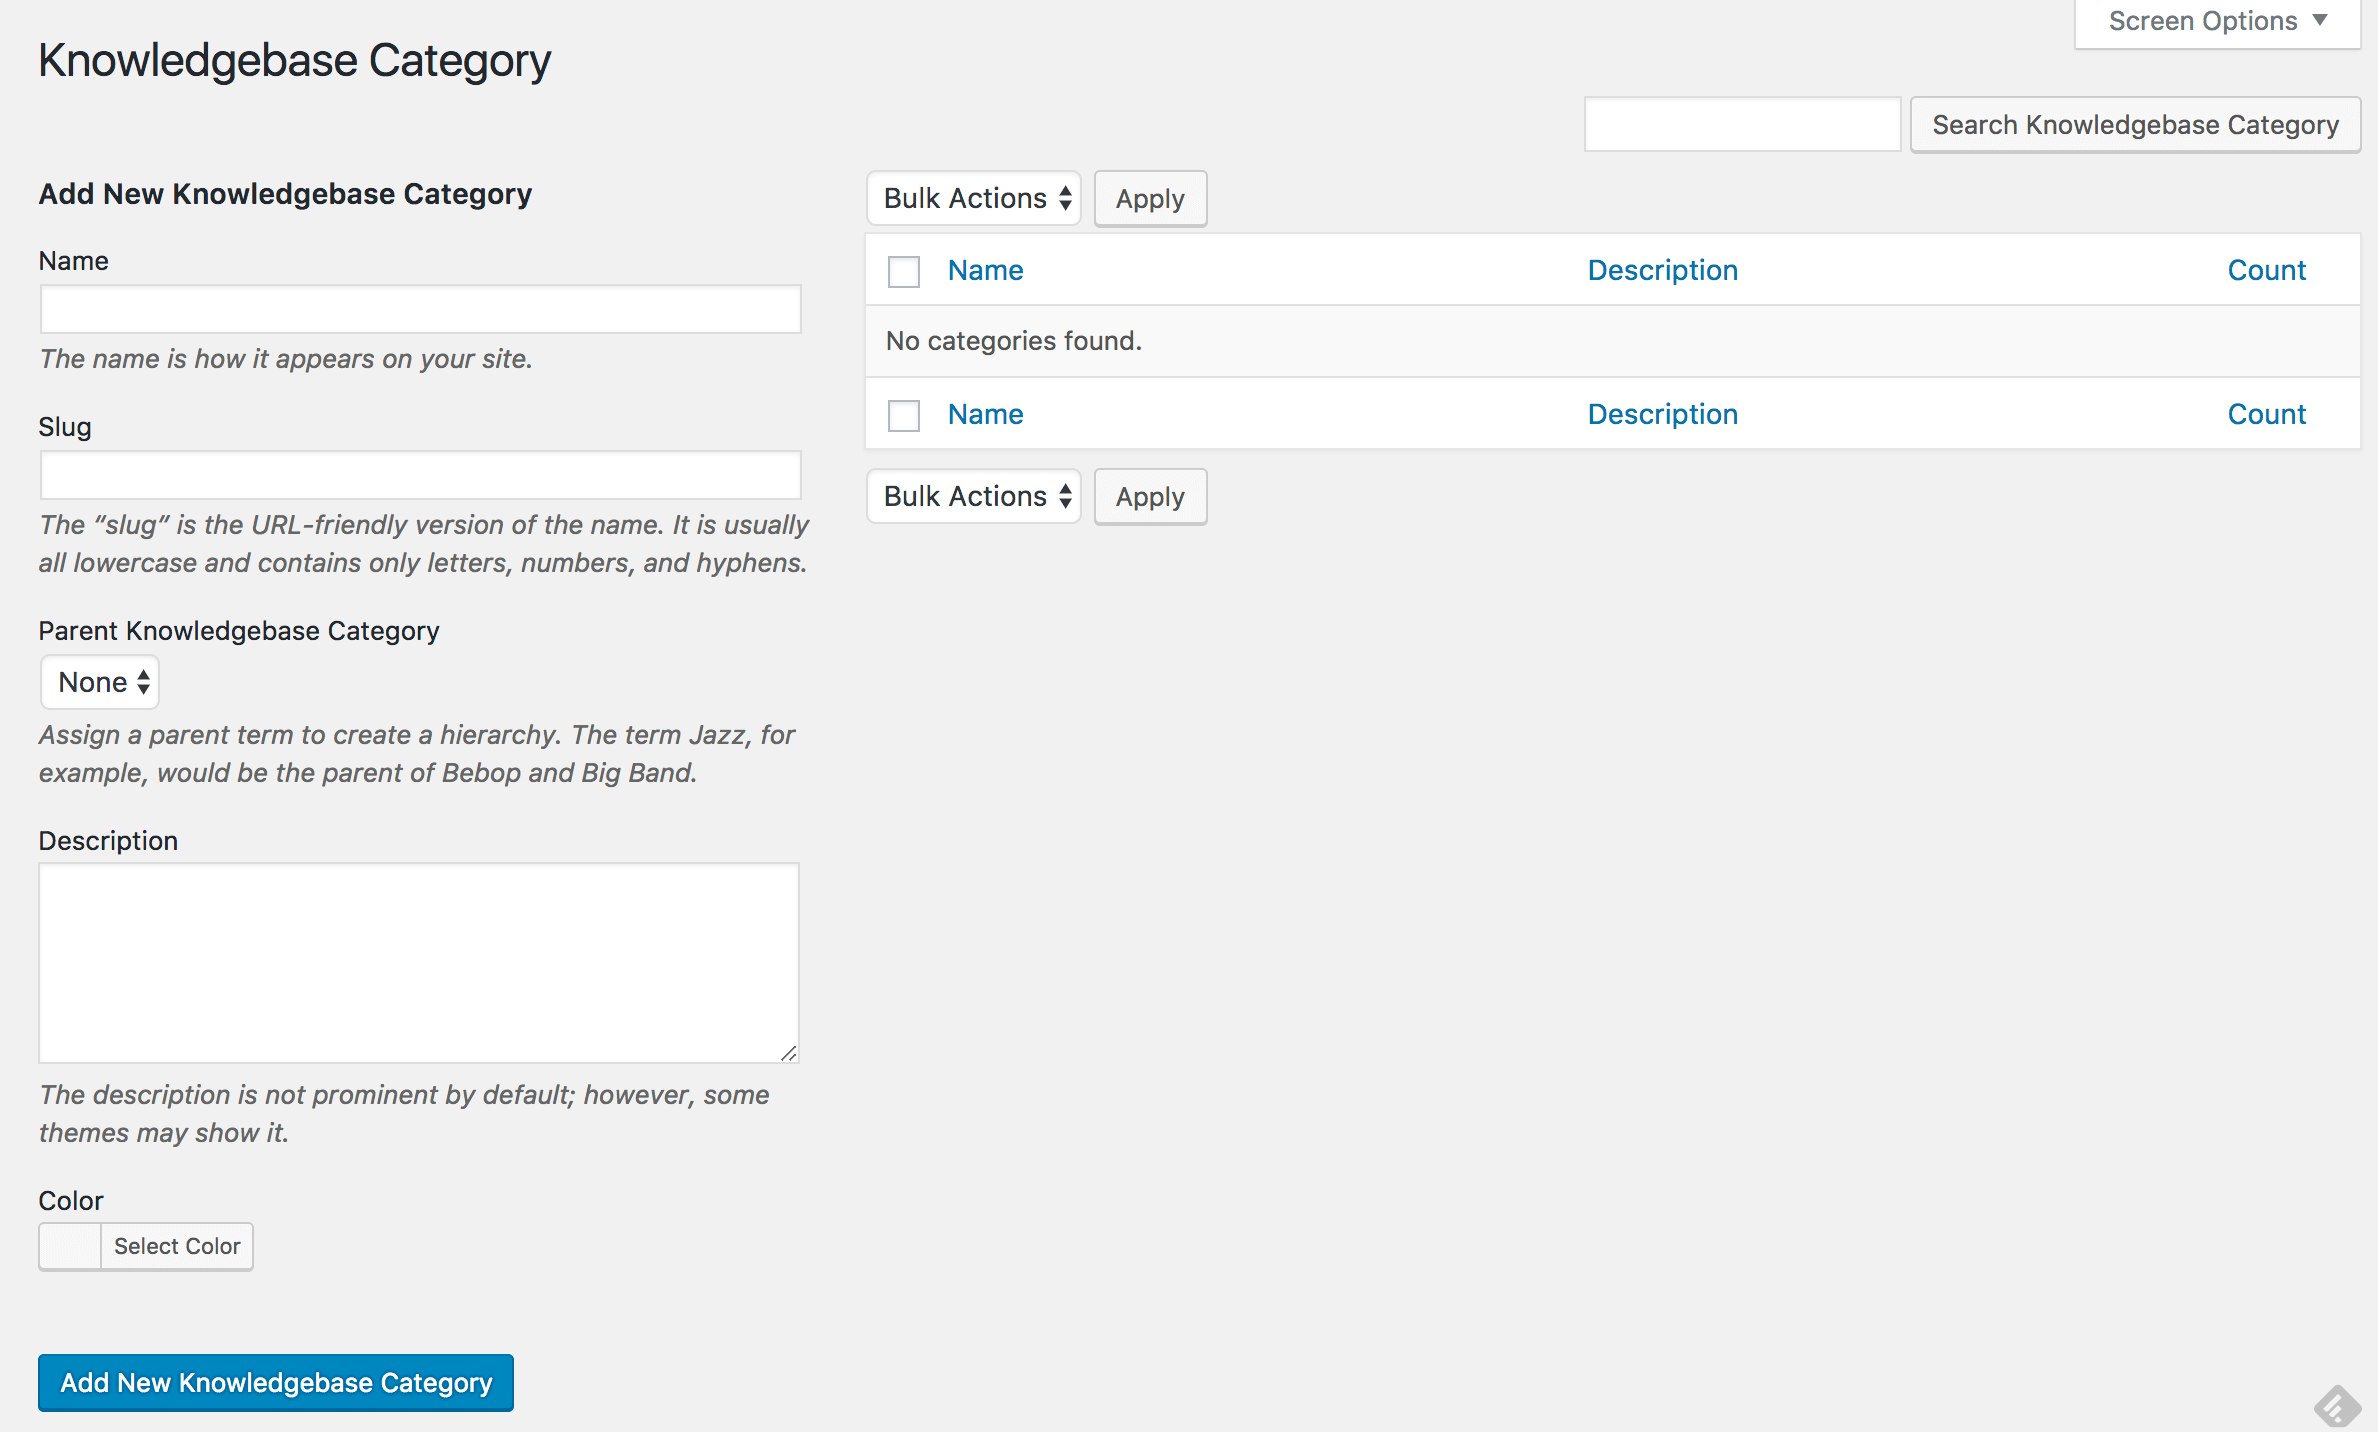
After settling on your major categories, you’ll need to add them to WordPress. First, navigate to Knowledgebase > Categories in your WordPress dashboard. Next, add a suitable name, slug, description, and color. You’ll notice that the format is similar to WordPress’ standard categories. When you’re ready, click Add New Knowledgebase Category at the bottom of the screen for each one:
Once you’ve finished creating all of your categories, it’s time to add the articles themselves.
3. Add Your Knowledge Base Content
Of course, your categories now need to be populated. The process will likely take up the bulk of your time, and we recommend you provide at least one or two articles to each category before launching to the public. After all, you can always add more down the line.
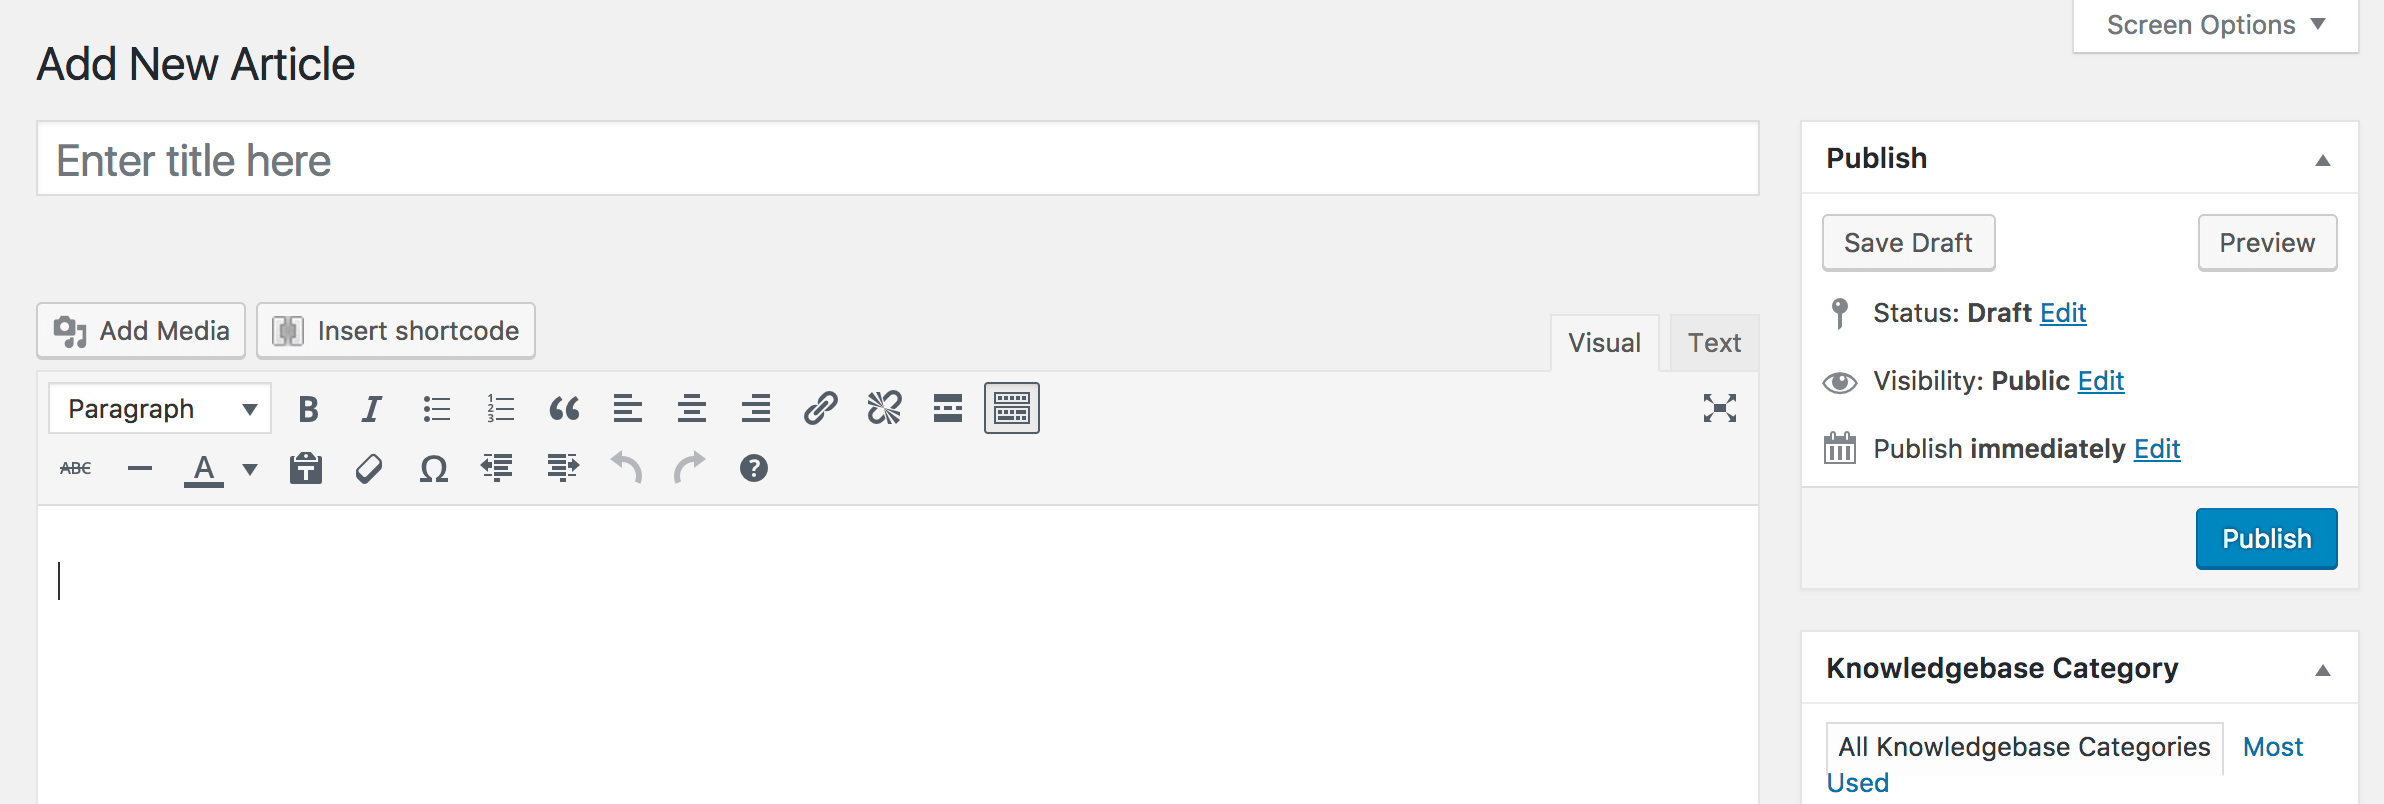
Thankfully, adding articles using WP Knowledgebase is almost exactly the same as writing regular blog posts. The only thing that changes is where you add them from. First, go to Knowledgebase > New Article. The interface should look familiar to you:
Choose a short, descriptive title for your knowledge base article. Then, write up your piece as normal in the content area, and choose a suitable category from the Knowledgebase Category metabox. Finally, click either Save Draft or Publish, depending on whether you want the post to go live straight away.
4. Create a Public Facing Knowledge Base Page
With your categories and content sorted, it’s almost time to go public! This means setting up a core page where visitors can browse through your knowledge base to find what they need.
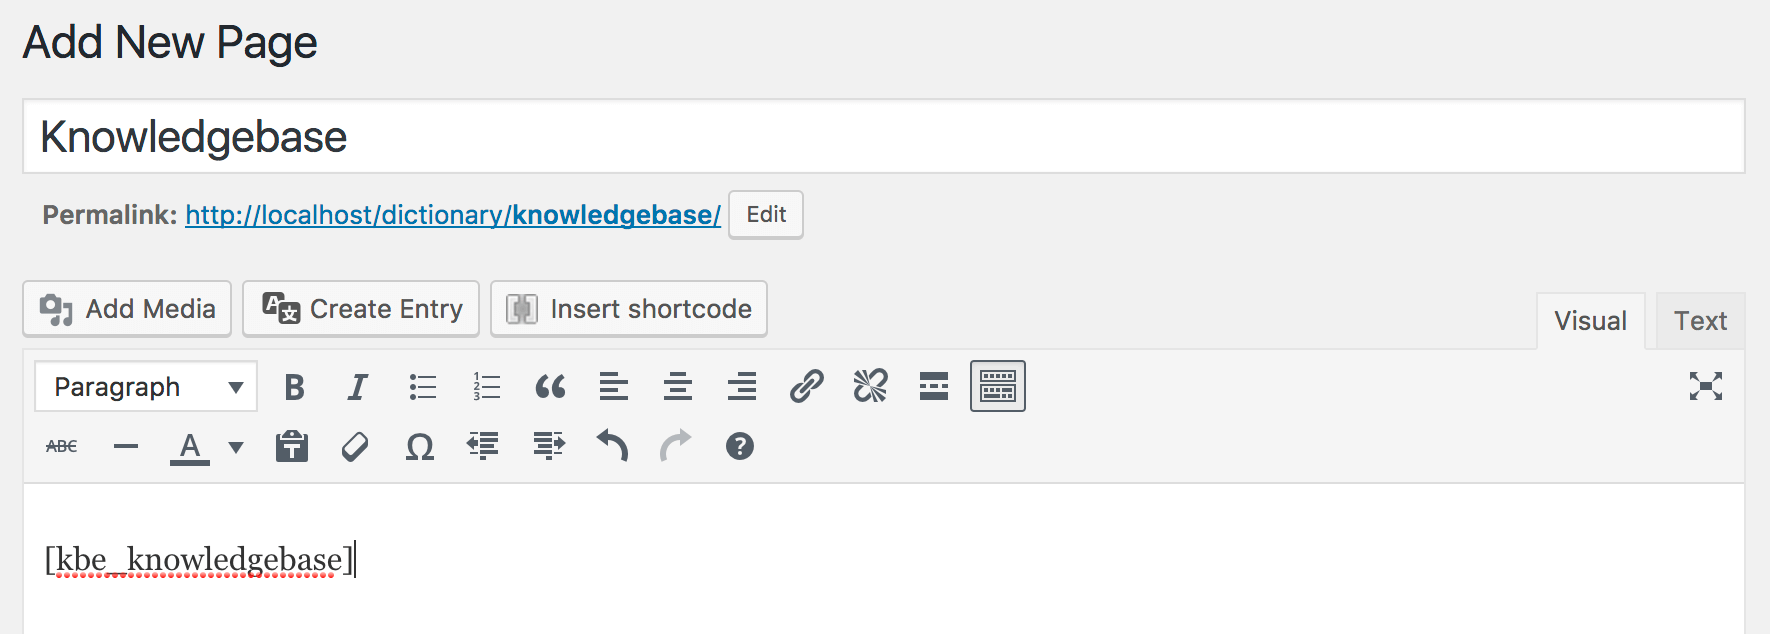
WP Knowledgebase offers to generate this page for you after you activate the plugin. If you said “Yes”, it can be found under Pages on your WordPress dashboard. However, if you’d like to create your own, head to Pages > Add New. Name this page something appropriate:
In the content section, add the shortcode [kbe_knowledgebase]. This will add your content automatically. Finally, preview the page to ensure everything loads as expected, and save your changes when everything looks correct. That’s all there is to it!
5. Optimize Your Knowledge Base Interface
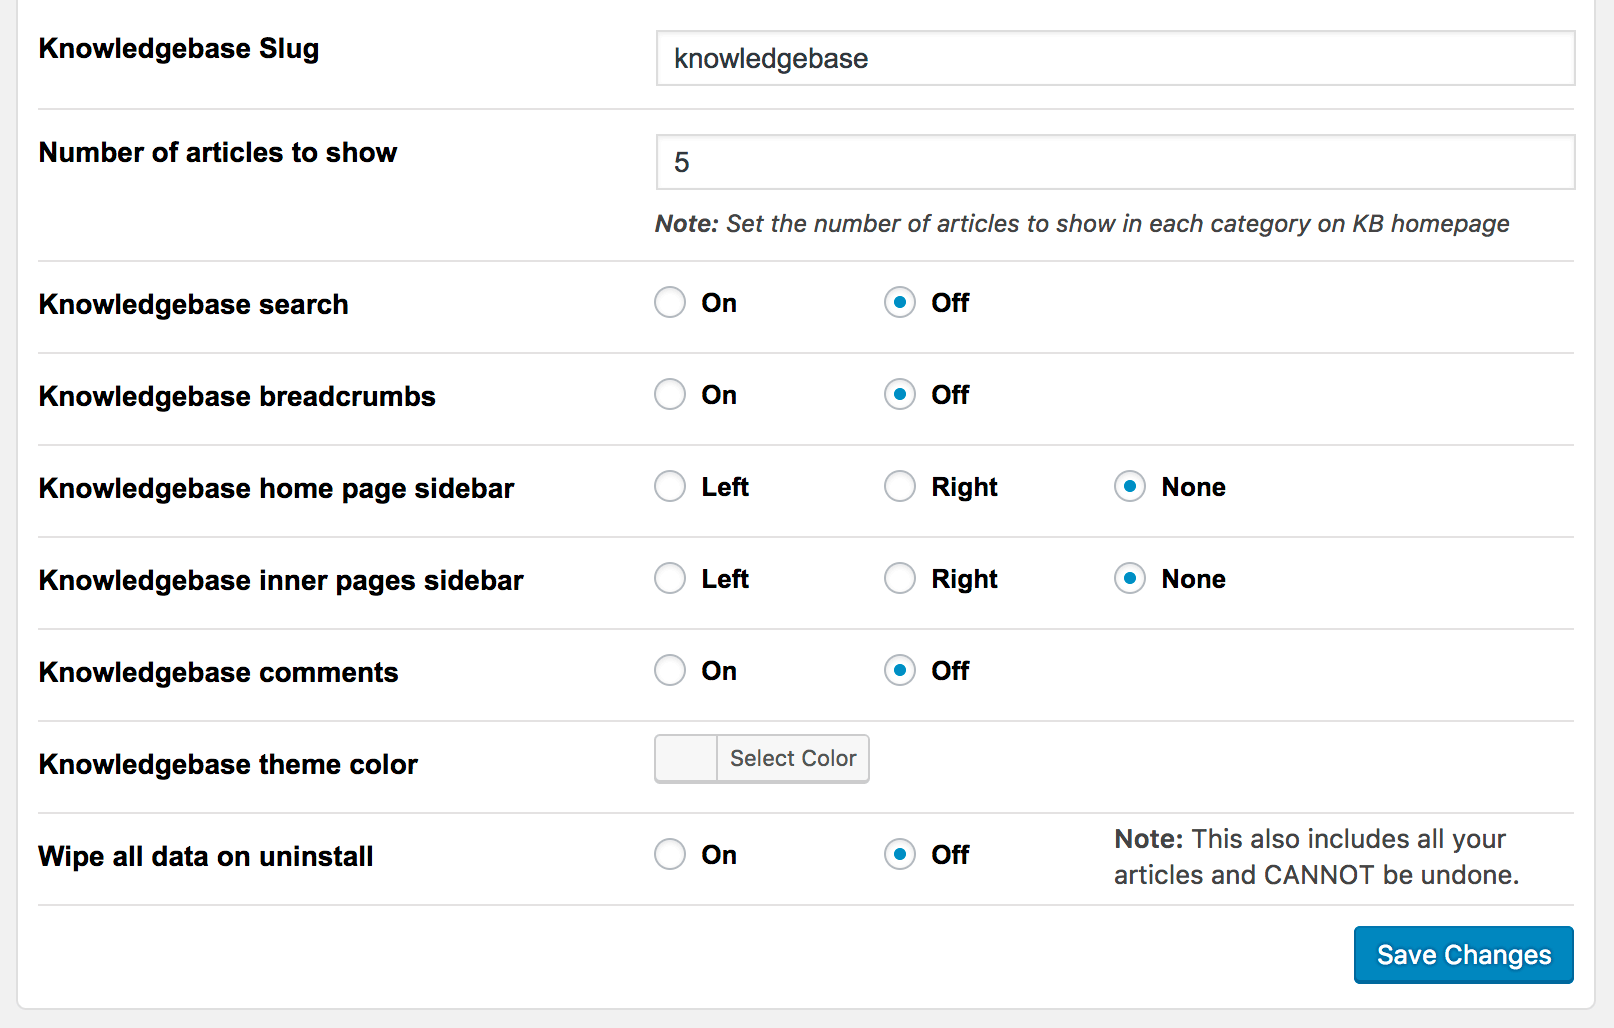
By now, your knowledge base is nearly perfect, except for a few tweaks. As you remember, we previously offered a few pieces of advice to help you design an easy-to-use knowledge base. This means you’ll want to ensure yours follows as many of these best practices as possible. To customize this in WP Knowledgebase, go to Knowledgebase > Settings to see all of your options:
You can tweak these options to suit your needs, though we recommend enabling both the Search and Breadcrumbs options at a minimum. For the most part, you’ll simply need to use the radio checkboxes, although some options (such as the color) can be selected via a drop-down panel.
Finally, click the Save Changes button once you’re finished. At this point, your knowledge base is up and running – all that’s left is to share the link with your visitors!
Conclusion
Adding a custom knowledge base to your website can provide visitors with always accessible self-help for a product or service, and boost your SEO rankings by providing your industry authority. It’s a win-win scenario, so there’s no excuse not to implement one.
WordPress makes this fairly easy to implement with the help of the WP Knowledgebase plugin. Let’s recap the steps you need to take:
- Install the plugin.
- Select a number of suitable categories.
- Add your articles using the plugin’s editor.
- Create a public-facing page.
- Optimize your overall design and functionality using the built-in settings.
What questions do you have about setting up a knowledge base on your WordPress website? Let us know in the comments section below!
Image credit: Sebas Ribas.


No Comments