Building a community around your brand can be a powerful way to engage your audience. However, if you don’t know where to start, the technical aspect of hosting a social site can quickly feel like an insurmountable challenge.
Thankfully, there are powerful plugins that can transform a plain WordPress website into a fully-fledged social platform. One of the most long-standing, popular solutions is BuddyPress. It only takes a few steps to get your community up and running with this tool!
In this article, we’ll show you how to use BuddyPress with WordPress to host a social site. Let’s get you up and running!
Why You Might Want to Create a Social Site
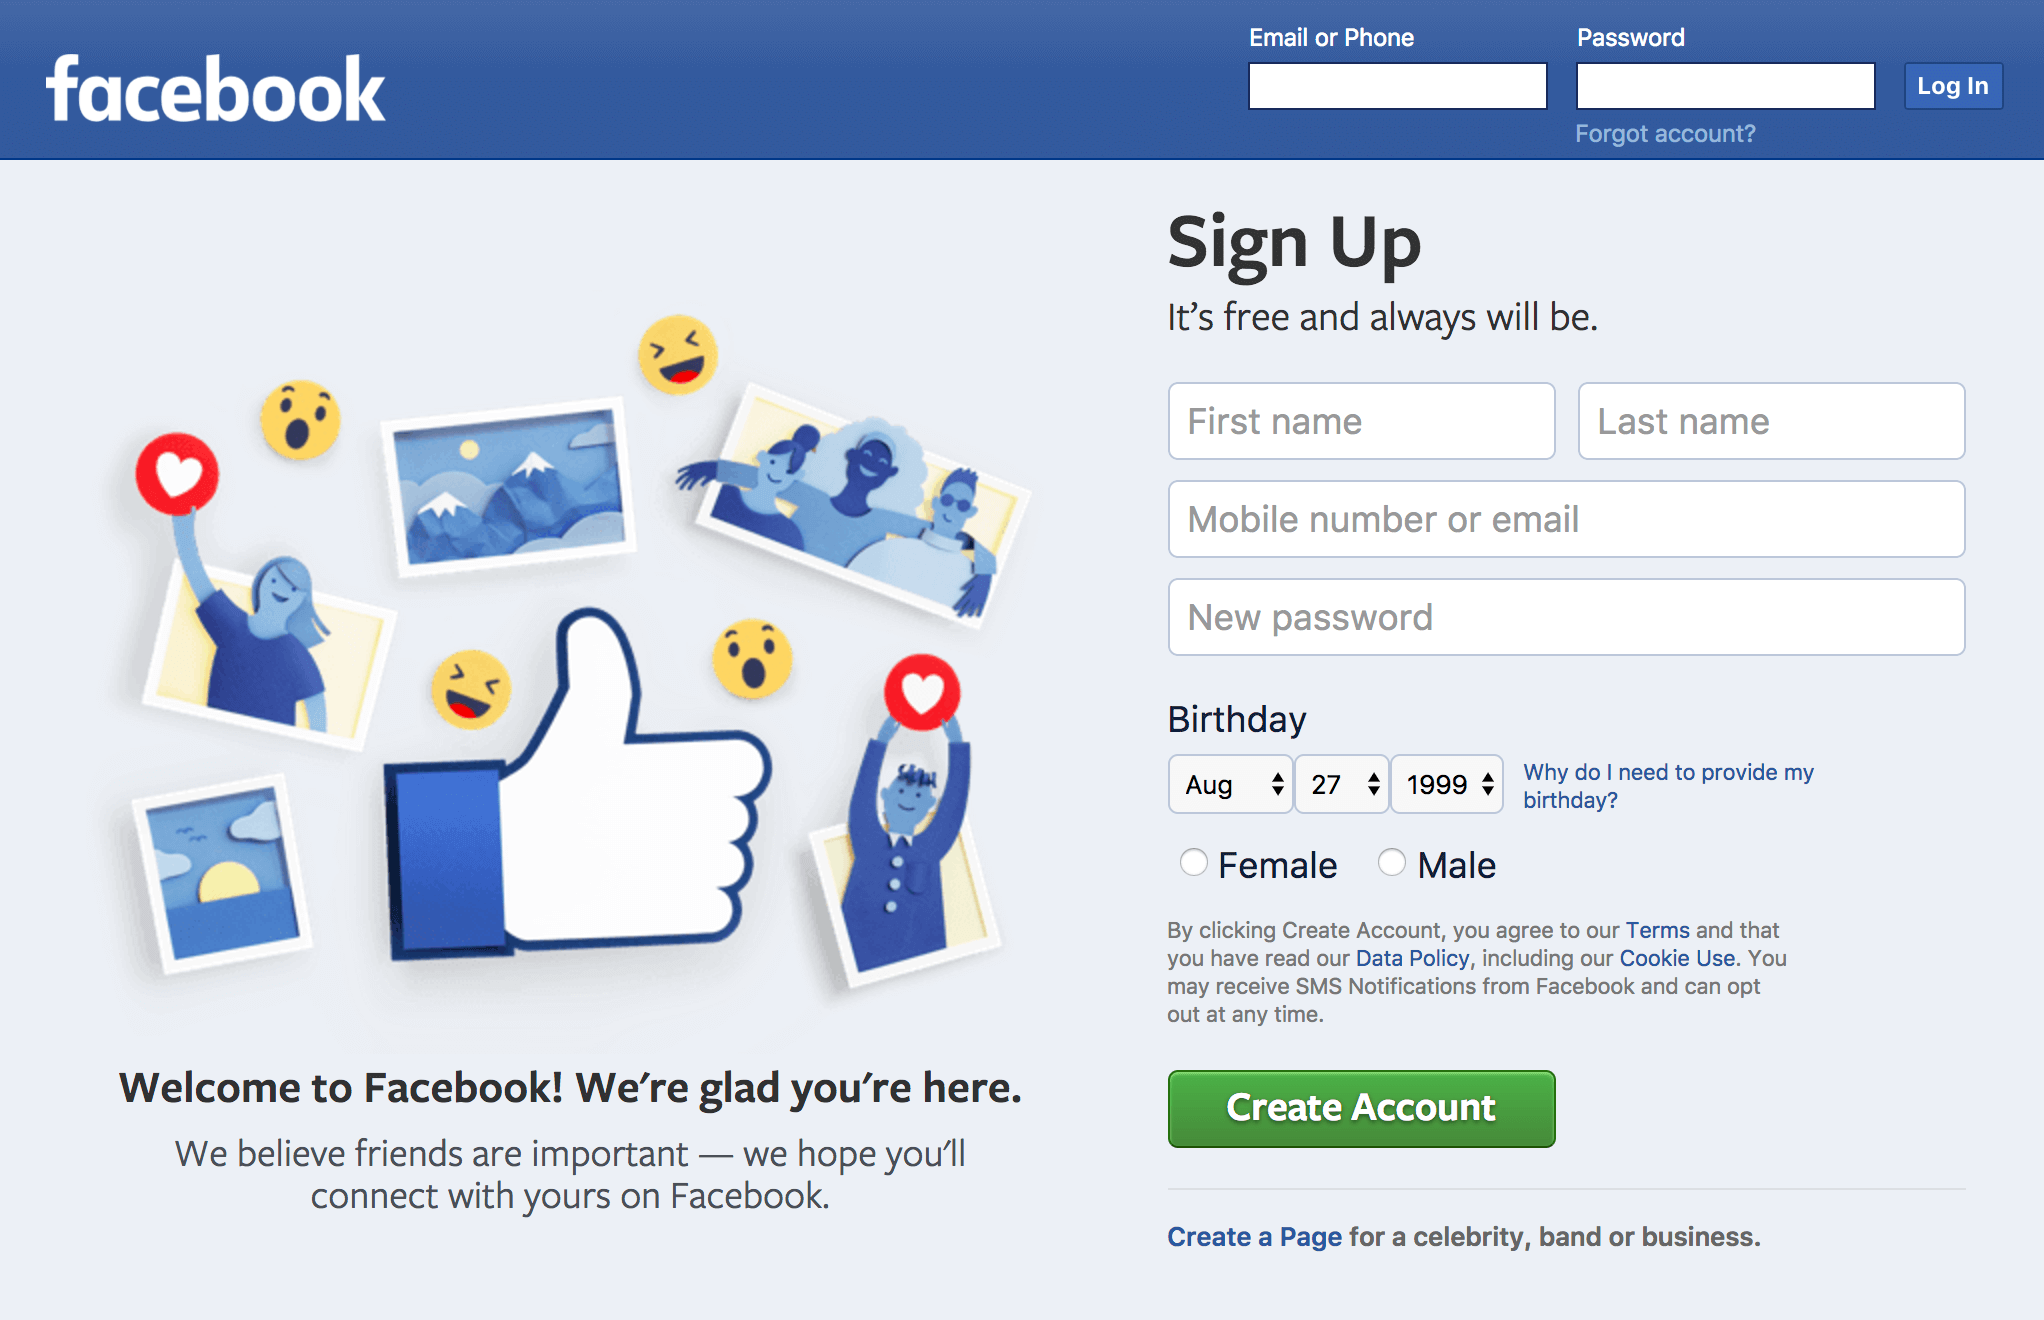
A social site (or social networking service) is an online community, which typically features user profiles and the ability to make public posts. Social sites range from basic forums to intensive networks, such as Facebook. Essentially, social sites enable and encourage users to interact with others online.
One of the many benefits of running a social site is the ability to create an online community around your brand. Online communities can:
- Increase customer loyalty by developing a multi-layer relationship with audience members.
- Encourage and support brand advocates, enabling fans of your work to evangelize to other potential customers.
- Give you a direct line of communication with your brand’s audience.
- Reduce the amount of time spent on customer support, as social site users can help each other while also enabling you to moderate and offer official answers.
- Increase sales by making your brand more accessible and friendly.
- Reduce market researching costs, because you have a built-in audience for querying in-house.
These reasons only scratch the surface of how a social site can be an asset for your brand. If any of them sound intriguing, creating a social site may be worth your while.
Introducing BuddyPress
BuddyPress ties into existing WordPress hooks to make for a seamless management experience. It is one of the most highly used and trusted social site plugins for WordPress, and has been actively maintained and updated since 2009.
Individuals and businesses trust BuddyPress for its consistent performance. There are many documented use cases for it, including:
- Campus-wide social networks for universities, schools, and colleges, such as CUNY Academic Commons.
- Internal communication tools for companies (typically kept private).
- Niche social networks for very specific interest groups, such as Dogs Universe.
- Focused communities for products and services (for example, Solo Practice University).
- Enhanced community forums like StudentsNepal.
BuddyPress comes with all the features you’d expect to find on a social site, and gives you the option to enable or disable most of them depending on your needs. You can enable personal profiles (including whatever custom fields you’d like), groups, ‘friends’ lists, notifications, private messaging, and more. You can even set up activity streams, for users to keep track of recent posts, and personal account settings.
Additionally, because BuddyPress follows WordPress standards, you can get additional extensions to add even more capabilities to your social site.
How to Create a Social Site With BuddyPress (In 5 Steps)
Thankfully, using BuddyPress is fairly simple. In this section, we’ll show you the five major steps you need to follow to launch your new social site. It’s a good idea to make sure your server meets the minimum requirements for BuddyPress before starting. In general, it is recommended that your server runs PHP 7.0 or greater, as well as MySQL 5.6 or higher.
In addition, you’ll want to ensure that your server adheres to these requirements:
- It must support pretty permalinks.
- You must be able to install WordPress manually, not through hosting company scripts.
- WordPress can’t have its own directory.
- Any subdirectory or domain folder must be in lower case.
- PHP must be installed with support for GD or ImageMagick modules.
- AllowOverride must be set to All in the .htaccess folder.
Once you confirm that your server is prepared, you can go ahead and install BuddyPress through the WordPress admin like any other plugin in the directory. Once BuddyPress is installed on your site, it’s time to set everything up.
Step 1: Configure Your BuddyPress Components
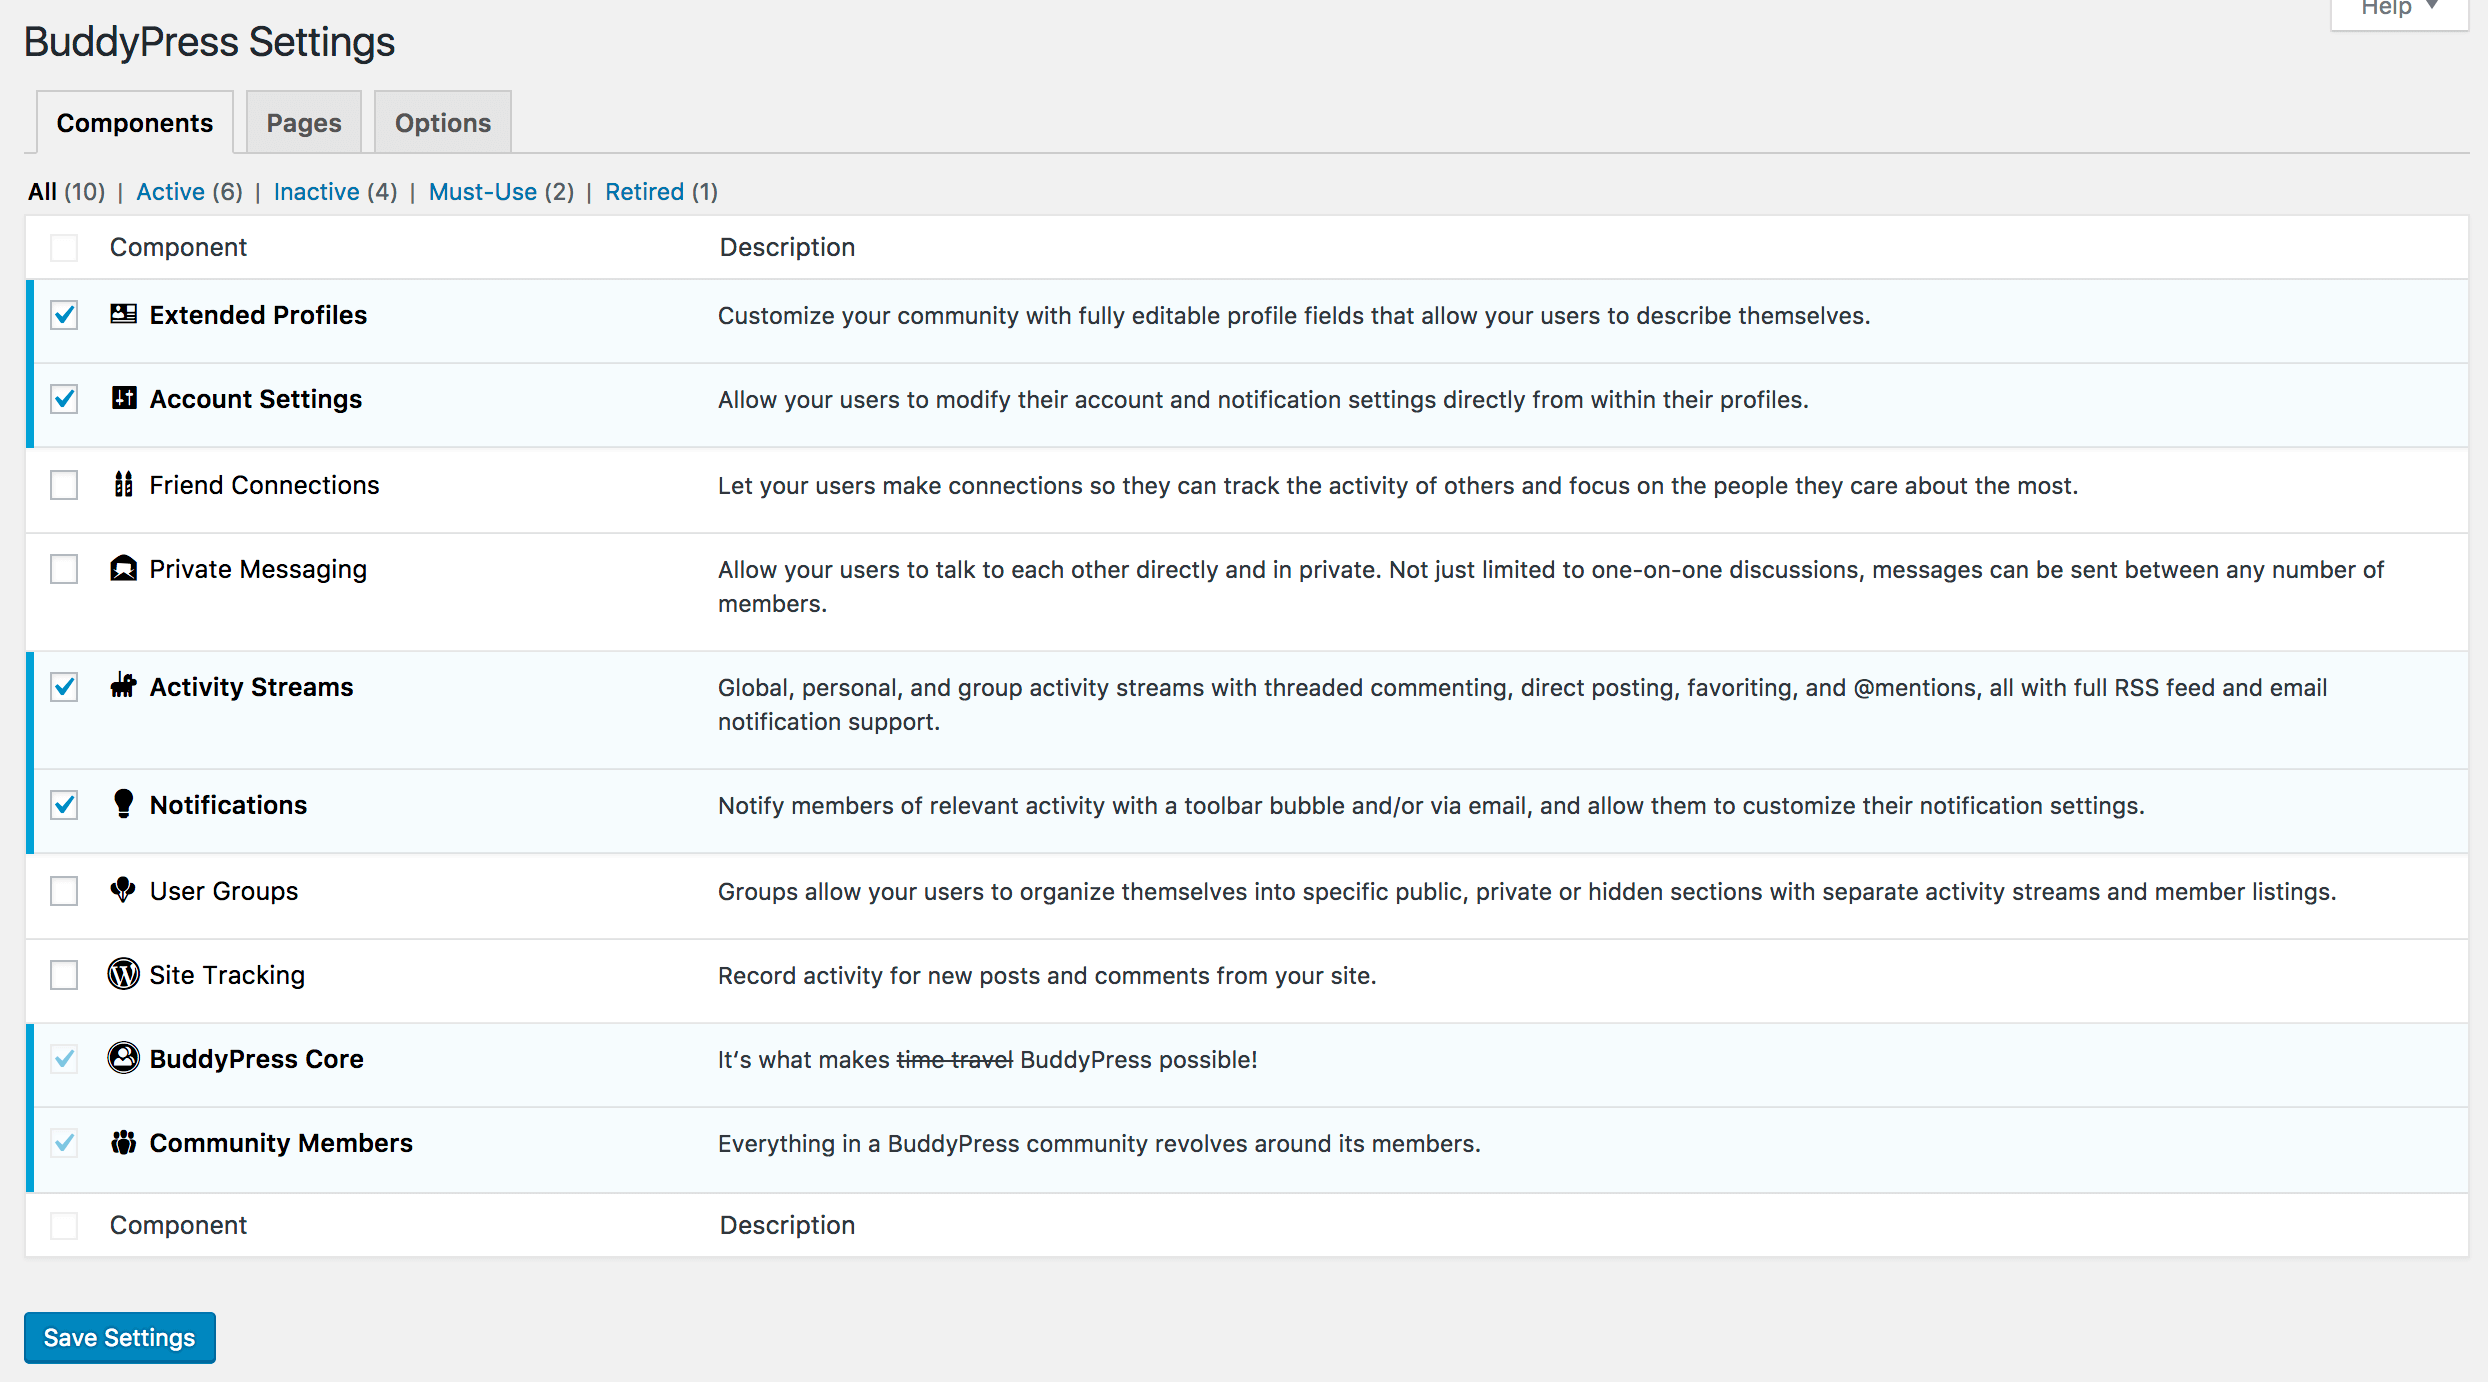
Components are akin to built-in plugins for BuddyPress; you can mix and match them to create a unique social site based on your audience’s needs. The first step of setting up BuddyPress is establishing which components you need, and configuring them to match the community you’d like to build.
There are only two required components for running BuddyPress:
- BuddyPress Core: This creates an essential foundation, hooking BuddyPress into WordPress for all other extensions.
- Community Members: This adds support for member account registration, and everything else depends on it.
This initial setup will leave you with a bare-bones site, and you’ll want to establish which additional features your audience needs. Keep in mind that simplicity can be good, but it’s important to provide the functionality users will expect.
Here are your choices for additional components:
- Extended profiles
- Account settings
- Friend connections
- Private messaging
- Activity streams
- Notifications
- User groups
- Site tracking
For example, you could set up a fairly comprehensive yet simple site by enabling account settings, user groups, and notifications. Your users would be able to manage their accounts, participate in group conversations, and get notifications for important events on the site. That’s all with just three components!
To activate your chosen components, go to Settings > BuddyPress and find the Components tab. Check all the components you’re interested in, and click Save Settings:
With your components activated, it’s now time to manage your BuddyPress-specific pages.
Step 2: Customize Your BuddyPress Pages
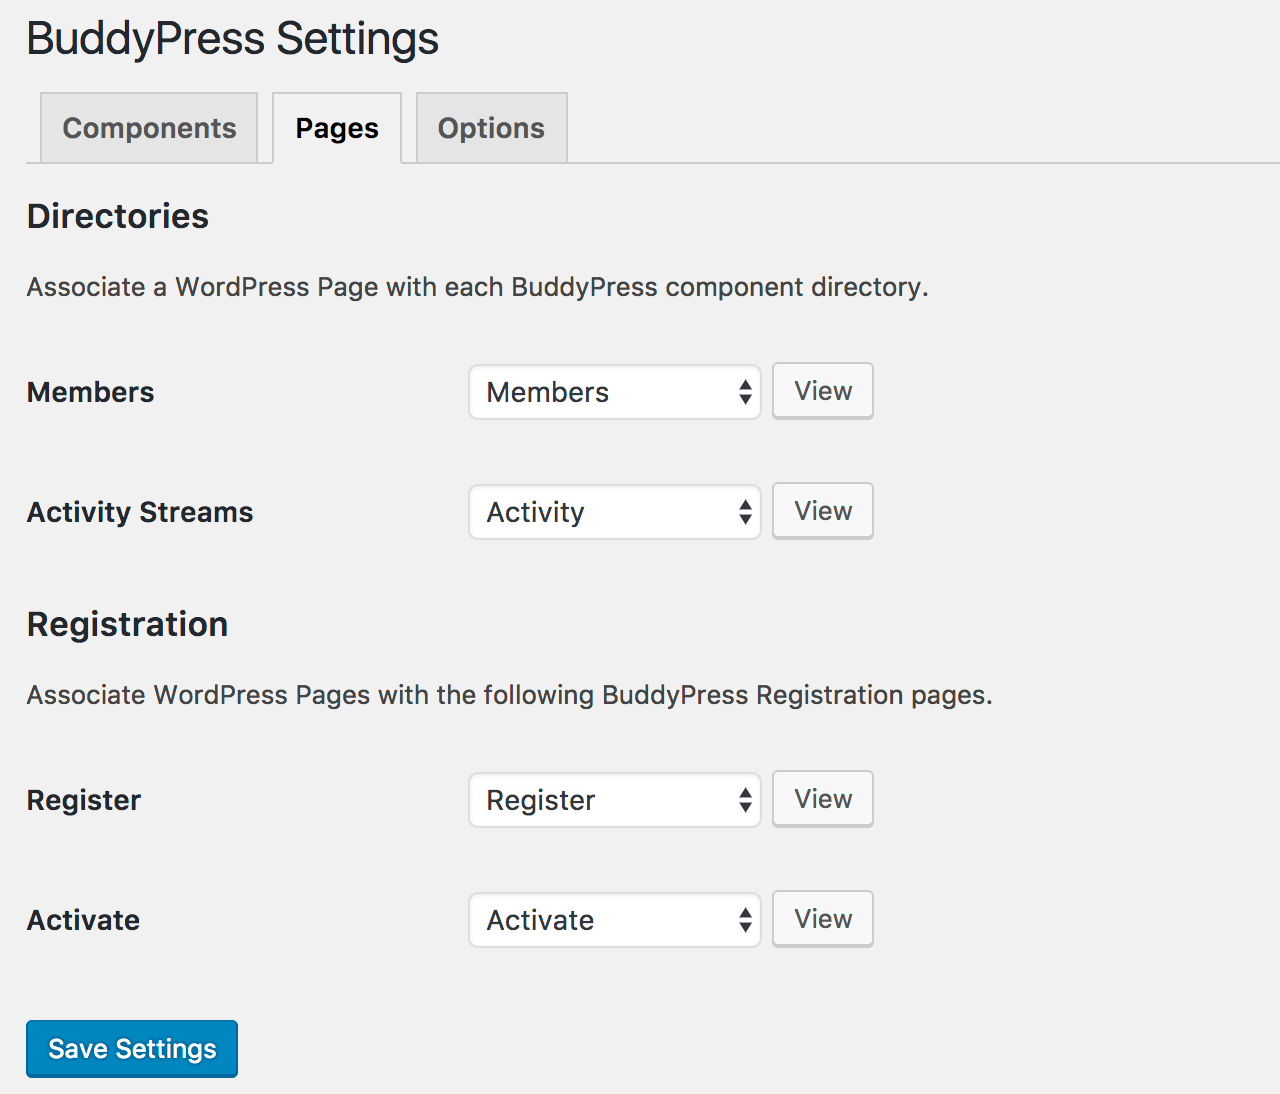
Most of the time, BuddyPress will successfully generate required pages for your site automatically. However, it’s important to check these pages for accuracy.
First, there are your directories for each component:
- Activity streams, if activated
- User groups, if activated
- Members
Then, there are your registration pages, so users can create new accounts:
- Register
- Activate
To check for these pages, go to Settings > BuddyPress and find the Pages tab. Ensure all pages are appropriately set based on your components, and click Save Settings:
Up next, it’s time to set your options.
Step 3: Choose Your BuddyPress Options
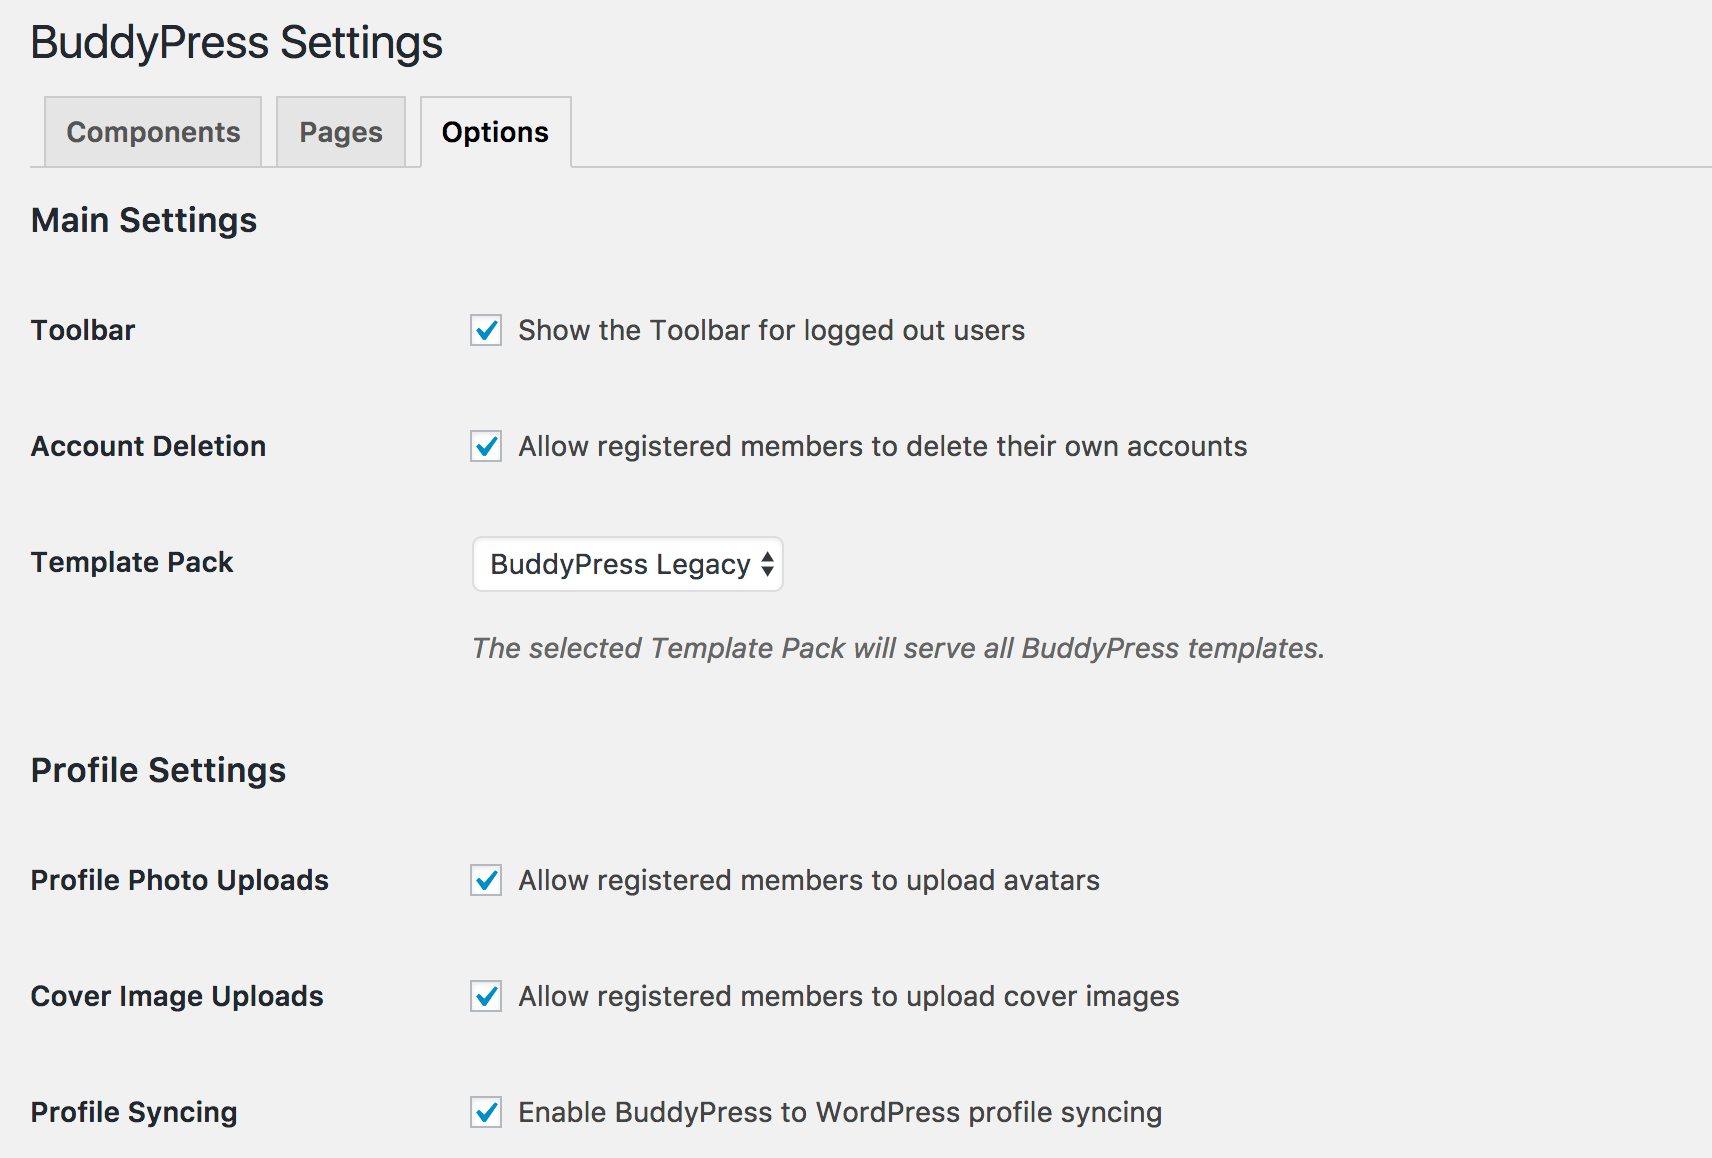
From here, you can tweak your users’ BuddyPress experience. This includes whether they can delete their accounts, upload avatars, or experience automatically-refreshing activity feeds:
First, check your main settings:
- Toolbar: Decide whether logged out users can see the admin toolbar.
- Account deletion: Decide whether registered members can delete their accounts.
Next, look at profile settings:
- Profile photo uploads: By default, Gravatar will handle avatars. You can choose to allow users to upload images.
- Cover image uploads: You can also allow registered members to upload cover images.
- Profile syncing: This keeps your BuddyPress member data in sync with their account on your WordPress installation. We recommend that you always keep this enabled for maximum compatibility!
After that, it’s time to review groups settings if you are using the groups component:
- Group creation: Allow any user to create a custom group. Note that administrators can always create groups!
- Group profile photo uploads: Similar to profile photos, allow each group to have their own profile photos.
- Group cover image uploads: Let each group add a custom cover image.
Finally, review your activity settings for users:
- Blog and forum comments: Let users make comments on activity notices.
- Activity auto refresh: Don’t force users to reload the page, but automatically refresh the activity stream with new items.
Check the boxes for any features you want enabled, and uncheck any boxes unnecessary for your site. When finished, click Save Settings.
Step 4: Choose a BuddyPress Theme (Optional)
One of the useful features of BuddyPress is that you don’t need a special theme. You can use any WordPress theme you’d like. However, many themes are specially designed with BuddyPress in mind, making its user interface a bit nicer for your users.
If you are setting up a new website from scratch, you can choose a theme designed for BuddyPress. There is a specific ‘BuddyPress’ tag in the WordPress.org Theme Directory. Alternatively, you can look to premium theme markets, such as ThemeForest, to source BuddyPress themes.
In the end, which theme you choose will depend on your audience. If you already have an established website, BuddyPress should operate normally on your existing theme.
Step 5: Invite New Users!
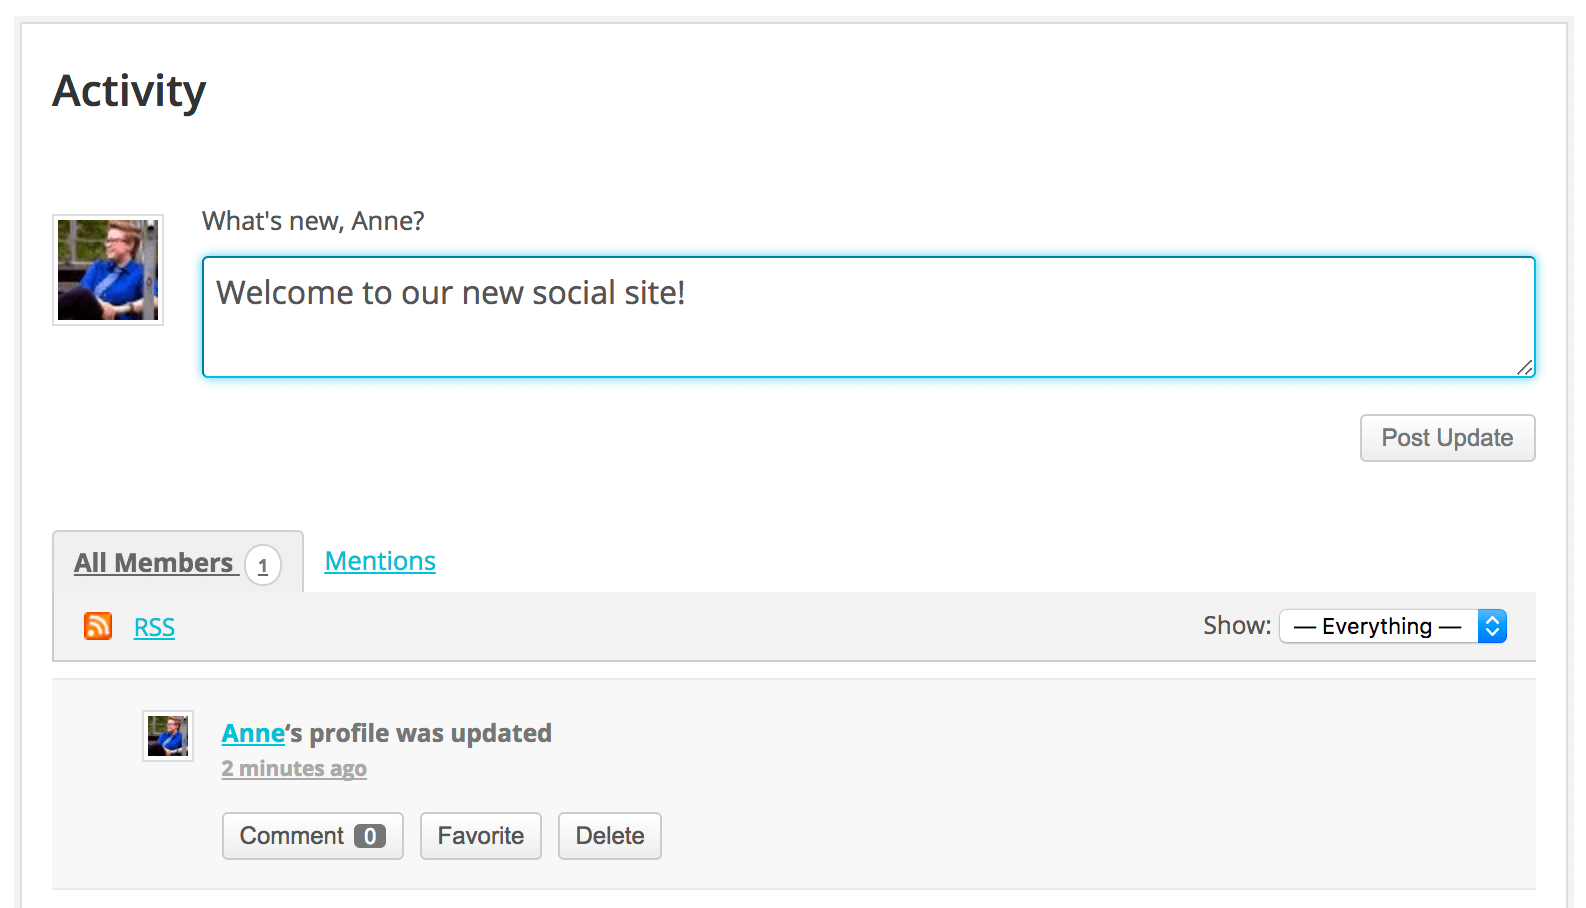
Your BuddyPress social site is now ready for its first users! Go ahead and send invitations out to your audience:
From here on out, it will be your responsibility to foster a friendly community and get them to engage with your brand in meaningful ways. No technology can do that for you!
Conclusion
Building a community on your WordPress website can be a great way to engage your audience. BuddyPress makes it simple to add the right technical capabilities to your site without needing to build anything from scratch.
In this article, we introduced you to the BuddyPress project and showed you the five steps needed to add it to your WordPress website:
- Choose and configure BuddyPress components.
- Set up your BuddyPress pages.
- Configure any additional options.
- Optionally, choose a theme optimized for BuddyPress.
- Invite your new community users!
What other questions do you have about adding BuddyPress to your site? Let us know in the comments section below!
Image credit: Ryan Franco.


No Comments