Ultimately, your readers decide the most important content on your website through search. Consequently, once they find your site, you want to encourage them to explore it. If you’re not improving their User Experience (UX) by providing helpful navigation, you risk losing them and hurting your bounce rate.
One of the best ways to guide your readers through your content is to use section menus. You can use them to link pages within a category while directing your audience to different pages on your site. WordPress users can automate this navigation by using widgets.
In this article, we’ll explain automatic section menus and why you should implement them. Then, we’ll show you how to add them step-by-step with widgets and code. Let’s get started!
What Automatic Section Menus Are (And Why You’d Use Them)
Section menus are a secondary menu area, typically based on category, to complement the main menu and breadcrumbs on a website. In short, they help readers see where they are within your content.
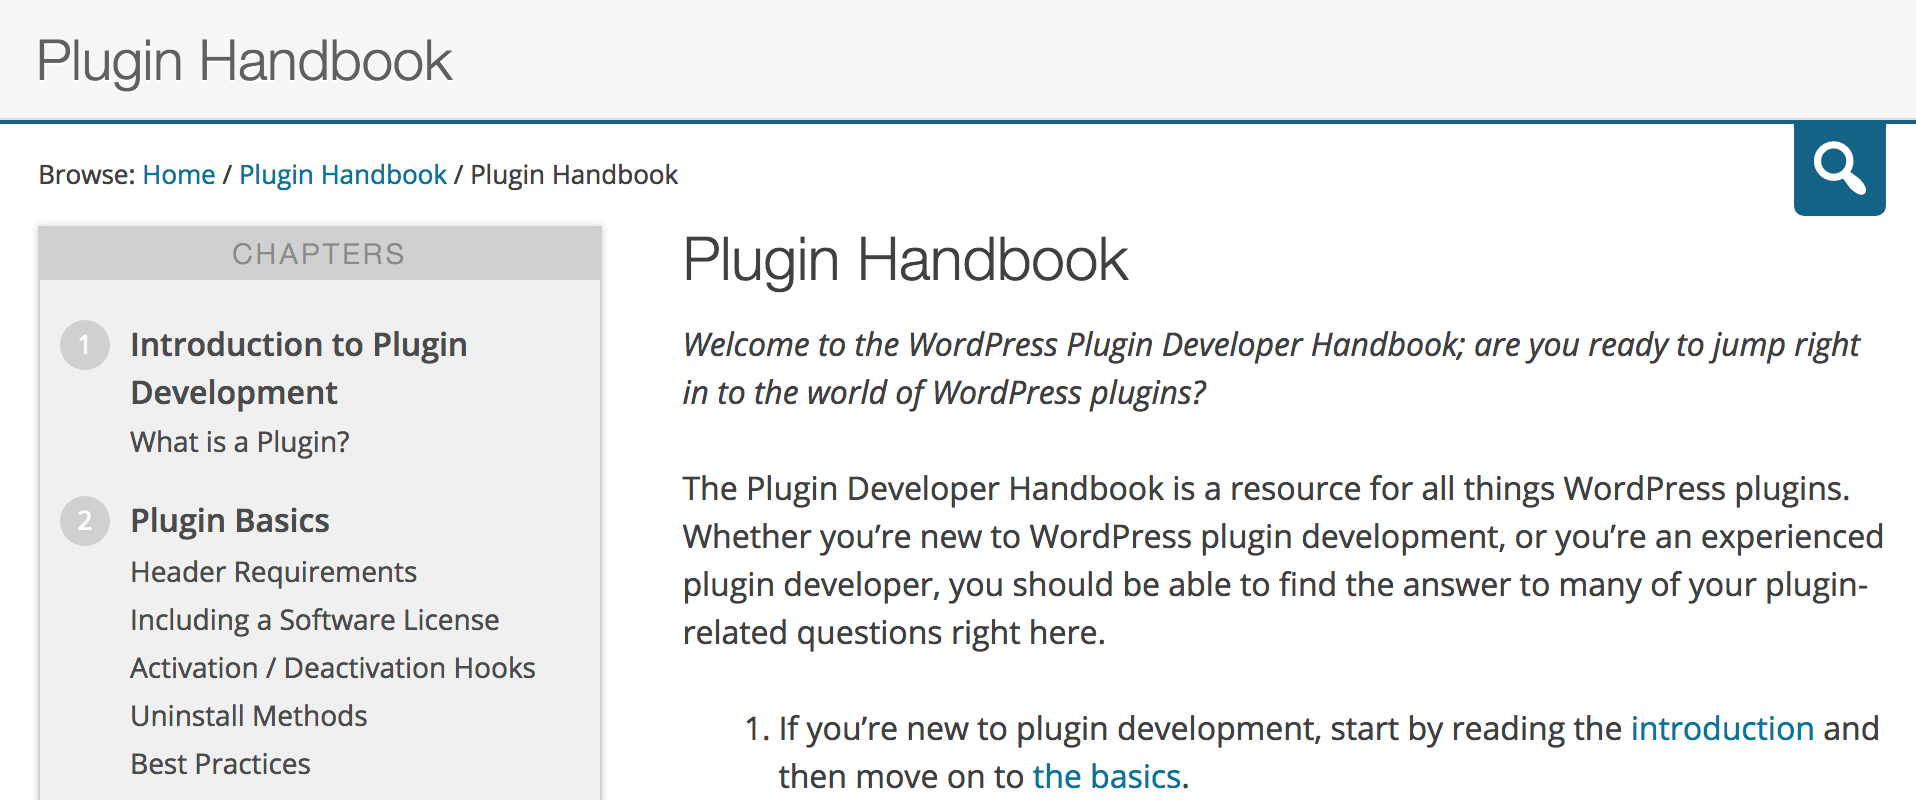
You can see an extreme example of section menus on the left-hand side of the WordPress developer handbooks:

The New York Times uses section menus to suggest recent news pieces in the same category:
Section menus can improve UX by presenting other related content to the reader, enabling them to find what they need and explore more of your site.
Normally, you would manually create section menus, but this could be tricky if you don’t have a lot of experience. Thankfully, you can register a custom widget to detect whether a page needs section navigation, and generate it when appropriate. This way, you can simply drop the widget in your sidebar and call it a day. You can take advantage of this widget by using WordPress’ built-in subpage system to organize sections on your website.
There are a few plugins for producing these menus automatically in the WordPress Plugin Directory. However, due to their lack of recent updates, we recommend you build and manage your own.
How to Create Automatic Section Menus Using Custom Widgets (in 5 Steps)
In order to register a custom widget on your WordPress website, you’ll need a few things:
- Direct access to a local WordPress installation or File Transfer Protocol (FTP) access to a remote server with one.
- A code editor, such as Atom or Sublime Text.
- Administrative access to the WordPress site you’re building with.
You’ll be creating a custom plugin to register your widget, so make sure you have write access to the /wp-content/ folder. Otherwise, you won’t be able to make changes to the code. Let’s get started!
Step 1: Set Up an Empty Plugin Folder Under /wp-content/plugins/
Enter your WordPress website’s /wp-content/plugins/ folder and create a new one called automatic-sections. Within this folder, create a file called automatic-sections.php and open it up in your text editor.
At the top of this file, copy and paste this code:
<?php
/**
 * Plugin Name: Torque Automatic Section Menus
 * Plugin URI: https://torquemag.io
 * Description: Automatically display section menus in a widget.
 * Version: 1.0
 * Author: Torque
 * Author URI: https://torquemag.io
 *
 */
Save the file, then log into your WordPress dashboard. From here, visit the Plugins area, and activate your new Torque Automatic Section Menus plugin so you can see any new changes live on your site.
Step 2: Find the ‘Parent Page’ and Return Its ID
When you create subpages in WordPress to organize sections, the top page is called the ‘parent page’. WordPress can quickly identify the top parent page in a short function, and you should add to your automatic-sections.php file below the other content you’ve included.
Here is our function for detecting the ID of the topmost parent:
function torque_check_for_parent_page() {
	global $post;
	// Check for a page's parents
	if ( $post->post_parent ) {
		// Fetch ancestors
		$parents = array_reverse( get_post_ancestors( $post->ID ) );
		// Get the top ancestor available
		return $parents[0];
	}
	// Return the ID value
	// This will be the top parent or current page ID if none exists
	return $post->ID;
}
Once you’ve done this, it’s time to generate a section menu based on the parent ID.
Step 3: Detect and List Subpages as a Section Menu
Next, you’ll detect and list any subpages underneath the ID we discovered in the last step. This piece of code will follow the previous function, and you can paste the code directly underneath. First of all, set up a new function – the rest of the code we’ll introduce throughout this section will go here:
function torque_list_subpages() {
	/* Code here */
}
This new function will perform three tasks:
- Prepare the search arguments to find any subpages using our previously discovered page ID.
- Perform the search to find whether there are any subpages.
- If there are subpages, return them as a list.
Here’s what this looks like in code form.
// Step 1: Use the top level page ID to set search arguments
$parent_id = torque_check_for_parent_page();
$args = array(
	'child_of' => $parent_id,
	'depth' => '-1',
	'title_li' => '',
);

// Step 2: Search for any subpages
$subpages = get_pages( $args );

// Step 3: If there are subpages, return them as a list
if ( $subpages ) {
	// Start a list with the parent page on top
	?>
	<ul class="section-menu">
		<li class="parent-page">
			<a target="_blank" href="<?php echo get_permalink( $parent_id ); ?>"><?php echo get_the_title( $parent_id ); ?></a>
		</li>
		<?php wp_list_pages( $args );	?>
	</ul>
<?php
}
This is where the magic happens! Unfortunately, you won’t be able to test this code just yet. You’ll need to turn it into a widget so you can trigger it in a sidebar on your theme.
Step 4: Register the Section Menus Widget
This is the part where you’ll turn the automatic menu into a widget you can drag and drop onto your theme’s sidebar. As previously, you’ll add this code below everything you’ve entered so far.
In the last step, you worked within a PHP function. This time, we’ll be working within a PHP class – here’s how to set up its shell:
class Torque_Automatic_Section_Menu extends WP_Widget {
	/* Code here */
}
PHP classes group functions that work together in one package, so you can manage complex features with simple calls in the code later. This new widget class will handle four functions:
- Initialize the widget and its default options.
- Build a User Interface (UI) to use within your WordPress dashboard so you can place it in a widget area.
- Save any changes made using the UI in the WordPress dashboard.
- Generate the output shown on the front end of your website.
Let’s go through each of these functions step by step. You’ll add each of these inside the class wrapper you created moments ago.
First, we need to initialize the widget and register its default options within WordPress:
function __construct() {
	$widget_options = array(
		'classname' => 'torque_automatic_section_menu',
		'description' => 'Generate an automatic menu for the current section of the website.'
	);
	parent::__construct( 'torque_automatic_section_menu', 'Section Menu', $widget_options );
}
Next, you’ll create a small HTML form for the WordPress dashboard. This will output a piece of code that turns into a drag-and-drop widget in the Appearance > Widgets page, as well as within the Customizer:
function form( $instance ) {
?>
<p>
	<label for="<?php echo $this->get_field_id( 'title' ); ?>">Title:</label>
	<input class="widefat" type ="text" id="<?php echo $this->get_field_id( 'title' ); ?>" name="<?php echo $this->get_field_name( 'title' ); ?>" value="<?php echo esc_attr( $title ); ?>" />
</p>
<?php }
The only input you’re worried about here is the widget title. Let’s make sure there’s a function in place to save this information!
function update( $new_instance, $old_instance ) {
    $title = ! empty( $instance['title'] ) ? $instance['title'] : '';
    $tel = ! empty( $instance['tel'] ) ? $instance['tel'] : 'Telephone number';
    $email = ! empty( $instance['email'] ) ? $instance['email'] : 'Email address';
    $instance = $old_instance;
    $instance[ 'title' ] = strip_tags( $new_instance[ 'title' ] );
    return $instance;
}
It’s now time to actually generate the final menu on the front end of your website. This code snippet detects whether you are on a page, and if you’re anywhere other than the home page, it will show the widget and display any appropriate subpages as a section menu:
function widget( $args, $instance ) {
	if ( is_page() && ! is_front_page() ) {
		echo $args ['before_widget'];
		$title = apply_filters( 'widget_title', $instance[ 'title' ] );
		?>
		<aside class="section-menu">
			<?php if ( ! empty( $title ) ) {
				echo $before_title . $title . $after_title;
			}; ?>
		 <?php torque_list_subpages() ?>
		 </aside>
		<?php echo $args['after_widget'];
	}
}
When the widget is added in a sidebar, it will use this code to generate the final section menu automatically. The only thing left to do is trigger it within WordPress:
function torque_register_section_menu() {
	register_widget( 'Torque_Automatic_Section_Menu' );
}
add_action( 'widgets_init', 'torque_register_section_menu' );
The final step is to add your widget to a sidebar within WordPress, which should be a cakewalk!
Step 5: Use the WordPress Admin to Add the Widget to a Sidebar
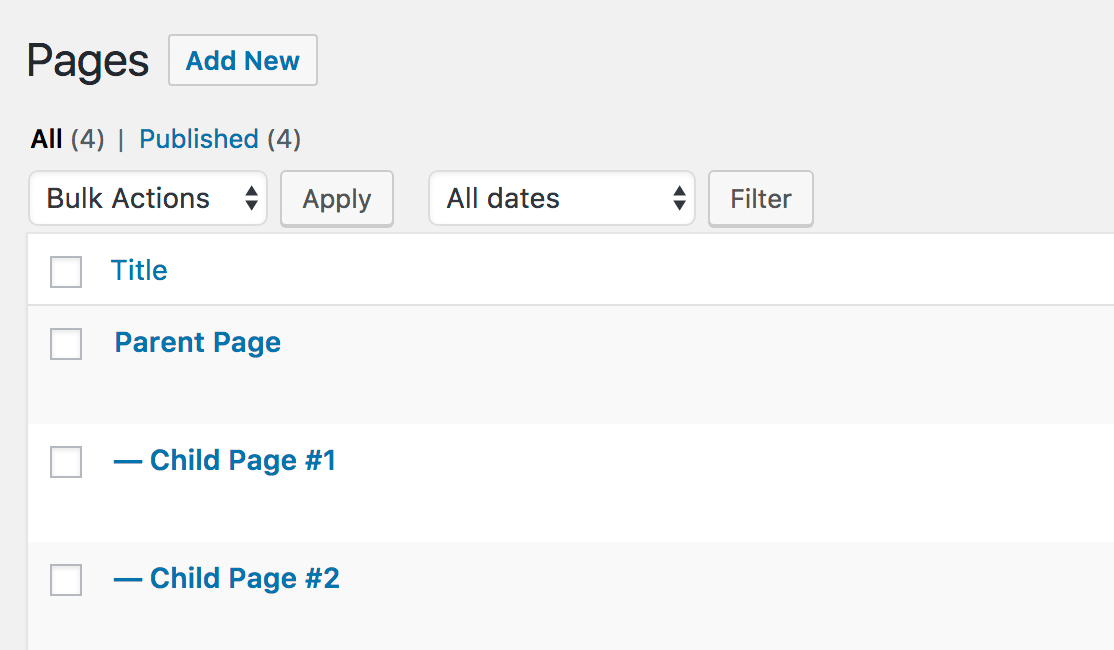
By now you have a custom plugin, with a new widget you can use to display it within a sidebar, so it’s time to take your new automatic section menus for a spin. To start, make sure you have a page with subpages in the WordPress dashboard under Pages:
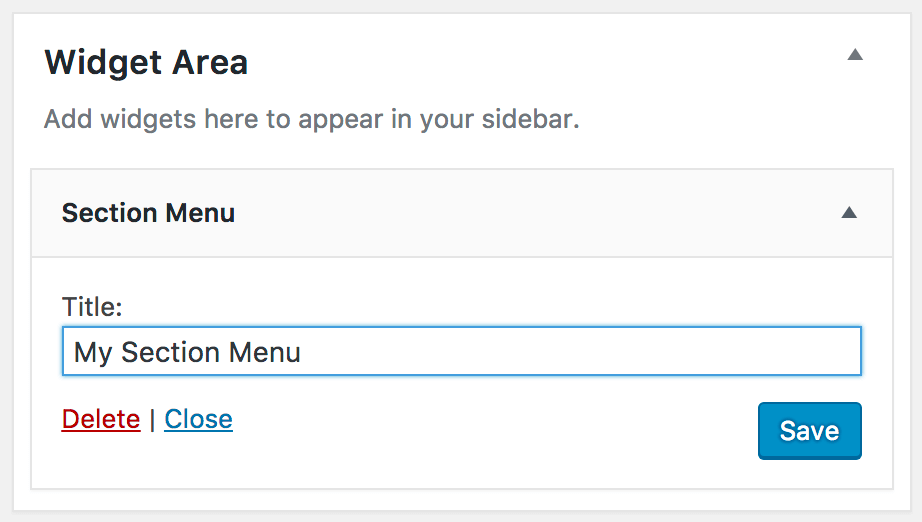
Next, go to Appearances > Widgets. Find your new Section Menu widget and drag it into your sidebar area, and save your changes:
Finally, view one of the subpages in your WordPress website:
If all has gone well, you should see all the other related pages within the same section, neatly displayed in your sidebar!
Conclusion
Section menus can greatly benefit your users if you run a large or complex website. Registering an automatic section menu to use in your sidebar makes it easy to offer this to your visitors, and reduce your bounce rate by improving the UX.
In this article, we’ve walked you through five steps to create a custom widget plugin to generate this navigation:
- Set up an empty plugin folder under /wp-content.
- Find the parent page and return its ID.
- Detect and list subpages as a section menu.
- Register the section menus widget.
- Use the WordPress admin to add the widget to a sidebar.
What questions do you have about creating automatic section menus? Let us know in the comments section below!
Image credit: Julien Lux.


No Comments
Start the conversation