Today we are talking about a topic that, frankly, I am a bit on the fence about: web push notifications. Why am I skeptical? Well, to be honest at least on my phone I switch them off as much as I can and rarely enable them inside apps.
For that reason, if a website asks to send me push notifications (as happens more frequently lately), I am immediately taken aback. For me, that comes close to a site that has popup overload.
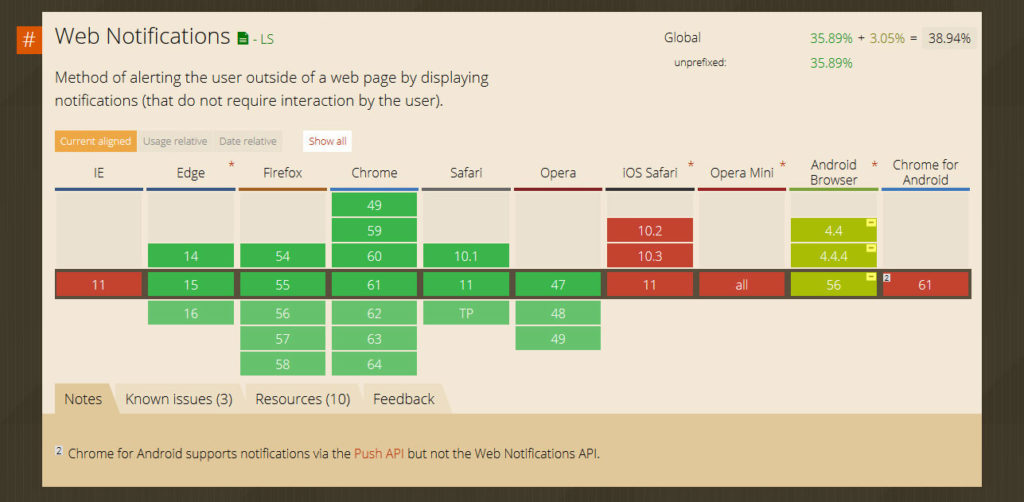
However, push notifications are definitely making a push (see what I did there?) around the web. Some big websites have started using them. All major browsers support them.
So, despite my skepticism, they seem to have something going for themselves. And in this article we want to find out what that is.
In the following, we will go over what push notifications are and what you can use them on your website for. After that, we will look at the pros and cons of these browser messages and, finally, how to implement push notifications in WordPress.
Are you in? Then let’s get started.
What Are Web Push Notifications?
You probably know all about push notifications from your smartphone or tablet. Mobile apps often ask whether they are allowed to send you notes about new messages, likes, someone attacking your village or whatever is happening in that particular app.
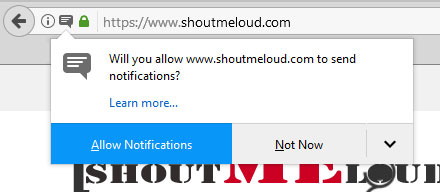
However, you might not know that the same is also possible in web browsers. Yet, an increasing number of websites will now show a message like the one below in your browser.
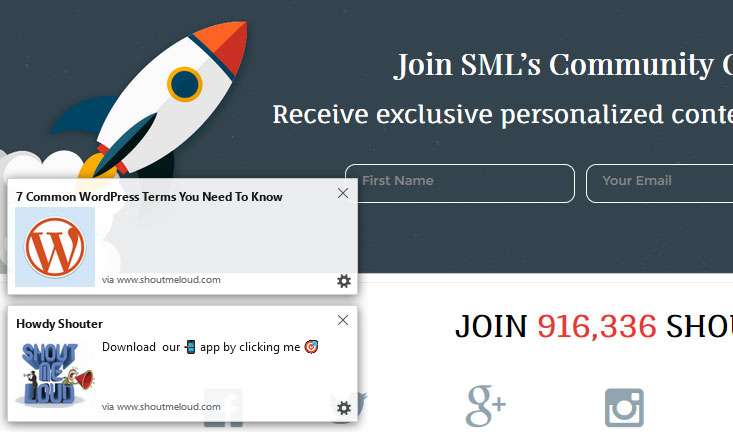
Then, if you accept and agree, you might see something like the following.
How Is That Different From a Popup?
Yet, so far, that doesn’t seem awfully inventive, does it? A message appears on your screen, so what? Slide-in popups have been doing that for years.
However, there is a difference between popups and push notifications. Mainly, the former only appears when you are on the site they belong to. In contrast to that push notifications can reach you even when you don’t have the website open in a browser tab. Hell, once you opted in, you might not even have to have a browser window open.
In short, push notifications can reach you anytime, anywhere, and independent of whether you are currently on a particular website.
So, What Can You Use Push Notifications For?
This opens up a whole range of possibilities. People spend a lot of time in their browser, so being able to contact them there is not a bad idea.
With push notifications, you can now send out campaigns, deals, and coupons or advertise new products, send reminders, announcements, updates and more directly to your audience’s main workspace. In addition to your existing channels of communication, that is.
In short, push notifications add an additional marketing channel to your mix. However, should you use them? Do they offer a solid return on investment? Let’s have a look at that next.
Pros and Cons of Push Notifications
In order to decide whether adding push notifications to your website is worth it, you need to weigh the pros and cons. Just like every other marketing channel, they have their benefits as well as drawbacks.
High Click-through Rates
We already mentioned the first obvious benefit above. Push notifications are another method for you to reach your audience. However, not just any old method. If you can believe the data out there, they represent a highly effective marketing channel.
For example, some case studies claim click-through rates of 15-25 percent for push notifications. On mobile devices, this number allegedly even jumps up to 50 percent. However, I couldn’t find any numbers to corroborate that.
In contrast to that, email campaigns, which are still one of the most effective ways to reach customers, have average CTR of about 4 percent across all industries.
That in itself is a weighty argument to use push notifications. Especially when you consider the ability to segment users into groups and send specifically targeted messages.
Work Across All Devices
A second argument for web push notifications is that they are compatible with all devices. In contrast to classic notifications that are part of mobile apps, push notifications from a website work on desktop computers, tablets, and mobile phones alike.
That’s especially good news if you don’t have a dedicated mobile app and use your website as your primary communication tools (as many of us do). Using web push notifications then allows you to earn the benefits of a mobile app without having to invest in creating one (though that is possible with WordPress).
No Private Data Required
These days everyone is very careful about giving away their email address. Everyone and their mom wants to send out newsletters, offers, and more and nobody wants to go through the hassle of finding unsubscribe links.
However, with push notifications, you don’t need to give away anything. You can stay completely anonymous and disable messages you don’t like at the touch of a button. For many users, this may be a lower psychological hurdle.
Risk Annoying Users
On the other hand, there’s the annoyance factor. On mobile phones, push notifications are one of the most cited reasons to uninstall an app.
There’s a reason why I basically never click allow when a site asks to send me push notifications. Like everyone else, I already live with a barrage of information from many sides: Email inboxes, text messages, news alerts, RSS feeds, various messengers, social networks, and more (plus, those pesky people who want to talk to you in real life).
Do I really want to open another door into my life? Only if it really makes sense to me. For that reason, if you do use push notifications, it’s important to treat your subscribers well and make sure not to annoy them.
How to Implement Push Notifications in WordPress
WordPress offers several solutions to get push notification on your website. The most popular by far is OneSignal. Therefore, we will first show you how to set up push notifications with this plugin, then tell you about a few more.
1. Install the Plugin
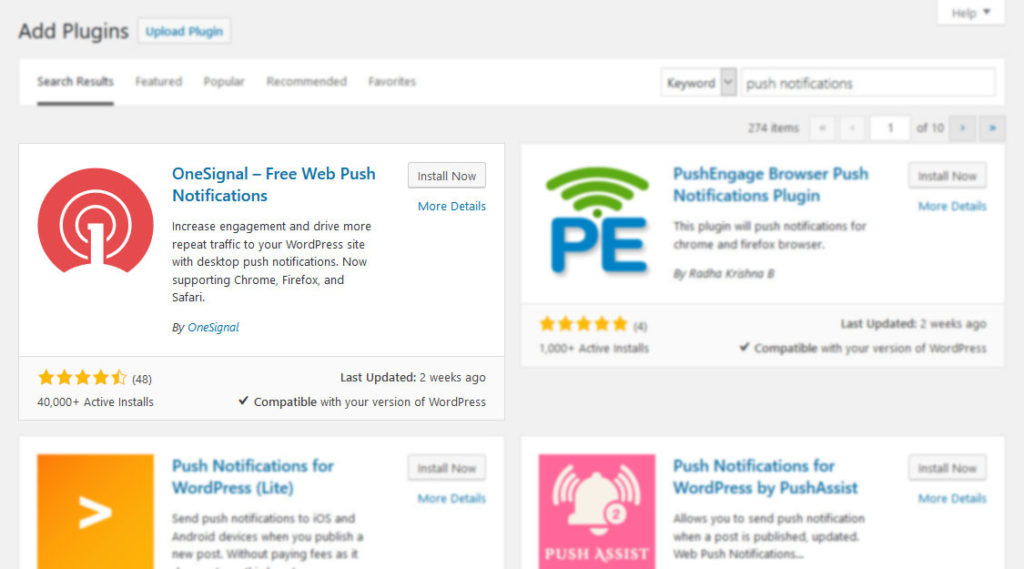
Of course, the first thing to do is install the plugin. For that, go to Plugins > Add New and search for OneSignal or push notifications. In both cases, it should show up on first place.
Click Install Now to get started. When done, don’t forget to activate the plugin.
2. Create a OneSignal Account
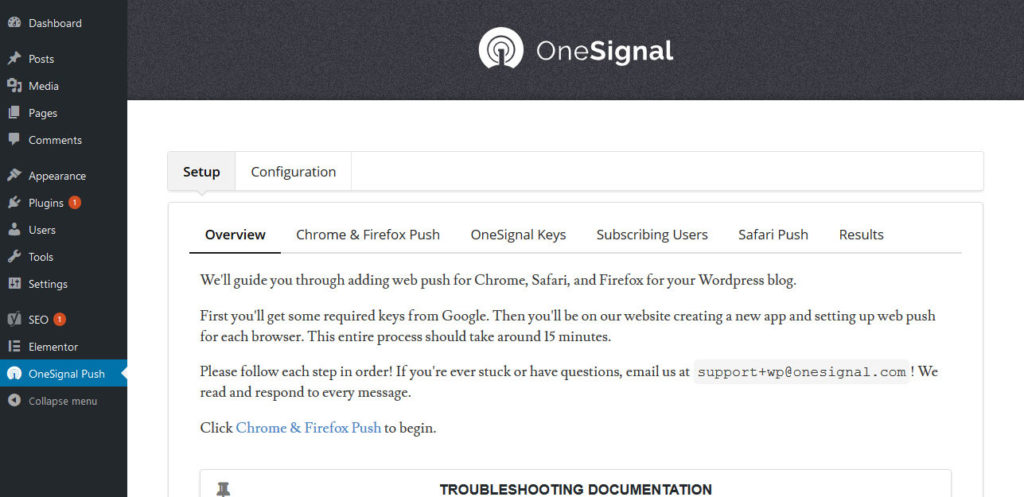
After the installation, you find a new menu item at the bottom. When you click it, you get to the installation guide for OneSignal. On a second tab, you find the configuration options.
The first step: creating a OneSignal Account. For that, hop on over to the OneSignal website, click on one of the Get Started buttons and fill in your information. Don’t forget to confirm your email address!
3. Create a New App
Once that is done, you get access to the OneSignal dashboard. Here, first click on Add a new app. Enter any name that makes sense for you and continue. Close the popup the comes up and then go to App Settings on the left-hand side.
Here, choose Google Chrome & Mozilla Firefox. We will deal with Safari later on. In the next step, OneSignal will ask you to input your site URL and path to your default notification icon.
For the first, make sure to not include any trailing slashes, meaning input https://yoursite.com, not https://yoursite.com/. Also, only input your main domain, not subpages like your blog.
As for the icon, make sure it’s square, at least 80×80 pixels large and its path begins with https://. If you don’t provide one, a default icon will be used.
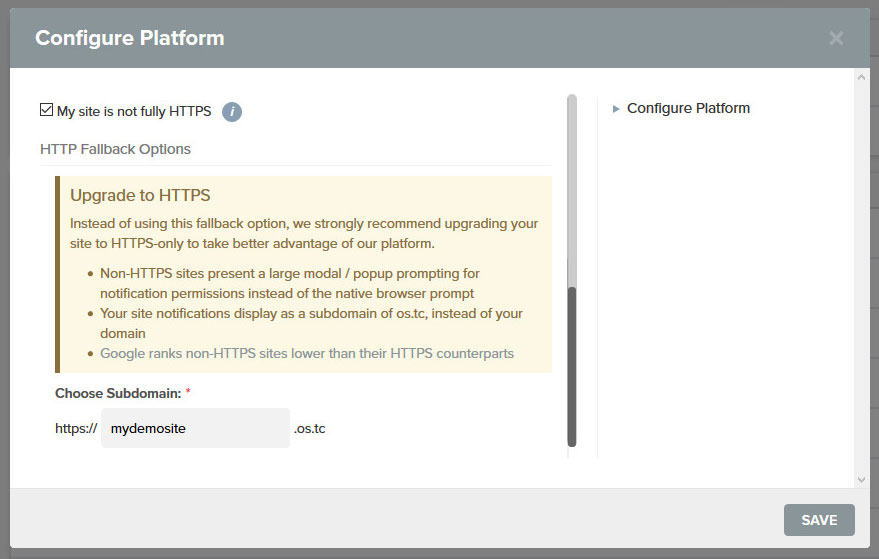
In case your site does not fully run on HTTPS, check the requisite box. Google Chrome only supports push notifications from fully HTTPS-enabled sources. For that reason, if your site isn’t, you need a workaround in form of a subdomain on the OneSignal server.
Pick anything you like, however, the best solution is to upgrade your site to HTTPS. After that, save.
4. Copy Keys
When you are done, click on Keys & IDs at the top. The app will then show you a screen with a REST API key and app ID.

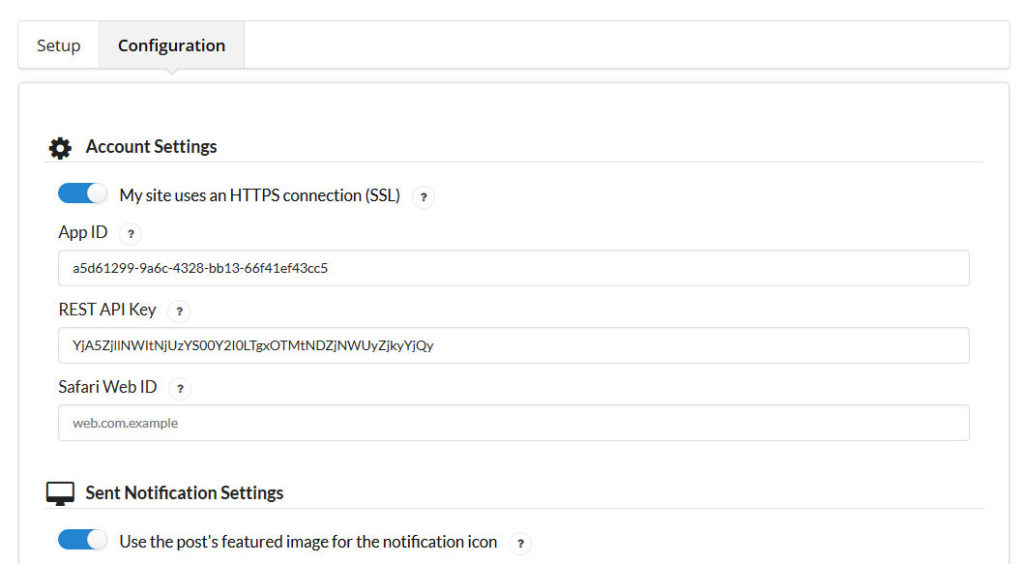
Copy each of these in the respective fields of the Configuration tab in the OneSignal plugin’s settings.
While you are at it, if have set up a subdomain in the earlier step, be sure to disable My site uses an HTTPS connection (SSL) and inputting it here as well. Save.
5. Enable Push Notifications for Safari
To enable push notifications for Apple’s Safari browser, go back to the OneSignal settings page. Here, click on Configure behind where it says Apple Safari.
Note: iOS does not currently support web push notifications, for that reason, you can only enable them for the desktop version of Safari. However, an iOS version is in development.
In the upcoming dialogue box, enter your site name and URL. The site name should be what you want your users to see as it will be used inside the push notification messages. For the site URL, the same rules apply as when we set up notifications for Firefox and Chrome.
After that, check the box where it says I’d like to upload my own notification icons. Upload a square file of 256 x 256 pixels, OneSignal will resize it for other purposes automatically.
Once done, hit Save. When you now refresh the settings page, you should see a Web ID below Apple Safari.
Copy it and paste it to the remaining box in the OneSignal configuration tab.
6. Subscribe and Test
Now it’s time to test your work. For that, first, go to your front page in a supported browser. Here, you should see a new button.
Click it and follow directions to subscribe to push notifications on your site. Don’t forget to click Allow in your browser. You should get a thank you message when it’s successful.
Then go back to the OneSignal site. Click on your app name on the left. At the top, click on New Push Notification.
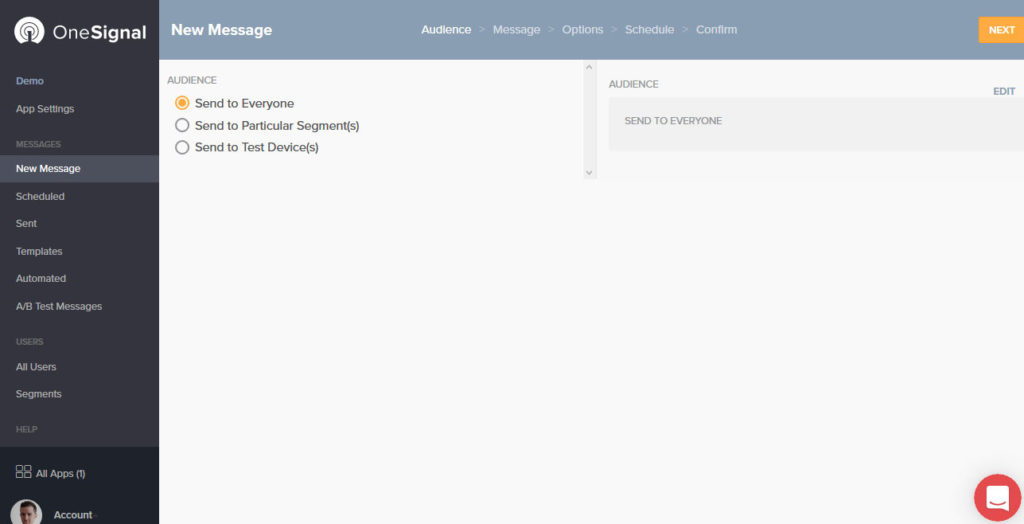
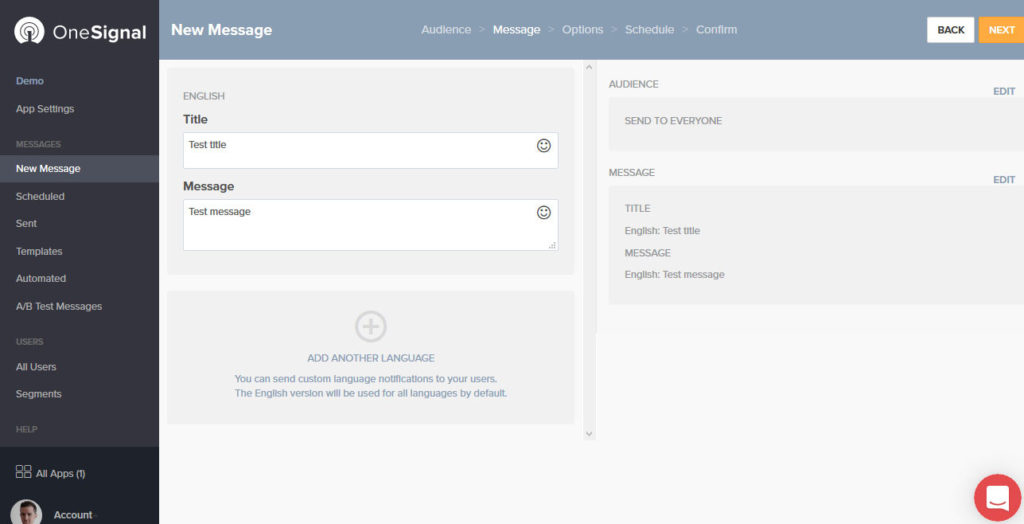
That brings you to this screen.
Choose who to send the message to and hit Next.
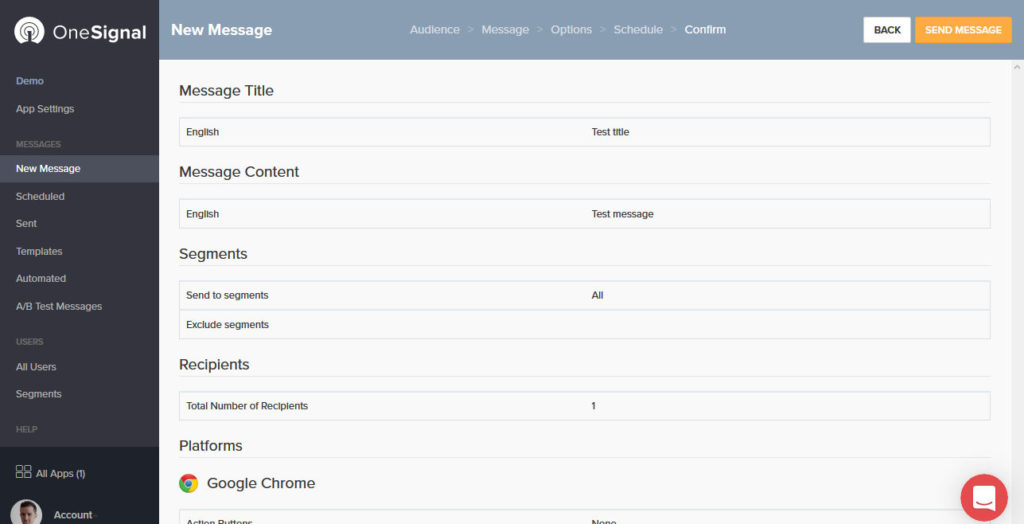
In the next screen, provide a title and message body, then continue. Skip through the next two screens as they are not important for our test and hit Send Message at the end.
If you’ve done everything right, your message should appear at the bottom of the screen.
Well done! OneSignal will from now on automatically send a message to subscribers when a new post is online. Now you can dive into the rest of the options to further configure your push notifications.
Other WordPress Push Notifications Plugins
Of course, there are other WordPress plugins for push notifications that we will quickly mention here.
Push Notifications for WordPress (Lite)
The light version of a premium plugin of the same name. The plugin can send push notifications to iOS and Android. The light version offers a maximum of 1000 notifications for each platform and automatically pushes out a message when a new post is published.
Push Notifications for WordPress by PushAssist
This one is similar to OneSignal. You need an account to use it and the WordPress plugin connects it to your site. It’s free for up to 3000 subscribers and includes the ability to segment subscribers. After that, plans start at $9/month.
PushEngage Browser Push Notifications Plugin
Another service to add push notifications to WordPress. It, too, requires you to register an account on their website. Then you can use the plugin to add the feature to your site. PushEngage is free to use up to 2500 subscribers, works with both HTTPS and HTTP and has many more features.
Push Notifications for WordPress in a Nutshell
Web push notifications are a feature that, while not liked by everyone, is definitely on the up and up. Avid surfers will have seen it crop up around the web more frequently.
For good reason. For those subscribers that do allow them, push notifications offer a great ROI. They are an awesome way to keep visitors up to date on what is going on with your site and business.
In addition to that, web notifications claim one of the highest click-through rates of all marketing channels out there. However, at the same time, you have to make sure to use them in moderation as the potential annoyance factor is equally high.
In this post, you have learned how to add push notifications to your WordPress website. For now, the process still a bit convoluted. Yet, since we are talking about a relatively young marketing channel, it will hopefully improve in the future.
What is your opinion on push notifications? Are you using them on your WordPress site or thinking about it? Let us know in the comments section below!









13 Comments