Visual branding is an important part of building a business. However, in some cases, your brand fonts may not be available on major font hosting sites such as Google Fonts or Typekit. This means you’ll need to find an alternative means of displaying them.
Fortunately, it’s possible to convert your brand’s fonts into website-friendly ones and embed them like any other. This process is actually less technical than it sounds, thanks to Font Squirrel’s web font generator and plugins such as Font Organizer.
In this article, we’ll walk you through the steps necessary to prepare your brand’s fonts for web use. Then, we’ll show you how to use them on WordPress. Let’s get started!
Prepare Your Font for the Web (In 2 Steps)
Unfortunately, you can’t just upload your font as-is to the internet and expect it to work. Different browsers and operating systems have different requirements for fonts. The good news is that you can take your normal font and convert it into a myriad of different formats, so it is accessible by almost every platform available.
Before you can worry about adding your font to WordPress, you first need to prepare your font for web usage. Here’s how to take your font and convert it.
Step 1: Check For Any Font Usage Copyrights

In order to use a font, you must respect its copyrights and use the proper licensing. Licenses can be completely unique to the creator of the font, but usually stick within a few expected guidelines, dictating:
- Who may use the font.
- Where the font can be used.
- Guidelines on how the font can be used.
For example, some fonts are only licensed to specific companies. Other fonts are licensed to anyone willing to pay a fee. Additionally, many fonts are offered open-source and completely free for any and all usage within the general public.
Ideally, you’ll already know whether you have legal rights to your brand’s primary font for commercial use. More specifically, you’ll need to find out whether you have permission to use your business’ font in a web context before taking any further steps. Some font licenses are only permissible on desktops to make print designs.
To find your license, you have a few options:
- Access the license in your original font download folder.
- Talk to your designer and ask to see the font license.
- Visit the website where you downloaded the font from, and search for the license provided.
- If you downloaded it from a free fonts website, look for general licensing information.
- Google “(your font) + license” to find the source and determine your level of license based on what you paid for it.
Each license will be unique but look for explicit rules on personal and commercial use, necessary fees, and how the font is able to be used. In order to use it online, the license should state that you are able to use it for commercial purposes in any digital format, including hosted websites.
If you don’t have the right license, go back to the source and purchase the correct license – and contact the creator of the font when in doubt!
Step 2: Convert the Font to ‘Web-Friendly’ Formatting
Once you’re positive you have a license that covers web usage, you’re in the clear to convert your font into a web-friendly format. This used to be a difficult process that only dedicated software could solve. However, there are many conversion tools now readily available online for free.
There are many font types to suit the sheer number of devices available, but a few are more popular than others. Common font file extensions are .OTF, .TTF, and .FNT – you should have a folder full of one of these extensions. These may be common but are not specifically formatted for general use online.
Font Squirrel is our web font generator of choice. It’s incredibly simple to use, and the only requirement is you have access to one of the common font types and the license to use it online.
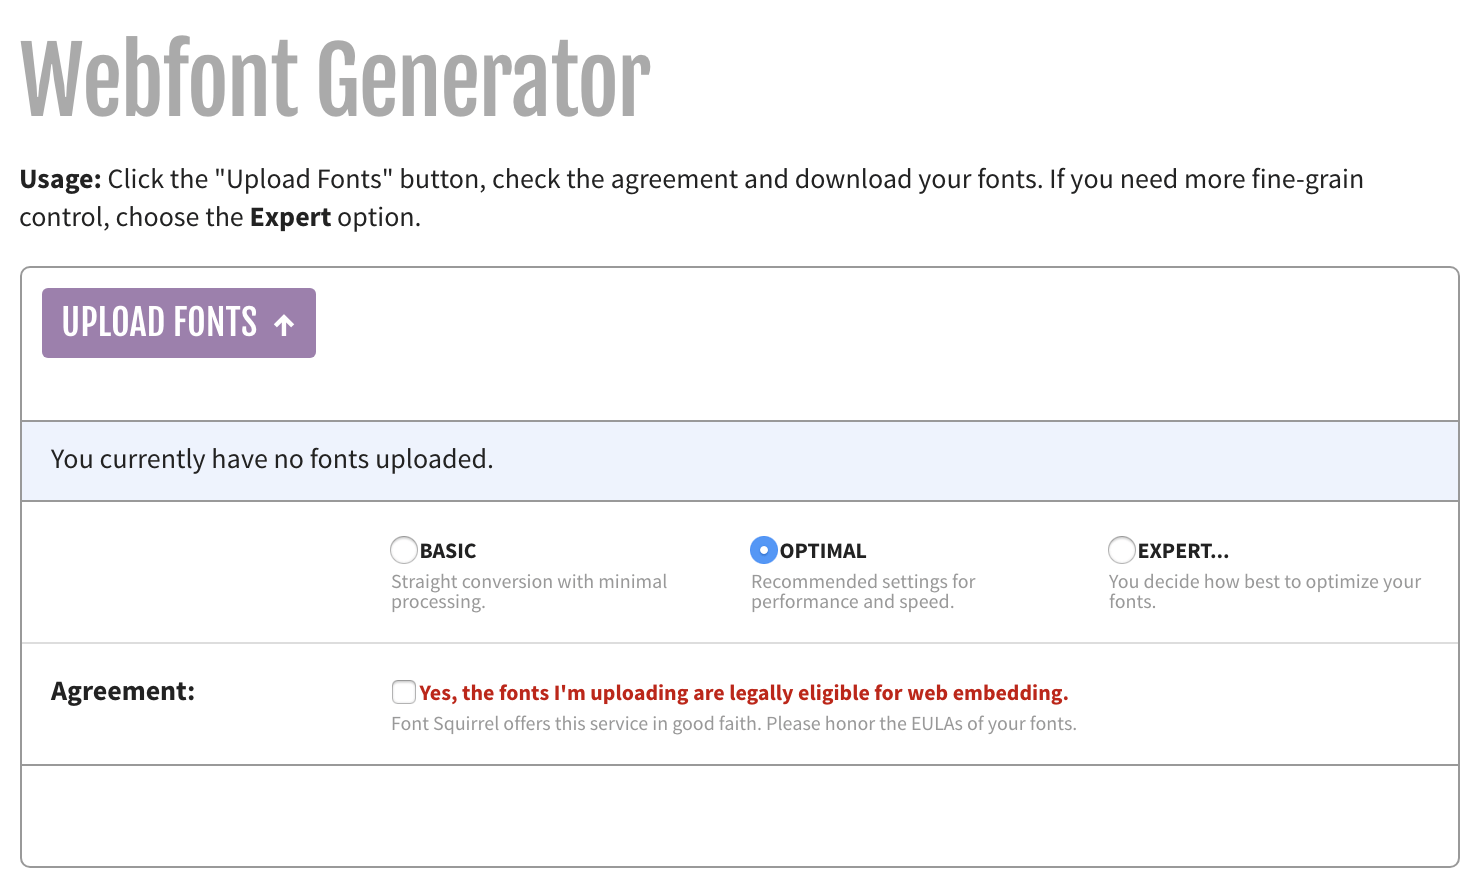
First, visit the Font Squirrel web font generator. Check the Yes, the fonts I’m uploading are legally eligible for web embedding agreement, or you won’t be able to download your final font files:

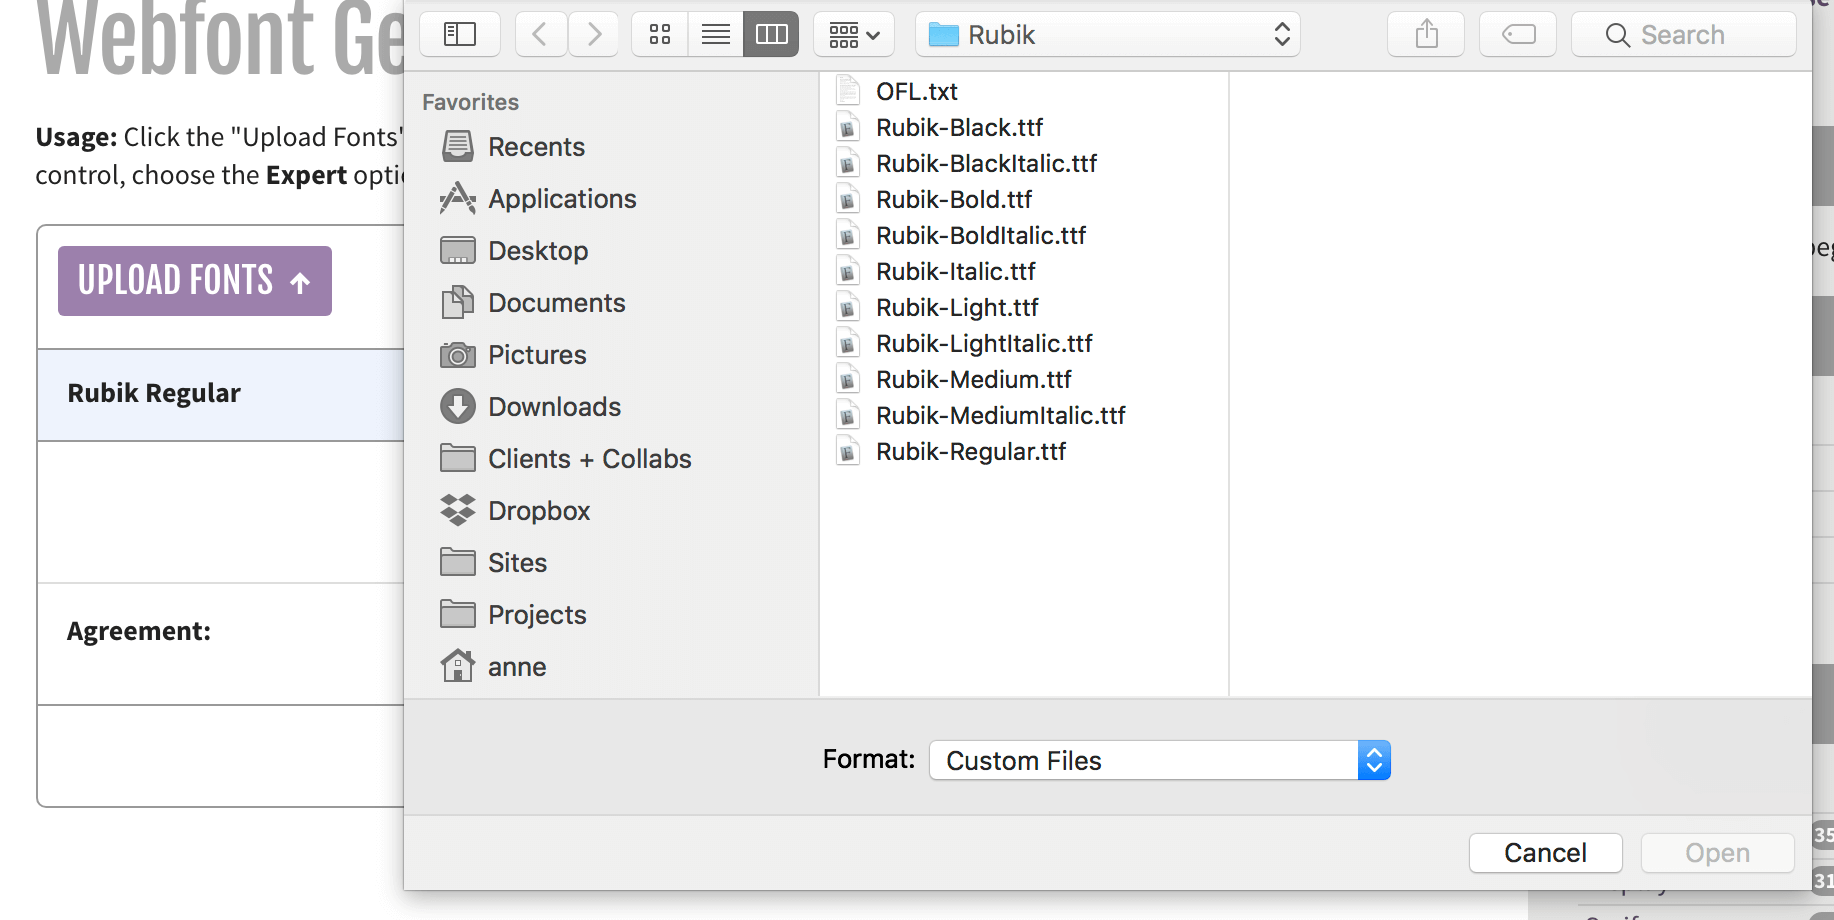
Next, follow the prompts to upload your font. You can select as many variations (such as bold, italic, and so on) of the same font as you want:

Once you’re finished uploading, download the provided font .zip file and save it somewhere you can access later. You’ll need this to upload the proper font formats to your website.
Add Your Font to WordPress (In 2 Steps)
Now your fonts are ready for the web, you can add them to WordPress. Thankfully, as is often the case with WordPress, this is a relatively simple process thanks to the power of plugins. Let’s dive in.
Step 1: Install the Font Organizer Plugin

Font Organizer is a simple plugin enabling you to upload custom web fonts to use on your WordPress website. We prefer it because it gives you full control, is frequently updated, has plenty of great reviews, and is easy to use. However, there are a plethora of custom font plugins to choose from, so feel free to take your pick.
Before installing the plugin, make sure to check your existing plugins and themes for custom font functionality. It is possible one of your themes or plugins already supports this feature, which means you don’t need a secondary plugin to handle it. You can check the documentation for your theme and each plugin to determine if this is the case. Typically, you might find this information under a Typography tab in the Customizer, but you may also find it under Appearances > Theme Options, or on a settings page for any existing font-related plugins.
Once you’ve checked for font support, or if you’d rather skip the research and jump straight into the plugin, go ahead and install Font Organizer on your WordPress website.
Step 2: Upload and Configure Your Font
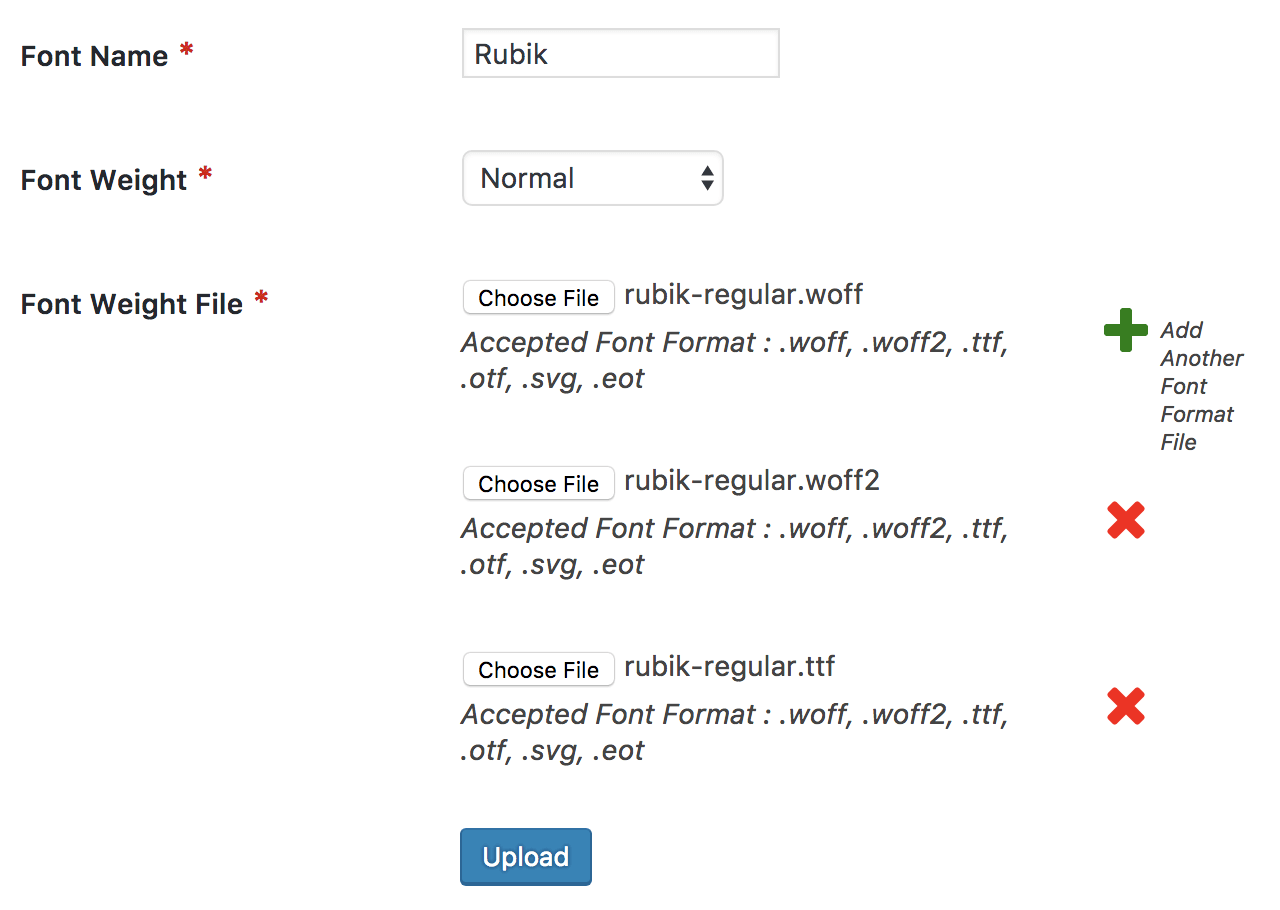
You’re down to the last step! The only thing left to do is upload and configure your font to be used on the website. First, go to Settings > Font Settings, then scroll down to Custom Fonts. Here, you can upload all of the font files provided to you by Font Squirrel. The font name should be the same, and you can upload all the files for one weight (i.e. bold, italic) at a time.

Click Upload when you’re finished adding all the file types of each weight, and wait for the page to reload, then repeat the process for each font weight.
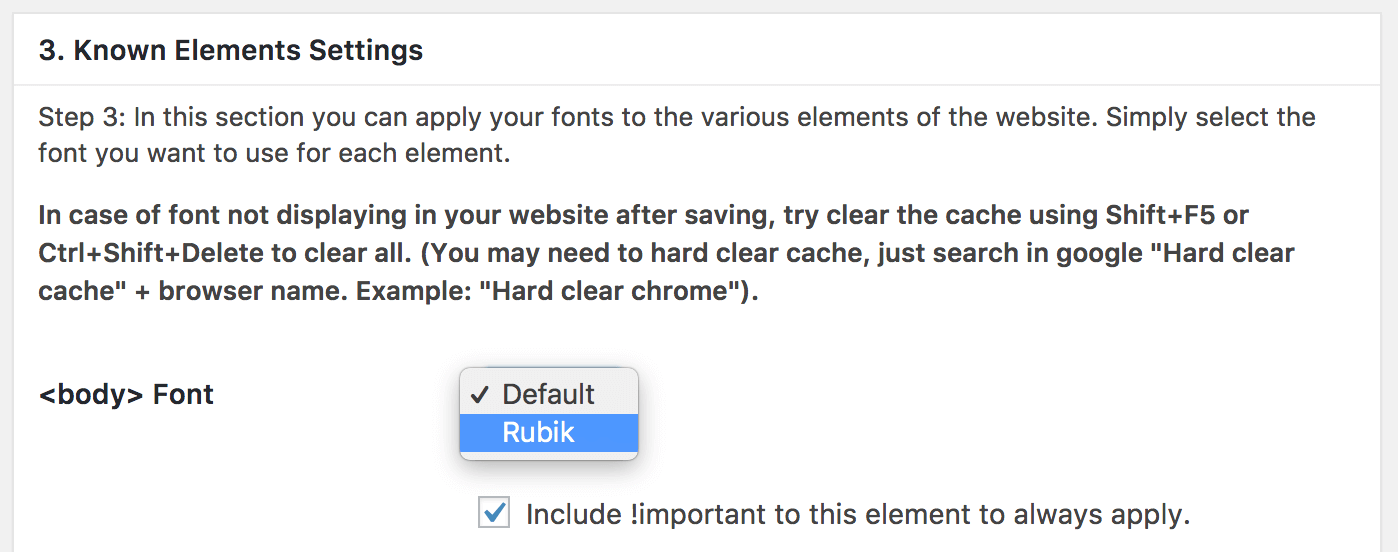
With your font in place, you can now integrate it into your CSS. Font Organizer provides an easy way for you to integrate your fonts right away. Simply select your font in the drop-down for all desired elements. Check the Include !important to this element to always apply. box if the changes aren’t showing up on your website.

Congratulations! That’s it. Your brand’s custom font should now be available on your WordPress website.
Conclusion
Including your brand’s fonts on your website is an important part of visual branding. Major brands such as PayPal and Dropbox even implement their own completely custom fonts. Fortunately, you can implement your own WordPress fonts relatively easily.
In this article, you learned how to use custom fonts on your WordPress websites in two parts:
- First, check that your font has the right copyright, and prepare it for the web.
- Second, install a suitable plugin and use it to load your font into WordPress.
What questions do you have about using custom fonts with WordPress? Let us know in the comments section below!
Image credit: Jason Leung.

12 Comments