HTML classes and ids are not just important for hardcore coders. After all, these days you no longer have to be a web developer to have your own web presence. Instead, you can achieve almost anything by drag-and-drop or clicking a mouse button.
That ability is a big part of the success of WordPress. The platform lets even laypeople build highly professional websites. However, if you want to dive deeper into theme customization, you don’t get around learning markup and code.
A working knowledge of HTML, CSS, PHP and, increasingly, JavaScript lets you do whatever you want with your site. For that reason, in this post we want to look into a central part of any WordPress theme: HTML classes and ids. In the following, you will learn about what they are exactly, why they matter and how to use them correctly. Knowing that goes a long way in making sweeping changes to any WordPress site.
A Crash Course in HTML
Before you can understand HTML classes and ids, you first need to be somewhat familiar with how HTML works.
Basic HTML Building Blocks
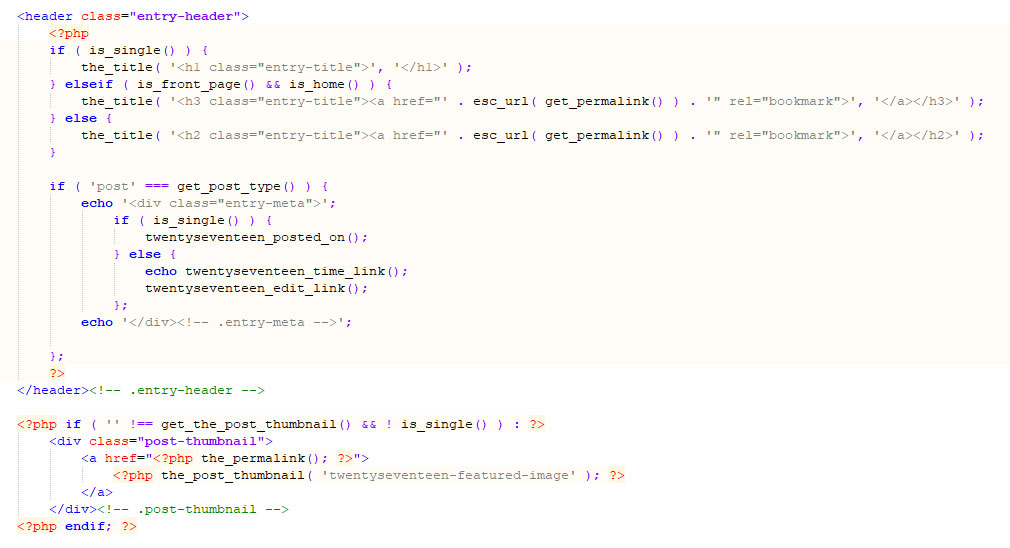
If you are working with WordPress, you might have looked into a template file before. When you do, you see something very similar to this:
While WordPress template files are written in PHP, they contain lots of HTML as well. For example, you will find a lot of these standard HTML elements:
<div>— Denotes larger page sections. Header, content, sidebar and footer elements often used to consist of<div>boxes. By now, however, we usually use more semantic markup like<header>,<nav>,<aside>or<footer>. Div boxes also can have other elements nested inside them.<h1>to<h6>— So-called heading tags. As the name suggests, they are used for titles or subheadings that give content structure. For more information, we have an entire article on this topic.<p>— Used for standard running content. The p stands for “paragraph”. If you look into the source code of this page, you will see most of the text enclosed in<p>brackets.<ul>and<ol>— Create unordered and ordered lists (such as what you are seeing at the moment). Each list item is also bracketed with<li>and</li>.
With these elements and a few more alone, you are able to create the rough structure of a site. For example, here’s a web document written in pure HTML:
<!DOCTYPE html>
<html>

<head>
  <title>My HTML Test Website</title>
  <meta charset="UTF-8">
</head>

<body>

<header>
	<h1>My HTML Test Website Title</h1>
</header>

<div>
	<h2>Heading for the first entry</h2>

	<p>Lorem ipsum dolor sit amet, consectetur adipiscing elit. Sed convallis elit in massa posuere sagittis. <a href="https://yourdomain.com">Maecenas tincidunt</a>, nisi eu ullamcorper eleifend, sapien magna suscipit dolor, non efficitur tellus ipsum sed quam. Praesent ut ullamcorper leo. <strong>Nullam luctus semper massa</strong>, quis porttitor dui malesuada ac.</p>
	<p>Vestibulum sapien purus, placerat sed diam ut, <a href="https://yourdomain.com">mattis dapibus lorem</a>. Integer a elit tempus, lacinia odio ac, pellentesque massa. Proin mattis ultricies tortor, vitae rutrum enim commodo ac. Fusce placerat nibh at tincidunt facilisis. Phasellus auctor semper mi, <em>nec condimentum justo fermentum id</em>. Pellentesque suscipit libero quis nisl interdum viverra.</p>
	<ul>
		<li>Ut sapien leo, semper eu nunc eget</li>
		<li>Pulvinar vulputate mi</li>
		<li>Ut imperdiet aliquam libero</li>
		<li>Quis pharetra nibh cursus sed</li>
		<li>Mauris tempus mauris non metus rutrum</li>
	</ul>
	<p>Etiam pulvinar magna sit amet tincidunt ornare. <strong>Nunc nec dolor sit amet enim congue dictum</strong>. Vivamus ut feugiat neque, a fringilla nulla. Nunc tincidunt vehicula porta. Phasellus ac semper tellus. Vestibulum a lectus facilisis erat scelerisque aliquet et rhoncus nisl.</p>
</div>

<footer>
	<p>© 1991-2004 Old-School Web Designs</p>
</footer>

</body>

</html>
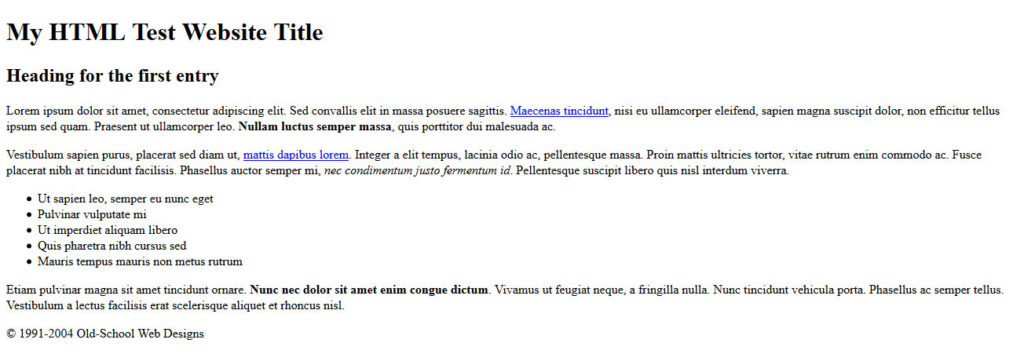
And here’s what it looks like in the browser:
Very barebones, I know. However, this is what websites used to look like in their beginning.
Then Things Got Complicated
As the demands on presentation of websites grew, so did the complexity of HTML. Newer versions of the markup language contained additional capabilities to style documents.
While this made the end product look much better, it made the code behind it much more complex to read and write. The main reason for that is that any styling had to be included inline (using style="").
Here is what that might look like in our example above:
<!DOCTYPE html>
<html style="font-family: sans-serif; color: #666;">

<head>
  <title>My HTML Test Website</title>
  <meta charset="UTF-8">
</head>

<body style="background-color: #F6F6F6; margin: 0 auto; max-width: 1050px;">

<header style="padding: 30px 0;">
	<h1 style="color: #3EB9C8; font-size: 40px;">My HTML Test Website Title</h1>
</header>

<div>
	<h2 style="background-color: #111D2F; color: #FFFFFF; display: inline;">Heading for the first entry</h2>

	<p>Lorem ipsum dolor sit amet, consectetur adipiscing elit. Sed convallis elit in massa posuere sagittis. <a style="color: #eb6126; text-decoration: none;" href="https://yourdomain.com">Maecenas tincidunt</a>, nisi eu ullamcorper eleifend, sapien magna suscipit dolor, non efficitur tellus ipsum sed quam. Praesent ut ullamcorper leo. <strong>Nullam luctus semper massa</strong>, quis porttitor dui malesuada ac.</p>
	<p>Vestibulum sapien purus, placerat sed diam ut, <a style="color: #eb6126; text-decoration: none;" href="https://yourdomain.com">mattis dapibus lorem</a>. Integer a elit tempus, lacinia odio ac, pellentesque massa. Proin mattis ultricies tortor, vitae rutrum enim commodo ac. Fusce placerat nibh at tincidunt facilisis. Phasellus auctor semper mi, <em>nec condimentum justo fermentum id</em>. Pellentesque suscipit libero quis nisl interdum viverra.</p>
	<ul>
		<li>Ut sapien leo, semper eu nunc eget</li>
		<li>Pulvinar vulputate mi</li>
		<li>Ut imperdiet aliquam libero</li>
		<li>Quis pharetra nibh cursus sed</li>
		<li>Mauris tempus mauris non metus rutrum</li>
	</ul>
	<p>Etiam pulvinar magna sit amet tincidunt ornare. <strong>Nunc nec dolor sit amet enim congue dictum</strong>. Vivamus ut feugiat neque, a fringilla nulla. Nunc tincidunt vehicula porta. Phasellus ac semper tellus. Vestibulum a lectus facilisis erat scelerisque aliquet et rhoncus nisl.</p>
</div>

<footer style="text-align:center;">
	<p>© 1991-2004 Old-School Web Designs</p>
</footer>

</body>

</html>
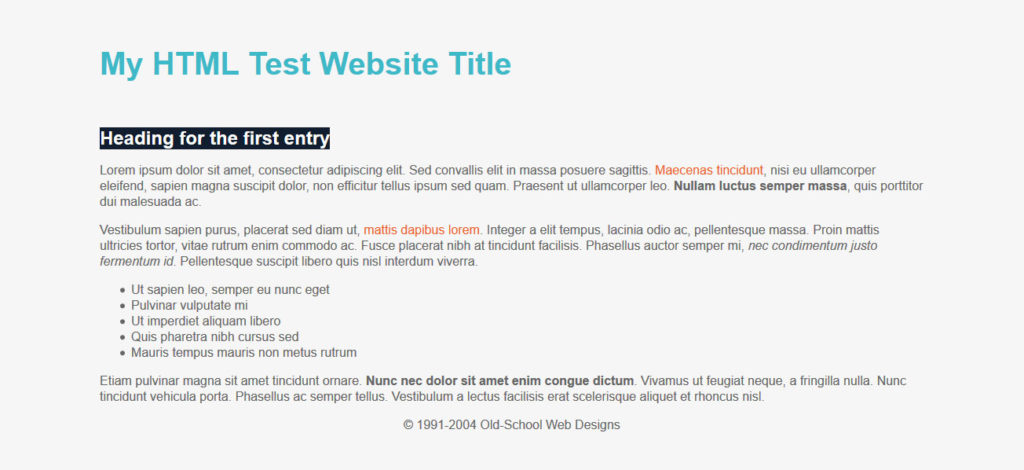
With that, the output looks a lot different than before:
The downside is that if you want to change the design or reuse styling for other elements, you need to go over the entire page (or several pages) and modify every instance individually. Especially with repeating elements (like links), this gets annoying really quickly. So, what to do instead?
Behold, the Style Sheet
A big step in the development of websites was the emergence of CSS or cascading style sheets. This means nothing other than putting all the markup for styling into a separate file instead of including it in the page document. This way, we are able to deal with the structure and presentation of the page separately.
For the example above, the style sheet looks like this:
html {
	font-family: sans-serif;
	color: #666;
}

body {
	background-color: #F6F6F6;
	margin: 0 auto;
	max-width: 1050px;
}

h1 {
	color: #3EB9C8;
	font-size: 40px;
}

h2{
	background-color: #111D2F;
	color: #FFFFFF;
	display: inline;
}

a {
	color: #eb6126;
	text-decoration: none;
}

header {
	padding: 30px 0;
}

footer {
	text-align: center;
}
After that, we can go back to the simpler page version further above. All we need to do is call the stylesheet by adding this line to the page’s <head> section:
<link rel="stylesheet" type="text/css" href="style.css">
After that, the page will retain the styling. That’s because the browser can pull it from the style sheet instead of reading markup for each element individually. This greatly reduces the complexity of the HTML you have to write.
It also means, if you change the styling in the central location, it changes for all elements at once. Plus, this works across all pages that call the style sheet in their head. Much more practical, don’t you think?
However, that still leaves a problem: what if you want to assign different styles to the same type of element? Are you stuck with going inline again?
No, that’s exactly where classes and ids come in.
What are HTML Classes and Ids?
Classes and ids are hooks you can assign to HTML elements to make them more specific. That you have additional identifiers to assign CSS markup to.
For example, let’s say I want to change the font size of my copyright text (but leave any other text in the footer the same size). I can do this simply by giving it an id like so:
<p id="copyright-text">© 1991-2004 Old-School Web Designs</p>
When I do, I can then assign some special CSS to that id by using the prefix #.
#copyright-text {
	font-size: 13px;
}
Here is the result:
Classes work in a similar way. For example, let’s say I have a number of <div> boxes for widgets in my sidebar and I want to change their styling. If my sidebar already has an id (for example #main-sidebar), I can target the boxes theoretically like this:
#main-sidebar div {
    /* input styling here */
}
However, that would also include any other div in there. So, a much smarter way is to give the widget containers their own class:
<aside id="main-sidebar">
	<div class="widget">
	</div>
	<div class="widget">
	</div>
	<div class="widget">
	</div>
</aside>
That way, I can change the styling for those boxes and leave everything else alone.
#main-sidebar .widget {
 /* input styling here */
}
Easy to understand, right? Also, note that instead of the hash symbol, classes are written with . in front of them. There is also a similar concept called theme hooks. These work in a similar way as classes and ids only that they allow you to attach functions to them instead of CSS. If you want to learn more about theme hooks, check out our beginner’s guide.
HTML Classes and IDS – When to Use What?
So, how do you properly use classes and ids? The first thing to note is that these selectors have no meaning for browser by themselves. There are no standards that work on every site, only if you define them both in the HTML and CSS. This is something that throws a lot of beginners.
Yet, so far it looks like HTML classes and are ids basically do the same thing, doesn’t it? However, there are differences. It’s no coincidence that above I have used an id for a single element and a class for several. That’s because ids are meant to be unique, classes are not.
To be more specific:
- An HTML element should only have one ID
- Each page should only contain one element with that ID
On the other hand:
- An element can have several classes
- You can assign HTML classes to as many elements as you like
Why Does This Matter?
The thing is, you can theoretically use classes and ids interchangeably. I certainly have done so in the past (before I knew better).
Just assign the same id to several elements like classes and they will take on the same CSS properties. It won’t break your browser and display exactly what you want. However, there are several reasons not to do that.
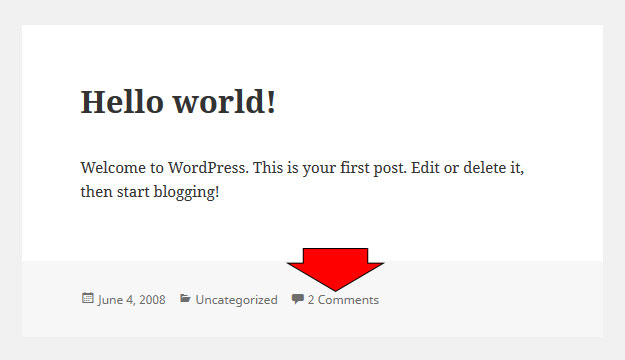
First of all, ids have a unique ability: You can use them to jump to an element on a page. For example, many WordPress themes have a feature that let you click on the number of comments in the post meta to go straight to the comment section.
They do that by sending you to an address like yoursite.com/postname#comments. With that URL, the browser will automatically scroll down to, for example, the <div id="comments"> element. However, if you have several elements with that id, it won’t know which one it is supposed scroll to. It’s the same reason why you can link to individual comments on WordPress sites because the platform dynamically create ids for them.
The second reason to stick with the defined conventions for HTML classes and ids is that while CSS doesn’t care whether an id is unique or not, JavaScript does. In fact, the programming language has a function called getElementById specifically to manipulate elements based on their id. However, it doesn’t have the same for classes.
Since more and more of the web (including WordPress) is moving towards JavaScript, it’s a good idea to stick with these rules. If you don’t, your code will not pass validation, will be harder to maintain, more likely to throw errors and possibly not future proof. Plus, it makes you look unprofessional.
Best Practices for Using Classes and Ids
Above, you have already learned the most important rule: make ids unique but reuse classes as often as you want. However, there are a few more things to keep in mind for properly using class and id selectors.
First of all, when you do create either of them, make sure to make them descriptive. That means, avoid stuff like <div id="box1"> and instead use something like <div id="top-signup-box">. Classes and ids are not just a technical tool, they are also a good way to make the structure of your site easier to understand.
Secondly, you can assign both classes and ids to an element at the same time.
<aside id="main-sidebar" class="sidebar widget-area">
This can, for example, make sense if you use classes for styling but need an id to create a target for a JavaScript script.
Aside from that, the ability to assign more than one HTML class is quite useful. If you use the same element several times and want to change something about only one of them, you can do so by simply assigning a second class to it.
Going back to the widget example on top, if you want everything to stay the same but change one attribute about the first element on the list, you can simply do this:
<aside id="main-sidebar">
	<div class="widget first">
	</div>
	<div class="widget">
	</div>
	<div class="widget">
	</div>
</aside>
When you now put the below piece of CSS in your style sheet, it affects only that first widget.
#main-sidebar .widget .first {
	/* insert styling here */
}
Pretty easy, don’t you think?
However, it’s just as important to know when not to use classes and ids. There are many HTML selectors that you can target directly, like <p>, <a>, <h1> to <h6>. Only when you need to assign individual styling to them (such as for a post title) does it make sense to give them an additional selector. So think before you class or id.
HTML Classes and Ids in a Nutshell
Classes and ids allow you to apply CSS styling in a more targeted manner. Learning about how to properly use them is a crucial step in being able to understand, write and modify WordPress themes.
In this post, we have covered what HTML classes and ids are and how they make web design easier. That knowledge will not only help you customize your own website but also let you understand the structure of other sites or themes.
Either way, knowing classes and ids is an important skill for anyone working in the digital sphere. Plus, the concept with very simple. They will soon be second nature to you and I promise you won’t want to live without them.
How do you use HTML classes and ids? Anything to add to the above? Let us know in the comments section below.


No Comments