If you keep up with the latest WordPress developments, you’ll know that the Block Editor has already landed. This packs a punch with its block-based system, but it’s still missing many options we’d like to see. As developers put out new block-based plugins, it should become easier to find the ones you need. For now, however, the landscape is a bit bare.
In other words, if you want to add specific functionality to the Block Editor, you may need to learn how to create your own blocks. This isn’t too difficult, and you’ll be able to use those blocks to add bespoke features to your site wherever you like. With a little polish, you might even be able to release them as public plugins and help push the editor’s development forward.
In this post, we’re going to briefly review how the block system works. Then we’ll teach you the most efficient way to create custom blocks for your website. Let’s get to work!
An Introduction to the New Block System

If you’ve ever used a page builder, then you should be able to pick up the Block Editor pretty quickly. At its core, it’s a new block-based system that replaces WordPress’ old approach to formatting.
With this editor, each page and post is broken down into multiple blocks (or elements). There are block options for all the basic types of content, such as plain text, headings, images, and lists. As you might expect, you can also add code or custom HTML blocks, as well as several third-party integrations.
Out of the box, the Block Editor includes most of the elements a basic website might need. However, WordPress is all about versatility, and it’s used to build a lot of complex and unique sites. So it should come as no surprise there are already plenty of custom blocks you can add to the editor using plugins.
So far, some of our favorite custom block plugins include Atomic Blocks and Stackable. Between the two, you’ll have dozens of new elements to play with. It’s still possible that you won’t find the exact block you need for your website, however, which means you might need to build it yourself.
How to Create a Block In 5 Steps
Blocks are built using mostly JavaScript. To set one up, you’ll need to register it, configure its attributes (in other words, what the block does), and create its template.
The process is not necessarily complicated, but it can get a bit messy. That’s why we recommend using a tool to help you set up the basics, especially if you’re new to WordPress development.
Step 1: Select a Boilerplate
For a block to work properly, it relies on several key files. Instead of setting those up manually, there are a few tools that will let you skip that part of the process, and jump right into configuring what your block will do.
First up, there’s create-guten-block, which is a Command Line Interface (CLI) tool. With it, you can set up new blocks as plugins using a simple command, which will generate the project structure you’ll need:
If you prefer to use your admin interface, we also recommend the Block Lab plugin. With this tool, you can create new blocks and customize them, all without leaving your WordPress dashboard:
Keep in mind that with Block Lab, you’ll still need to do some coding to set everything up. However, it’s still a much more straightforward process than building your block structure from scratch.
Throughout the rest of this tutorial, we’re going to focus on the Block Lab plugin, since it provides the most user-friendly experience. Without further ado, therefore, let’s get to work on your first custom block.
Step 2: Set Up a New Block
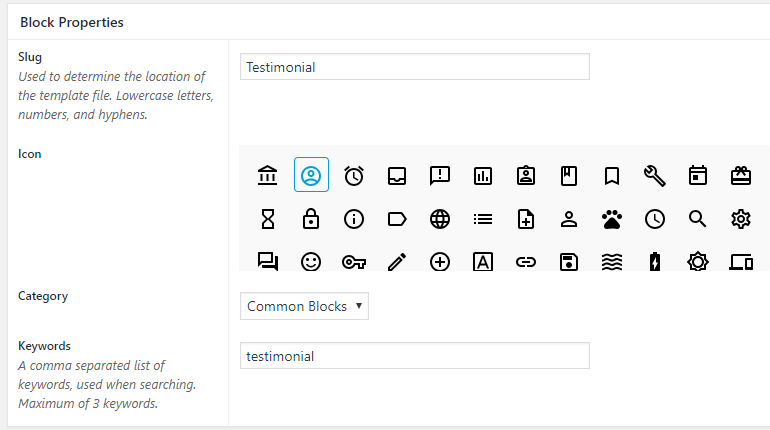
Once you install and activate the plugin, a new Block Lab tab will show up in your dashboard. Click on it, and select the Add New option. On the next screen, you can set your block’s slug, icon, and related keywords:
You can also choose which category your new block will be listed under. Keep in mind that whatever choices you make here won’t affect your block’s actual functionality, so feel free to have some fun. For the purposes of this tutorial, we’ll be creating a block for displaying customer testimonials.
When you’re done, don’t save the changes to your block just yet. Instead, move on to the next step.
Step 3: Configure Your Block’s Core Fields
Every block is made up of fields, so you’ll need to add some now. To do that, click on the Add Field button:
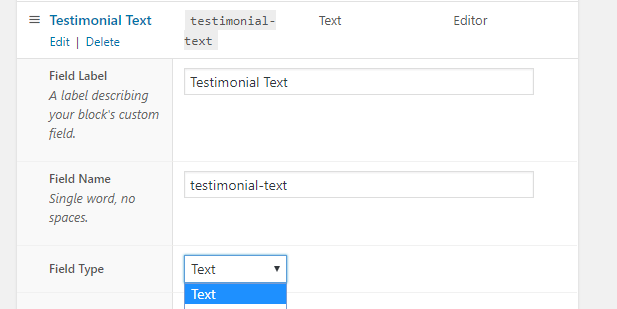
Since we’re working on a testimonial section, we’ll go ahead and add two fields to our block, one for text and another for images. That way, each testimonial can be accompanied by a picture. To set up the text field, all you have to do is enter a label for the field and choose a type:
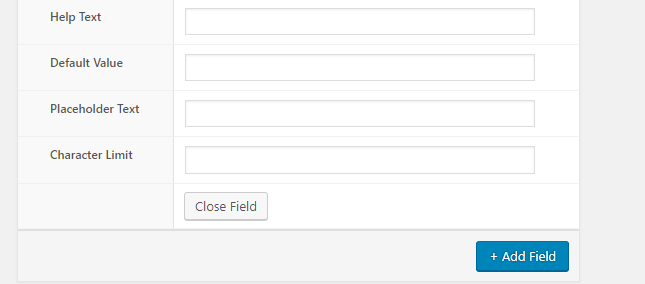
Below that, you can also set some help text for your field, as well as a default value, placeholder text, and character limit:
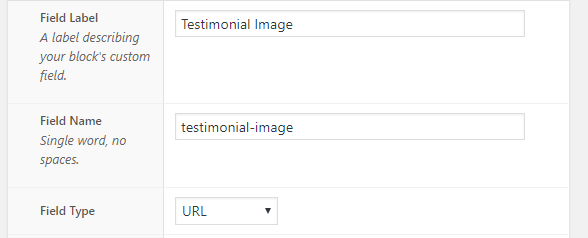
Since this particular plugin is still in its early stages, it doesn’t yet include a field specifically for images. However, if you choose URL from the Field Type drop-down menu, you can circumvent that issue easily:
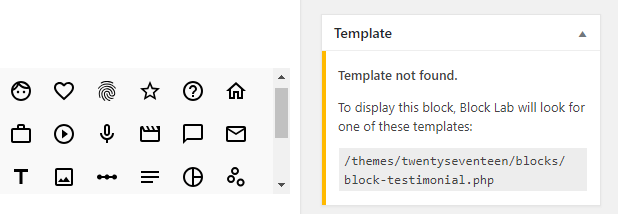
At this point, your fields are all set up. So go ahead and save your new block. After you hit the Publish button, a message like this will show up under the Template widget:
Right now, your new block is registered in WordPress. However, you still need to create a template file for it, which we’ll do in the next section.
Step 4: Create a Template File for Your Block
Once your block is saved, the Block Lab plugin will look for a matching template file. In this case, it will look for that file in the themes/twentyseventeen/blocks/block-testimonial.php directory, since that’s the name we chose for our block.
Right now, that file doesn’t yet exist. So it’s time to open your trusty text editor and fix that. Template files provide the basic structure for your block, and they can be as simple or as complex as you want. To keep things straightforward, here’s what ours looks like:
<div class="testimonial-pic"><?php block_field( 'testimonial-image' ); ?></div>
<div class="testimonial-text"><?php block_field( 'testimonial-text' ); ?></div>
All we did was set up two containers with individual classes, one for the image and one for the text. Now, we can save our block-testimonial.php file, and the block will technically work.
However, it’s not going to look pretty yet, unless we style it using some CSS. To do that, you’ll want to use your child theme’s stylesheet. Of course, how to style the block is completely up to you! When you’re done tinkering, the last step is to make sure your block is working properly.
Step 5: Test Your New Block
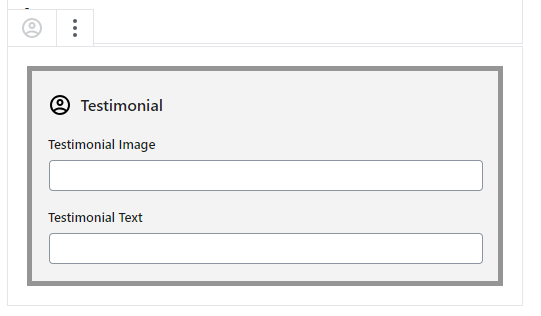
When you’re ready to test out your new block, go ahead and open up the Block Editor for any post or page. Then, look for your new block within the category you chose earlier. Here’s what ours looks like:
The next step is to fill out both fields, and check out what the block looks like in action:
Your mileage may vary, depending on how you decided to style your custom block. With a little time and tweaking, however, you can put together something that’s both attractive and functional.
Conclusion
Adding blocks to the new editor is a completely different experience from building plugins. To get the most out of your blocks, you’ll need to have a working familiarity with JavaScript. However, the good news is that there are a lot of exciting tools you can use to simplify the process of creating new blocks, such as create-guten-block and Block Lab.
So far, Block Lab offers the most user-friendly approach, since it enables you to create custom blocks in just five steps:
- Set up the boilerplate.
- Create a new block.
- Configure your block’s core fields.
- Create your block’s template file.
- Test your new block.
Do you have any questions about how blocks work? Let’s talk about them in the comments section below!
Image credit: Pixabay.




1 Comment