
It’s tough to stand out among the millions of blog posts published every day, and the social media revolution has changed the way people consume content. Creators need to get, well, creative if they want to attract visitors.
Enter Web Stories. These bite-sized pieces of visual content stand out easily on Search Engine Results Pages (SERPs), and their brief nature caters well to mobile users with small screens and limited time. Google recently released a new WordPress plugin designed to make it easy for you to incorporate Web Stories into your posts.
In this article, we’ll take a look at the Web Stories plugin features and explain exactly how to use it to create beautiful, engaging content. Let’s dive in!
Understanding Web Stories
Before we look at the new plugin, let’s review what Web Stories actually are and why you might want to start using them.
Web Stories are a visual storytelling format for web content, powered by the AMP framework. You may already be familiar with Instagram and Facebook Stories. Web Stories are the same idea applied to web content.
The idea is to provide what Google calls “snackable content” – quick, easy-to-read stories perfect for smartphones and on-the-go viewing:

Web Stories help improve the Search Engine Optimization (SEO) and User Experience (UX) of your site and drive organic traffic. Some other benefits include:
- Web Stories get their own section at the top of Google SERPs for prime visibility.
- Google tends to rank Stories highly in web searches, image searches, and the Google app.
- Stories really pop on a SERP and catch the attention of users.
- Stories include support for full-screen immersive ads and affiliate links, enabling you to easily monetize them.
Major outlets such as Wired, CNN, and BBC News use Web Stories frequently, so you’ll be in good company if you incorporate them on your site.
An Introduction to the Web Stories for WordPress Plugin from Google
Web Stories for WordPress is a new plugin from Google that’s designed to make it easy to add Web Stories to your site.
Without help from some kind of tool like this one, creating Web Stories requires coding and AMP knowledge. By enabling users to craft their content visually, this plugin gives many more publishers the opportunity to work in this new medium.
The Web Stories plugin uses a simple, drag-and-drop, What You See Is What You Get (WYSIWYG) editor. If you’ve ever used the Canva app, you’ll have an idea of what to expect. Speaking of Canva, the plugin features integrations with it and Unsplash that you can use to grab free assets for your stories.
There are also multiple templates available to help you create your Web Stories. Once you’re finished with your design, you can publish your new visual content with ease using the Web Stories block.
How to Get Started with the Web Stories for WordPress Plugin (In 3 Steps)
The Web Stories for WordPress editor makes it very easy to create engaging content without the need for complex code. In order to really understand how it works, it may be helpful to see it in action. The steps below will show you how to get started.
Step 1: Install the Plugin
The first step to creating your own Web Stories is to install the plugin. Head to your WordPress dashboard and navigate to Plugins > Add New. Then search for “web stories”:
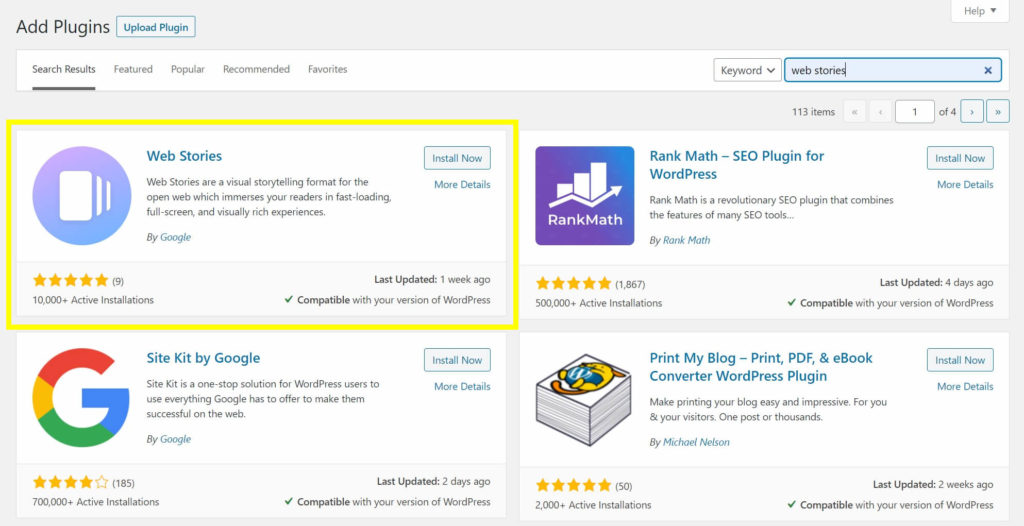
Click on Install, then Activate. You’ll now see a new Stories link in your dashboard sidebar.
Step 2: Create Your First Web Story
Now that you’ve got the plugin installed and activated, it’s time to create your first Story. Click on Stories in the WordPress sidebar. This will take you to the Web Stories dashboard:
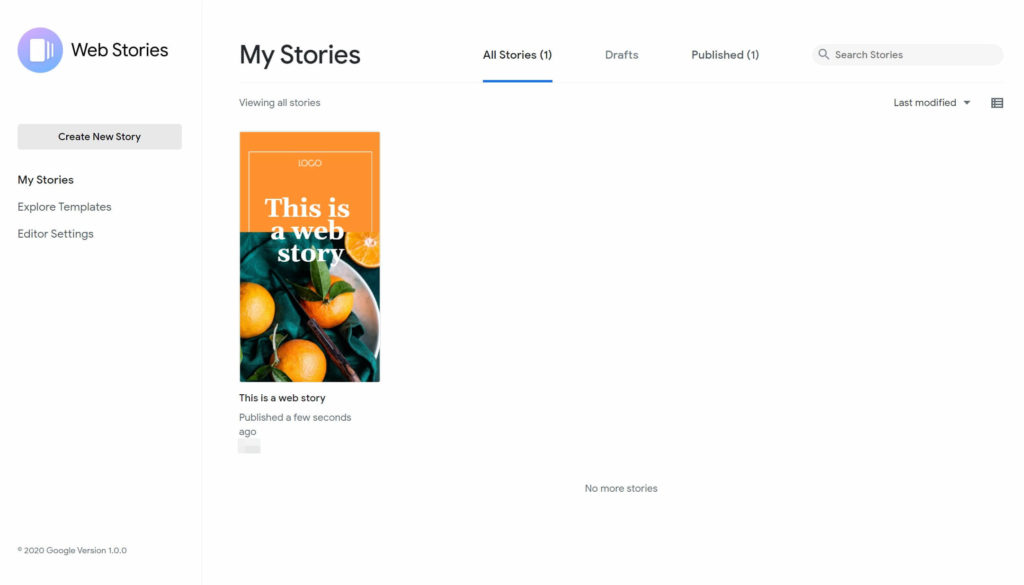
From here, you can view and edit the Web Stories you’ve created, explore the eight available templates, or create a new Story.
You can click on the Templates tab to check out sample Story templates. These are excellent for inspiration, but for this example, we’re going to create a new Story from scratch.
Click on Create New Story on the left side of the dashboard. This will open up the editor to a blank Web Story:
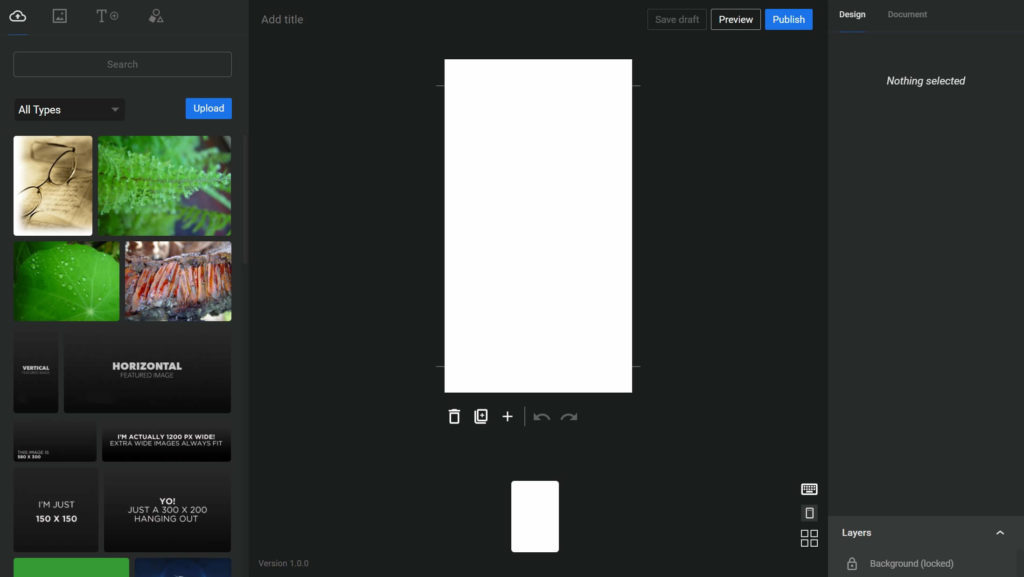
The current page is in the center. On the left, there are three panes: images (from your WordPress Media Library), text, and shapes. Drag any object from these panes into the editor to add it:
Select an object on the page to open the Design pane on the right, where you can find options for that component.
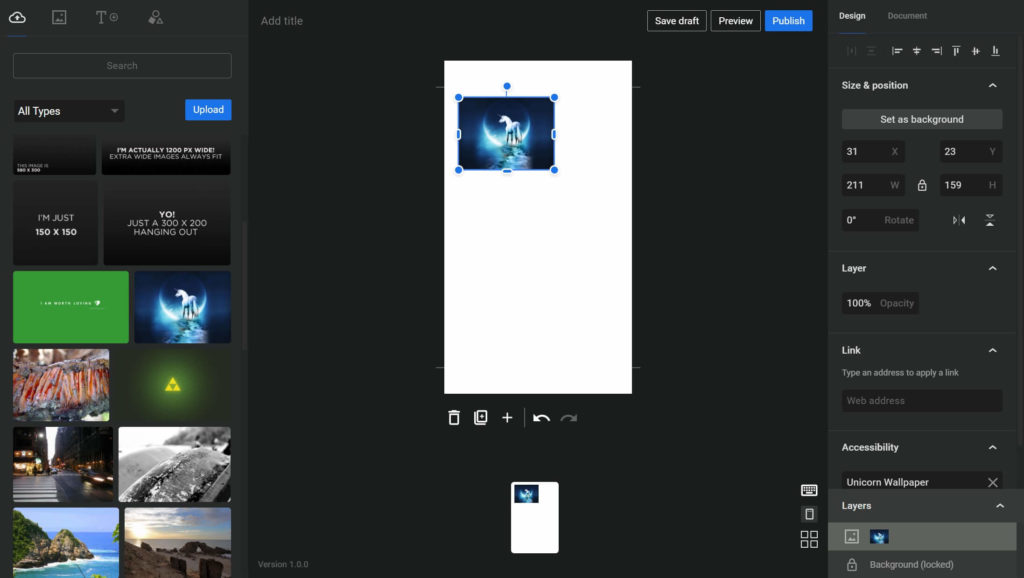
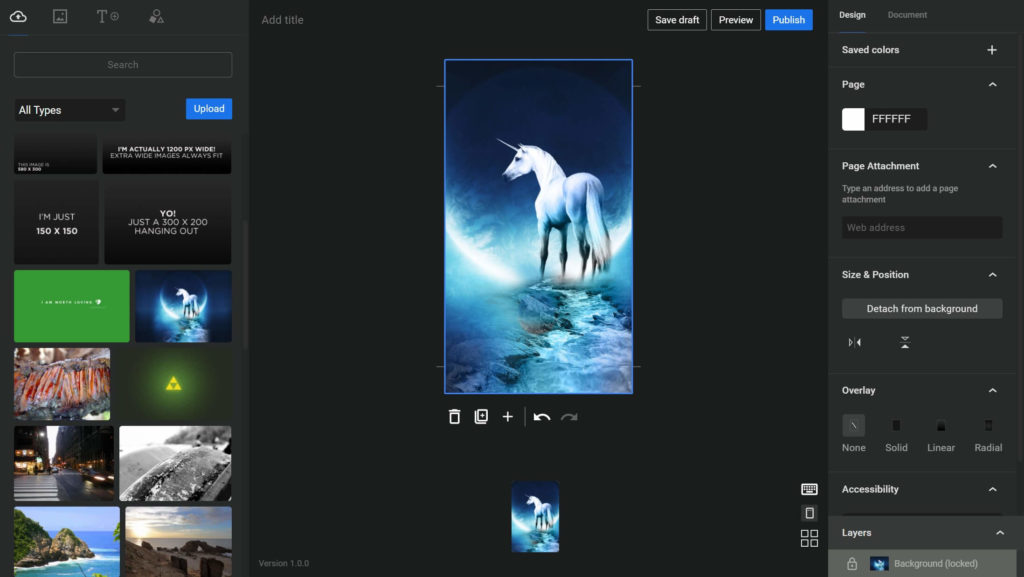
Let’s create a cover slide for our Story. We’ll select the image we added and click on Set as Background:
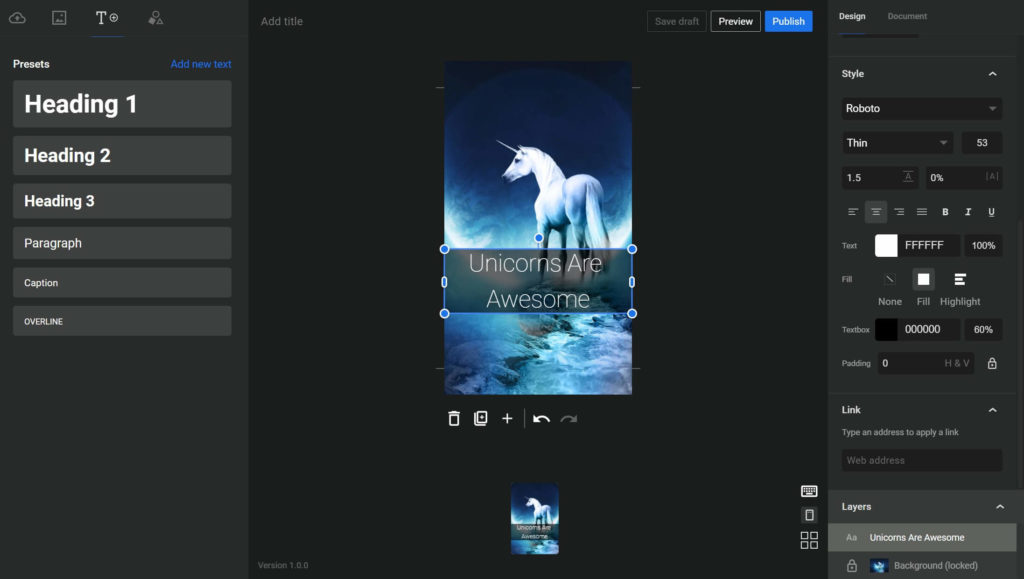
Next, we’ll add a heading block. This will be our Web Story title. Then we’ll use the design options to add a translucent background and adjust the font to make the title pop:
Now we have a completed page! To add another, click on the Add Page button in the center of the editor. Your Story can have anywhere from four to 30 pages.
Step 3: Publish and View Your Story
At any time, you can save your draft or preview your Story with the buttons in the top right corner of the editor. When you’re finished, click on Publish:
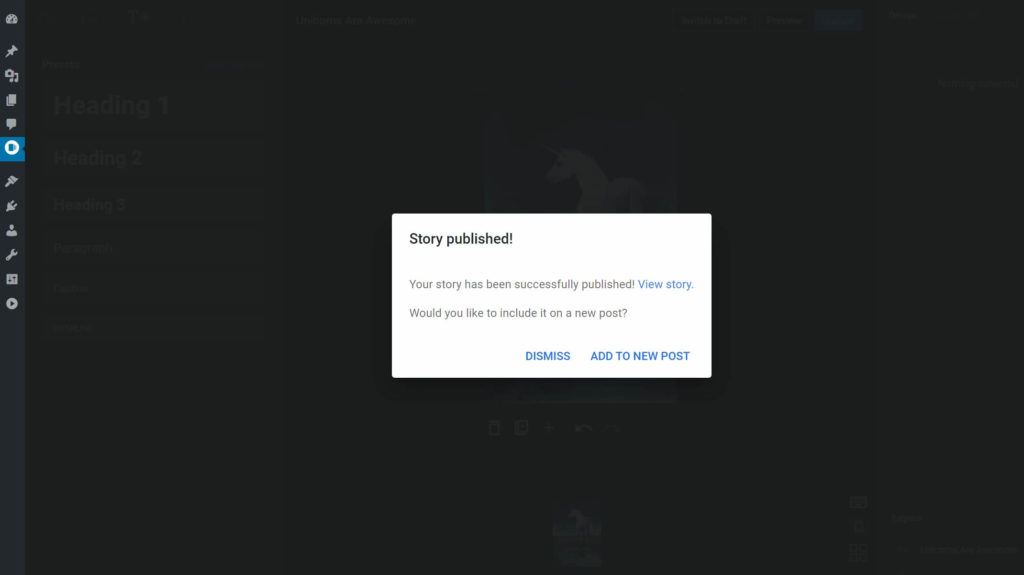
You can choose to view the Story right away, add it to a new post, or dismiss the popup and work on something else. Choose Add to New Post to create a new draft with your Web Story embedded.
Alternatively, if you don’t want to publish your new web story right away, you can always do so later using the Web Stories block we mentioned earlier. To do so, first navigate to Stories in your dashboard and find the one you want to publish.
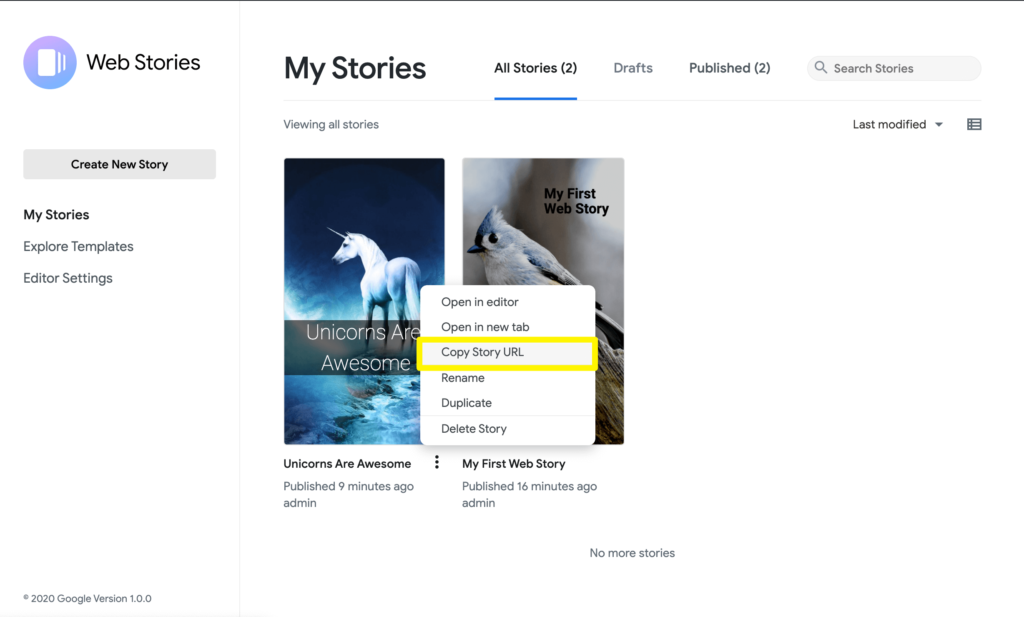
Click on the three dot icon next to the story’s title and select Copy Story URL:
Next, create or open the post where you want to include your web story. Select or search for the Web Stories block:
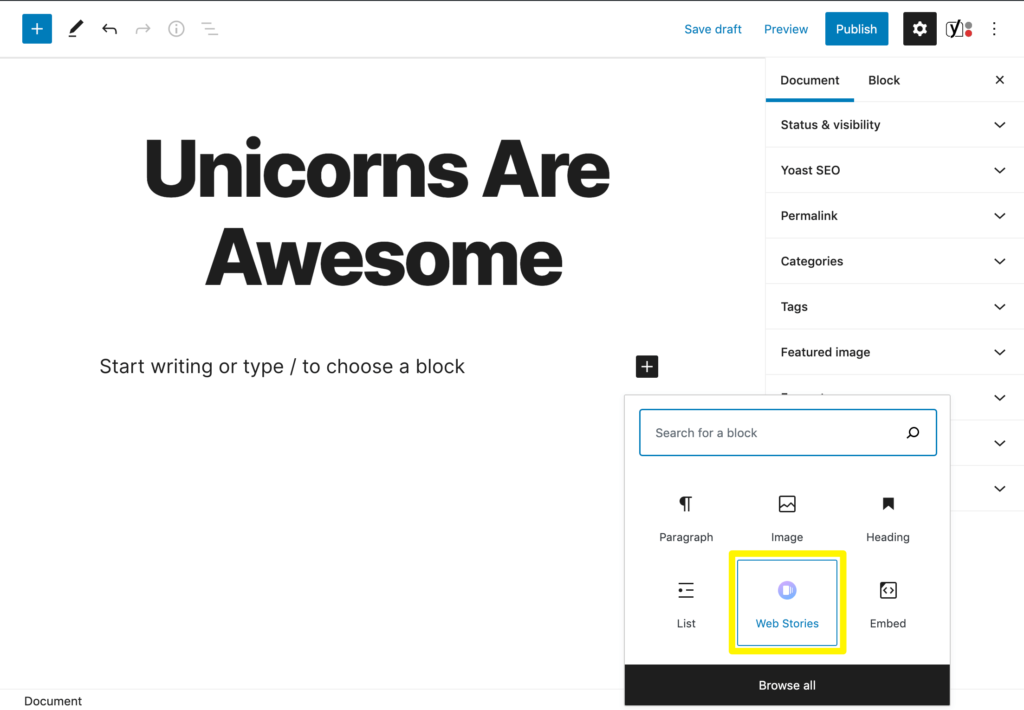
Then, paste your story’s URL in the field provided and click on Embed. It will appear in the editor:
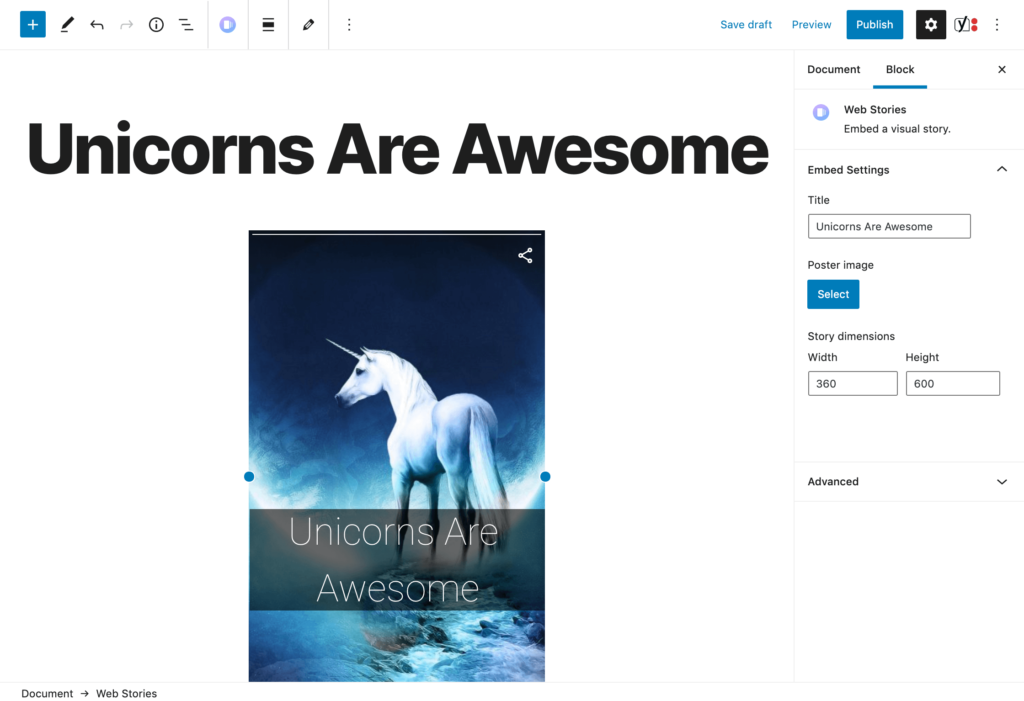
You can then continue editing the post and publish it when you’re satisfied.
Conclusion
If you’re looking for new ways to boost traffic and engage visitors on your site, look no further than Web Stories. The new Web Stories for WordPress plugin from Google makes creating this type of content quick and easy.
We covered a lot of ground in this article, including how to get started:
- Install the Web Stories for WordPress plugin.
- Create your first Web Story using the drag-and-drop editor.
- Publish your Web Story and create a new WordPress post to go with it.
What do you think of Google’s new Web Stories plugin? Let us know in the comments section below!
5 Comments