You may be reluctant to migrate your WordPress site to another hosting provider yourself, especially if you’ve ever broken it accidentally while tinkering under the hood or had an update crash. You know the panic that results from seeing an error message where your website should be.
Thankfully, there are several tools that can help you migrate to a new host without issue. Unlike with proprietary website builders, you can pack up your WordPress site and move on to greener pastures with a few simple steps.
In this article, we’ll explore some of the reasons you may want to migrate your website, followed by a step-by-step guide to do so using a migration plugin. Let’s jump in!
Why You May Want to Migrate Your WordPress Site to a New Host
There are many reasons why you may want to move your WordPress site to a different host. Some of the most common motivations for such a change include:
- Financial: You’ve found a better price on the same services, or you can earn as an affiliate with a different hosting provider.
- Technical: You need (or want) features your current host doesn’t provide, such as developer tools, advanced analytics, better server capabilities, or increased security.
- Poor customer service: You’ve run into significant trouble trying to get assistance from your host’s support team, either for technical or account-related issues.
Your business depends on a smoothly running website. If your host isn’t delivering on these fronts, it can impact your ability to manage key responsibilities. In that case, you’re better off making the effort to find a provider that will set you up for success.
How to Migrate Your WordPress Site to a New Host (In 4 Steps)
Migrating your website isn’t complicated when you prepare ahead of time and take the appropriate steps. There are a couple of methods you can use to do so. You can move it manually, or if you’d prefer some guidance, there are several plugins that can assist you.
This post will walk through the process using Duplicator. It’s one of the most popular and highly-rated migration plugins, and a beginner-friendly solution. Here’s how it works.
Step 1: Prepare for Migration to Make a Smooth Transition
Before you can start migrating your site, you need a place to move it to. This is a good time to see if your new provider offers a free or affordable migration service as an option. Many do.
If not, find your DNS settings and keep this information on hand. Then head back to your WordPress site and get it ready for the big move.
Delete any excess files you don’t need from your website, such as old themes, unused plugins, outdated backups, etc. This will save time, especially during the upload to your new server. It’s also wise to ensure your website is current with all WordPress, theme, and plugin updates.
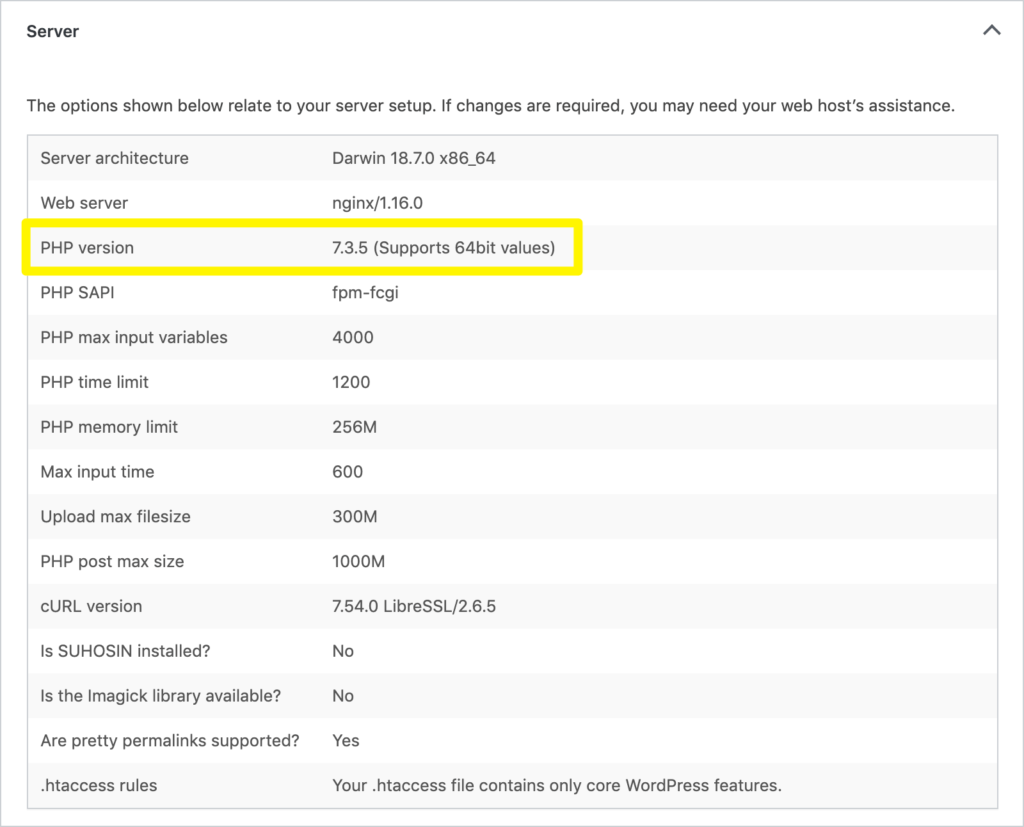
Next, check the PHP version of your current server and your new one. Make sure these are compatible or your deployment will be flagged with a warning.
To view your current server’s PHP version, go to Tools > Site Health > Info > Server in your WordPress dashboard, or look for it in your current hosting account settings:
You’ll also need to create a new empty database with full user rights for your new website, as you would when installing WordPress manually. Make note of your database name, username, and password. You’ll need these later to complete your migration.
Finally, it’s always a smart idea to create a backup of your website before you make any changes. Once you’ve completed these checks and prepared for migration, it’s time to put Duplicator to work.
Step 2: Install and Run Your Migration Plugin
The Duplicator plugin works by compiling your website’s files and database into a ‘package’ that you can export and then re-install on your new server. To get started, install and activate Duplicator on your WordPress site, then navigate to Duplicator > Packages > Create New:
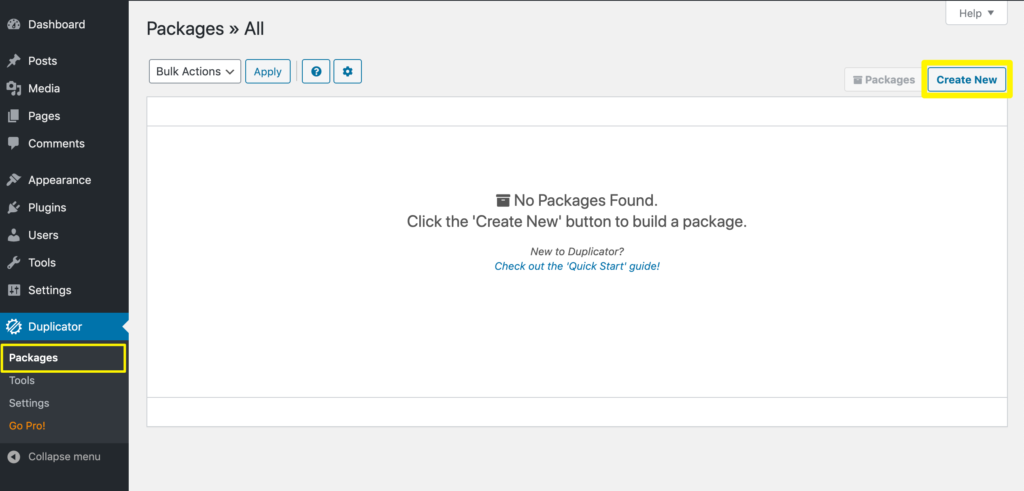
If you like, you can use the options on this page to specify what content from your site should be exported for migration to your new host. By default, your entire site will be included. Click on Next to finish creating your package.
Then, Duplicator will run a scan to make sure your site is ready to migrate:
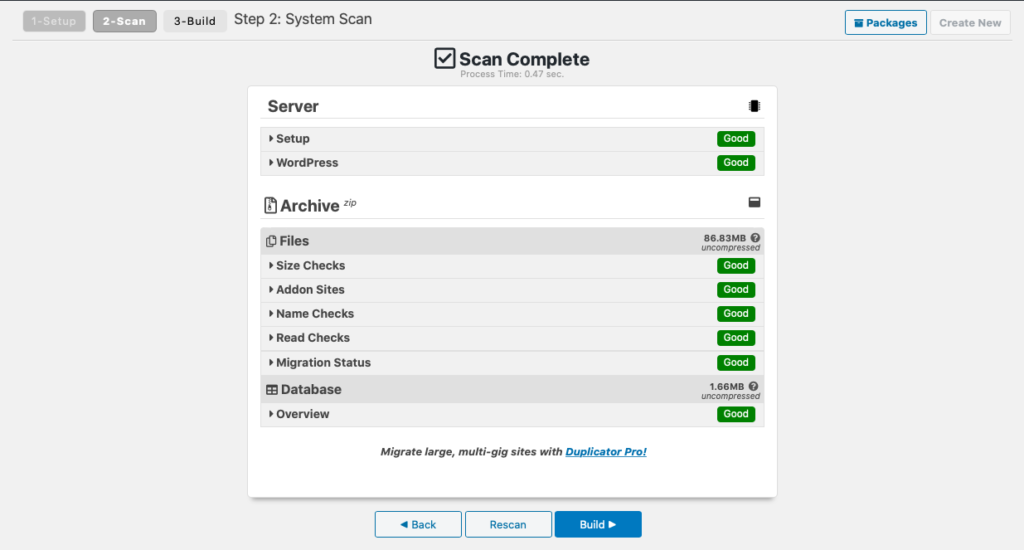
If errors are flagged, resolve them before proceeding. When everything is in order, click on Build.
It may take a few minutes for Duplicator to compile everything. Once your package is built, select One-Click Download to download both the Installer (which will help with moving your site to your new host) and the Archive (your site’s files and database):
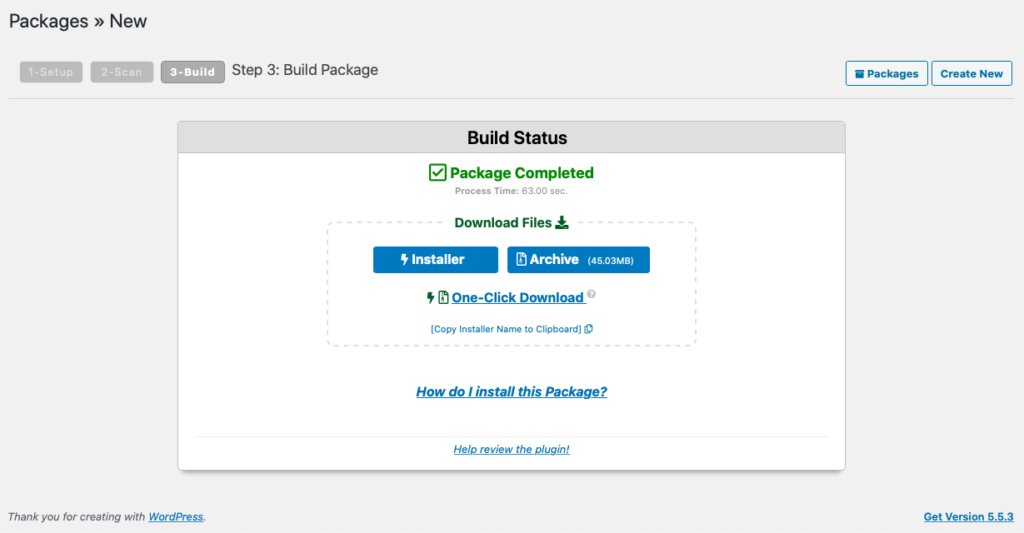
Your website is now packaged and ready to migrate.
Step 3: Upload Your Site’s Files and Deploy the Migration Plugin Again
The next step is to upload your package to your new website’s empty directory – usually the public_html or www folder on your server. This part may be a bit tricky for less experienced users. You’ll need to connect to your server via File Transfer Protocol (FTP) or use your new host’s File Manager tool.
Once your Duplicator package is successfully uploaded to your new server, open your preferred browser and go to yourwebsite.com/installer.php to run the Installer:
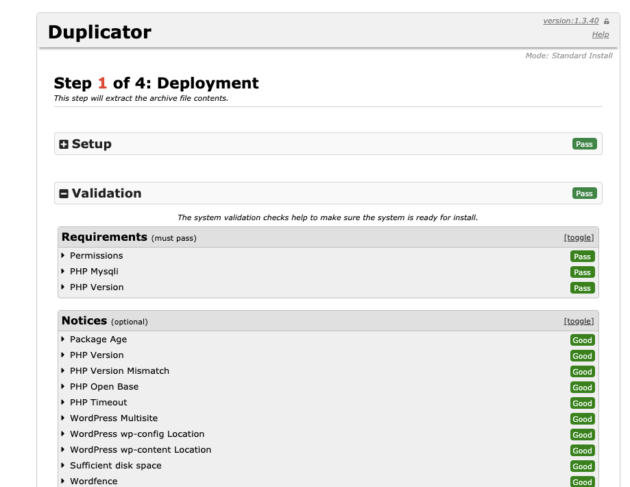
Duplicator will run another check. Select the checkbox next to I have read and accept all terms & notices if you are ready to proceed.
Enter the database setup information from the database you created in Step 1 and click on Test Database. If it passes, click on Next.
On the following screen, Duplicator will ask you to update your data. These settings are typically used if you’re moving your site to a new domain, so you shouldn’t have to touch anything here. Just click on Next:
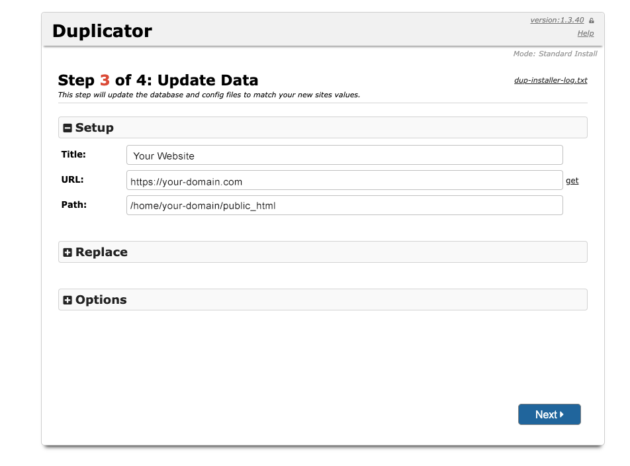
Duplicator will then complete the upload process and show you a button to log into your WordPress dashboard. Clicking on it will remove the Installer from your site and finalize the installation:
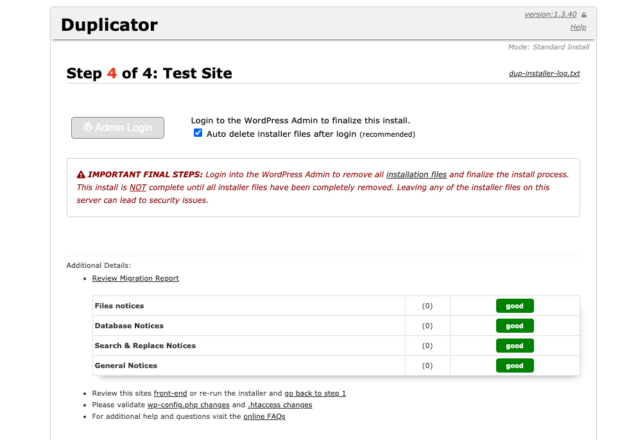
You’re now done with Duplicator. Your files and database are located on your new host’s server. However, there’s one last step to complete your migration.
Step 4: Update Your Domain Name System (DNS) Settings to Point to Your New Host
Although your website has moved, your domain name is still pointing to your old host’s server. In order to make sure visitors are directed to the right place when they try to access your site, you need to update your DNS settings. This process is kind of like setting up your forwarding address with the postal service.
To do this, you’ll need to find your new host’s nameservers. This information should be available in your account settings. They’ll look something like ns1.yourhost.com, and there will likely be two of them.
Then log in to your domain registrar account (which may be your hosting account, if you bought your domain from the same company). The exact process from here will vary a bit depending on which provider you’re working with, but the basic steps are as follows:
- Locate your domain management settings for your WordPress site.
- Find your Nameserver settings.
- There should be a setting where you can change your nameservers. Select the Custom option and enter the nameservers for your new host.
Contact your domain registrar’s support team if you need help.
It may take several hours or even a couple of days for your DNS changes to propagate, so don’t cancel your current hosting right away. That way, visitors will still be able to see your content while the update takes place.
Conclusion
Migrating a website may seem like a formidable task, but with some simple preparation and help from the Duplicator plugin, it’s a task you can handle yourself if you choose. Duplicator walks you through the process, flagging any areas of concern in advance so you won’t have to track down issues after the fact.
To migrate your WordPress site, follow these four basic steps:
- Prepare for migration to make a smooth transition.
- Install and run your migration plugin.
- Upload files and deploy the migration plugin again.
- Update your DNS settings to point to your new host.
Do you have any questions about using Duplicator to migrate your WordPress site? Let us know in the comments section below!

No Comments