Using a WordPress membership plugin is a great way to create a social network-like community around your site, monetize your website with restricted content or paid memberships, and more. In the following review, we want to look at one of those plugins: ProfileGrid Memberships.
It is available for free in the WordPress directory and has more than 8,000 downloads and a solid 4.6/5-star rating at the time of this writing. The plugin comes with a wide range of features and functionality that we will dive into in this blog post. In addition, we will also take a look at the premium version and the features it adds to the user experience.
Let’s go take a look at this WordPress membership plugin.
ProfileGrid Memberships Setup and First Steps
You can install ProfileGrid Memberships on your WordPress website like any other plugin. Simply go to Plugins > Add New and search for it by name.
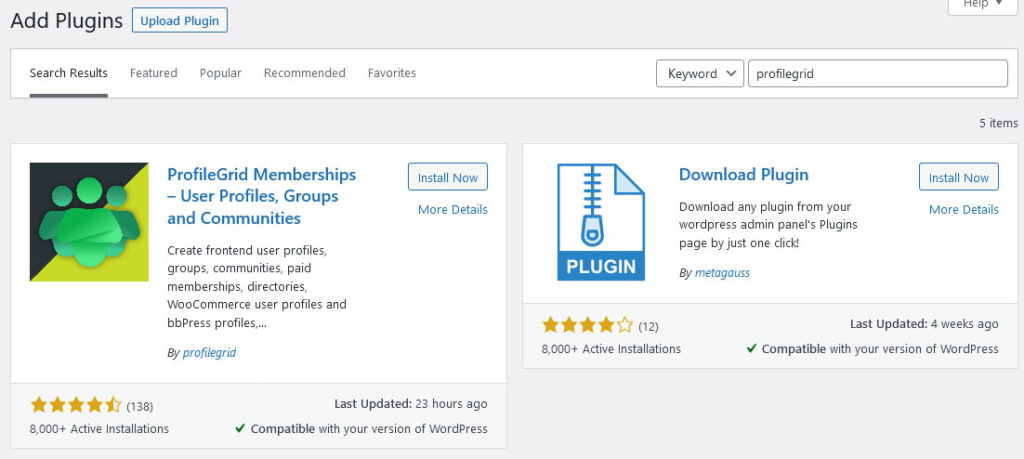
In the upcoming results, click Install Now and then Activate after it’s done downloading – that’s it. After the installation is complete, you will find a two new menu items called ProfileGrid and User Blogs in your WordPress back end.
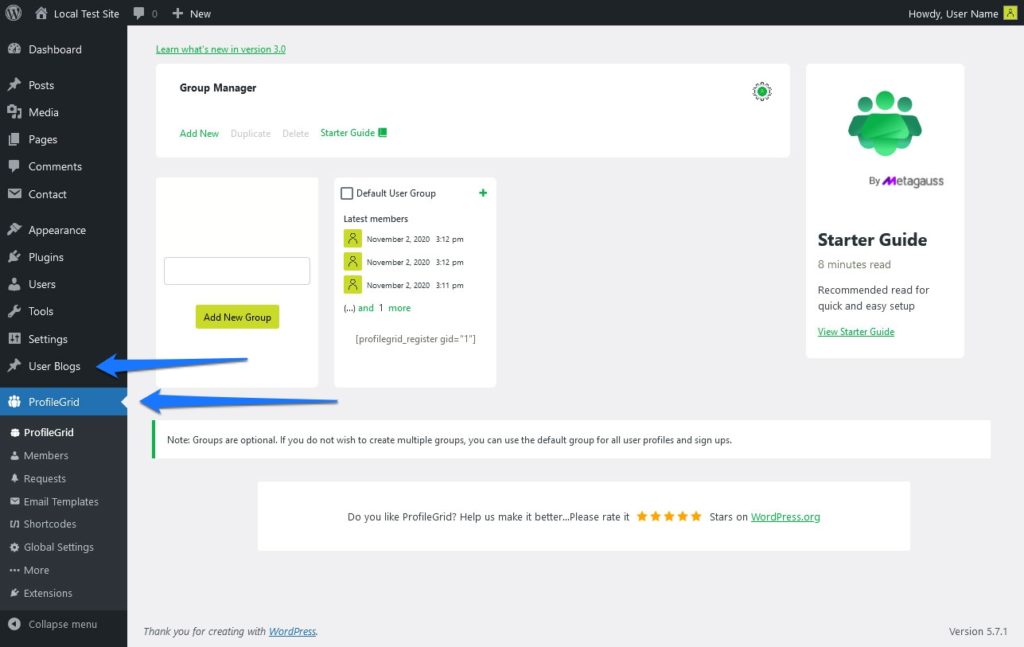
Available Plugin Options
Here are the options of the ProfileGrid menu and what’s hidden behind them:
- ProfileGrid — The main dashboard of the plugin with the group manager.
- Members — Here you can view and manage members on your site, active and deactivate their membership, assign them to groups, delete them, and more.
- Requests — Approve and decline membership requests for closed groups.
- Email Templates — Edit and manage messages users will receive when they take various actions, like join a group or delete their membership. You can also create your own message templates.
- Shortcodes — A list of available shortcodes to include different ProfileGrid Memberships elements on your posts and pages. We will talk a lot about them below.
- Global Settings — Configure settings of the main plugin as well as any extensions you might have installed on your site.
- More — Contains a preview of some of the options you get with premium extensions.
- Extensions — A list of available ProfileGrid Memberships extensions and other premium offers.
Under User Blogs, on the other hand, you will find options to manage user-generated content. More on that soon.
Plugin Pages
In addition to the settings menu, the plugin also creates and publishes a number of pages.
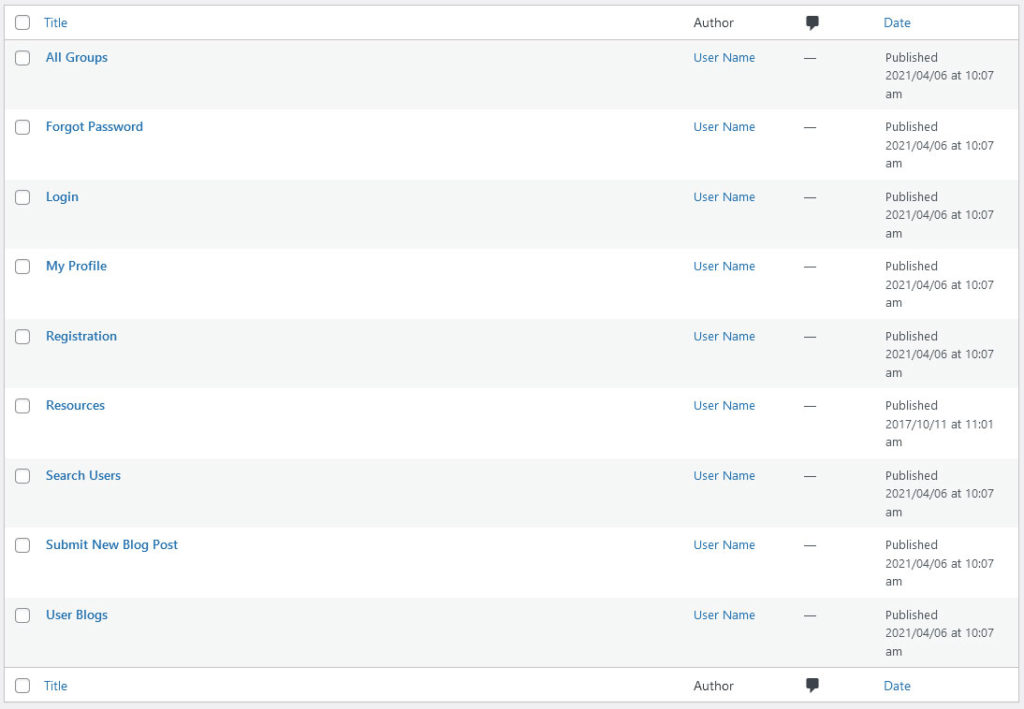
We will go over what to use each of them for further below, but it is good to have an overview first.
- All Groups — Lists all groups present on your site.
- Default User Group — This page is an example for individual group pages. You can change it to whichever group you want and also create additional ones.
- Forgot Password — The password recovery page for your site members.
- Login — The default ProfileGrid Memberships login page for users.
- My Profile — Here is where site members will find their user profile when they are logged in.
- Registration — Where users can register for your site. You can adjust the shortcode ID to control which group they will register for.
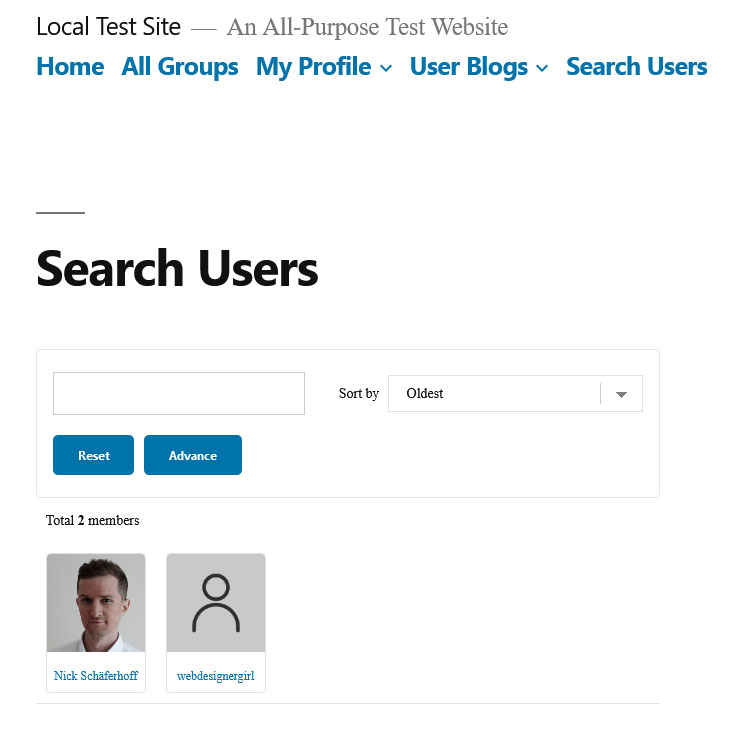
- Search Users — A page to search other users in order to connect with them.
- Submit New Blog Post — This page gives site members the ability to create user-generated content.
- User Blogs — Where blog posts created by other users will appear.
It’s important to note that these are all just example pages. You can configure all of them however you want and also place different functionality in other places of your site, not just pages. That’s because ProfileGrid Memberships creates all of these via shortcodes (as will come up often in this review). You can easily see this when you open any page in the editor.
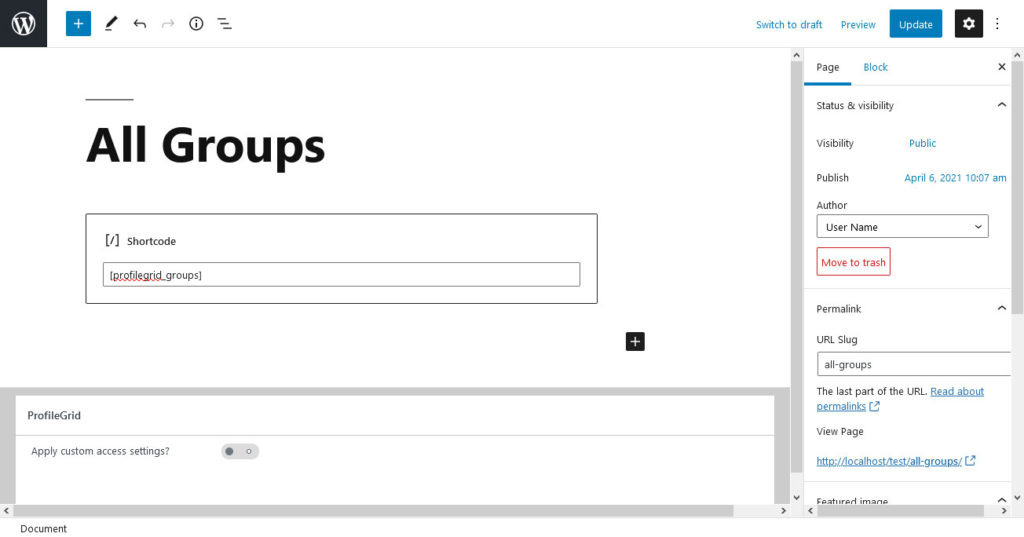
As a consequence, you can name the pages whatever you want and place the functionality where you find it most appropriate. For example, if you want to have the login form in the sidebar of your homepage, you can easily do this as well.
Using the ProfileGrid WordPress Membership Plugin
In order to better understand how to use this membership plugin, let’s build a simple example site in order to explore it.
1. Create a New Group
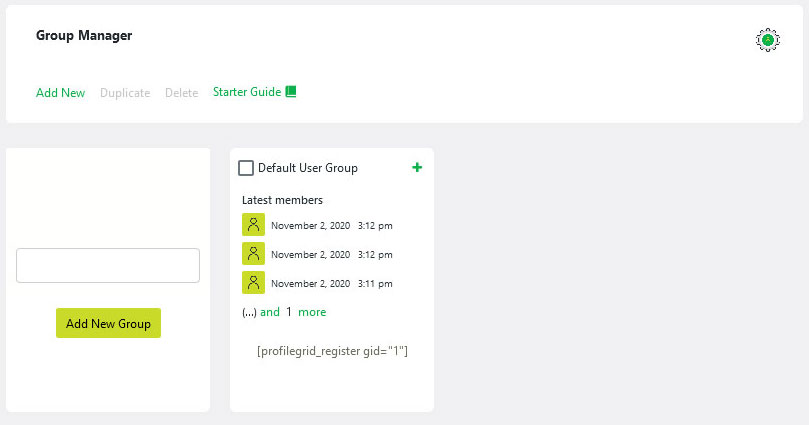
Groups are one of the main building blocks in ProfileGrid Memberships. In the beginning, you have one default group on the dashboard.
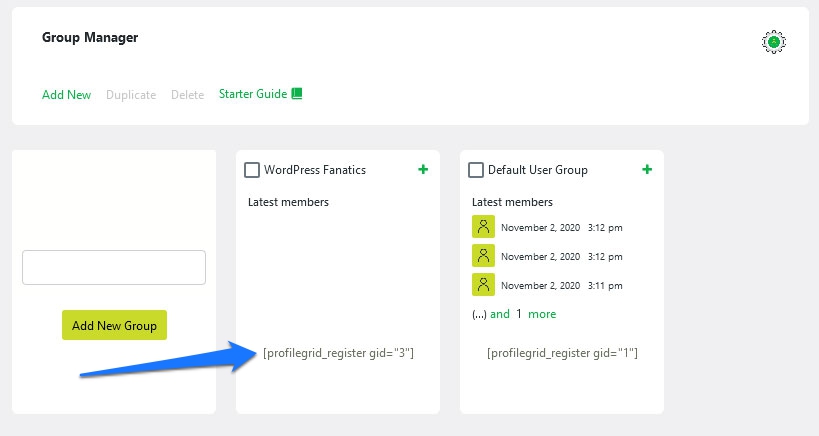
If you don’t need to separate users into different cohorts, you can use it right away. Alternatively, you can create a new group by adding a name to the respective field and clicking Add New Group. It will then appear as its own card in the dashboard.
2. Customize Group Settings
When you hover over any group, you find two links to options named Settings and Fields. Under Settings, you find everything you need to adjust the behavior of the group to your wishes.
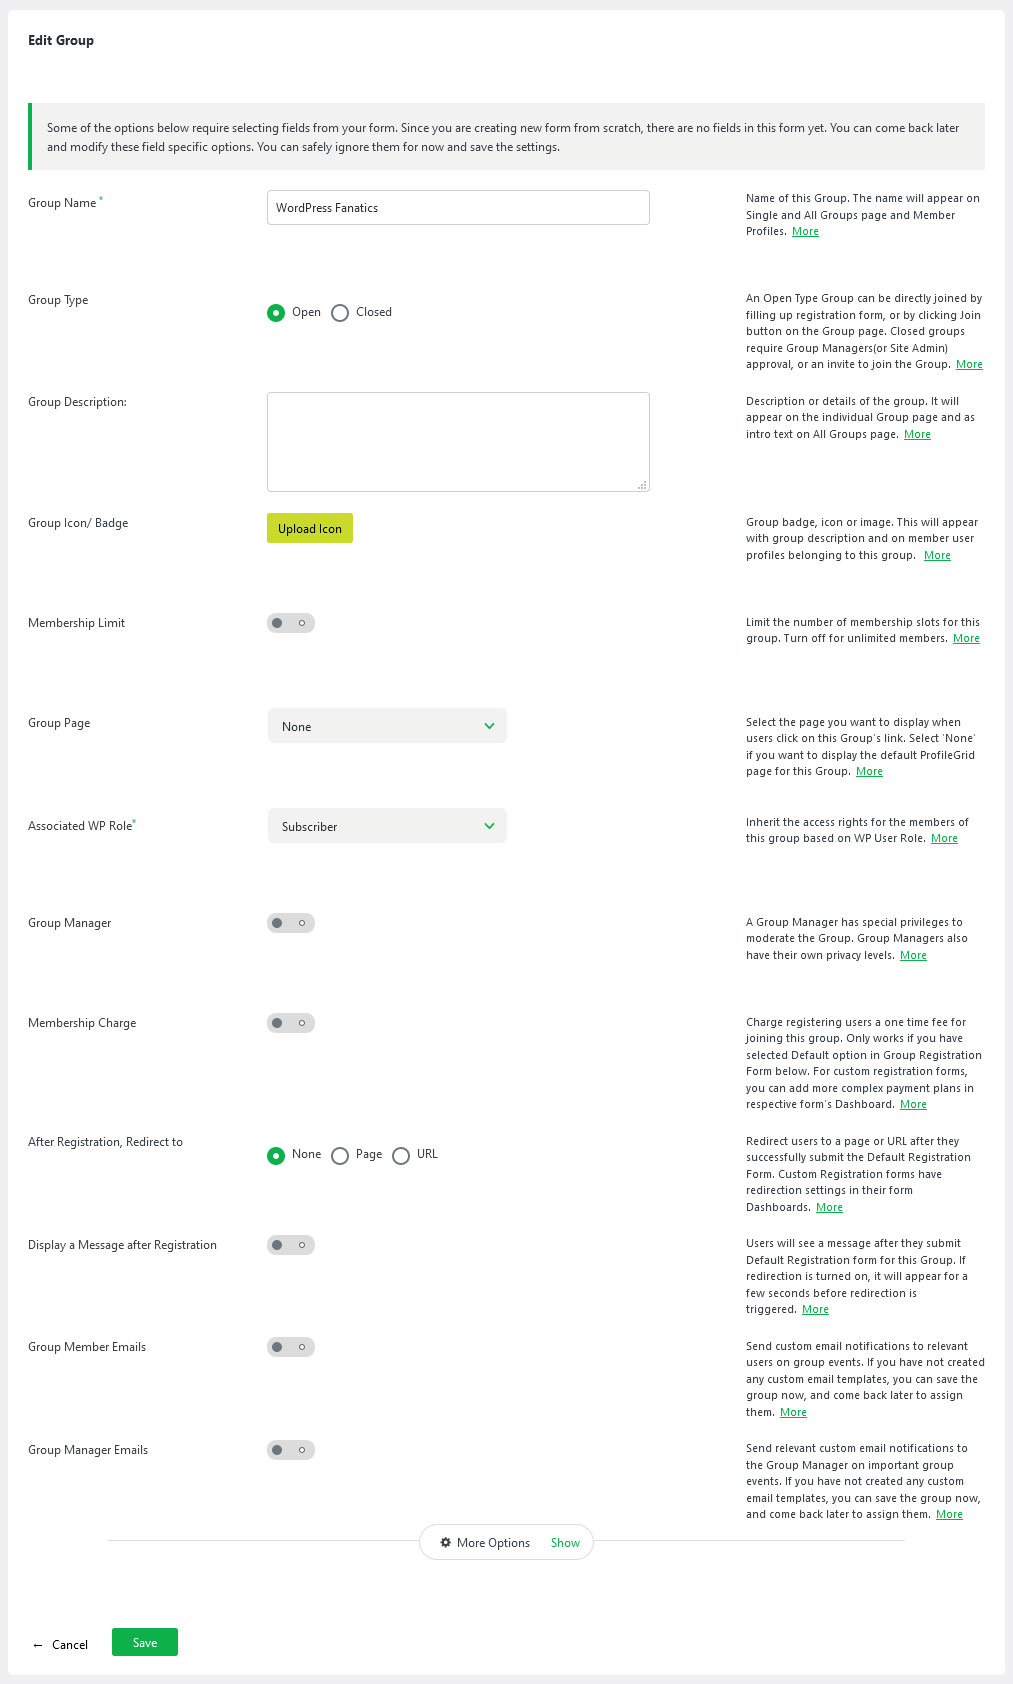
There are a lot of options here:
- Group name — The name of the group. It’s what you gave it during the creation but you can always change it here.
- Group type — Open or closed group. The first are open for everyone, for the second, members need to be approved by an administrator to join.
- Group description — The group description that will appear on the group page and also on the list of all groups.
- Group Icon/Badge — Here, you can upload and assign a visual that will appear on the page together with the group.
- Membership Limit — Limit the number members and compose a message that will display when the group is full.
- Group Page — Assign a page to the group. Leave it as None to use the default page that ProfileGrid Memberships creates.
- Associated WP Role — The user role that new group members will have assigned to them.
- Group Manager — Assign a group leader and give them a special title if you want.
- Membership Charge — Set an optional price tag to join the group.
- After Registration, Redirect to — Optionally define a page that people will be redirected to after joining.
- Display a Message after Registration — Create a message that new members will see after joining.
- Group Member Emails — Configure which emails will be sent to members at certain events like joining the group, a password change, or membership termination.
- Group Manager Emails — Similar to the above but for group managers.
Change the settings to your liking and forget to save!
3. Configure Fields
Fields, on the other hand, allows you to configure the information that people need to fill in when joining group and that will appear on their user profile. Note that these don’t always have to be the same.
Using this is very easy. Simply add, edit, and delete form fields. When editing or creating new fields, you also have a multitude of options to configure them.
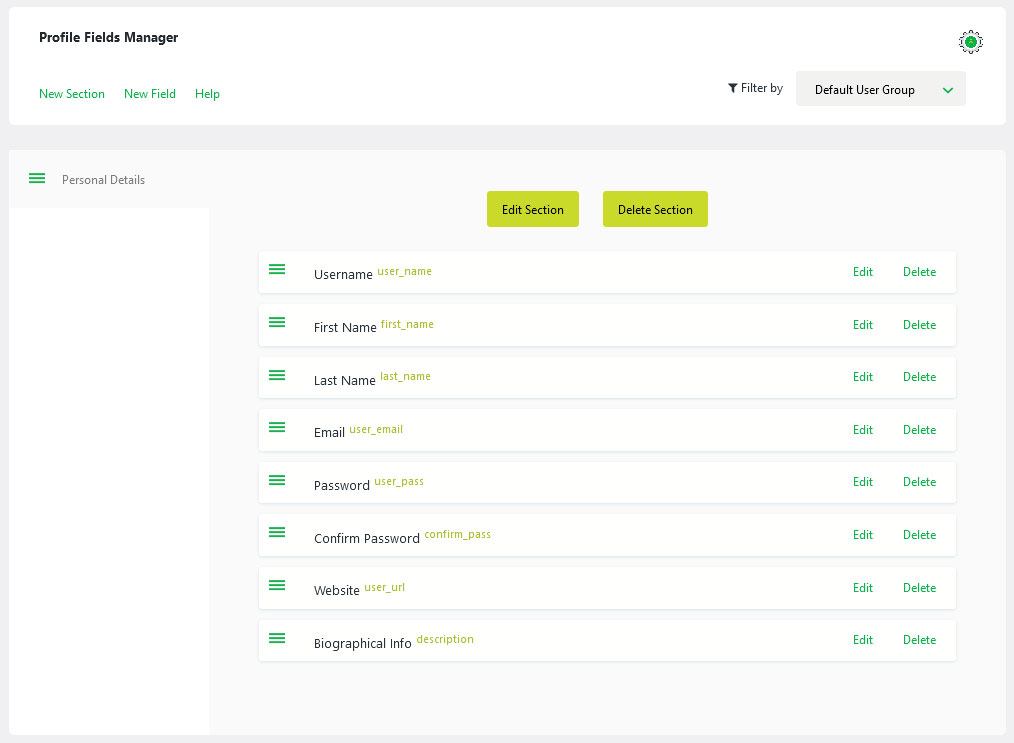
Style them with CSS or icons, assign them to groups and sections, determine whether to include them in the registration form and/or display them on user profiles.
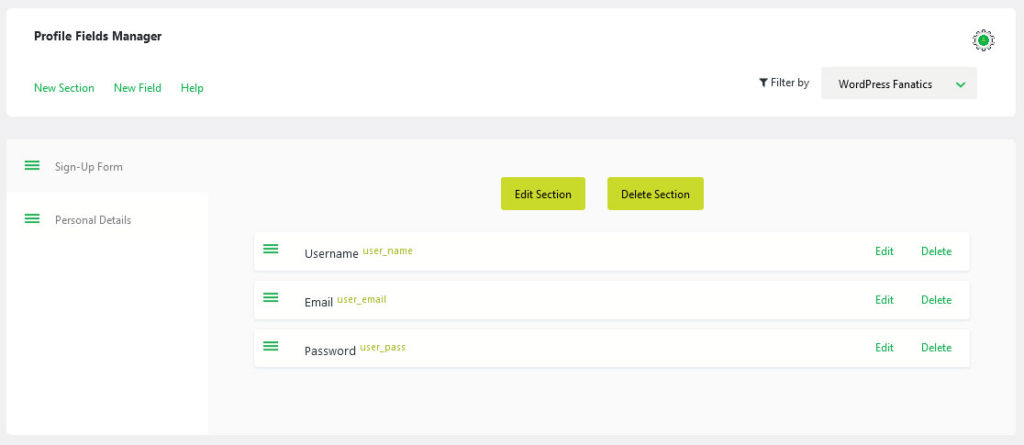
You can also create sections with separate field setups to use in different places. For example, you can create one section that contains information that users have to fill in to sign up. You can then create another one with information they can add to their user profiles if they wish to.
4. Allow Users to Register
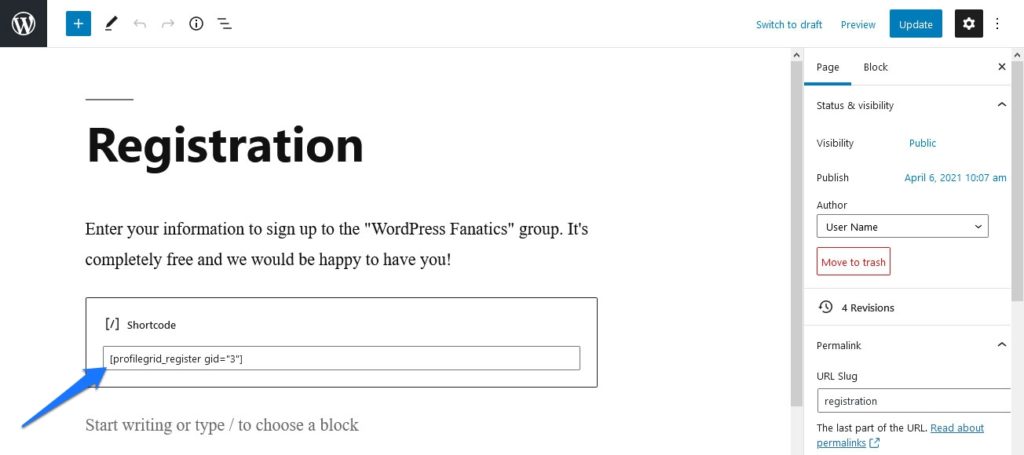
To create a registration page for any group, you can use the shortcode displayed in the card on the dashboard.
Simply mark and copy it, then paste it to the page or place on your site where you would like the registration form to appear.
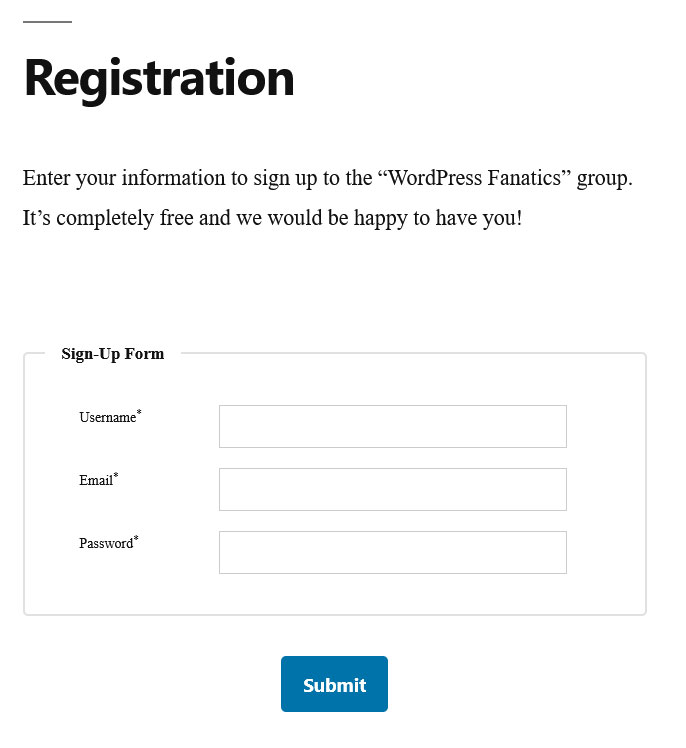
As already mentioned earlier in the review, ProfileGrid Memberships automatically creates a page for this called Registration, so this might be a good place to start.
After that, when you look at front end, you can see your form right there.
In addition, when you fill it in to sign up, you can also see the new member information coming in on the back end.
6. Check User Profiles
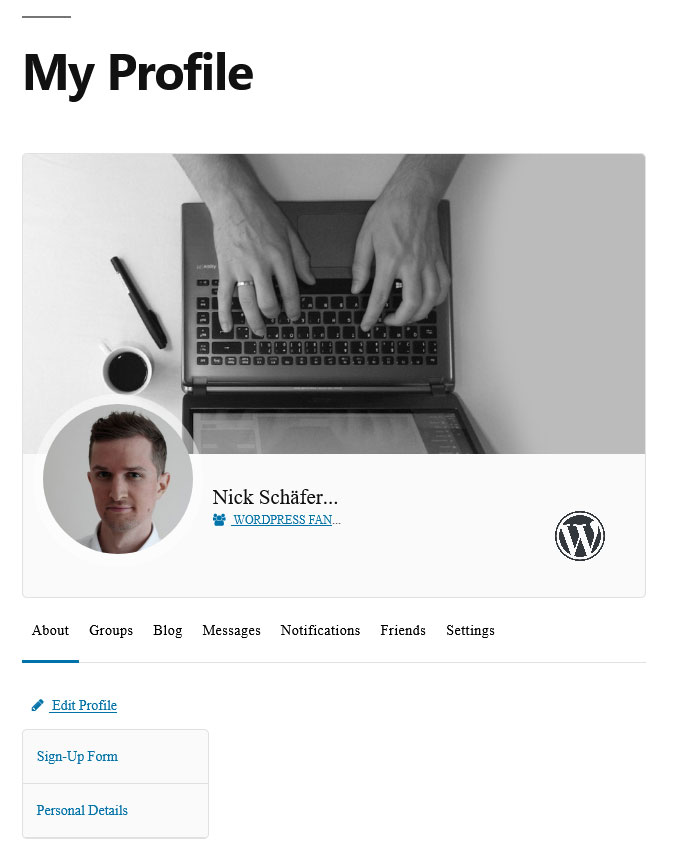
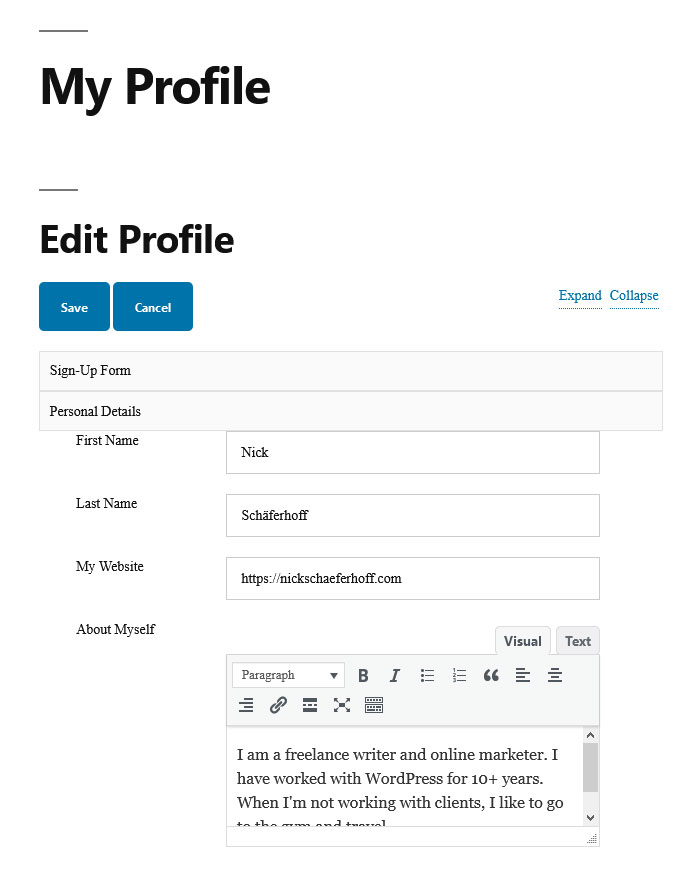
When someone has registered to your site, they can then access their user profile under My Profile when logged in.
Here, they have a multitude of options. For one, when they click Edit Profile, they are able to add more information to display on their page (if it’s set up that way).
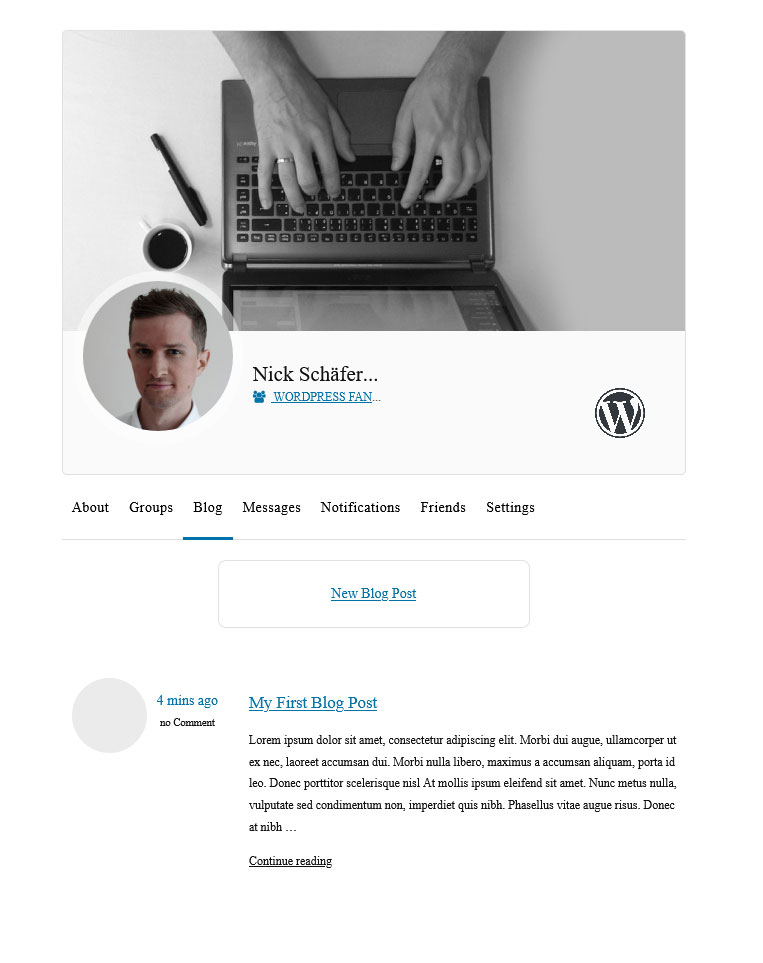
Members profiles also come with the following information:
- Groups — See all groups that this person is a member of.
- Blog — All blog posts by this user (more on that below).
- Messages — Here, other users can start a conversation with this person.
- Notifications — Activity log. Shows when they join a new group, etc.
- Friends — Any other users this profile is connected to.
- Settings — Fill in account details, change the password, set the profile to private, and delete the account if you don’t need it anymore.
Overall, it looks a lot like what you might find on Facebook and other social networks. This is very cool to build a community and allow users to communicate among each other. Also, you can look for any other members with the search functionality (under the Search Users page by default).
7. Create Blog Posts
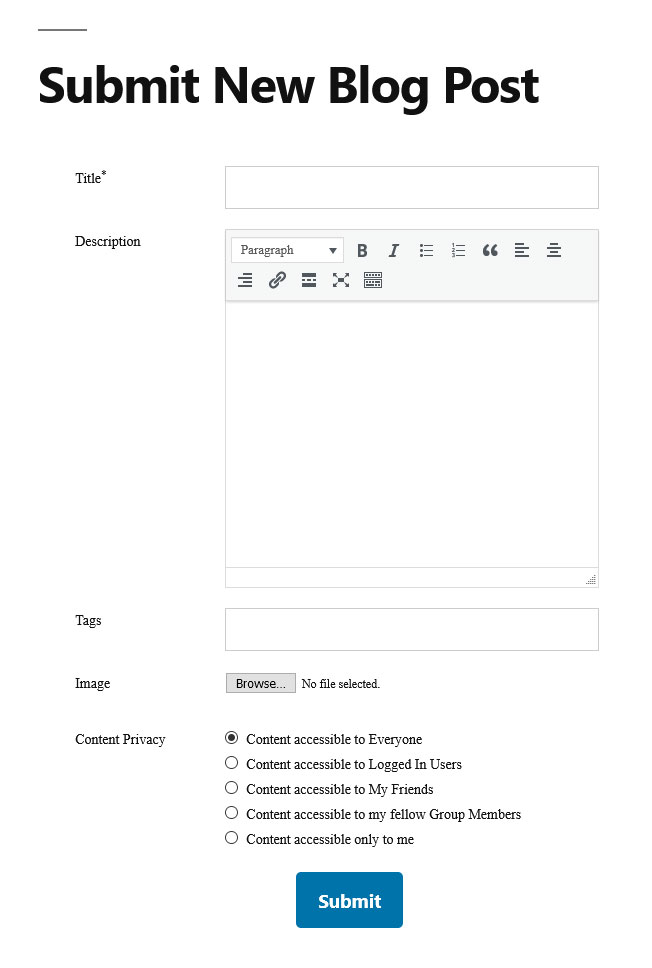
Another feature that members can take advantage of is writing content. This happens on the page Submit New Blog Post or any other page that you add the [profilegrid_submit_blog] shortcode to.
Just like a usual blog post, they can add a title, use the editor to add content, include tags, and even an image. At the bottom, they are able to control who should have access to the post, from everyone to friends, fellow group members, or even just themselves.
Once submitted and approved they will then appear on the user profile under Blog. Logged in users also find the option to write more blog posts here.
In addition, all blog posts submitted in this form will appear under User Blogs. Though, as all other things, you can customize this and place them wherever you want by using the shortcode.
Free ProfileGrid Memberships Extensions
The above covers the core functionality of the plugin. However, you can further extend it with addons. Even for the free version, ProfileGrid Memberships offers more than a dozen extensions on their website.
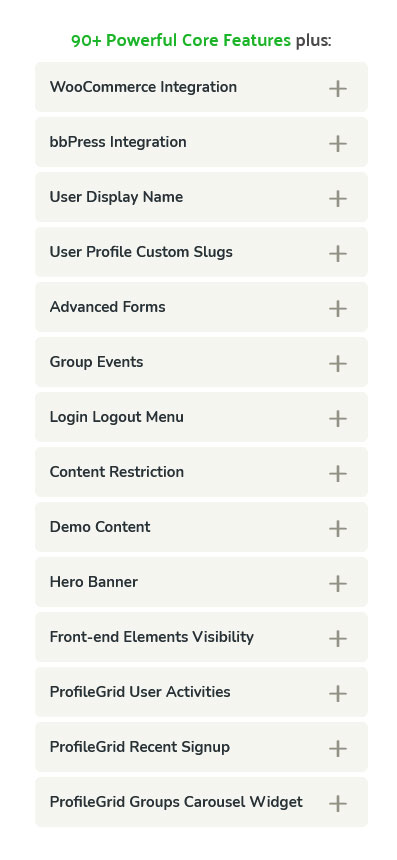
Among them are integrations with WooCommerce and bbPress, group event options, widgets to show user activity and recent signups, and more.
Simply click on any extension you are interested in, hit the Free Purchase button and it will take you to where you can add it to your cart and download it.
Premium Offers
On the same page you find ProfileGrid Membership’s premium offers as well. The plugin is also available as Premium and Premium+ editions.
In contrast to the free version, they both come with extra extensions. There are too many to list them all here. Addons range from the ability to add custom tabs to user profiles over MailChimp integration, Stripe Payments, more powerful options for group managers (more privileges, the ability to manage more than one group) to a multitude of integrations with WooCommerce.
Premium gives you a one-site license and updates and support for one year. Premium+, on the other hand, is for unlimited sites and lifetime updates and support.
New features are already in the pipeline. You can find the full list via the link above.
Last Thoughts: ProfileGrid Memberships Review
ProfileGrid Memberships is a powerful WordPress membership plugin that provides a myriad of features even in its free version. Seriously, there is too much functionality to cover in one review. This is just the tip of the iceberg.
If you want to find out about everything the plugin can do, you find a full list of features here. Needless to say, it has everything you need to build a thriving community on your WordPress site. Even building the next Facebook doesn’t seem out of reach.
My only point of critique is that it is a bit technical at times, which might be a deterrent for end users who are not developers. That and the documentation could use a bit more work.
However, aside from that, I fully recommend that you give ProfileGrid Memberships a try if your goal is to build a membership site in WordPress.
Have you tried ProfileGrid Memberships? What are your likes and dislikes? Tell us in the comments below!

No Comments