If you aim to build plugins for WordPress, making use of Git workflows can be extremely beneficial, especially to foster collaboration. However, figuring out how to set everything up is a challenge when you’re new to the process. Perhaps you’ve never seen Git before and don’t know how it works? Or maybe you’re unsure as to how it use it with Local?
Today, we’ll go over all of that. This post will discuss what Git is and how it works, then show you how to use it in Local. You will learn how to install Git, create a Git repository as well as best practices and workflows for using Local and Git together.
What is Git (And How Does It Work)?
Definitions are often the best place to start when learning a new tool or workflow. Git is a distributed version control system. It allows you to track source code changes when creating and developing software projects. The intent is to provide a cohesive space for developers and programmers to work together on development projects. And with it, you can establish goals for your projects like loading speed, data security, and more.
You can also use Git to keep track of changes made to files throughout a lengthy development process.
To be clear, Git is the software for maintaining version control. Other services like GitHub, GitHub Desktop, and GitLab make use of it. Other version control software exists but Git is by far the most popular. It is what most developers are familiar with and will use for their projects. That’s why we’ll focus on it here.
But first, let’s talk about how to create a new site in Local and then how to create a Git repository.
How to Install Git on Your Computer
In order to use this version control system, you first have to install it on your local machine. For that, head on over to the official download page, choose your operating system, and download the installation file.
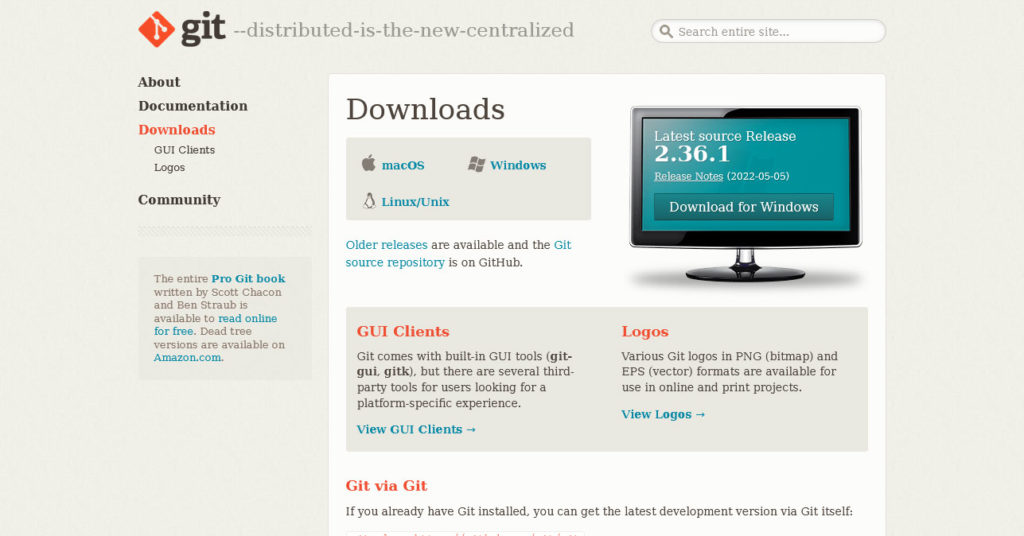
After that, run the file to start the setup process. It will ask you for things like where to save the program, whether to create various shortcuts, what to use as its default code editor, etc.
You will also have to decide whether Git should use its default name (“master”) for the first branch in new repositories, if the software should be available from the command prompt or only in bash, the OpenSSH and SSL library, and a few more features. For the sake of this tutorial, I simply went with the default settings.
Once the setup is finished, we are ready to move on.
How to Set Up a New Site in Local
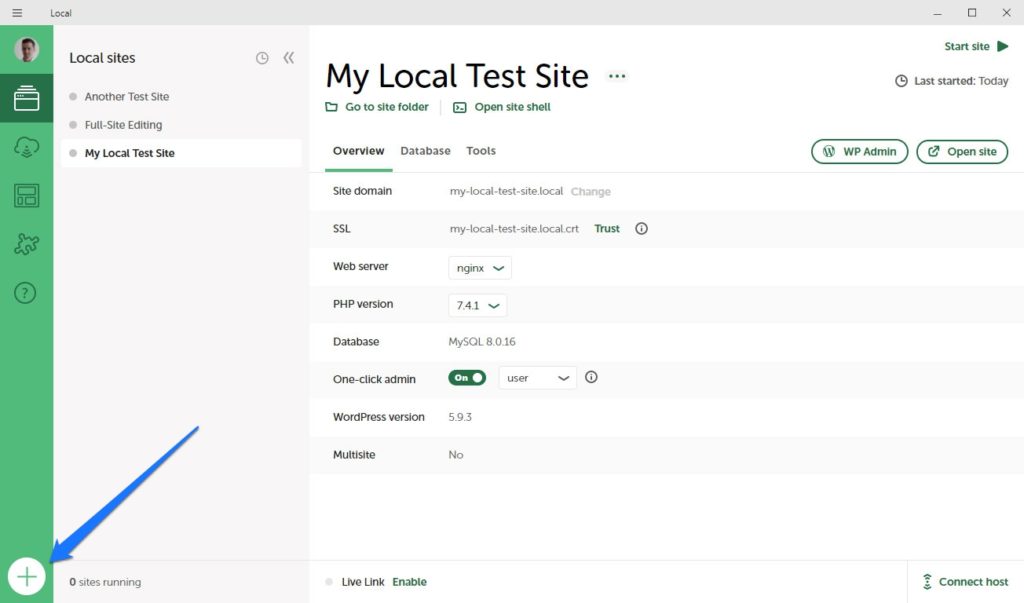
Next up, we will set up a site in Local to use for testing Git. Doing so is incredibly easy. Just follow the steps as follows:
- Open Local.
- Click the + icon at the left bottom corner of the screen.
- Configure the site name, local domain, and path on the hard drive.
- Set up the environment (PHP version, web server type, database)
- Input a username and password.
- Done.
Told you it was super simple. You need this site so you have a place to test your development projects, which may include things like themes, plugins, or other code snippets. You will manage the actual development process in the Git repository.
How to Create a Git Repository
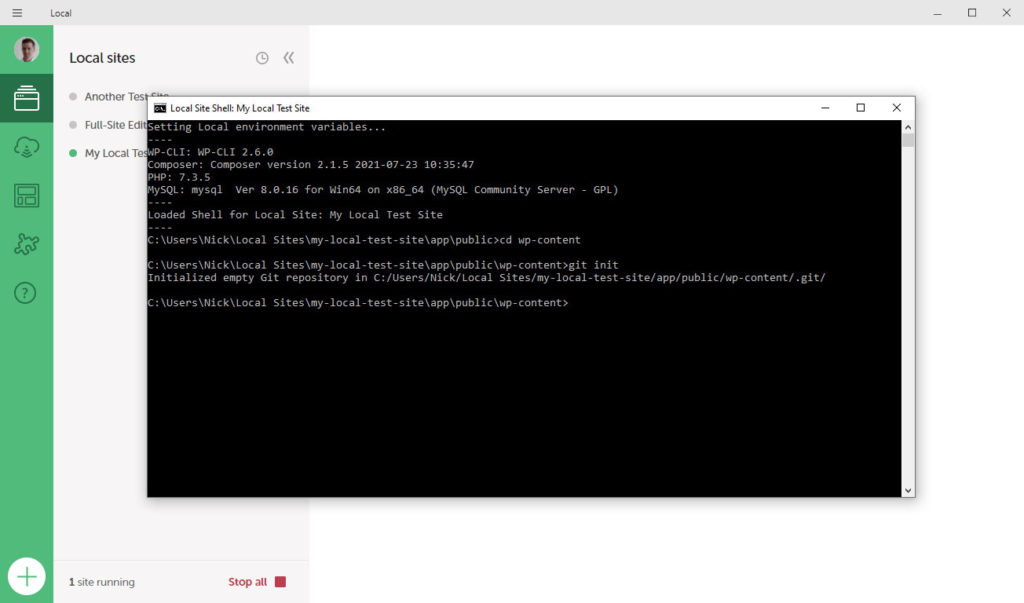
With your new website available in Local, you can now move on to creating a Git repository. To do this, you need to:
- Open Local.
- Right-click your newly created site and select the option, Open Site Shell to open the command line interface.
- Here, type in
cd wp-content. This will take you to the wp-content directory folder in your WordPress site. Similarly, if you wish to work with a specific theme, you’ll need to type incd themes/theme-directory-name. Or, if you wish to work with a specific plugin, type incd plugin/plugin-directory-name. - Next, type in
git initand press Enter.
Connecting to Github Desktop
After creating a Git repository, you’ll then need to add it to GitHub Desktop. This is the preferred tool in the official Local documentation, so that’s what we’re recommending you use as well.
If you don’t already have GitHub Desktop, you’ll need to download it. Install it as you would any other piece of software. One of the most important parts is that it will ask you for a username and email.
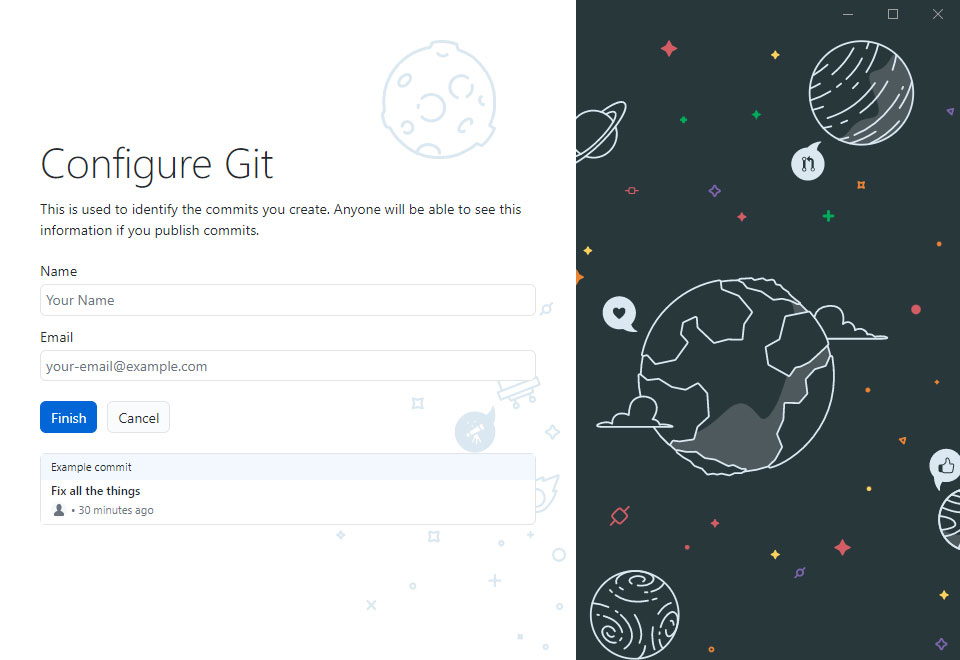
The username will appear for the commits you make, so this step is mandatory.
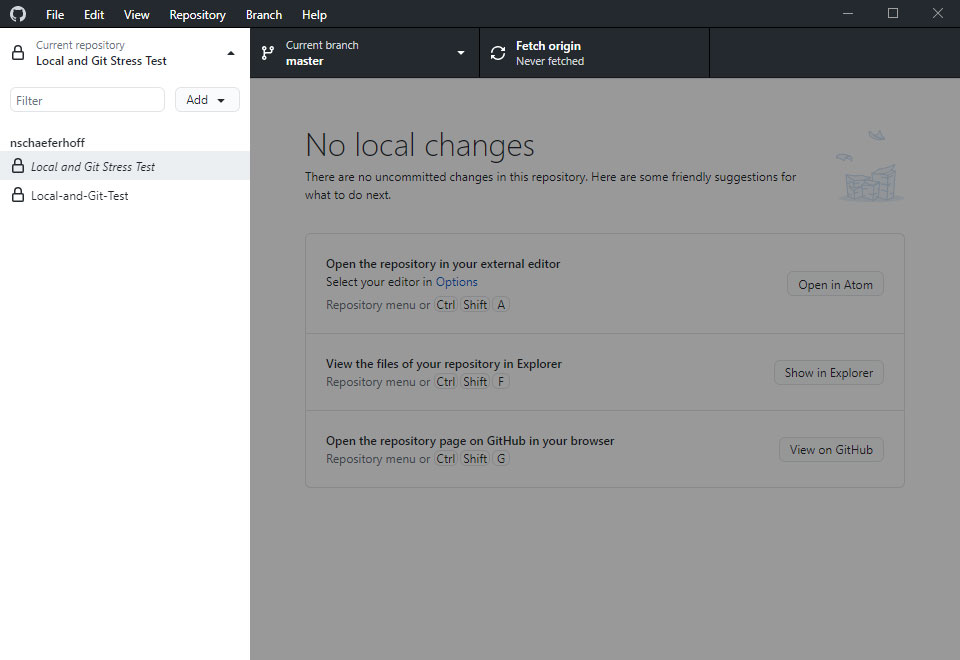
When you are finished, it’s time to add your local repository to GitHub Desktop. When you first open the program, it already has a shortcut for that on the user interface.
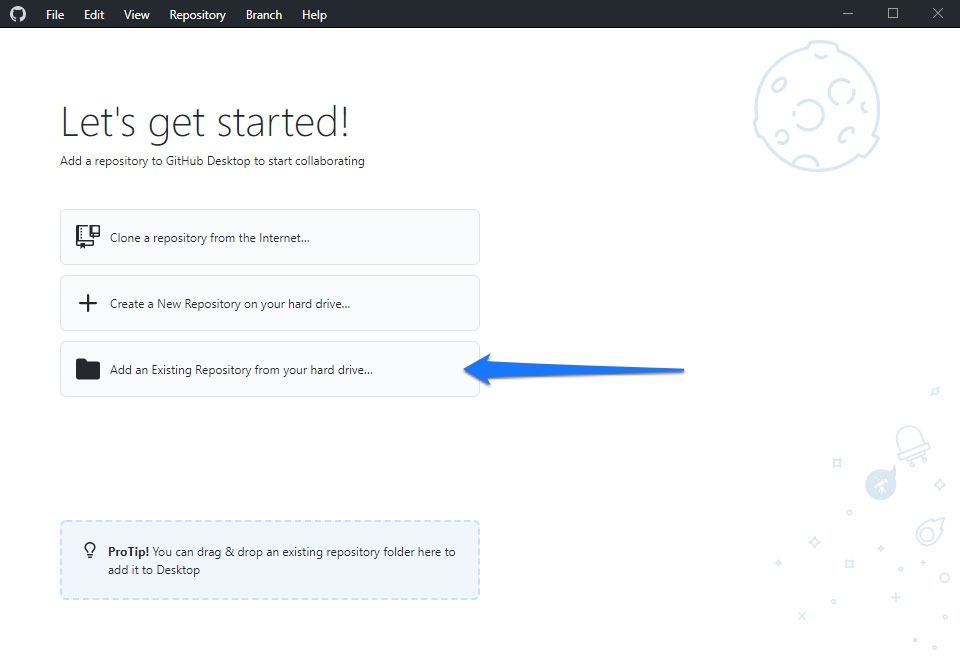
Click it (an alternative path is File > Add Local Repository), then navigate to where you created your Git repository earlier and say Select Folder. If done correctly, you should see a list of files contained within the wp-content directory of your website on the left-hand side of the screen.
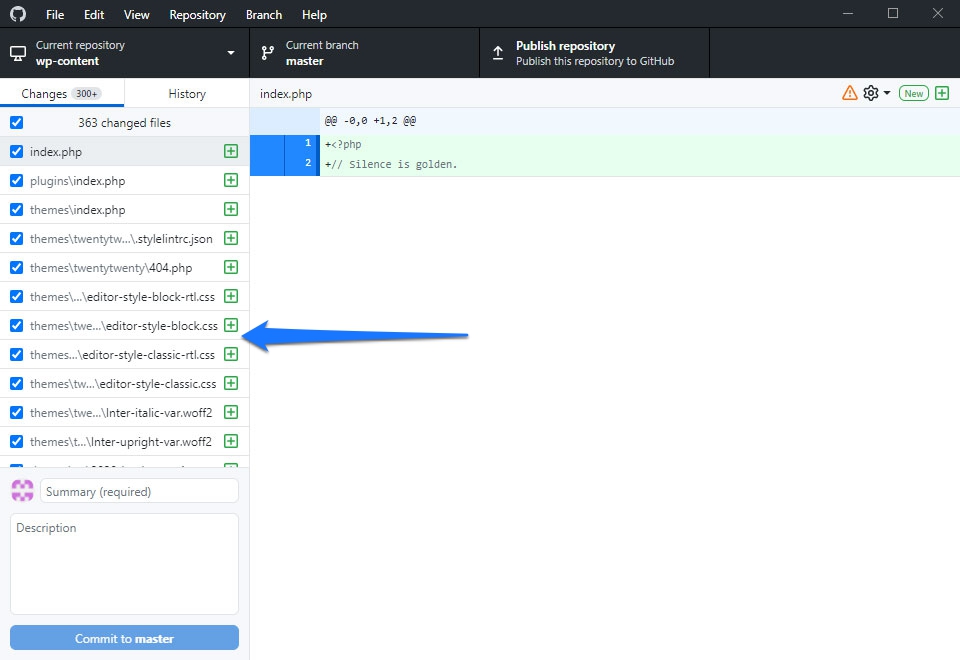
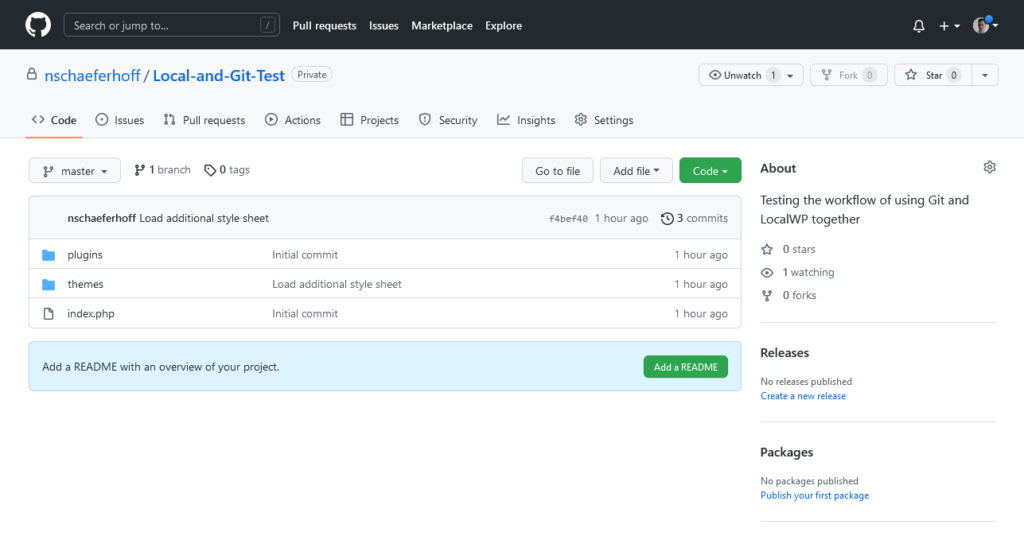
At the bottom left, input a summary for this project, then click Commit to master. This will commit any files and the changes you have made to the local repository. After that, you can publish your local repository to the one on GitHub by clicking Publish repository.
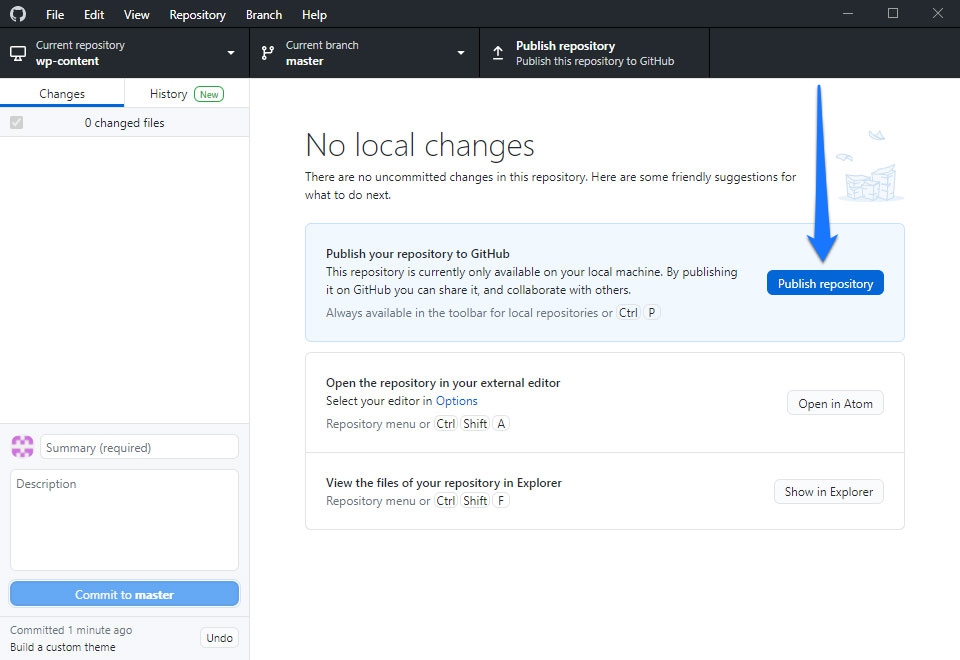
Note that you might be asked to sign in to GitHub and authorize GitHub Desktop to access your account. In that case, you might have to re-click the button once you return to GitHub Desktop.
In the dialog that appears, fill in the name and then click Publish Repository again. It should now be available on GitHub and ready for use.
Best Practices for Git Version Control in Local
Now that you have all the components configured, you can start putting them to use in your development projects – either just locally or across teams, too. To get started, here are a few best practices to follow when using Git for version control in Local.
Commit Your Changes
First thing’s first, you need to make it a habit to regularly commit your changes. You can think of a commit as the container in which you house a series of changes that are related to one another. So if you fix three different errors, each one is an individual commit. However, each step involved in fixing the error is not. Instead they produce just one commit.
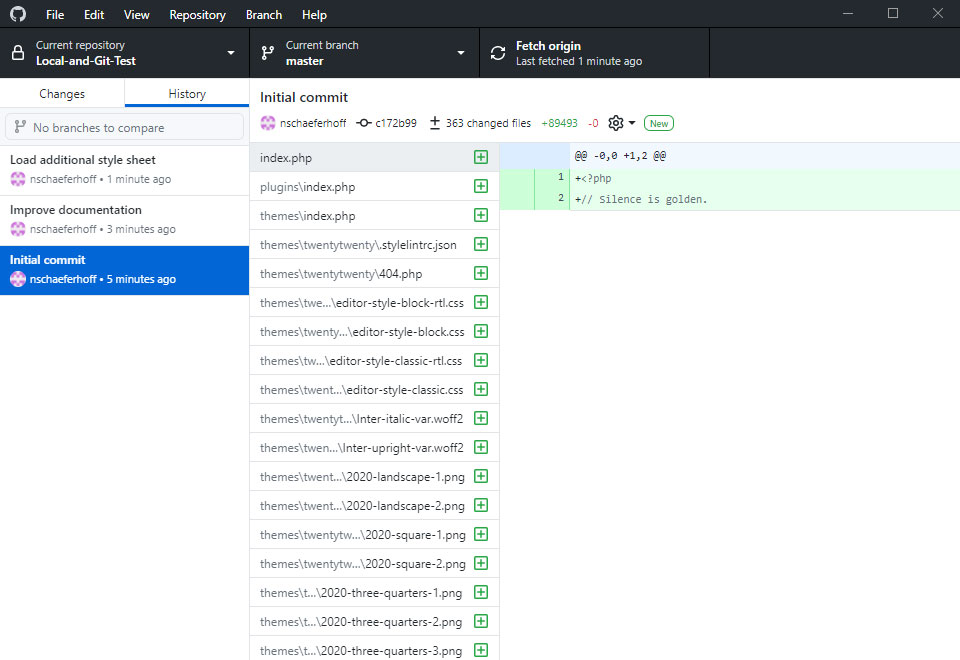
When working on projects, using commits makes it easier for you and for team members to see what has happened, who made what change and why, and what you can roll back to should a change be unnecessary. You can make commits as small as you like, but you should only do so when your code is totally finished.
Your best bet is to commit it once you have completed a section of work. And if you haven’t finished with a section, use the Stash feature in Git to clean up your workspace without yet committing.
Commit Frequently
Related to the above, it’s not enough to commit your code – you should also do so often. Doing this keeps commits manageable, small, and easy to roll back should the need arise. It also makes it easier to collaborate as a team, as you can share code you’ve written much more frequently this way. Everyone on your team stays on the same page and it reduces the chances of merge issues, too.
When you only commit occasionally, it’s much harder to follow your thought process. It’s also much more difficult to backtrack if there is a mistake.
Always Test
Committing frequently is important, but don’t get so eager that you don’t test your code first. Thoroughly run tests on all your code locally to ensure it’s functional and works as intended before committing it and prior to publishing it.
Include Helpful Commit Messages
Another best practice for Git version control is to write messages each time you commit. To start, write a brief summary of what changes you have made that doesn’t exceed 50 characters. Skip a line and then write the body of your message, which should go more into detail. Indicate why you made the changes, what’s different since the previous version, and be specific.
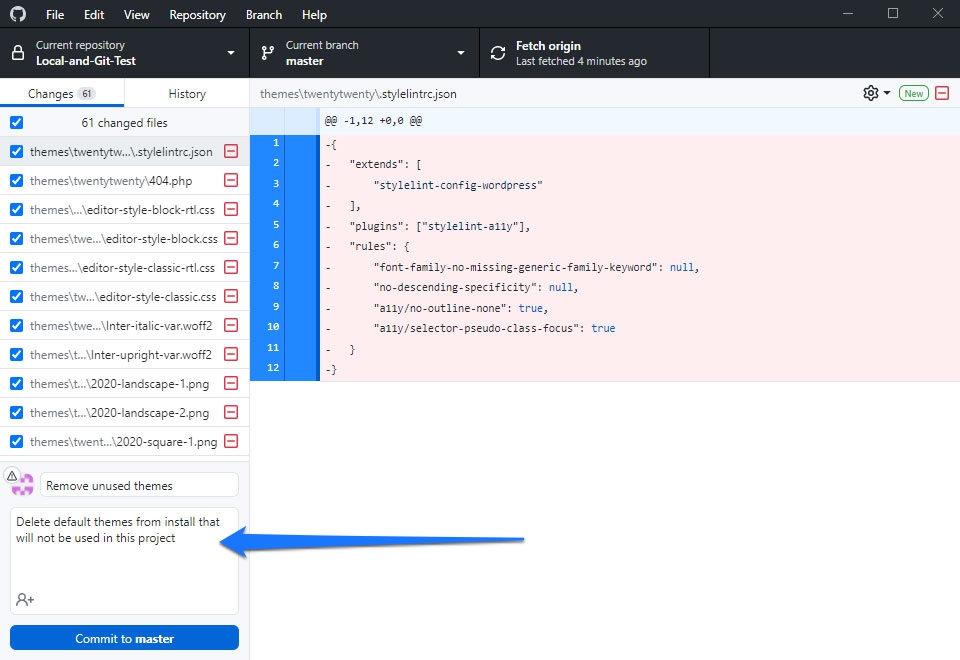
You should also always use the present tense to keep all commit messages consistent.
Don’t Be Afraid to Rely on Branches
Lastly, definitely make use of branching in Git where applicable. Branches make it much easier to keep various segments of the development process organized and separate from one another. It’s not uncommon to see branches for bugs, new ideas, feature tests, and so forth.
Local + Git Workflows to Consider
From this point, we’ll shift our discussion to workflows and some of the ways you can make your work in Git more efficient and easy to follow.
Feature Branches
Feature branches are one of the most common workflows when working in Git. They are most helpful when more than one person is working on a project at the same time – or even working on the same feature. Making use of feature branches makes it so both developers can commit code without causing issues for each other.
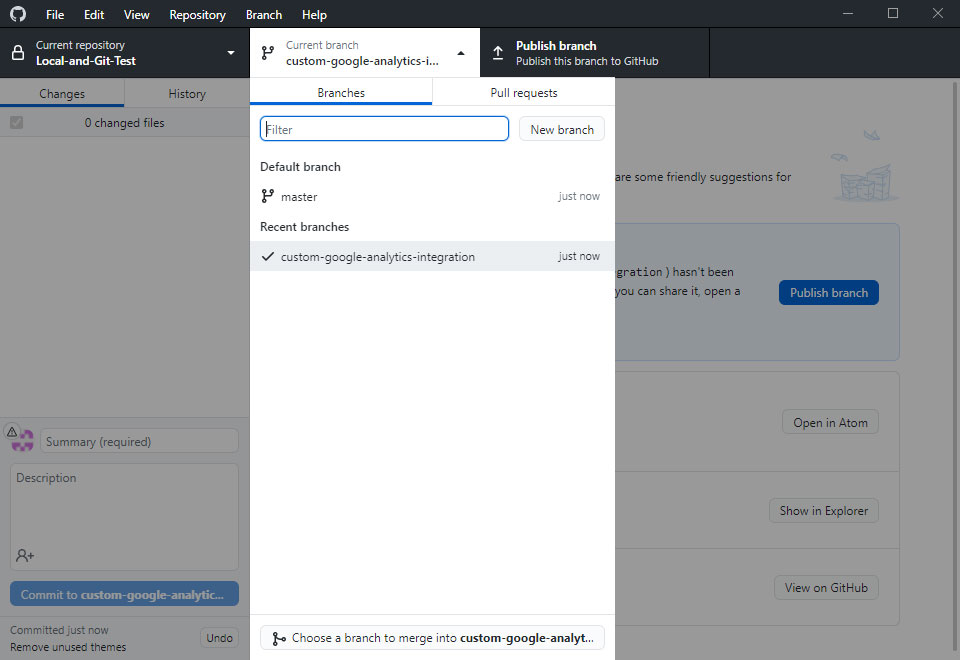
Anytime a new feature is added to a project, it should get its own branch. That way, it can go through the entire development process, commits, and testing without affecting other branches. And once development has finished, you can merge it with the master branch – which actually leads us to our next workflow option.
Merge
Another important workflow is to do a merge. As we hinted at above, when you wish to combine two branches in a workflow, you can do so by merging them. It adds the content of one branch to another. This is the most common way to prepare a feature for publication.
To use merge, you’d use the command, git merge while viewing the main branch. Once everything looks as it should, you can push this change to GitHub within Local. You should test the feature at this point to ensure the merge works smoothly.
Lastly, you’ll need to delete the branch that was merged into the main branch, as it is no longer needed.
Forking
Another workflow option is forking, which sounds like it would be the same as feature branching but it’s actually quite different. Essentially, with forking, every developer on a project has their own local Git repository and public repository. This way multiple people can be working on a project simultaneously, committing changes – and publishing those changes – without having to verify compatibility with co-developers.
This workflow isn’t necessary for most types of projects, but you will often find it in use by those working on very large, open-source projects. Typically, someone or a small team of people will then be responsible for pushing each individual developer’s published commits to the primary repository for the project.
Git Flow
The last workflow option we’ll be discussing here is the Git Flow. It’s a popular option and works pretty similarly to the feature branch workflow discussed above. The only real difference is that developers will be creating feature branches from a sub category branch (usually called develop) instead of the master branch.
In Git Flow, developers on a project do not have permission to add branches directly from the master branch. This is similar in practice to the forking workflow without the need for a secondary public repository for each developer.
As with the forking workflow, Git Flow is often used by open-source or very large teams to keep everything organized and tidy. It also prevents buggy code from being committed to the master branch.
Those in charge of the development team can then take their time in reviewing each commit from each developer under the develop branch to either reject or approve them. Should a commit be accepted by those in charge of the project, it will be pushed to the master branch.
The only real drawback to this workflow is that merging large features into the master branch can be time-consuming and cause conflicts and bugs to arise.
Git and Local in a Nutshell
Getting started with Local and Git is surprisingly easy. And while there is a significant learning curve to properly writing and committing code, having a solid understanding of Git best practices and the popular workflows available can assist you in working collaboratively.
Hopefully, this guide will serve as a good overview of what options are available to you and how you can work both locally and server side more effectively and efficiently.
Do you have any additional tips for using Git in Local? Let us know in the comments below!

No Comments