We have all heard it before: “The money is in the list.”
Building a thriving list of email subscribers is one of the cornerstones of a successful website. Despite being a slightly older form of digital communication, it remains one of the most important ways of staying in touch with your audience.
Forking over your email address is a huge sign of trust from the side of your visitor. It gives you direct access to their inbox, a coveted sanctuary for most, making it likely they will actually read what you send them and come back to your site. It’s no wonder building an email list is one of the best ways to keep visitors on your website longer.
Today I want to talk about one of my favorite tools to do so: MailChimp.
What is MailChimp and why use it?
MailChimp is one of the many newsletter and email marketing services out there. Its basic function is to help you collect email addresses, store them in one or more lists, and create and send out email campaigns to your subscribers. Besides me, 7 million users trust MailChimp for their email marketing.
Create email templates without coding
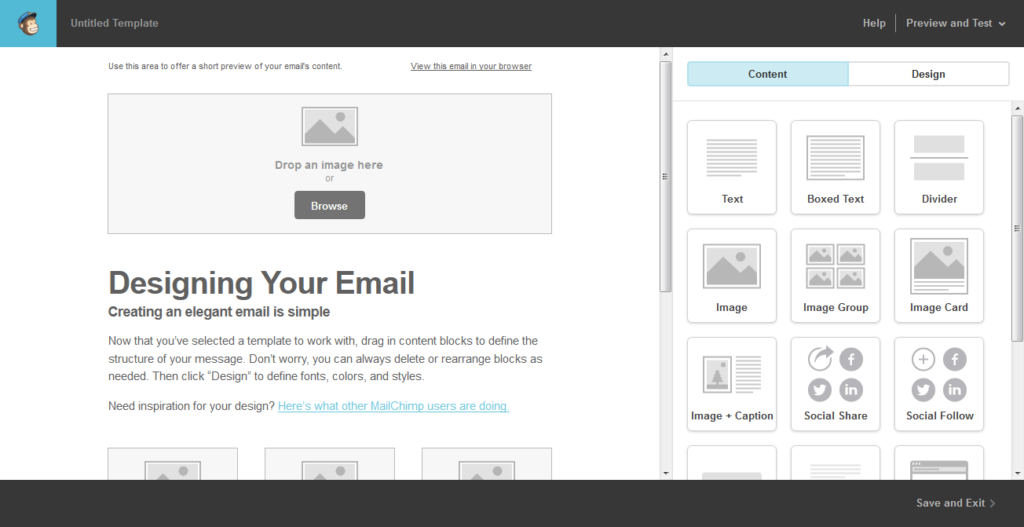
One of the best features of this service is its drag-and-drop email creator. While many of us have been forced over time to acquire some coding knowledge, chances are programming an HTML email template might be out of your league. Thankfully, the MailChimp editor makes this as easy as playing an online game.
Keep track of all important data
Besides that, MailChimp lets you track opening rates, click-throughs, subscriber locations, and more. You can even perform A/B split tests to test subject lines. Plus, the data can be combined with Google Analytics to gain insight on traffic, conversion rates, and revenue (more on that below).
Light on the wallet
If you just started off with your blog or are bootstrapping your startup, MailChimp is good news as well, since it is free for the first 2000 subscribers and 12,000 monthly emails. That’s right, you can have up to 2000 people on your list without paying a dime.
After that, the pricing for unlimited emails starts at $10/month and consecutively gets more expensive with the number of people on your list. A pay-as-you-go credit system is available as well. Overall MailChimp is very affordable.
Mobile optimized
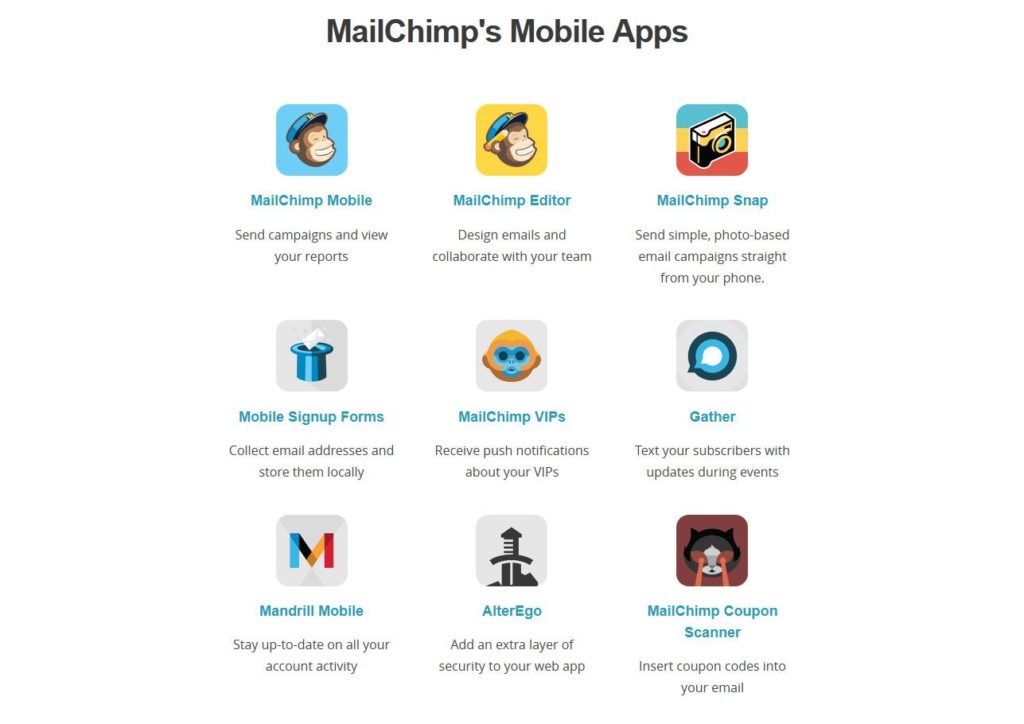
Furthermore, MailChimp’s entire interface is responsive and beautifully so, making it easy to do your email marketing on the go. If that isn’t enough yet, there are also a number of mobile apps for even more convenient mobile management.
Advantages of MailChimp in a nutshell
- Free for up to 2000 subscribers and 12,000 emails/month
- Custom email template creation via drag-and-drop
- Tracking for opening rates, click-through rate and more
- A/B split testing
- Great user interface and user experience
- Mobile apps for on-the-go marketing
How to integrate Mailchimp into WordPress
One of the main reasons for us WordPress fanatics to go with MailChimp is that its integration with our favorite platform is incredibly easy. A number of awesome and high-quality plugins out there let the two services make nice with one another easily.
Getting email subscription forms on your website
The first step to building a list of subscribers and raving fans is to give them the opportunity to actually subscribe. We are all familiar with email subscriptions forms. These can take many different shapes, from sidebar widgets, to pop-ups, to slide-ins. Subscription forms for MailChimp are no exception.
1. The plugin route
By far the best WordPress plugin for MailChimp integration is the aptly-named MailChimp for WordPress. It allows you to easily create customized sign-up forms anywhere on your site. The plugin has over 95% positive ratings and is currently running on more than 200,000 sites.
Here is how to set it up and get your forms up and running.
Setting up the plugin
First you need to download MailChimp for WordPress from the plugin directory, unpack and upload it to your plugins folder. Alternatively you can also install it directly from the WordPress backend. Don’t forget to activate!
After that you will need to connect your MailChimp account to the plugin. If you don’t have an account yet, sign up here. Connecting the two means obtaining an API key from MailChimp and pasting it in the appropriate place inside the plugin.
To get your API key, you need to navigate to Account > Extras > API keys in your MailChimp backend. There, scroll down and click Create A Key. The numbers and letters that show up in the box within the list are your API key. Mark and copy.
Next you need to scoot over to the Settings menu of your newly installed WordPress plugin. On the first page you will find a box to paste the API key. Click Save Changes and you are connected.
Creating sign-up forms
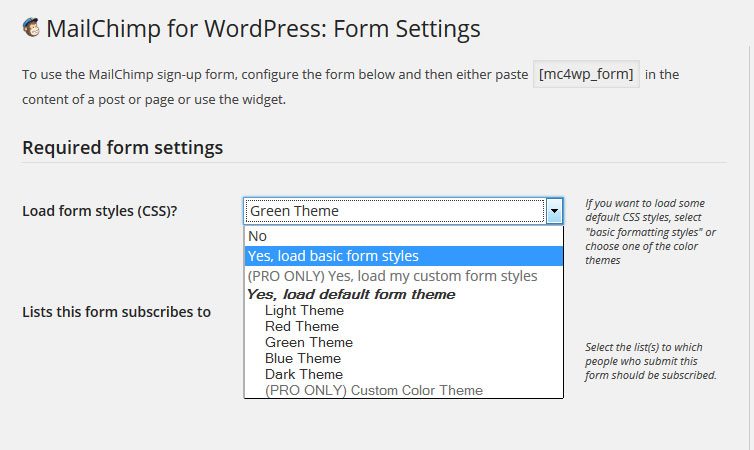
Under Forms you can now create your subscription forms. Choose between different designs and formats. MailChimp for WordPress comes with five basic themes and a field generator that lets you customize your form by adding elements in HTML.
Further below are additional settings such as success and error messages as well as the option to hide the sign-up form after completion.
Make sure you save all changes.
Getting the forms on your site
There are different ways of making your creations show up on your WordPress website. Number one is to use a shortcode. You can find it underneath the builder module (see screenshot). Pasting this anywhere inside your posts and pages will add the subscription form in that particular spot.
The second option is to use the integrated widget. Drag and drop it into any widget area you like, give it an optional title and click Save. All done.
A third way to get people to sign up to your email newsletter, and one of the best features of this plugin, are found under Checkbox settings. By activating the appropriate options, you can enable anyone who writes a comment or uses a contact form on your site to automatically sign up to your newsletter list as well. How awesome is that?
Plus, MailChimp for WordPress works with many popular plugins out there such as Contact Form 7 and WooCommerce for easy integration.
2. The manual route
The aforementioned plugin really comes in handy when adding MailChimp sign-up forms to your WordPress site. However, it is not the only way.
MailChimp itself also offers subscription forms to copy and paste onto your site. This manual route is often favored by developers and other coding types.
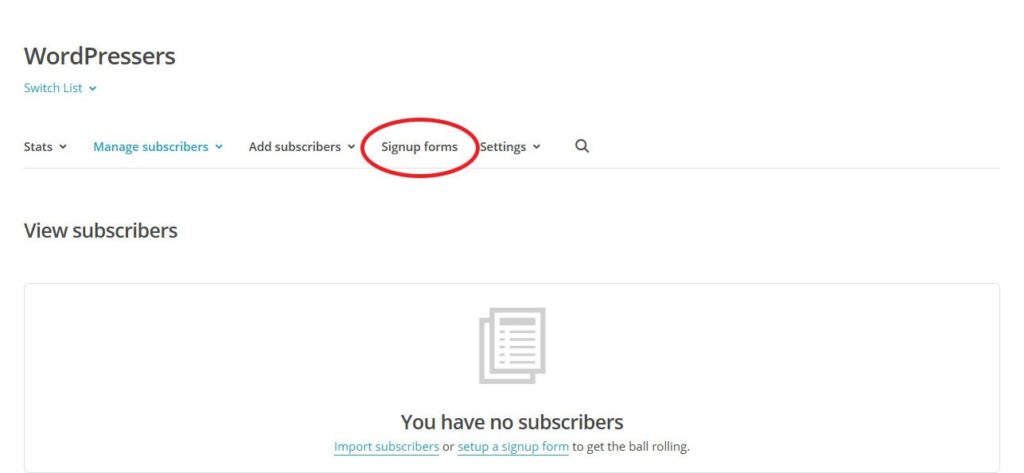
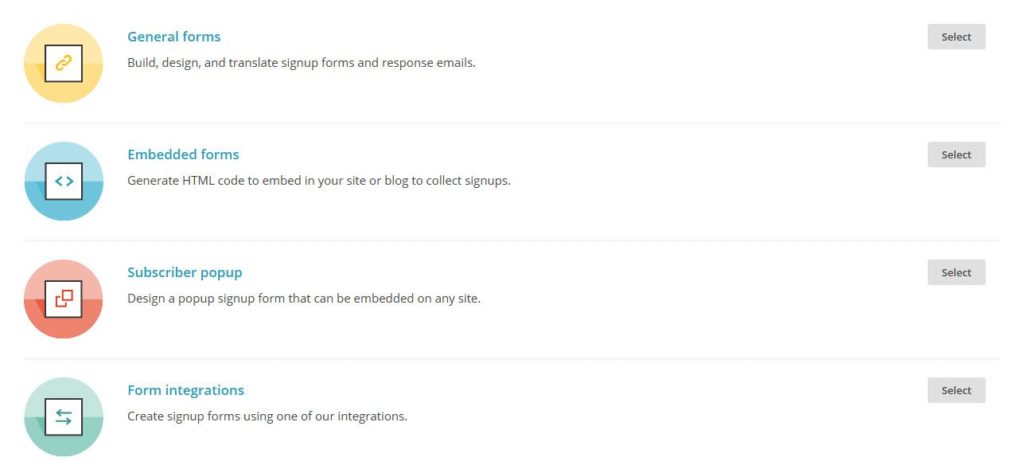
To create a custom form within MailChimp, go to Lists in the MailChimp options. Once you have created a subscriber list, you can then create your forms via Signup forms at the top.
From here you have the option to create different forms:
- General forms
- Embedded forms
- Subscriber popups
- Form integrations (e.g. into Twitter cards)
A click on Embedded forms gets you to the part where you can create HTML code to paste onto your site. Pick one of the design templates (Classic, Super Slim or Naked) depending on how much manual customization work you can and want to do.
After that, copy the code at the bottom.
Now paste this wherever you want the form to appear. Done! However, you can see why many opt for the plugin, right?
3. Other routes
Above are the two main ways to get MailChimp sign-up forms onto your website. However, that doesn’t mean they are the only ones. Other plugins exist that work with the email service as well.
As the name suggests, this plugin allows you to create popups for your WordPress site. The cool thing is that you can use both HTML and WordPress shortcodes within the popups and can therefore use both sign-up forms mentioned above.
SumoMe has been making quite a splash in the WordPress and online marketing world. Their free suite of plugins for list building and beyond is easy to use and high quality. All of their email-related apps (list builder, scroll box, smart bar) can be synced with MailChimp right out of the box. All it takes is a few clicks.
How to further improve your MailChimp experience in WordPress
1. Automatically send latest posts to your list
MailChimp lets you create what is called “RSS-driven campaigns.” That means you can create automatic newsletters that send content from any RSS feed (including your own) to your subscribers at a given interval. Perfect to keep them up to date about what is going on on your blog! And don’t worry: Emails will only go out when you post something new.
A detailed description on how to do this can be found in the MailChimp knowledge base.
2. Combine Google and Mailchimp Analytics
Ever wonder how your newsletter sign-up rate and website traffic correlate? Curious about how many visitors each newsletter drives to your website? Tired of jumping back and forth between your different data sets? Analytics360 to the rescue.
This plugin brings both Google Analytics and MailChimp tracking data to your WordPress dashboard. You can see all of your stats in one place and really dive into which newsletter is bringing in how much traffic instead of making educated guesses.
Turn WordPress into an email-marketing powerhouse
MailChimp is a perfect companion for any marketer or website owner. The service itself is top-notch and makes child’s play out of creating high-quality email campaigns to keep subscribers up to date on your content. Plus, it’s affordable!
Besides its rich features, one of MailChimp’s strong suits is the easy integration with WordPress. High-quality plugins and MailChimp’s API make combining the two services a cinch. If that isn’t enough, you can also use ready-to-paste HTML code to get subscription forms anywhere on your site.
So, if the money truly is in the list, you can make the first investment today by following the above steps. Good luck!
Are you using MailChimp? What are your experiences? Share your thoughts in the comments below!







14 Comments