
Whether people are saving a PDF format or printing out pieces of paper, visitors sometimes want to have a permanent version of your content (especially if you are posting evergreen articles). Unfortunately, most default website styles don’t translate well to the printer.
Optimizing your WordPress website for printer-friendly design is a subtle, yet powerful way to go the extra mile for your visitors. This not only impacts physical printouts but downloadable PDFs as well. In other words, you can offer beautiful PDFs on demand and even encourage the reader to download your articles for safekeeping.
In this article, we’ll show you two different options for making your WordPress site printer and PDF friendly – via Cascading Style Sheets (CSS) and a WordPress plugin. Let’s get started!
Why You Should Make Your Blog Printer-Friendly
While you may be already optimizing your website to look great on all devices, you may also be wondering whether it’s worth modifying for printers too. Although physical copies are part of the story, it’s important to remember that ‘printer-friendly’ also applies to PDFs – we’ll refer to the latter through this piece for ease of understanding.
Printer-friendly design essentially removes unnecessary web elements and focuses on the content alone. This creates a clean and professional looking page without elements that would be useless in a static PDF. You can see a good example of this technique with the tabs available at Ultimate Guitar:
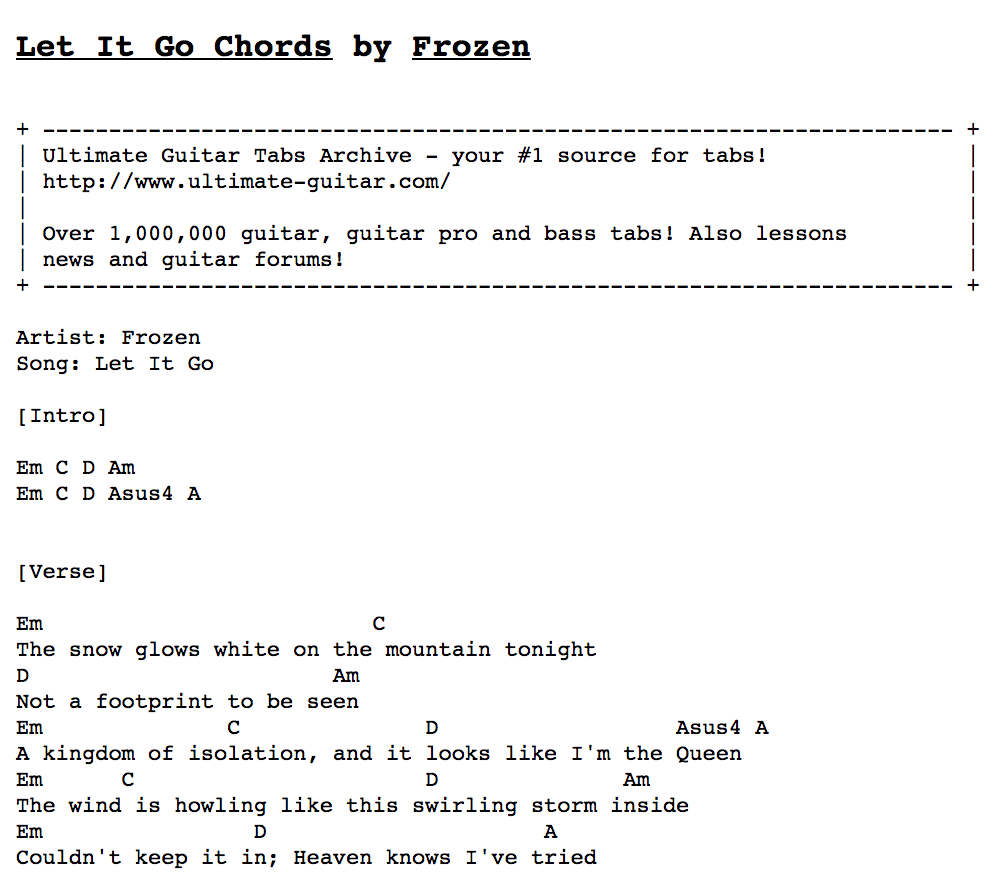
The format clears out all of the unnecessary web design elements to provide a cleanly presented tablature, making it easier to read and follow. It’s a subtle, yet incredibly useful way to help the reader, potentially earning the site repeat traffic in future.
No matter what kind of content you offer, here are a few major benefits of having a print-friendly blog:
- You can share PDFs on sites such as Slideshare or LinkedIn.
- You’re able to offer printable step by step instructions.
- You can quickly repurpose evergreen content as e-books for giveaways.
Thankfully, it’s relatively simple to clean up your website’s print designs – WordPress makes print styling particularly simple.
2 Ways to Make Your WordPress Website Printer-Friendly
There are two main ways to make your WordPress website printer friendly. To follow along, we suggest firing up your favored File Transfer Protocol client and making a full backup of your site before you begin.
Let’s get started by looking at custom design queries, then move onto the WordPress plugin solution.
1. Write Custom Media Queries in CSS
Media queries are a unique CSS selector enabling certain styles to target different aspects of your site. Many people associate media queries with responsive design, because that’s their most popular usage. However, there are more applications. For example, they can target orientation, resolution, screen sizes, and printed pages.
The major benefit to writing your own media queries is you’ll have total control over the output. You can get as ‘nitpicky’ as you’d like, which is important if branding is a major concern for you or your client. However, this method does take a bit more elbow grease and understanding of design to implement correctly.
How to Write Your Own Media Queries in CSS
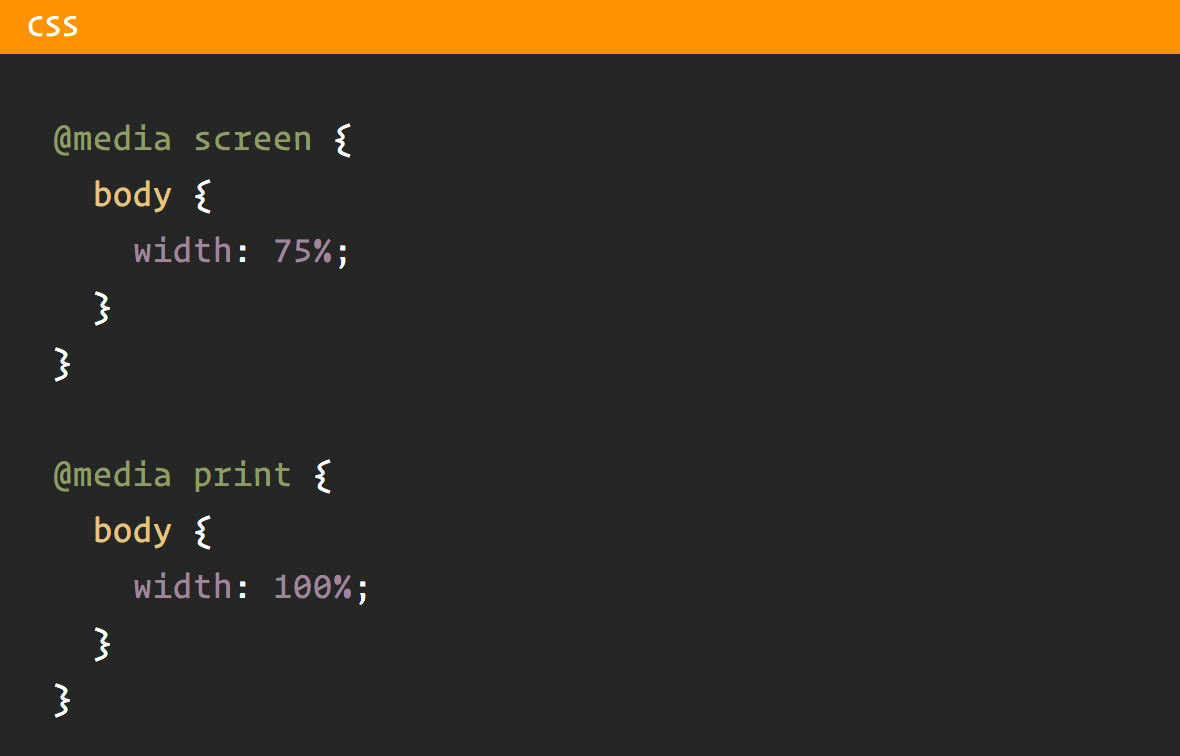
The three major categories for media queries are print, screen, and speech. Here’s a quick example of how you could target print styles and completely remove unneeded sections for the print version:
@media print {
	/* Print Styles Go Here */
	 #header, #footer, #nav { display: none !important; }
}
Of course, the actual CSS selectors you use will vary based on your site’s design. However, there’s more you’ll need to do – such as registering your printer-friendly CSS using your theme:
- First, create a custom print.css file within your theme.
- Next, enqueue the print.css file within your theme’s functions.php file.
- Finally, add custom CSS to target print styles in your print.css file.
Now, let’s dig into each of these steps. In your theme’s folder, create a blank print.css file. This is where you’ll add print-specific styles later. Next, use wp_enqueue_style to register your new CSS file on the front end of your website. For example:
/**
 * Register a custom CSS file and enqueue it
 */
function torque_custom_print_css() {
    wp_enqueue_style( 'print-css', get_template_directory_uri() . '/css/print.css' );
}
add_action( 'wp_enqueue_scripts', 'torque_custom_print_css' );
Finally, it’s time to create your own custom print styles within the print.css file. There are two queries you should know about. We’ve already covered the first (media queries), which will serve as the wrapper for all of your printer styles. The second is a unique selector called @page, which lets you to dictate special page styles not usually available for CSS.
Here’s an example of what it could look like all together:
@media print {
	/* Unique, Cleaner Print Styles Here */
	h1 {
	  page-break-before: always;
	}

	#header, #footer, #sidebar { display: none !important; }
	@page {
		/* Dictate Special Page Settings Here */
		size: 5.5in 8.5in;
		orphans: 4;
		widows: 3;
	}
}
Now you understand the essentials of styling a printer-friendly website, let’s check out a plugin that handles this entire process automatically.
2. Use the Print-O-Matic WordPress Plugin
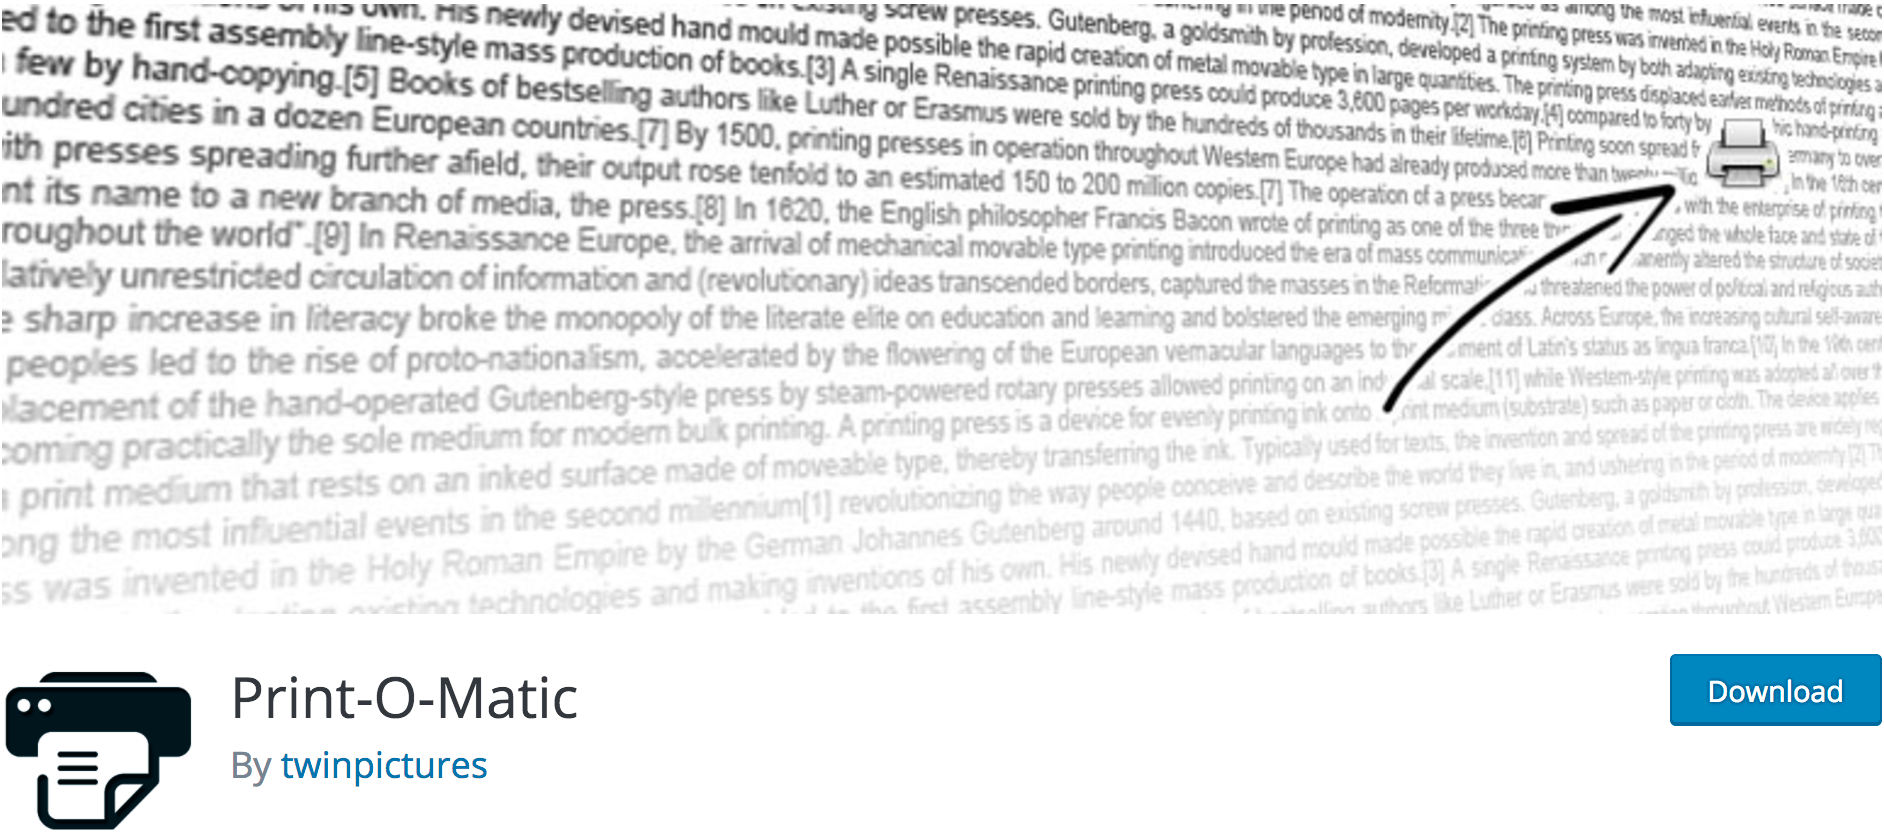
While using a plugin is faster (and suitable if you need something that just works right out of the box), you may have to give up a little control. Even so, Print-O-Matic is a solid choice if you’re working quickly. It offers a pre-built design that is applied to your WordPress posts and pages, has a lot of functionality, and is frequently updated – so it should work with current installations.
An extra bonus is the option to include a Print button inside each of your posts. This will showcase that your content is printer-friendly, meaning you can implement this feature with a bang!
How to Use WordPress Plugins for Printer-Friendly Design
To start, install, and activate the Print-O-Matic plugin on your WordPress site. Once complete, head to Settings > Print-O-Matic on your WordPress dashboard. Here, you’ll be presented with a form. If you’ve followed the previous method, you should be able to recognize some of the settings we covered, along with some others.
From this screen, skip down to Custom Print Page Style. Here, you can add any necessary additional styles to make sure the PDF output matches your branding. However, you can also choose to simply default to your theme’s style by checking the Use Theme CSS For Print Page option:

Next, you should find as many element selectors as possible that don’t need to be printed – such as your header, sidebar, and footer. Enter these using commas in the Do Not Print Elements box:

Finally, review the rest of the options to ensure they match your personal preferences. When you’re finished, click Save Changes. To include the print button on a page or post, simply add the [print-me] shortcode to your desired location. That’s it!
Conclusion
In a nutshell, providing printer and PDF-friendly styles for your website makes your content more shareable for users. It could also become part of your marketing strategy (such as by creating e-book giveaways). It’s simple to add this support to WordPress, so there’s no excuse for not getting onboard.
To review, we showed you two simple ways to include printer-friendly designs on your WordPress website:
- Write your own custom CSS. This is best for fine-tuned branding and user experience.
- Use a plugin such as Print-O-Matic. This works well for situations where you just want something that works out of the box.
What questions do you have about enabling printer-friendly design on your WordPress website? Let us know in the comments section below!
Image credit: Raw Pixel.
5 Comments