As a developer, creating your own themes presents both a business opportunity and a creative outlet. However, a top Content Management System (CMS) like WordPress doesn’t just accept any theme. Only those that meet certain criteria will be accepted on the official website.
By understanding these specific theme requirements, as well as how the theme review process works, you can improve your chances of getting your theme accepted. After all, when your theme is added to the WordPress Theme Directory, it increases the exposure and credibility of your work.
In this post, we’ll explain the WordPress Theme Review process, and walk through five steps you can take to increase your chances of getting accepted. Let’s jump right in!
The Benefits of Getting a Theme Accepted by WordPress
As the largest CMS in the world, WordPress is a valuable resource for developers and site owners alike. Many users rely on the official WordPress Theme Directory to find both free and premium themes for their sites. So it makes a lot of sense to submit your own themes there:

Getting a theme accepted in this directory can offer you more exposure to the WordPress community. Plus, if you’re new to theme development, aiming to have your theme accepted by WordPress is also a useful learning experience.
For example, you may have to learn more about CSS and PHP in order to transform your static HTML design into a usable end product. WordPress has a thorough review and vetting process for the themes and plugins it accepts. So if yours is approved, it helps you establish credibility as a developer and learn valuable skills along the way.
Users who download your theme can also review it and leave feedback on a dedicated forum, which presents an opportunity to continuously improve your work. You will also be able to keep track of download statistics and see ratings from users who download and use your theme.
An Overview of the WordPress Theme Review Process
Before you submit your theme, it’s helpful to first understand how the WordPress Theme Review process works. The Theme Review team is made up of volunteers, who are responsible for ensuring that the themes included in the directory are safe and reliable.
When you upload your theme, it gets added to a ‘new theme’ queue. One or more members of the team will evaluate it based on a list of key criteria. They will also make note of any recommendations they have for changes to the theme.
Your theme will then be added to a ‘theme ticket’, where status updates will be tracked. If it passes the process, it will be marked as approved, before moving to a different queue followed by the final review stage.
There’s no set time frame for when you can expect a theme to be accepted or reviewed. However, many developers say that in their experience, it’s usually about a two-month process.
The most important thing to keep in mind is the development standards that must be met. For example, all themes must be completely PHP error-free. They must also include skip links and other accessibility features, transferable theme text strings, and so on. Below, we’ll show you where to find these requirements, and offer some advice to help you adhere to them.
How to Get Your Theme Accepted on the Official WordPress Site (In 5 Steps)
So you have your theme created, but is it ready for WordPress? Let’s take a look at five steps you can follow to get your theme accepted on the official WordPress site.
1. Check the Required and Recommended Guidelines
Both the required items and recommended guidelines are invaluable tools for WordPress theme development. Carefully reading (and re-reading) these documents is one of the most effective ways to prevent your theme from being rejected:
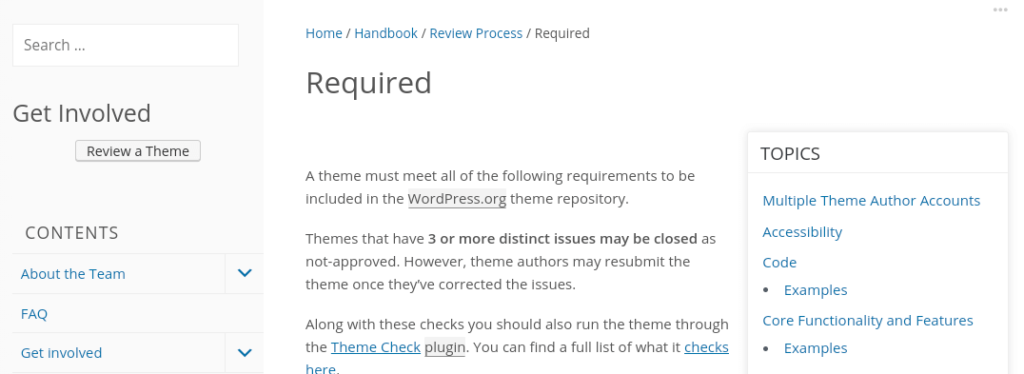
When it comes to the required criteria, accessibility is crucial. This means adding skip links and other keyboard navigation functionality, so all kinds of visitors can use your theme’s features without problems.
Another important requirement is the theme’s documentation. Your theme needs to include clear guidance and readme.txt files for installation and so on. The theme must also have a unique name that does not include the terms “WordPress” or “theme”.
The WordPress theme requirements also stipulate that developers must prefix functions and classes. In addition, they prohibit plugins, minification of scripts, or any PHP errors. Finally, it’s critical to make sure your theme is 100 percent GPL or GPL-compliant licensed.
2. Create Strong Documentation
Another way to increase the likelihood of getting your theme accepted on WordPress is to create strong theme support documentation. You’ll want to make sure to include all necessary information, and format it consistently and correctly.
Some documentation tips and best practices include:
- Use annotated screenshots and save them as JPGs.
- Capitalize menu items, italicize the theme’s name, and bold admin links and buttons.
- Include a demo of the theme and list its key features.
- Add a support page with sections for Featured Images, Widgets, and Theme Options.
It’s also helpful to explain any limitations or restrictions within your theme.
The Review team suggests including both a readme.txt file and a changelog.txt file. If you need help putting your documentation together, you can visit WPThemeDoc on GitHub:
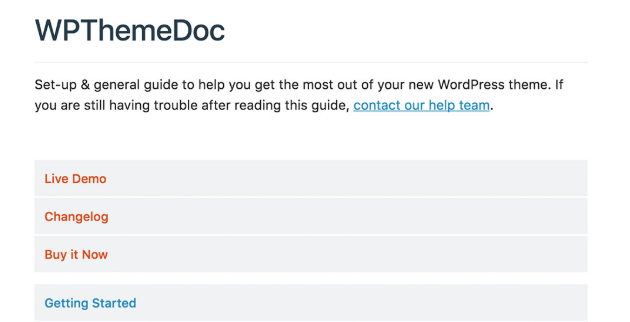
This resource is free and provides an easy-to-use template for creating extendable documentation for WordPress themes.
3. Review Your Theme’s Code With the Theme Check Plugin
As we mentioned earlier, one of the quickest ways to get a theme rejected is to have errors in your code. You can avoid this by using the Theme Check plugin:

This plugin lets you use the same automated testing tools that WordPress employs when reviewing theme submissions. You can run the plugin to see how your theme measures up against WordPress theme standards and practices.
4. Import the Theme Unit Test Data to Check Your Theme’s Functionality
The Theme Unit Test is a file you can import into a WordPress installation, in order to test the functionality of your theme. You can clone the themeunittestdata.wordpress.xml file from its GitHub repository:

Once you download the file, you can import the test data into your WordPress installation by going to Tools > Import > WordPress:
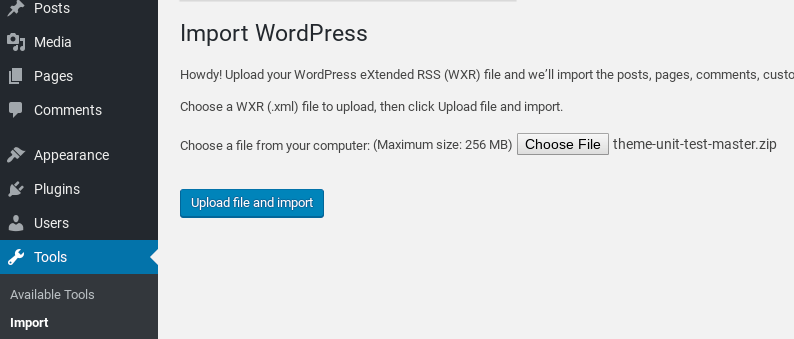
After you select Upload file and import, choose the box labeled Download and import file attachments located under Import Attachments. Then click on Submit.
It’s recommended that you set up a new local install for each theme you create. In addition, some specific issues to be on the lookout for include display errors for tables, pingbacks, and image alignments.
5. Upload Your Theme to WordPress.org
Once you’ve combed through all the necessary requirements and recommendations, and have run your theme through the various testing tools available, you can upload it to WordPress.org:
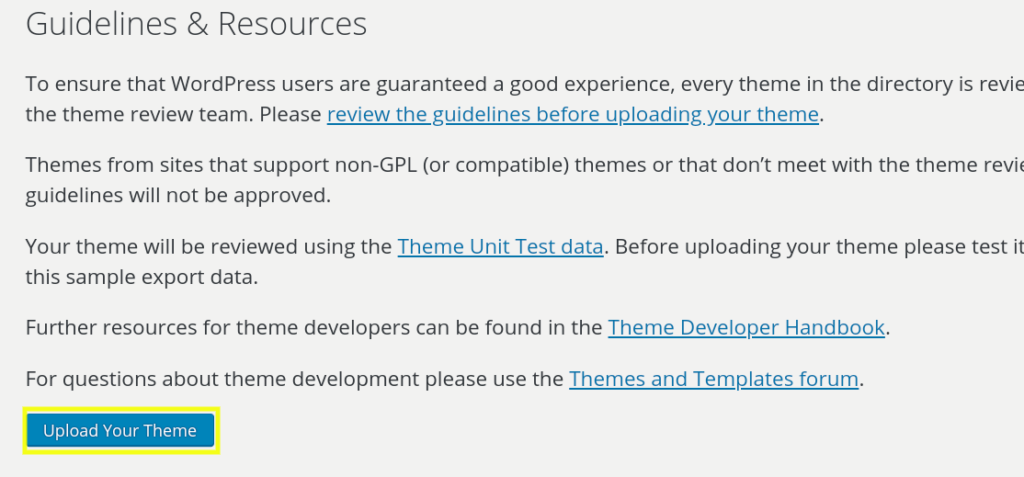
After you click on Upload Your Theme, you’ll be prompted to log in (if you haven’t already). Make sure to upload your theme as a themename.zip file.
That’s it! Now you just need to wait to be notified of status updates from a Theme Reviewer and be prepared to make any necessary changes or additions.
Conclusion
There are many advantages for developers to having their themes accepted on the official WordPress website. However, the WordPress Theme Review process is rigorous and can be intimidating.
As we discussed in this article, there are five steps you can take to increase the likelihood of your theme being accepted on WordPress.org:
- Check to ensure that your theme meets all required and recommended WordPress Theme guidelines.
- Create strong theme support documentation.
- Review your theme’s code with the Theme Check plugin.
- Import the Theme Unit Test data to check your theme’s functionality.
- Upload your theme to WordPress.org to submit it for review.
Do you have any questions about the WordPress Theme Review process? Let us know in the comments section below!
Image credit: Pxhere.

No Comments
Start the conversation