Google AdSense is a popular channel for promoting an online business. In fact, over 38.3 million websites use it to spread the word about their products or services. However, spammers and bots have the potential to derail your advertising campaign, and perhaps even lead to the suspension of your AdSense account.
Fortunately, it is possible to block fake AdSense clicks. By monitoring your site carefully, you can take decisive action against low-quality traffic and ensure that every click is a real customer who’s interested in purchasing your products or services.
In this article, we’ll look at why fake AdSense clicks pose a serious threat to your eCommerce store. We’ll then show you how to automatically block poor-quality traffic, right down to individual visitors who are interacting with your ads in suspicious ways. Let’s get started!
Understanding Fake AdSense Clicks (And Why They’re a Problem for Your eCommerce Site)
Fake Google AdSense interactions are clicks that are generated by low-quality traffic. These are typically carried out by spammers or automated tools such as bots that manipulate impressions and clicks. However, they can also occur if the same person repeatedly clicks on one of your ads. Some site owners may even attempt to manipulate customers into accidentally interacting with ads they’ve placed.
In an attempt to provide a positive User Experience (UX) for shoppers and brands alike, Google tries to detect all invalid Adsense activity. It also provides advertisers with some leeway, as it’s not unusual for a visitor to accidentally double-click on an ad. Bots may also generate invalid clicks through no fault of the advertiser.
However, if you accrue a large number of invalid AdSense clicks, then it can affect your ability to make money online. Google may deduct a portion of your earnings if it detects lots of suspicious activity. If the problem persists, then Google may even suspend your account. At this point, you’ll lose your opportunity to promote your products via one of the world’s most popular advertising networks.
How to Protect Your eCommerce Store From Fake Google Adsense Clicks (In 3 Steps)
Online advertising can introduce your eCommerce store to entirely new audiences and help boost your sales. However, your ads can also be prime targets for spammers and bots. Here are a few helpful steps you can implement to prevent malicious third parties from getting your account banned from the AdSense platform.
Step 1: Monitor Your Traffic
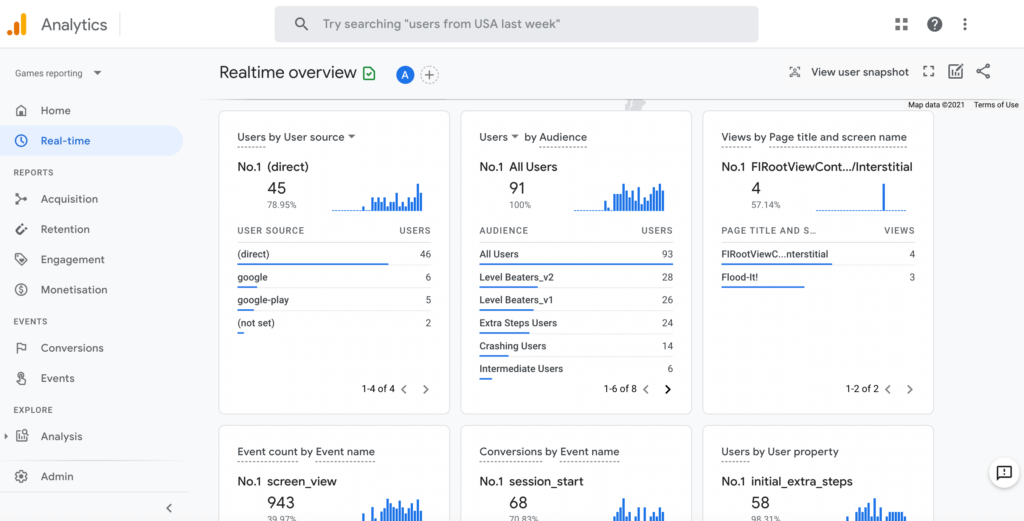
Even if you report invalid clicks to the Google AdSense team, this won’t necessarily be enough to protect your account from suspension. According to the program policies, it’s your responsibility to monitor your traffic using a platform such as Google Analytics:
It’s best practice to compare your Analytics data to your Google AdSense data. This can help you identify any connections between a specific traffic source and an influx of invalid AdSense activity. For example, you might identify a particular advertising partner that’s sending lots of spammy traffic your way.
To maximize your chances of identifying suspicious traffic, it’s smart to integrate Google Analytics with your WordPress website. The Google Site Kit plugin displays Analytics data directly in your dashboard so it’s always within easy reach.
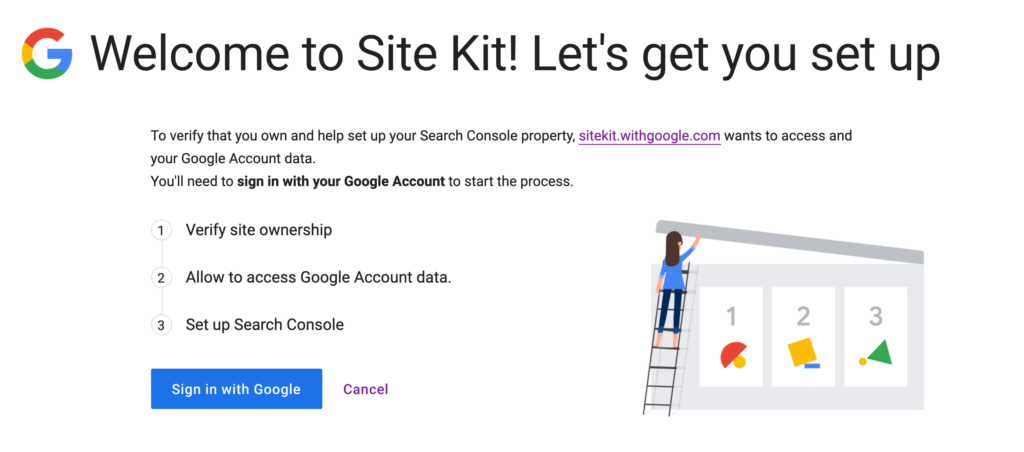
After activating the Google Site Kit plugin, click on the Start Setup prompt. You’ll need to verify that you own your eCommerce store by logging into your Google account and granting access to your Search Console data:
Site Kit will add a verification token to your website when you click on Proceed > Allow. If you haven’t previously connected your store to Google Search Console, then you’ll need to complete this process now.
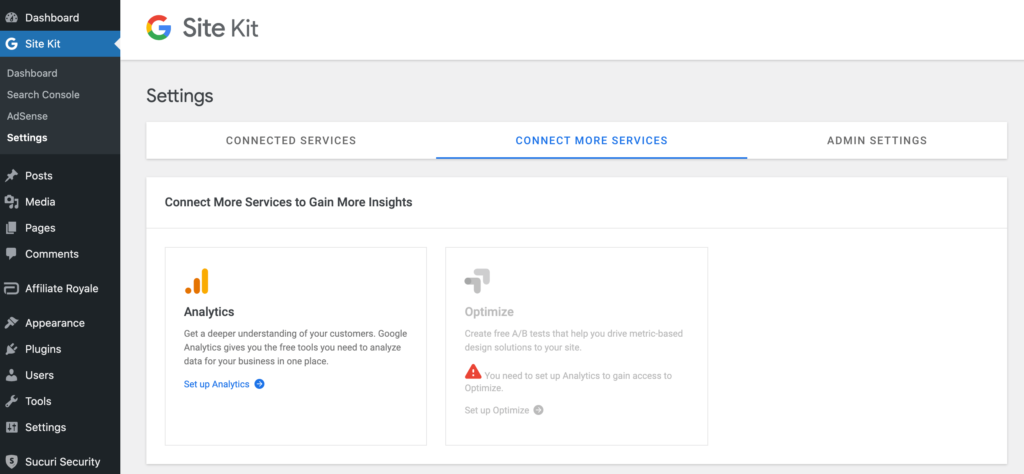
Finally, activate the Google Analytics service by navigating to Site Kit > Settings > Connect More Services > Set Up Analytics. You can then enter your Google account details, grant the requested permissions, and click on Configure Analytics:
Now, you can access your analytics at any time by navigating to Site Kit > Dashboard > Analytics. For the best results, we recommend getting into the habit of checking this screen every time you access your WordPress account.
Step 2: Automatically Block Spammers and Bots
Once you’ve identified an invalid traffic source, the next step is blocking it to prevent more fake clicks. Sometimes, you may be able to work with your hosting provider to block a specific IP address. A Web Application Firewall (WAF) can also help filter out bad traffic.
However, blocking an invalid traffic source isn’t always straightforward. It may help to specify spammy behavior that will result in an instant, automated block.
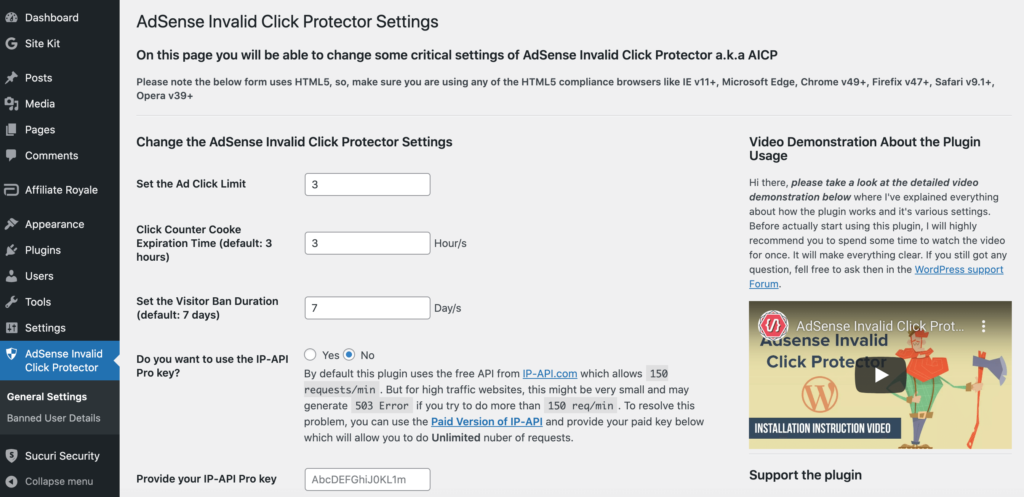
You can set rules for auto-blocking bots, spammers, and other undesirables using AdSense Invalid Click Protector (AICP). After installing and activating the AICP plugin, navigate to Adsense Invalid Click Protector > General Settings:
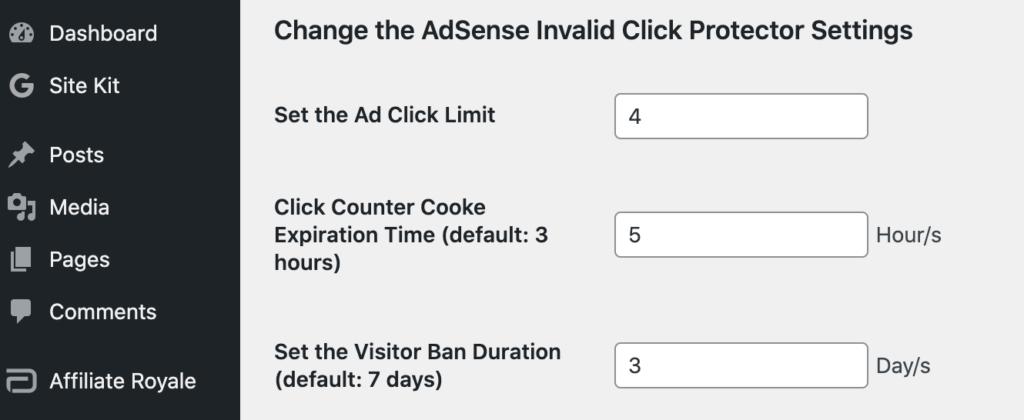
You can automatically block users who interact with your ads multiple times in rapid succession by setting an Ad Click Limit. This is the number of times a visitor can click on an ad before your campaign temporarily stops appearing for that particular person:
You can also set a countdown using the Click Counter Cookie Expiration Time. For example, if you enter 2 hours, then suspicious users will be unable to view your advertisement for two hours after reaching your click limit.
You may also want to change the Visitor Ban Duration. By default, banned users won’t see your campaigns for seven days.
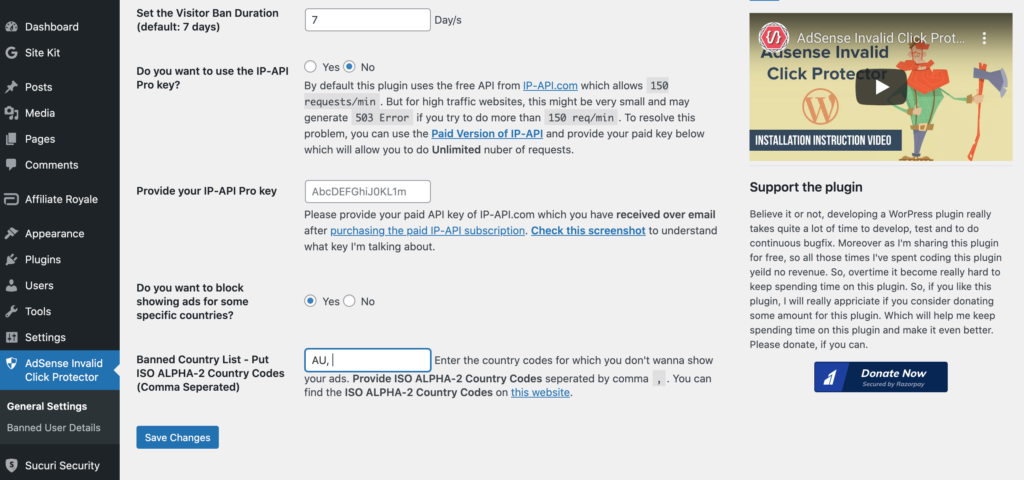
It’s also possible to prevent ads from appearing to users in specific geographic locations. This can be useful if you’re consistently receiving invalid AdSense activity from a particular country. To create location-based rules, find Do you want to block showing ads for some specific countries:
You can then select Yes and enter the country code for each location where you no longer want to run your ads. Once you’re happy with the information you’ve entered, click on Save Changes.
Step 3: Add the AICP Code to Your Google Adsense Campaigns
After configuring AICP, you’ll need to add the plugin’s code to your existing AdSense ads. This step will vary depending on how you initially added your Google AdSense code to WordPress.
If you completed this process manually, then you’ll have to update every instance of this code across your website. For example, let’s imagine you added the AdSense code to your sidebar via a widget. In this scenario, you can navigate to Appearance > Widgets, and then locate your AdSense code.
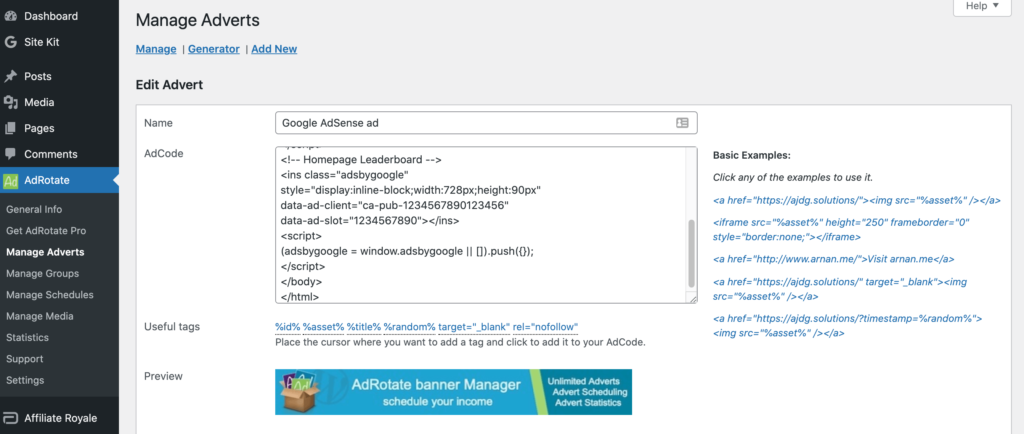
Alternatively, you might have integrated your AdSense code using a plugin such as Quick Adsense or the AdRotate plugin. In this case, navigate to the plugin in question and open your AdSense code block:
Regardless of whether you added your code manually or via a plugin, you should now be viewing your AdSense code. It should look something like the sample code provided by Google:
<script async src="https://pagead2.googlesyndication.com/pagead/js/adsbygoogle.js"></script>
<!-- Homepage Leaderboard -->
<ins class="adsbygoogle"
style="display:inline-block;width:728px;height:90px"
data-ad-client="ca-pub-1234567890123456"
data-ad-slot="1234567890"></ins>
<script>
(adsbygoogle = window.adsbygoogle || []).push({});
</script>
Now, add the following line to the start of this code snippet:
if( aicp_can_see_ads() ) {
<div class="aicp">
/* Your AdSense code goes here */
At the end of the block, remember to close your if and div tags:
/div>
}
Your completed AdSense code should now look something like this:
if( aicp_can_see_ads() ) {
<div class="aicp">
<script async src="https://pagead2.googlesyndication.com/pagead/js/adsbygoogle.js"></script>
<!-- Homepage Leaderboard -->
<ins class="adsbygoogle"
style="display:inline-block;width:728px;height:90px"
data-ad-client="ca-pub-1234567890123456"
data-ad-slot="1234567890"></ins>
<script>
(adsbygoogle = window.adsbygoogle || []).push({});
</script>
</div>
}
Save your changes. All of your Google AdSense advertisements will now adhere to your AICP settings, and you should notice less invalid AdSense activity.
Conclusion
Advertising campaigns can be an effective way to connect with an entirely new audience and drive conversions. However, spammers and low-quality traffic may mean you’re paying for click-throughs that are never going to result in sales.
In this article, we showed you how to defend against fake Google AdSense clicks in three easy steps:
- Monitor your traffic with Google Analytics.
- Automatically block spammers and bots using AdSense Invalid Click Protector (AICP).
- Add the AICP code to your Google Ads.
Do you have any questions about how to protect your eCommerce store against fake AdSense clicks? Let us know in the comments section below!

No Comments
Start the conversation