WordPress is one of the world’s most popular Content Management Systems (CMS). However, it’s also a favorite target among hackers, with 4.3 billion attempts to exploit vulnerabilities recorded in a single year. As a site owner, you may find this figure very worrying.
Thankfully, there are ways to make your site less susceptible to attacks. By becoming an expert in HTTP security headers, you can restrict the actions that servers and browsers can perform – even if your site contains a known vulnerability.
In this post, we’ll discuss what HTTP headers are, and why they’re an important tool in any website owner’s arsenal. We’ll then show you how to add five security headers to your site, using the popular Redirection plugin. Let’s get started!
An Introduction to HTTP Security Headers (And How They Can Benefit Your Website)
Whenever someone visits your site, your server will send an HTTP response header to their browser. These headers tell the browser how to act throughout its interactions with your website, including how to display errors and manage the cache.
In this post, we’ll be focusing on HTTP security headers. These specify the security-related details of HTTP communication, and can harden your site against a range of threats such as Cross-Site Scripting (XSS), clickjacking, and brute force attacks.
When used correctly, these headers can restrict the behaviors that the browser and server can perform. This can be particularly useful for preventing hackers from exploiting known vulnerabilities in your WordPress themes and plugins. Given that vulnerable themes and plugins have a total active installation count of 70 million, using HTTP security headers on your site is a smart choice.
There are several ways to add security headers to your site. You might edit your .htaccess file using a client such as FileZilla, or use a security-focused tool such as Sucuri or Cloudflare. However, in this post we’ll show you how to quickly and easily add these headers using the Redirection Plugin.
How to Set Up the Redirection Plugin
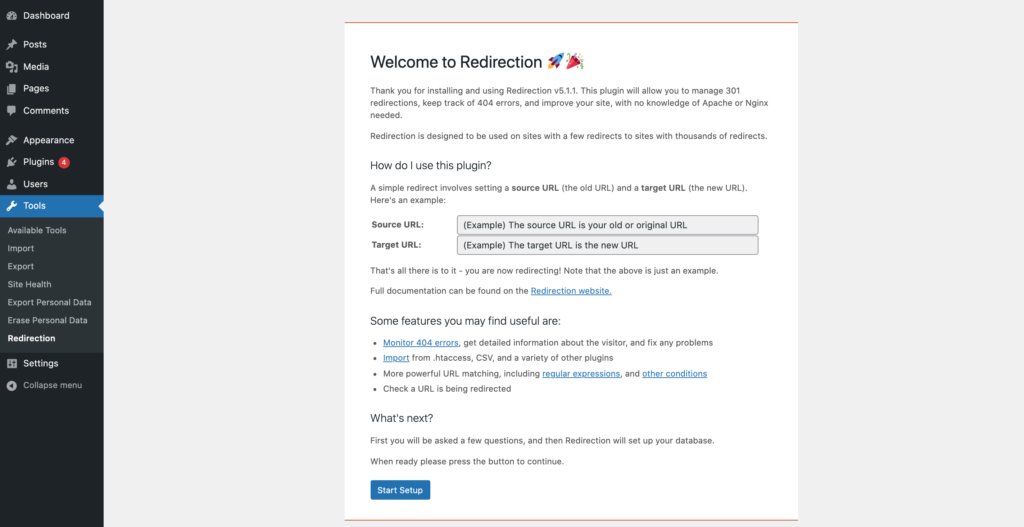
Redirection is primarily a redirect manager, but it also comes with various preset HTTP security headers that you can add to your website. After installing and activating the plugin, navigate to Tools > Redirection and click on Start Setup:
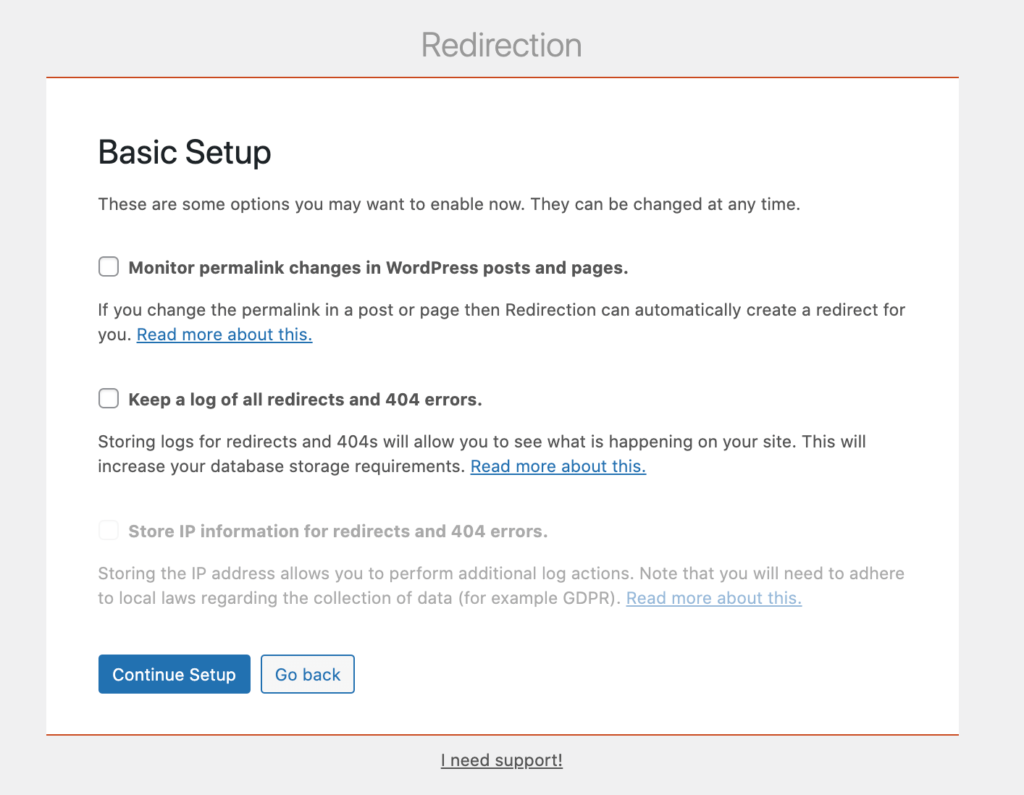
On the next page, you can specify whether Redirection should automatically create a redirect if you change a permalink of a post or page. This setting can help you avoid 404 errors. Redirection can also create a log of your 404s and redirects. However, this option will increase your database storage requirements:
After configuring these settings, click on Continue Setup. Redirection communicates with WordPress via the Representational State Transfer (REST) Application Programming Interface (API), so it will check to make sure that this API is available. Assuming that the REST API is accessible, click on Finish Setup.
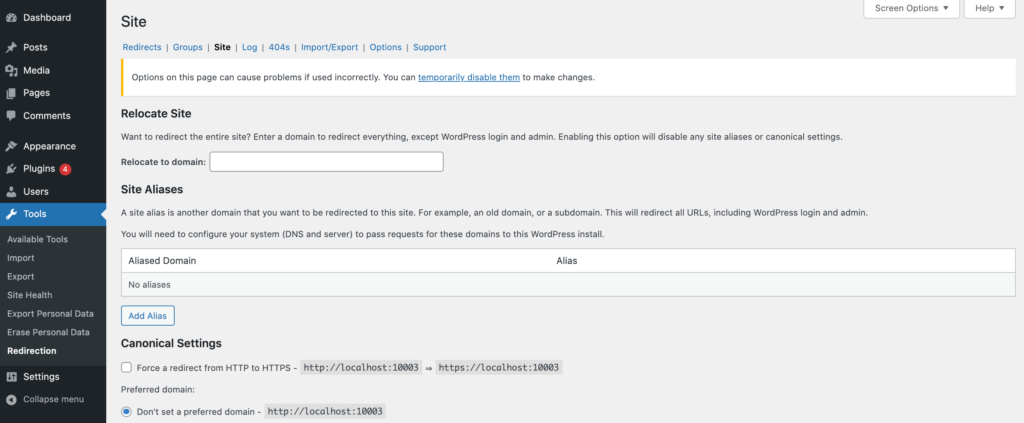
Now that the plugin is up and running, go to Tools > Redirection and select the Site tab:
Next, scroll to the HTTP Headers section and click on the Add Header dropdown. Select Add Security Presets:
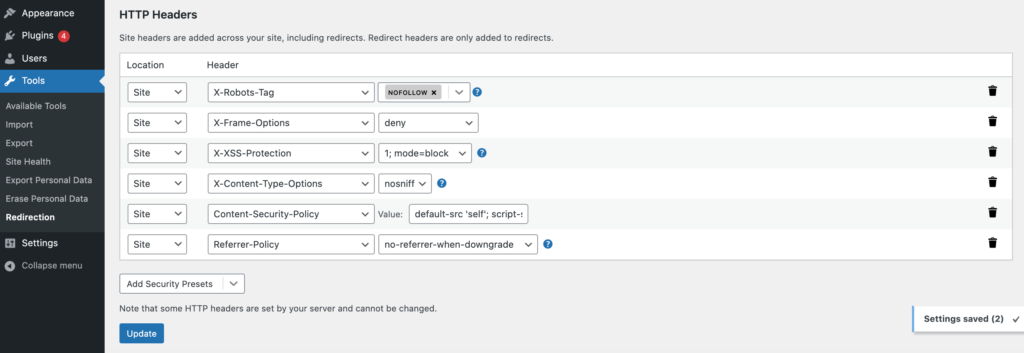
Now, click on the Add Security Presets button again. This will import Redirection’s list of preset HTTP security headers:
At this point, multiple HTTP security headers are running on your site, courtesy of the Redirection plugin. Although we won’t be touching on it in this post, you can also use Redirection to create custom headers.
How to Add HTTP Security Headers in WordPress (5 Types)
So far we’ve covered the main steps for adding Redirection’s security headers to your site. However, you may want to tweak their default behavior in order to get the best results. Let’s explore some of these security headers in more detail, and see how you can customize them to better suit your needs.
1. X-Frame-Options
X-Frame-Options (XFO) provides clickjacking protection by instructing the browser how to behave when handling your site’s content. Clickjacking occurs when an attacker uses a transparent iframe to trick a visitor into interacting with a hidden element, such as a button.
By default, XFO does not allow a page to be rendered in a frame regardless of where the content originates from. This can protect your visitors against XFO-based attacks. However, if these default settings cause usability issues, then you can switch to the same origin option. This setting enables the page to load in a frame on the same origin as the page itself, which should resolve any issues you’re encountering with your own content:
Alternatively, you can opt for allow-from URI directive. This setting permits the page to be loaded in a frame on the specified origins or domain. After selecting this option, you’ll get access to a field where you can enter the Uniform Resource Identifier (URI) that you wish to whitelist.
2. X-XSS-Protection
The X-XSS-Protection header prevents pages from loading when a Cross-Site Scripting (XSS) attack is detected. If a hacker does manage to launch a successful XSS attack, they could potentially execute malicious code on your server, or in the visitor’s browser. This includes code that’s capable of performing various actions, including stealing the visitor’s personal information or redirecting them to an entirely different website.
By default, this header is set to 1; mode=block. This means that if an XSS attack is detected, the browser will sanitize the page and prevent it from rendering. Alternative options include 1, which will sanitize the page, but not prevent that page from rendering:
The Redirection plugin also supports the 1; report=<reporting-URI> directive. This attribute sanitizes the page but also reports the violation using the report-uri directive.
3. X-Content-Type-Options
This response header indicates that the Multipurpose Internet Mail Extensions (MIME) types advertised in the Content-Type headers shouldn’t be changed. This can be an important line of defence against content sniffing.
As part of this attack, a third party will transform non-executable MIME types into executable types. They may then attempt to upload malicious content to your website by disguising it as something else.
By default, Redirection’s X-Content-Type-Options header uses the nosniff directive. This blocks all requests if the destination is of type style and the MIME type is not text/css. It also blocks requests if the destination is of type script and the MIME type is not a JavaScript MIME type. With these settings in place, the browser is required to use the MIME type sent by the origin server.
The nosniff directive also enables Cross-Origin Read Blocking (CORB) protection for several MIME-types, including text/html, and application/json. CORB is an algorithm that can identify and block cross-origin resource loads in web browsers before they reach your page. In most browsers, this can keep sensitive information out of untrusted script execution contexts, which makes it more difficult for hackers to steal your data.
4. Content-Security-Policy
Redirection’s Content Security Policy (CSP) adds an extra layer of security that can help harden your site against several common attacks. By default, Redirection uses the following:
default-src 'self'; script-src 'unsafe-inline' 'unsafe-eval' http:; style-src 'unsafe-inline' http:; img-src http: data:; font-src http: data:; sandbox allow-forms allow-scriptsThis CSP states that all content should originate from the site’s own domain, and also defines a valid source for images and fonts. This can prevent the browser from loading untrusted resources.
You can also use the sandbox attribute to set an extra set of restrictions for the content in the iframe. This can be a space-separated list of predefined values, as we can see in the Redirection plugin’s default attribute:
sandbox allow-forms allow-scriptsHere, Redirection is permitting form submissions and scripts. CSP is a huge topic, so we recommend checking out a complete list of all the possible values to see what different security policies you can create.
5. Referrer-policy
When writing content, you’ll often include links to external websites. Whenever a visitor clicks on one of those links, the destination site will receive information about where this person came from.
Referrer data can be invaluable for helping websites understand their traffic. However, sometimes you may need to restrict the amount of information that you share with these third parties. This is particularly important if the point of origin contains sensitive data that could identify users. Leaking personal information across origins can compromise your audience’s privacy, and give hackers more information to work with.
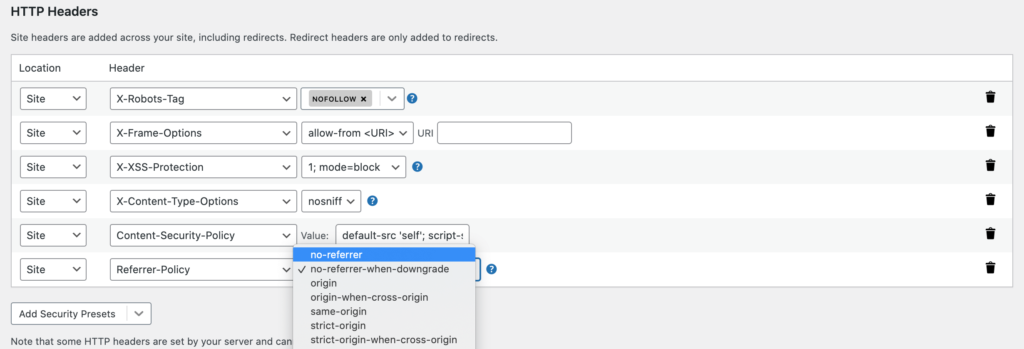
You can control the amount of data that is sent via the Referer header, using Referrer-policy. By default, the Redirection plugin uses the value no-referrer-when-downgrade. This prevents the browser from sending the Referrer header when navigating from HTTPS to the less-secure HTTP. You can replace no-referrer-when-downgrade with a range of alternative values:
The possible options include no-referrer, which instructs the browser to never send the Referer header with requests that are made from your website. You can check out the MDN Web Docs to learn more about Referrer-policy values.
Conclusion
As a website owner, you need to protect your CMS against a wide range of attacks. HTTP security headers can restrict the actions that servers and browsers can perform, which can be invaluable for protecting your site against major security threats.
Let’s recap five HTTP security headers that you can add to your site using the Redirection plugin:
- X-Frame-Options
- X-XSS-Protection
- X-Content-Type-Options
- Content-Security-Policy
- Referrer-policy
Do you have any questions about any of these HTTP security headers? Ask away in the comments section below!




No Comments
Start the conversation