In this post, we will review TranslatePress, a popular plugin to build multilingual websites. Not only was it a nominee of plugin madness 2021, it also boasts over 100,000 installs in the WordPress directory and a solid 4.6 out of 5-star rating.
Why use a multilingual plugin and translate your WordPress site in the first place? Well, there are some compelling reasons:
- Though English is the most commonly used language on the web, ¾ of Internet users don’t speak it as their primary language – that’s 3.8 billion people!
- 56.2% of consumers say the ability to obtain information in their own language is more important to them than price
- 40% of users won’t make purchases in a language that is not their own
In short, if you are only offering your website in one language, you may be missing out on a ton of traffic and potential customers. So, building a multilingual website doesn’t seem like such a bad idea, does it? Then let’s review how TranslatePress can help you do so.
How to Use TranslatePress
The best way to understand what TranslatePress is capable of is to go over a simple use case and see the plugin in action.
Installation and Setup
You can easily install TranslatePress like any other plugin. Log in to your WordPress back end, go to Plugins > Add New and search for it by name. Once found, click on Install Now and then Activate once it has been downloaded.
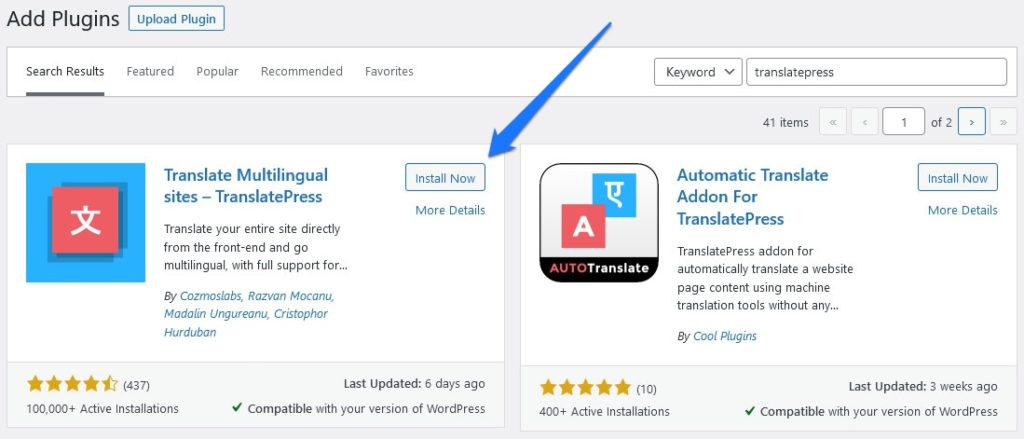
After that, go to the settings, which you can find under Settings > TranslatePress.
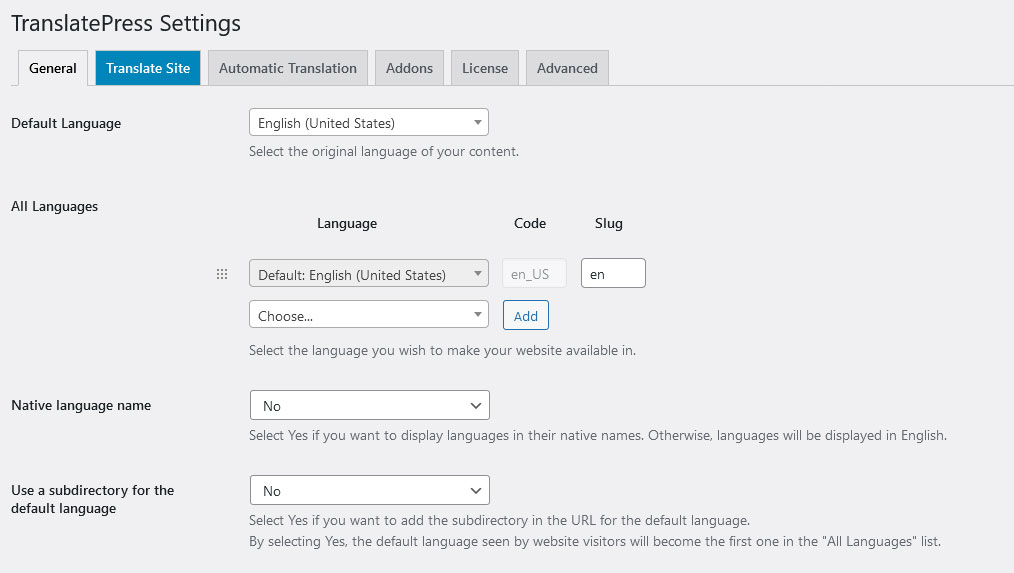
Here, you first need to pick your source language that your site is currently in. Choose it from the drop-down menu under Default Language. In this case, I keep it as English.
Secondly, you need to pick a target language. That’s what you want to translate your site to. In this example, I choose German, since that is one of the languages I speak. Choose it from the drop-down list and then click Add, don’t forget to save at the bottom.
There are also options to review what changes TranslatePress makes to your site URL to keep the different language versions separate. By default, it will display target languages in a different directory. That means, if your site is at yourdomain.com, the German translation would appear under yourdomain.com/de/.
However, you can also determine that your default language should get the same treatment as well. So, if your site is originally in English, the homepage would then be available under youdomain.com/en/. It’s up to you to decide which way you like better and you can change this where it says Use a subdirectory for the default language.

You can also customize the end of the URL under Slug in the language settings.
How to Translate Your Content
Once you have your source and target language in place, it’s time to get translating. For that, click the big blue button that says Translate Site or a link with the same name in the WordPress admin bar.

Doing so takes you to this screen:
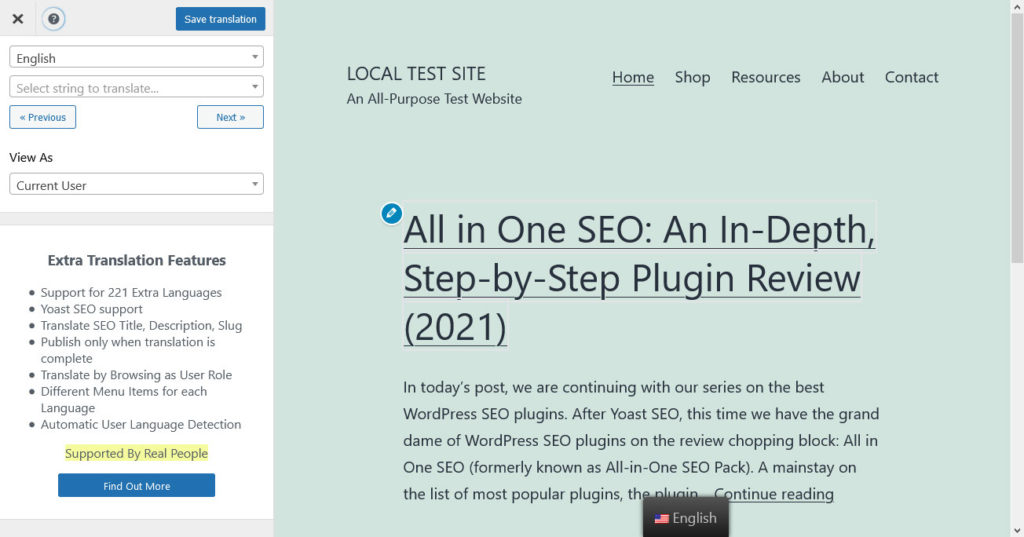
On the right side you see the content of your site. On the left, you find the tools to convert it to another language.
The process is very simple. Choose your source language with the top drop-down menu. Below that, you can access all the strings (meaning text) on the current page via another drop-down. You can also cycle through them with the Next and Previous buttons plus they keyboard shortcut Ctrl/Cmd+Alt+right/left arrow.
When you pick a string, it opens up a second menu at the bottom where you can input its translation.
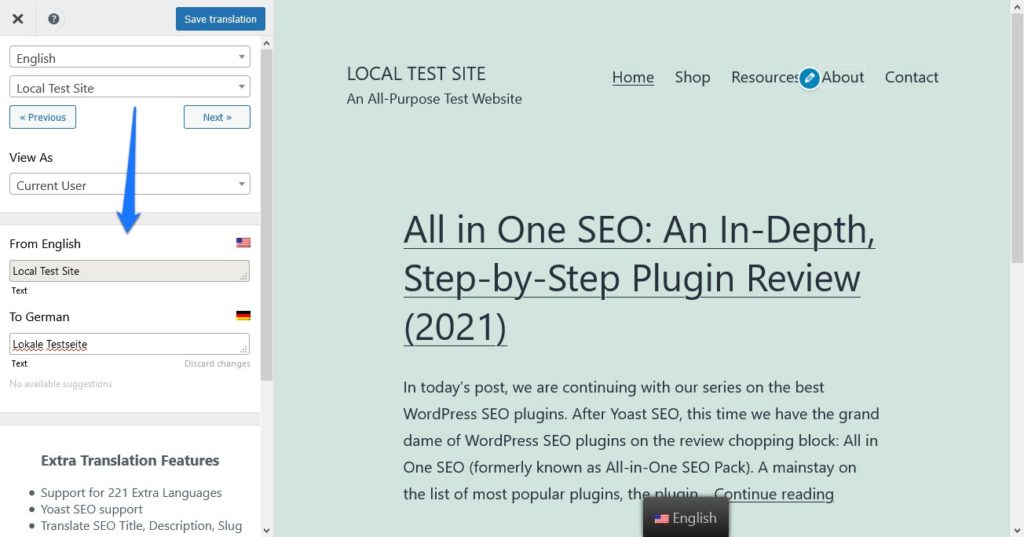
Do it and click Save translation at the top or hit Ctrl/Cmd+S. That’s pretty much it.
You can also choose strings to translate on screen with your mouse. Hover over what you want to translate and click the blue pen icon next to it.
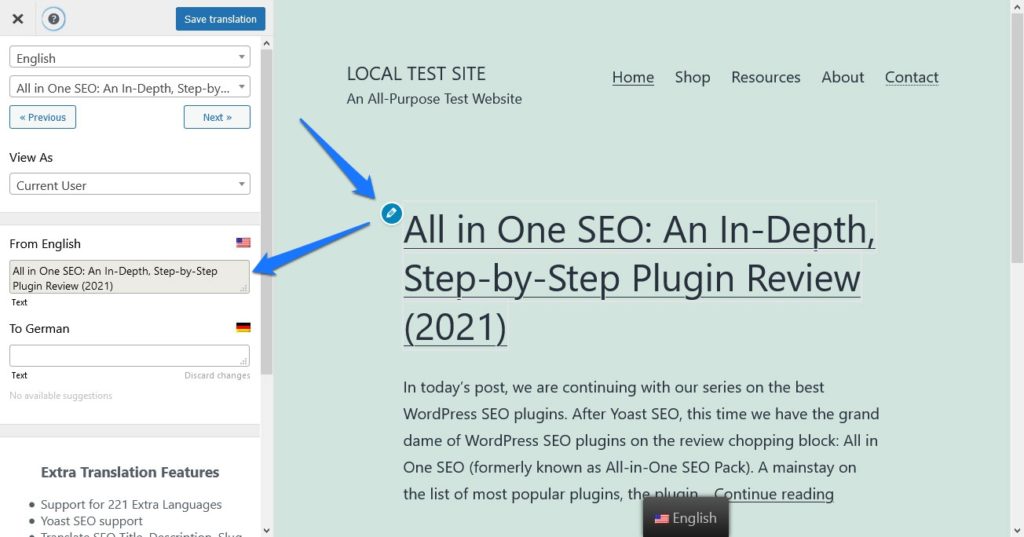
In addition, when you are done with one page, you can also use this screen to navigate your site and translate other parts of it. E.g. you can click on the blog post seen in the screenshot to convert it to another language as well.
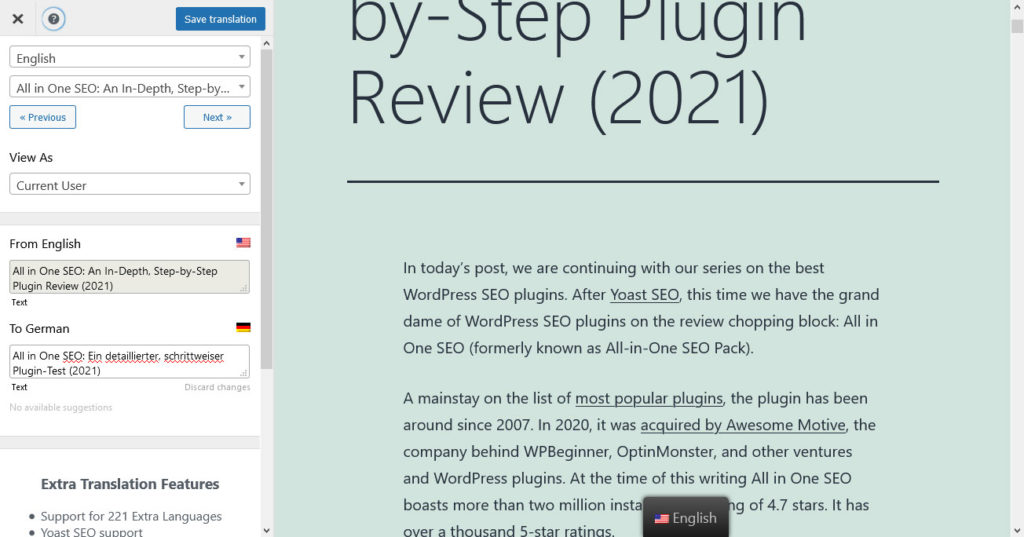
When you have saved your changes and now go to the front end of your site, you will see a language switcher there.
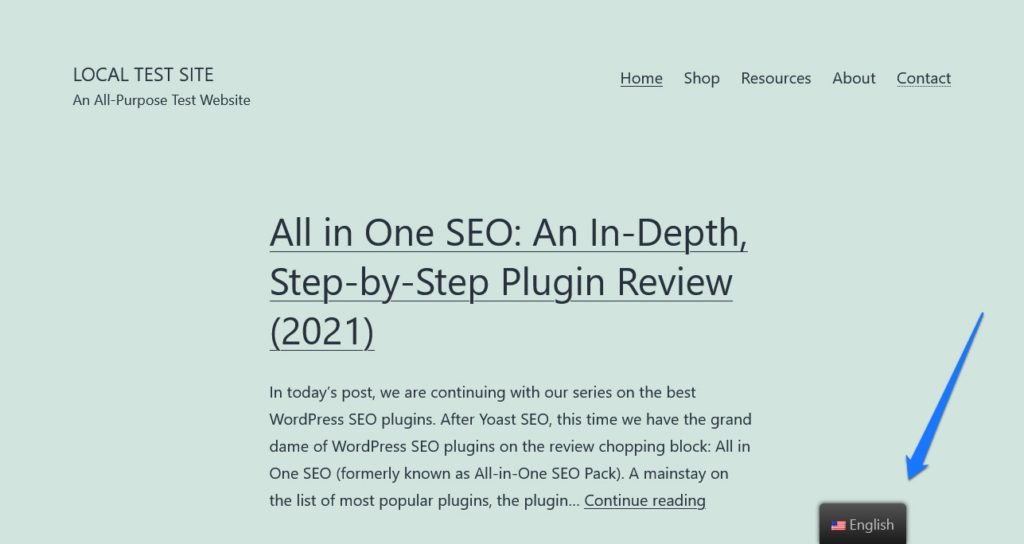
Hover over it and choose your target language. The site will automatically change to the translations you just created.
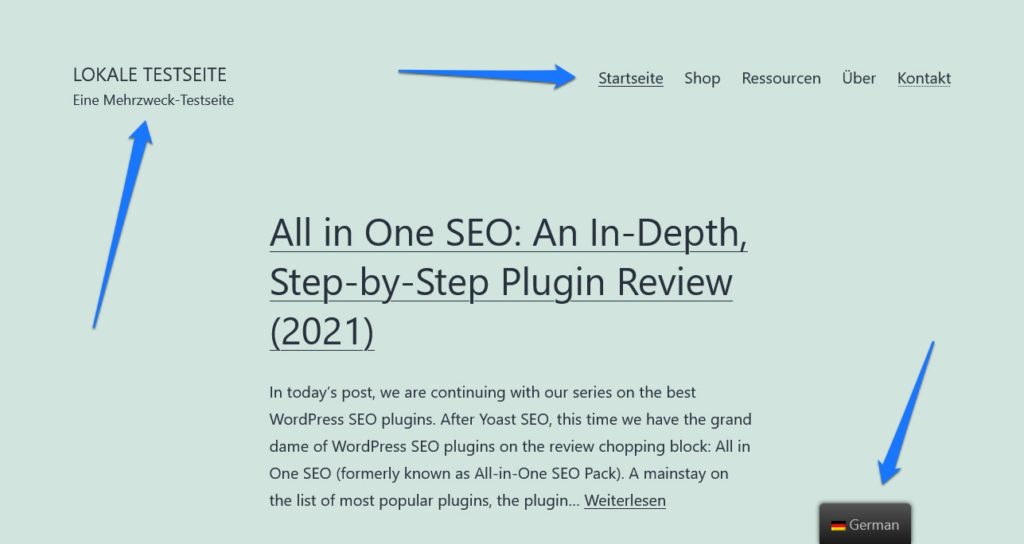
Easy peasy, don’t you think?
How to Automatically Translate Your Content
Aside from manually translating content, TranslatePress also offers the possibility to do it automatically. Unsurprisingly, you find this option in the settings under Automatic Translation where you first need to set Enable Automatic Translation to Yes in order to access it.
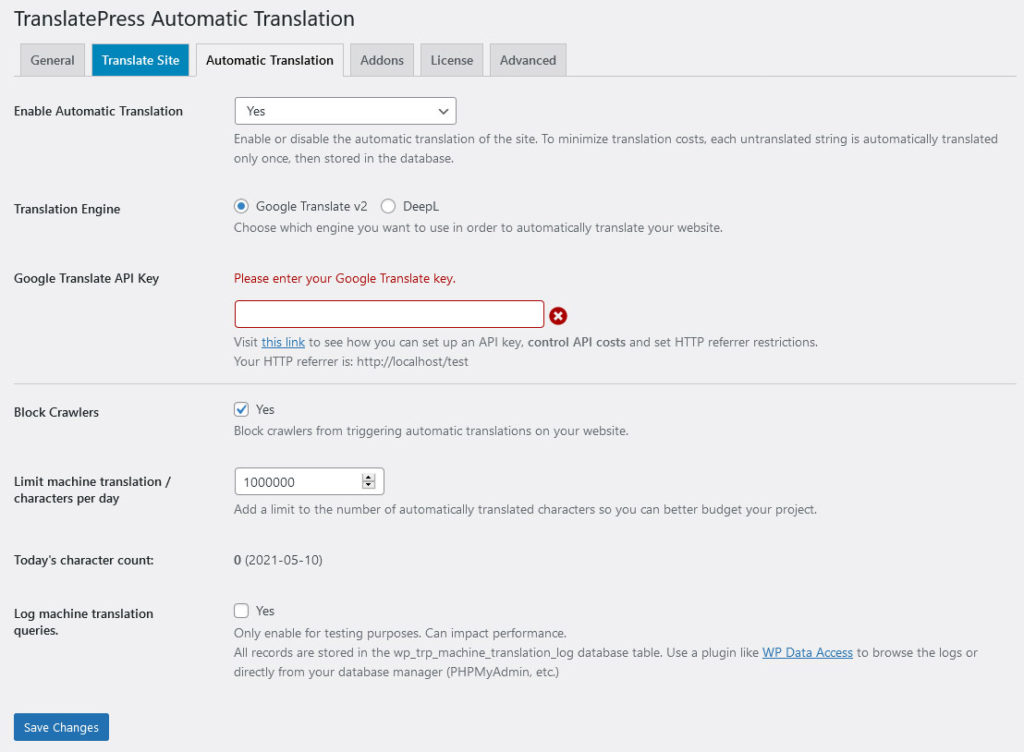
In the free version, you can only use Google Translate for this and you need to input an API key from Google Cloud to do so (there is a free trial available). You can find instructions on how to set it up on the TranslatePress website.
Once you have entered and saved your API key, when you now go back to your website front end and switch languages, you can see that it has been completely moved over to your target language.
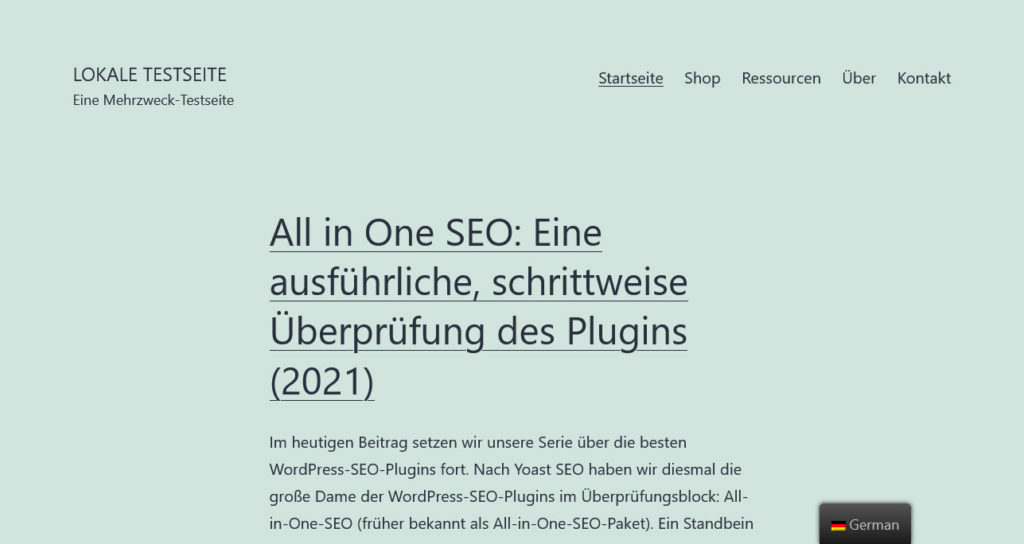
However, and that is important, anything you enter via the manual translation mask mentioned above supersedes the automatic translations. So, if you find that the machine translation is not entirely up to your liking, you’re able to correct it in the way we already covered.
Add and Modify the Language Switcher
We have already mentioned the language switcher above. It automatically appears on your site when you activate TranslatePress. If you don’t like its default look and position, the plugin offers plenty of options to customize it.
Available Settings
First of all, in the settings, you can choose whether or not your target languages should be displayed in the target language itself.

For example, if I enable this, it no longer says German on the front end of my test site but Deutsch (Sie) (which means formal German) instead.
Secondly, you can customize the floating language selector that’s currently on your site via its built-in options.
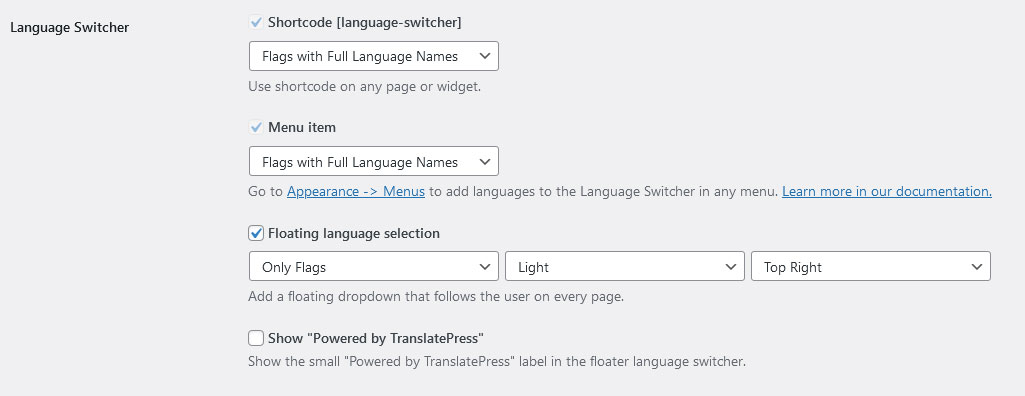
You have the following choices:
- Display full or short language names with or without flags or only flags
- Choose a light or dark theme
- Determine the position: top or bottom of the screen or left and right
With that, you can already make it look very different.

Of course, if you know your way around CSS classes and ids, you can also completely customize it to your liking, including its design and position.
Use the Shortcode and Menu Option
If none of that is right for you, you can also completely eliminate the default switcher and go with one of the two other options: using the shortcode to place it anywhere you want and adding it as a menu item.
For the first option, TranslatePress comes with a built-in shortcode called [language-switcher]. You can use it to place this element wherever you want, including widget areas.
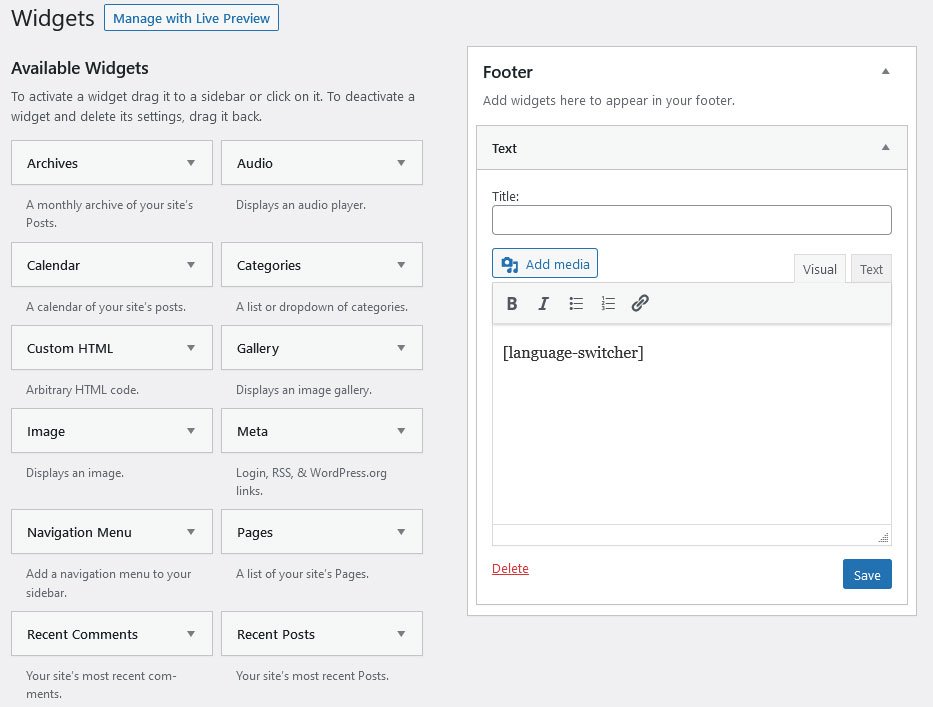
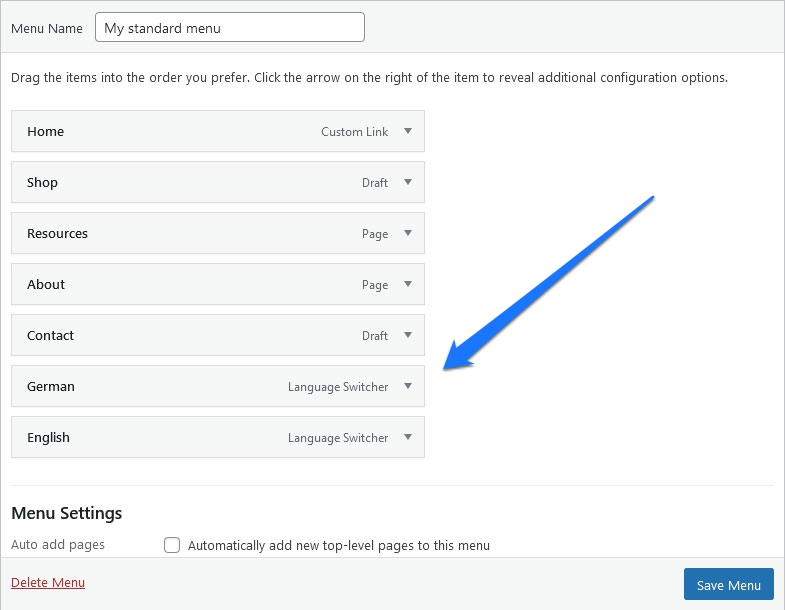
Finally, with TranslatePress active on your site, you also find some new options under Appearance > Menus.
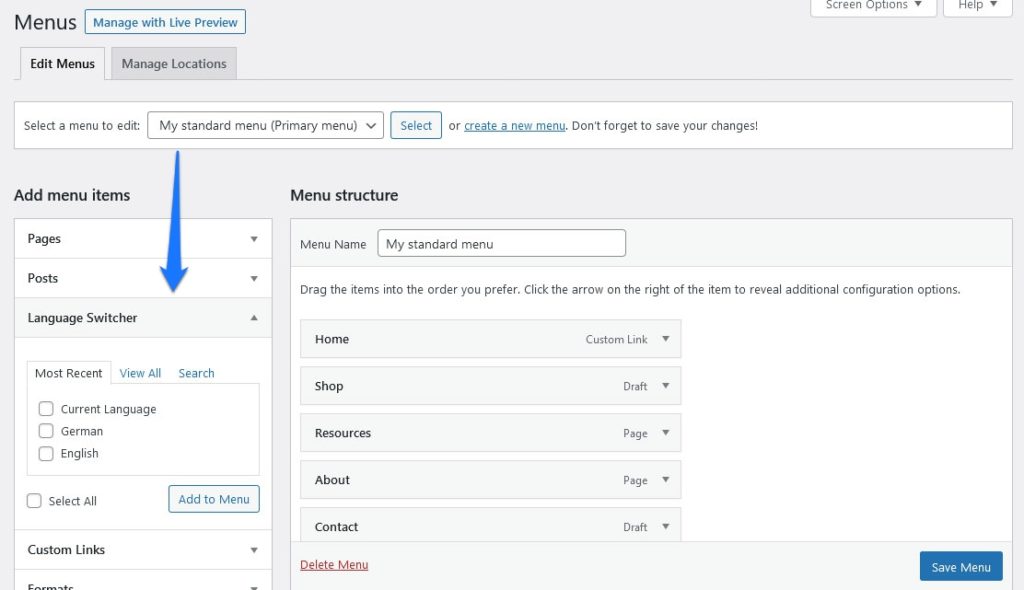
This allows you to add the language button to any WordPress navigation menu instead. Just pick which languages you want to appear, add them to the menu, drag and drop them wherever you want, save, and you are done.
Here’s what it looks like on the page:
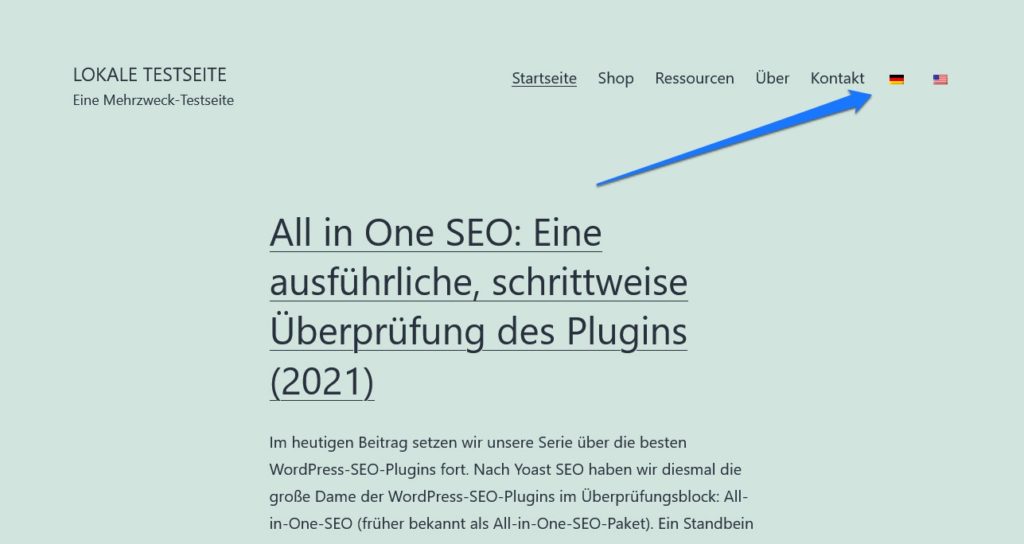
For both of these options, you also have the possibility to choose the format in which your language switcher will appear on page.
Other TranslatePress Features
Aside from the main features we already talked about in the above review, TranslatePress offers a few more options that we will cover now.
Under License you will be asked to input a license key if you purchase any of the premium addons. More on that below.
Aside from that, you find most other options under Advanced.
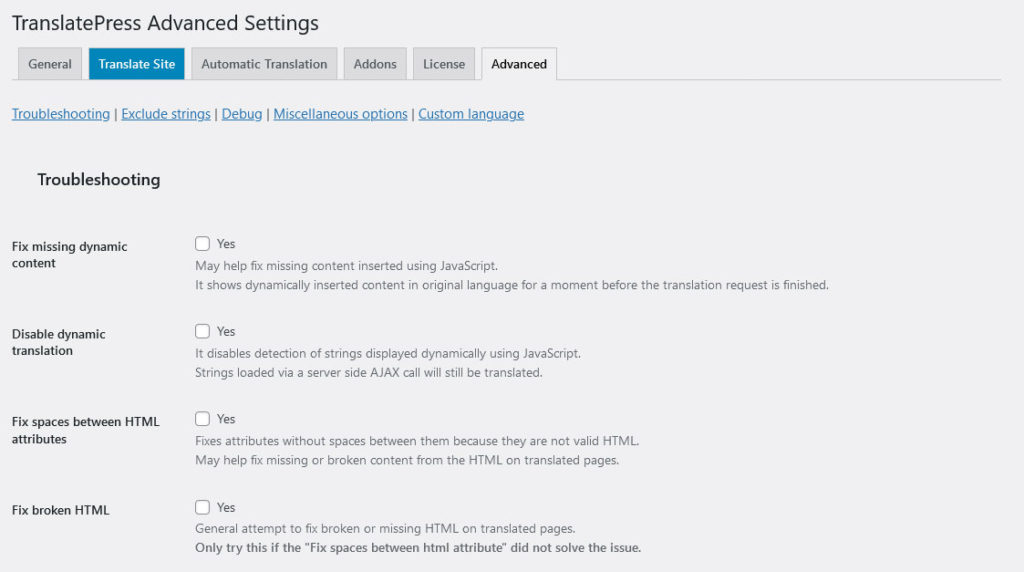
Let’s quickly go over them:
- Troubleshooting – These options help you if TranslatePress has problems translating text on your site due to their markup and other reasons. You can find details here.
- Exclude strings – Here, you can input strings that you don’t want the plugin to attempt to translate. You can exclude text domains, text in HTML nodes, strings under certain paths on your website, and more.
- Debug – Debugging options for TranslatePress.
- Miscellaneous Options – Options for translation of numbers and numerals (e.g. to automatically input a different phone number for a different language version), the hreflang tag, and date format for target languages.
- Custom language – The ability to create your own language option inside of TranslatePress including slug, flag icon, and more.
TranslatePress Premium Features and Pricing
Besides the free version, TranslatePress also has premium plans that we want to go over in the last part of this review. They come in the variety of Personal, Business, and Developer licenses that cost 79€, 139€, and 199€ respectively (about $95, $168, $240).
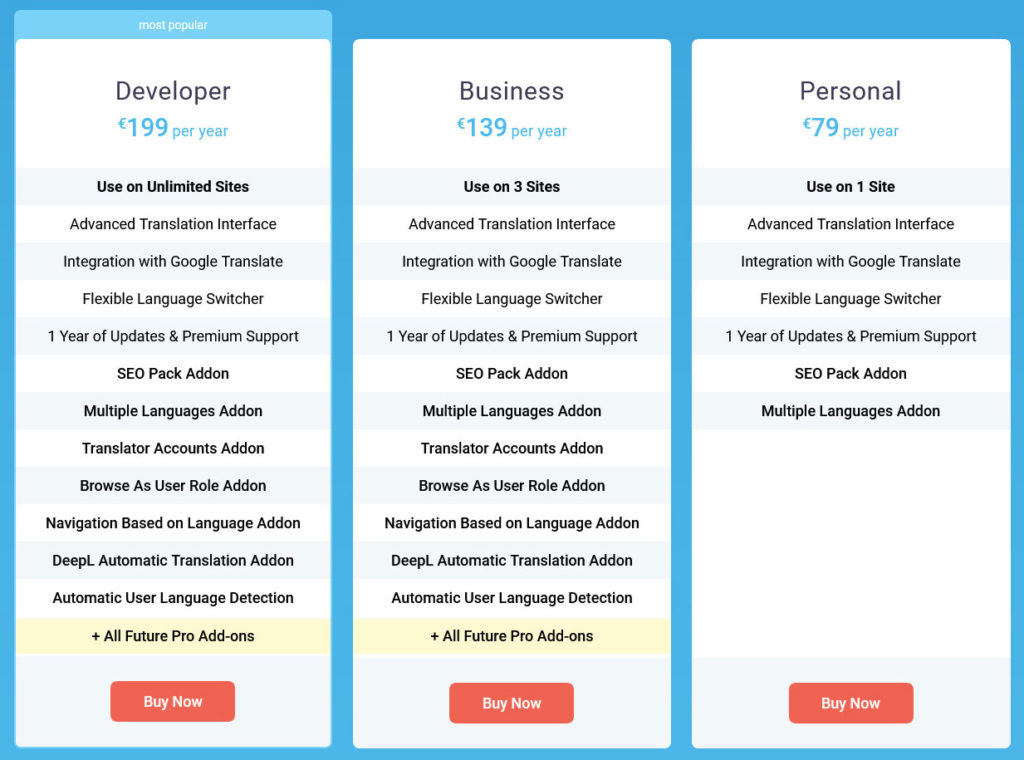
Personal is valid for one site, Business for three, and Developer for an unlimited number of sites.
In addition, they come with various addons. The Personal license includes:
- SEO Pack – Allows you to translate page URLs, SEO and social titles and descriptions, as well as image ALT tags. It also adds multilingual sitemap support to all popular SEO plugins.
- Multiple Languages – Add more than one target language to your site, which is what you are limited to in the free version. Choose from 221!
In addition, Business and Developer accounts benefit from these addons:
- Translator Accounts – Allow other, non-administrator users to translate site content.
- Browse as User Role – See what site translations look like as certain user roles, including content that might be restricted to them.
- Navigation Based on Language – Adds the ability to create different menus for different languages, not just translated versions of the same menu.
- DeepL Automatic Translation – Adds the ability to automatically translate your site with the DeepL translation service instead of just Google Translate. Note that this needs access to the DeepL API that is priced separately.
- Automatic User Language Detection – Detects browser language settings and automatically redirects visitors to their language version.
In addition, Business and Developer license holders get access to all future addons that the makers of TranslatePress will release.
TranslatePress Review: Final Thoughts
TranslatePress is a very comfortable multilingual plugin solution to translate your site. It’s quick and easy to set up, has few options to consider, and you can get started right away.
What impressed me most is how easy and straightforward it is. There is no need to manually create several language versions in the editor, everything happens in a central interface that makes the process really easy.
Plus, the plugin takes care of it pretty much automatically. You just input the translations and they appear on your site like magic, including the changes to the site URL. It’s pretty cool and works for translating WooCommerce as well.
I would maybe wish for some more settings to style the language switcher because users without CSS knowledge are stuck with the default options. However, what’s available is also definitely functional and enough in most cases.
To anyone looking for an easy way to translate their WordPress website, TranslatePress is definitely something you should give a try.
What feature in this TranslatePress review do you find most exciting? Let us know in the comments!

1 Comment