If you’re a WordPress developer, you’re probably looking to set up a local development environment where you can test your changes before pushing them to your live site. However, you might not know the best way to go about it.
There are a few different ways to move a live WordPress site to a local environment. The best option will likely depend on your experience level, and the migration process might only take a few minutes.
In this post, we’ll discuss why you may want to move a live website to a staging environment. Then, we’ll share two different ways to migrate your site. Let’s get started!
Why You Might Want to Move Your Live Website to Local
There are a few reasons why you might want to move your live WordPress site to a local environment. The main reason is usually for development and testing purposes.
With a local development environment, you can test out changes to your theme or plugins without affecting your live content. This enables you to experiment freely without worrying about breaking your site.
Additionally, your hosting plan might not have sufficient resources (such as CPU or memory) to run WordPress locally. In this case, it can be helpful to use a staging site on an alternate host before the database is created and imported on the localhost.
Lastly, some developers prefer to work offline on their local machine because it’s faster than working on a remote server. This isn’t necessarily a reason to move your live site to local, but it’s something to keep in mind.
How to Move a Live WordPress Website to a Local Environment (2 Methods)
Now that we’ve established some reasons for moving your live site, let’s look at two methods you can use for a successful migration. Note that for both methods, you’ll need to create a local server environment. You can do this with MAMP, WAMP, or XAMPP. For this tutorial, we’ll be using the latter.
1. Use a Plugin
The quickest and easiest option is to use a plugin. Duplicator is a popular choice for migrating WordPress sites. It’s free and relatively easy to use, even if you’re not a tech-savvy person:
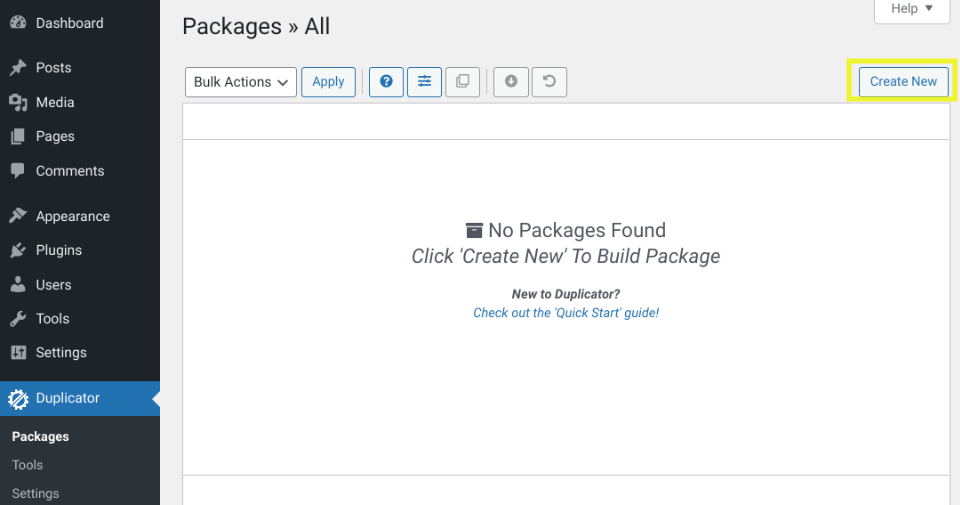
To get started, install and activate the plugin on your live WordPress site. Next, navigate to Duplicator > Packages and select the Create New button:
On the next screen, you’ll need to choose whether to include any additional files or directories. Click on the Next and Build buttons to proceed.
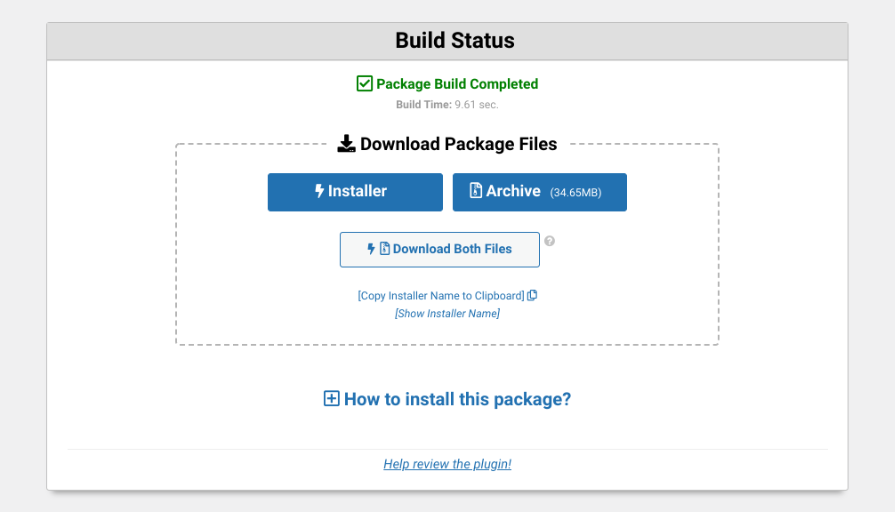
Duplicator will create a package of your WordPress site which you can download to your computer. You’ll need to download both the installer.php and archive.zip files:
Now, it’s time to upload the files to your local server and run the installer. To create a new database for your site in localhost, you can use phpMyAdmin or run a SQL query in MySQL. You’ll need to make a note of the name, username, and password of your database.
Next, you’ll need to create a new folder inside the local server root folder (C:\xampp\www\) for your new local site. Open the folder, then copy and paste the archive.zip and installer script files.
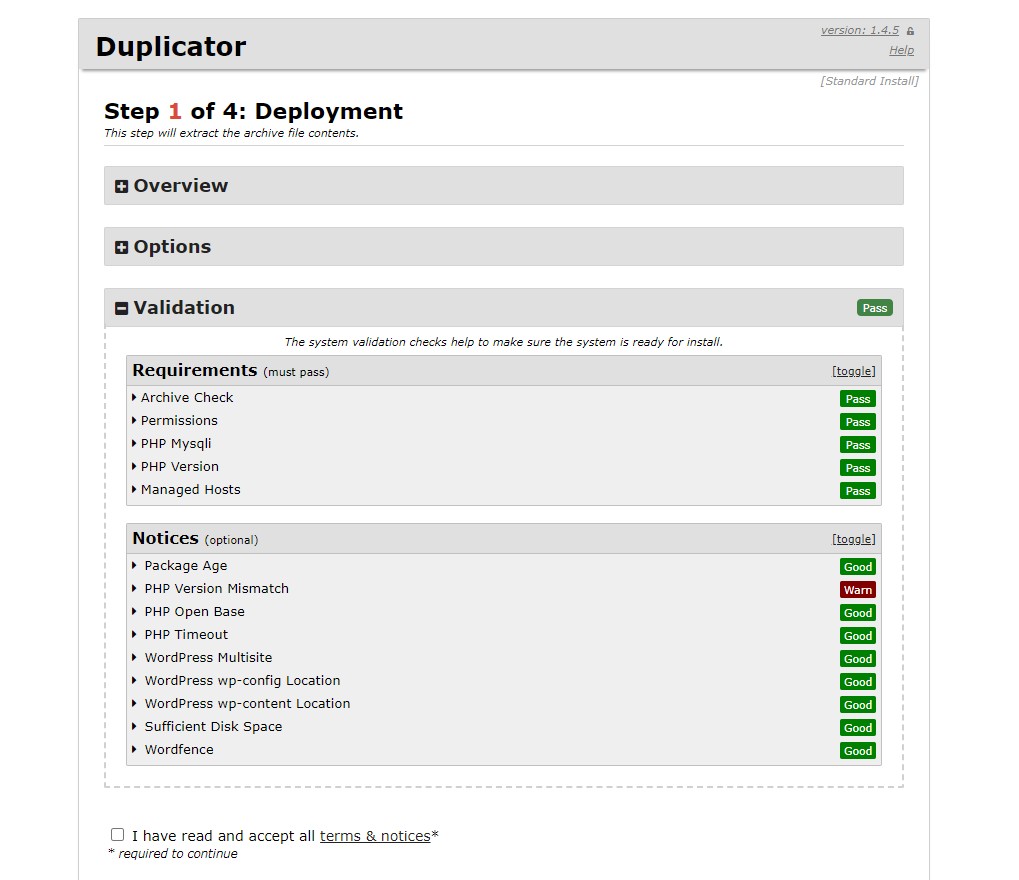
You can then go to http://localhost/package/installer.php in your browser to run the Duplicator installer script:
Here, you can input your database details. Once you’re done, click on the Next button.
If everything is working properly, you should see a success message. Click on Next to proceed.
On the next screen, you will need to enter a new username and password for your WordPress site. Then scroll down and select Install.
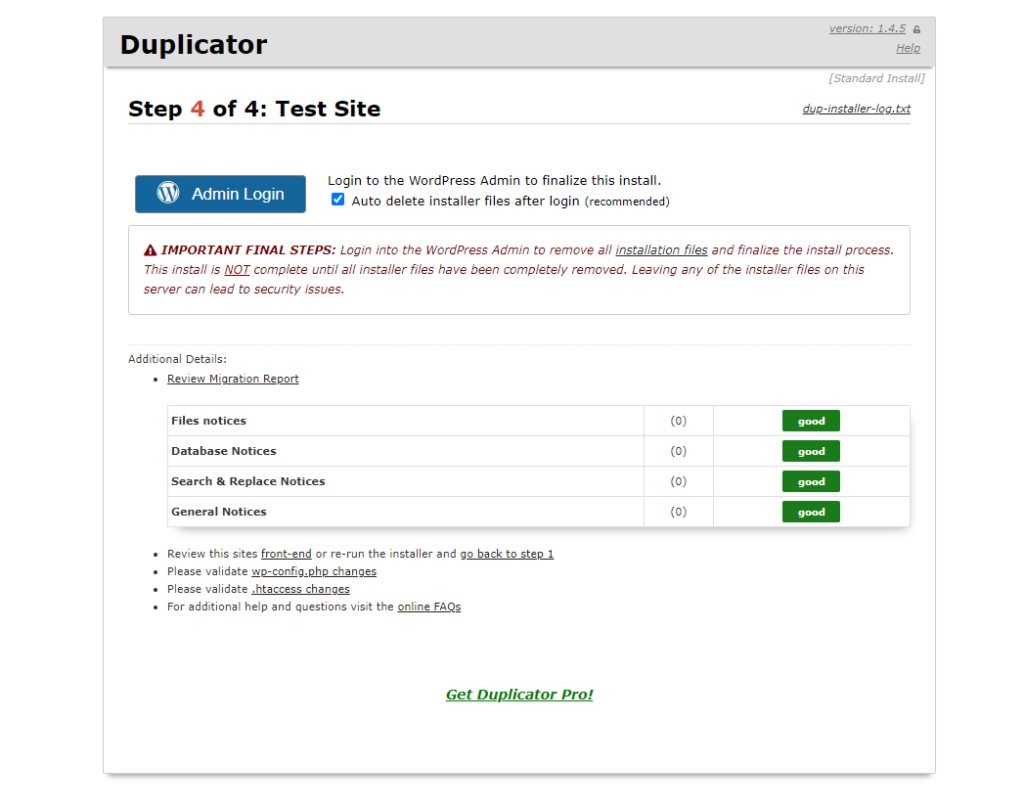
Duplicator will start migrating your WordPress site to localhost. This process typically takes a few minutes. When the migration is complete, you will see a success message:
Click on the Admin Login button to log in to your local WordPress site. You should now see your live WordPress site running on localhost.
2. Manually Export Your Database
You can also move your WordPress files and database manually from your live server to your local development environment. This method is recommended for experienced developers who are comfortable working with a File Transfer Protocol (FTP) client and phpMyAdmin.
If you’re not familiar with these tools, don’t worry! We’ll walk you through each step of the process so that you can successfully migrate your site.
The first thing you need to do is back up your live WordPress site. This way, if anything goes wrong during the migration process, you’ll have a backup to fall back on.
Step 1: Export Your WordPress Database
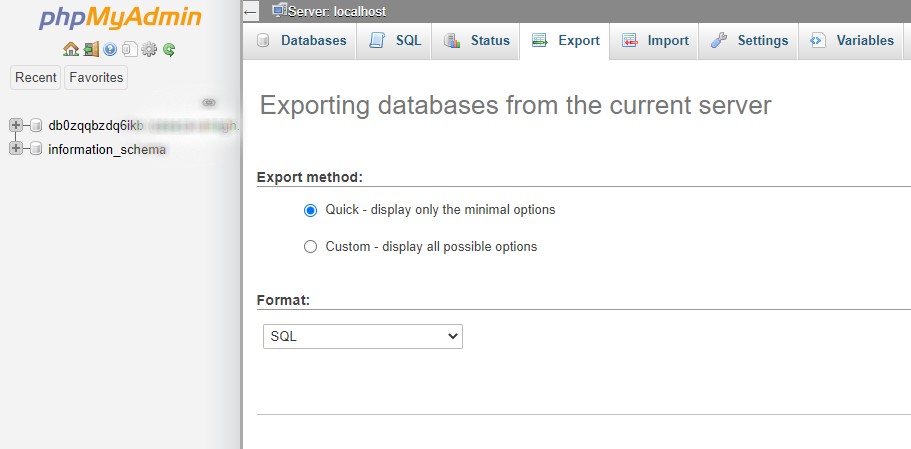
First, you’ll need to export your WordPress database. Log into your hosting account’s cPanel and navigate to phpMyAdmin. Then, select the database you want to export followed by the Export button:
You can choose between the quick or custom methods. Click on Go to download your database files.
Next, you can download the WordPress files using an FTP client or File Manager. In File Manager, you can simply download the public_html folder. If you’re using FTP, select all of the files in your site’s root folder, then right-click and select Download.
Step 2: Create a New Database
Now it’s time to create a local server environment. Again, you can do this using MAMP or XAMPP.
Once you’ve set it up, you can add a folder inside C:\xampp\www\ to put your local site. You can copy and paste the WordPress files here.
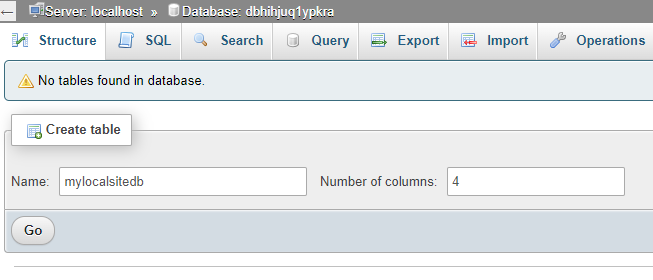
You’ll also need to create a new database using phpMyAdmin. You can do this by visiting http://localhost/phpmyadmin/. Then, select the Database tab, name your database, and select Go:
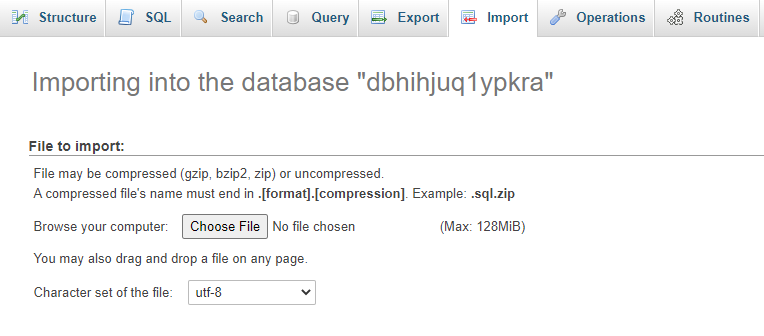
Next, select the Import tab followed by Choose File:
Then, upload the database export file that you downloaded earlier, and click on the Go button. PhpMyAdmin will unzip and import your WordPress database.
Step 3: Update the wp-config File
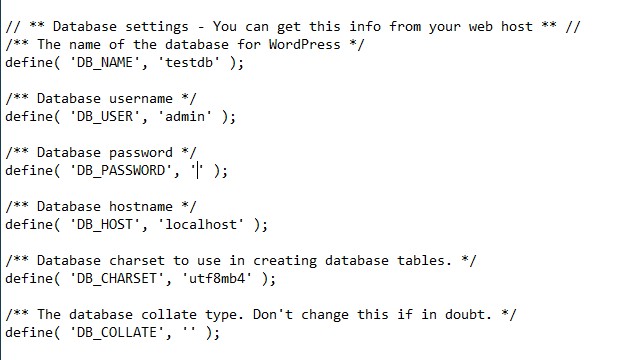
The last step is to update your wp-config.php file. Navigate to the local WordPress installation folder and copy and paste the wp-config.php file into a text editor:
You’ll need to change the name of the database to your new database name created with phpMyAdmin. Then, you can update the database username and password (if you’re using one).
That’s it! You can now access your live website in your local browser.
Conclusion
Moving your live WordPress site to a local server is recommended when you’re testing out new features or editing your files. It can prevent unnecessary downtime and minimize the chances of something going wrong.
As we discussed in this article, there are two methods you can use to move a live site to a local environment:
- Use a plugin such as Duplicator.
- Create a local server environment and manually export your database and files.
Do you have any questions about moving a live WordPress site to local? Let us know in the comments section below!


No Comments