Tired of looking at your unkempt website? Of seeing it full of clutter and chaos, lowering your mood, and reducing your quality of life? Do you abhor the rows of post drafts, piles of spam comments, and a jumble of dashboard widgets that greet you every time you log on? Sounds like it’s time for a website clean up!
Introducing the revolutionary Marie Kondo (-inspired) system for bringing order to your WordPress website. With the KonMari (-esque) guide for uncluttering your web presence, you, too, can have a peaceful environment to work, create content, and grow your business.
Are you ready to enter a new era of website administration that is no longer a slog but sparks joy? Then let’s go onto this journey of a lifetime together.
*Copyright disclaimer: TorqueMag and WP Engine are in no way affiliated with the KonMari method, Marie Kondo, or the Marie Kondo brand. This is not an officially endorsed KonMari guide or product but a tongue-in-cheek guide to website maintenance. Please don’t sue me!
The KonMari Method in a Nutshell

For the uninitiated, let’s go over the basic tenets of the KonMari method before learning how to apply it to your WordPress site.
- Tidy up by category – Instead of going by location, Marie Kondo advises to go through your tidying-up journey by category. In terms of house cleaning that’s usually clothes, books, papers, miscellaneous, and sentimental items. Naturally, they are not the same when talking of a website but we will use the same principle.
- Keep only what sparks joy – Go through each item that you own one by one. For each, ask yourself if it sparks joy, meaning if it speaks to you on a personal level. If not, it’s time to discard it with gratitude. This is a very personal way of looking at your stuff because only you will know what sparks joy.
- Discard, then organize – When done sorting what you have, designate a place for everything. Keep similar things together and keep storage solutions simple to make items easy to reach and put back, so to speak.
- Do it all at once – Instead of in increments, when you have time, do it in one fell swoop. This prevents you from going back to your old ways. It might take a while but the point is not to stop.
It’s important to note that the focus of this method is on what you want to keep, not on what you want to get rid of. This is also not a method to put all of your possessions in order but paring them down to the essentials that you really adore and that have a place in your life.
The goal is to end up with a website that sparks joy when working with it and looking at it. For more info, visit the official Marie Kondo website. Remember, life really begins after you set your website in order.
How to Apply Marie Kondo’s Ideas to Clean Up Your WordPress Website
After settling on what the pillars of the Marie Kondo method are, let’s go over how to apply them to your website.
Our Cleaning Categories
Since WordPress has its own organizational layout, we are less flexible in organizing. We also can not freely decide where we put things because that has already been done for us. However, what we can do is choose the order in which we tackle the different categories of website items, which is:
- Core updates
- Content
- Design
- Dashboard/Back end
- Plugins
- Themes
- Media
- Comments
- Users
- Updates
- Database
We will approach each part of your website in the same way and according to the principles laid out above: collect what is there, go through each part one by one to determine what goes and what stays, then organize the remains.
Note that, in this case, because some tasks take quite a while, organizing can also mean adding them to a to-do list. This is where we diverge a bit from the original Marie Kondo spirit but some website tasks simply take too long to do them all in one go.
Preparing for the Deep Clean
The benefit we have when dealing with websites in contrast to real-life items is that we can make a copy of what we have to which to apply the KonMari method. This is what we highly recommend, in the form of a local development or staging site, since many of the changes we are about to introduce should not be visible to users while you are making them.
You wouldn’t invite friends over while cleaning your belongings, would you? Instead, you would invite them to your newly sparkling and decluttered house so they can see the results of your efforts. We are doing the same here but in this case we are making a copy of our “house” that we will work in and then present to the world when it’s ready.
1. Caring for Core Updates
First up on our journey to website bliss: site updates. WordPress kindly collects all available core, plugin, and theme updates under Dashboard > Updates.
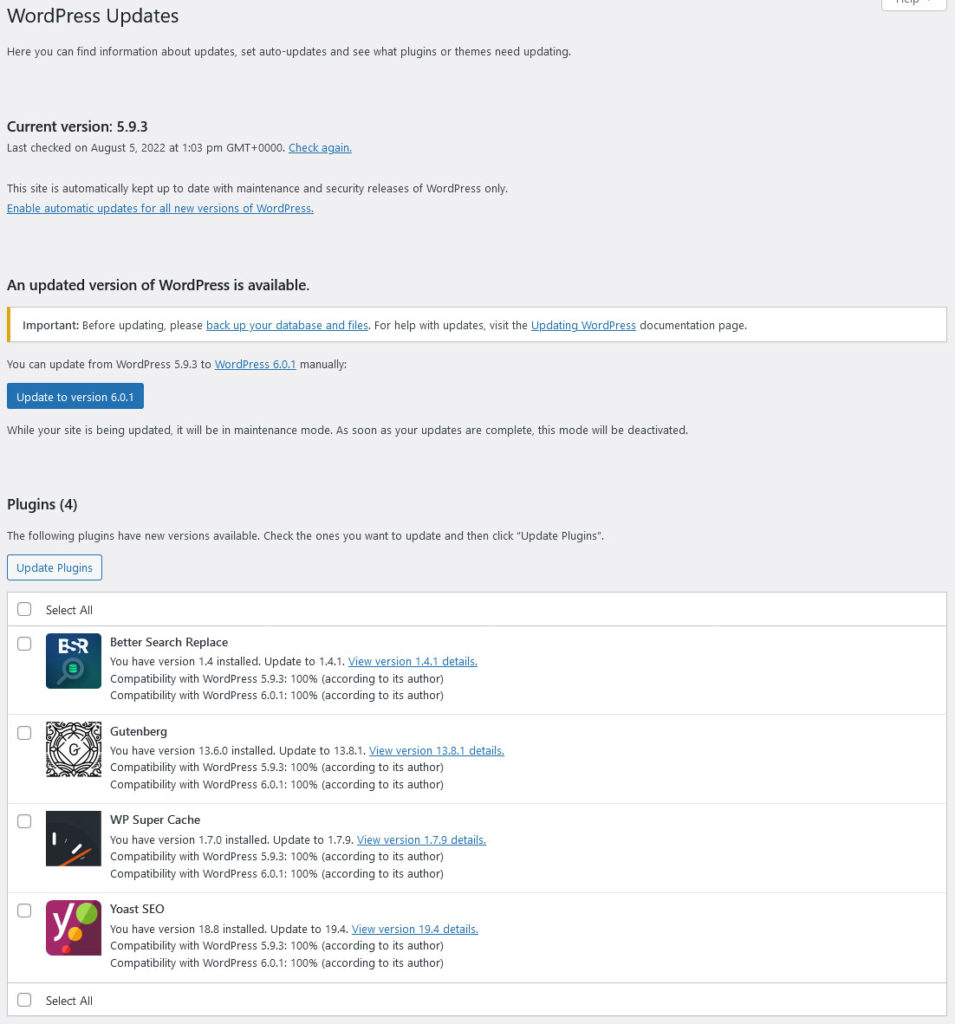
If you find a lot of out-of-date components and core versions here, that’s probably not something that sparks joy. After all, lack of updates is one of the main reasons how WordPress websites get hacked. Therefore, your first task in Marie Kondo’ing your WordPress site is updating the core software.
So, click the update button, wait until it is finished, then check your site for any problems. If there are none, send it some gratitude and move on.
No need to do the same for plugins and themes, we will get to those separately below. Categories, remember?
2. Cleaning Up Your Content
Content is at the heart of every website, therefore, it deserves the most attention.
Putting It All in One Place
Thankfully, WordPress already does a good job at collecting all the content in central locations, namely the Posts and Pages menus.
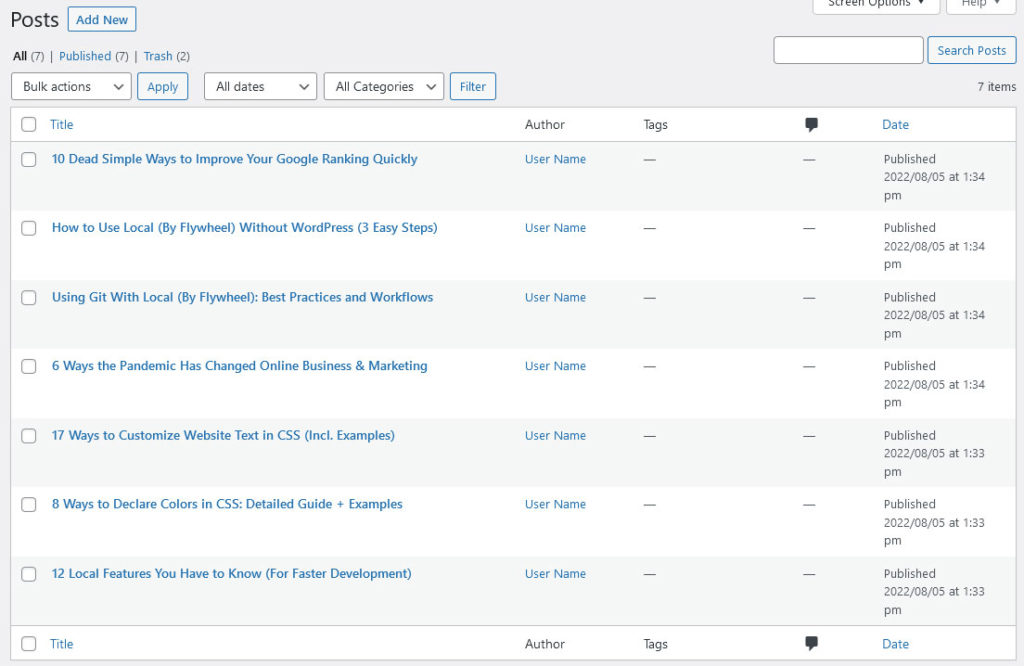
However, keep in mind that part of content is also the categories and tags that it is assigned to. In addition, depending on your website design, you might have important content such as a mission statement or else in text widgets in the sidebar or footer. Don’t forget those! Make sure that you are aware of everything there is before moving on.
Looking for the Spark
Since it has already been collected for us, we can quickly move on to the examination part or what, in non-KonMari terms, is also called a content audit. That means going through each of your posts and pages and determining whether you feel the spark enough to keep them.
Do they add value to your website and visitors? Do they represent your best work and what you are trying to convey with your site? Is your website better because they are there?
If the answer is yes, they stay. If the answer is no, it’s time to say goodbye, thank them for their service and hit the Delete button.
There might also be some that do spark joy but need some extra attention to get to the point where they deserve to stay on your site. We will get to those in next step.
Remember, don’t just do this for posts and pages but also taxonomies and other page content.
Organizing What Remains
After sorting through, it’s time to organize the content that deserves to stay on your site. This can mean different things:
- Update – Some posts and pages might be great in principle but are out of date and need an update. That includes SEO settings such as titles and meta descriptions, which might be the only reason they didn’t spark joy initially.
- Consolidate and move – For some, it might make the most sense to combine them in order to form something better than their single parts. Consolidate posts with similar content into one, better post. Don’t forget to redirect! Other content might just need a new place, like your mission statement.
3. Dusting Off Your Design
Next up, web design. This, of course, is most important because it will spark joy in your visitors – at least ideally.
Gathering Design Elements
Now turn to your website’s front end.
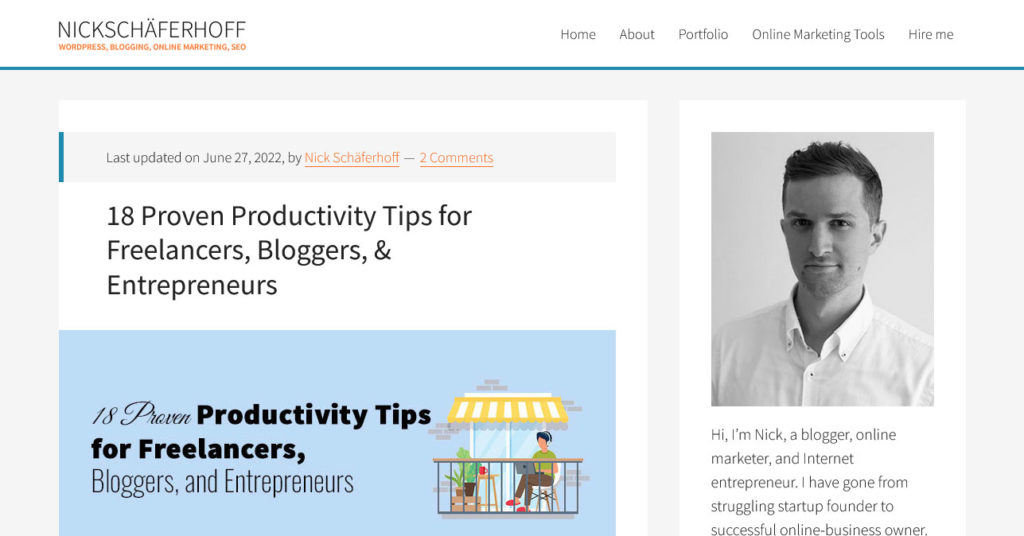
Have a look at it piece by piece, your header, navigation, main content, visuals, sidebar (including widgets), footer, etc. Does each spark joy in you? Do they contribute to the purpose of your site and pages? Which ones feel rather meh than yay?
Do this for all your top-level pages and for the different templates you use on your website. Plus, don’t forget to do the same for the mobile site version.
Sorting Through the Mess
The first step is to get rid of what is completely out of place and simply not working. That widget that isn’t helping, the menu item that’s just cluttering up your navigation or belongs to a content piece that no longer exists – it’s time to discard them all with gratitude. Go to where in the WordPress dashboard you control them and let them go.
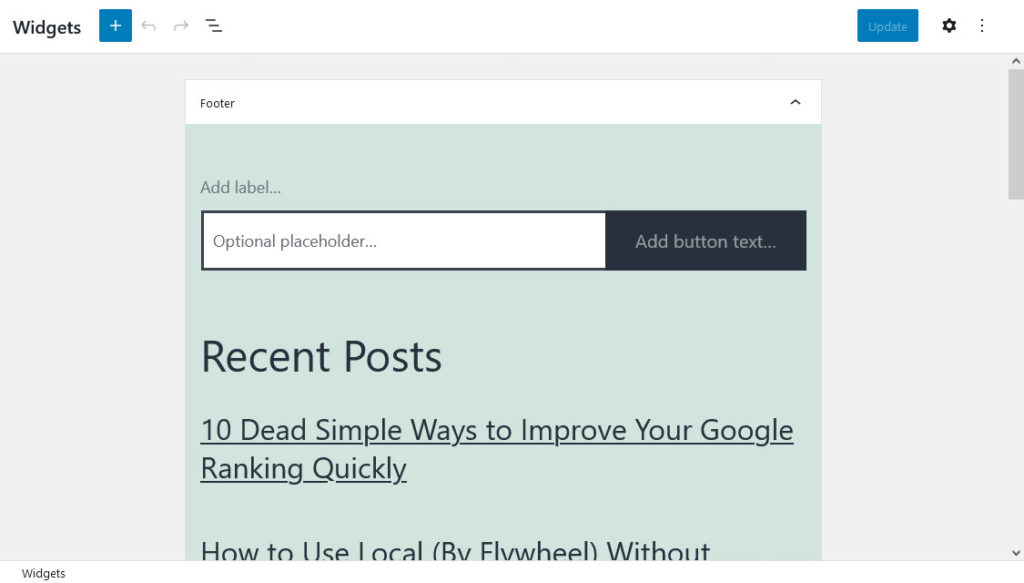
While there, make sure to look through your menus and the widget configurations that you might have saved and that no longer serve the serenity of your website and let go of those, too.
If you are using Full-Site Editing and a block theme, you also have the templates and template part menus to go through. Look for any spark-killers in there and send them on their way.
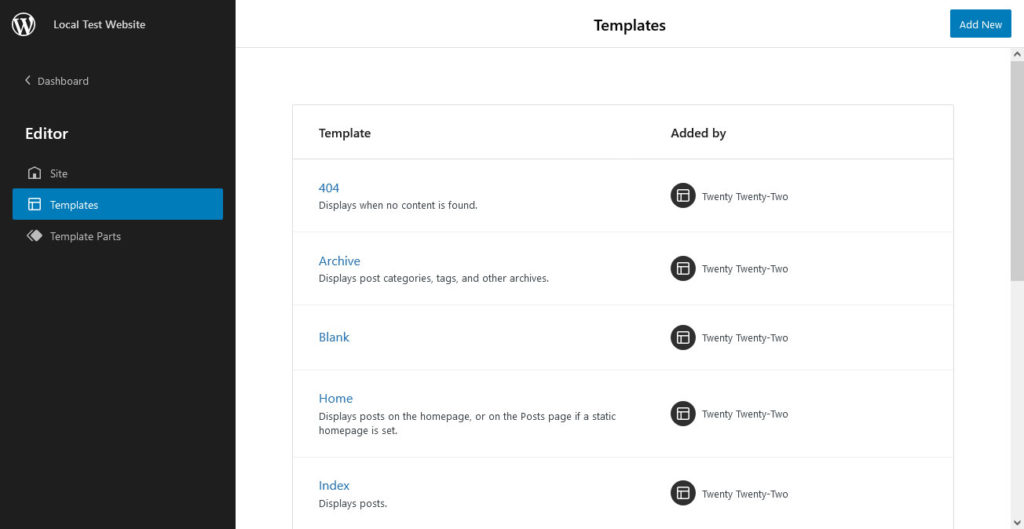
Bringing Order to the Chaos
Now, web design elements are not like clothes or silverware. Often, organizing them means reworking them rather than simply putting them in a new place (though that’s also part of it). So, what about those things that are not sparking joy but that do contribute and are necessary for a functioning website?
If they are quick fixes that you can do right away, go ahead. However, if they need a little more work assigned to them, for now you might note them down and file them away in your list of improvements. We will get to them further down the line.
4. Burnishing the Back End
From the front end, we are now moving on to the back end. In the WordPress dashboard, you also have a whole bunch of elements available on different pages.
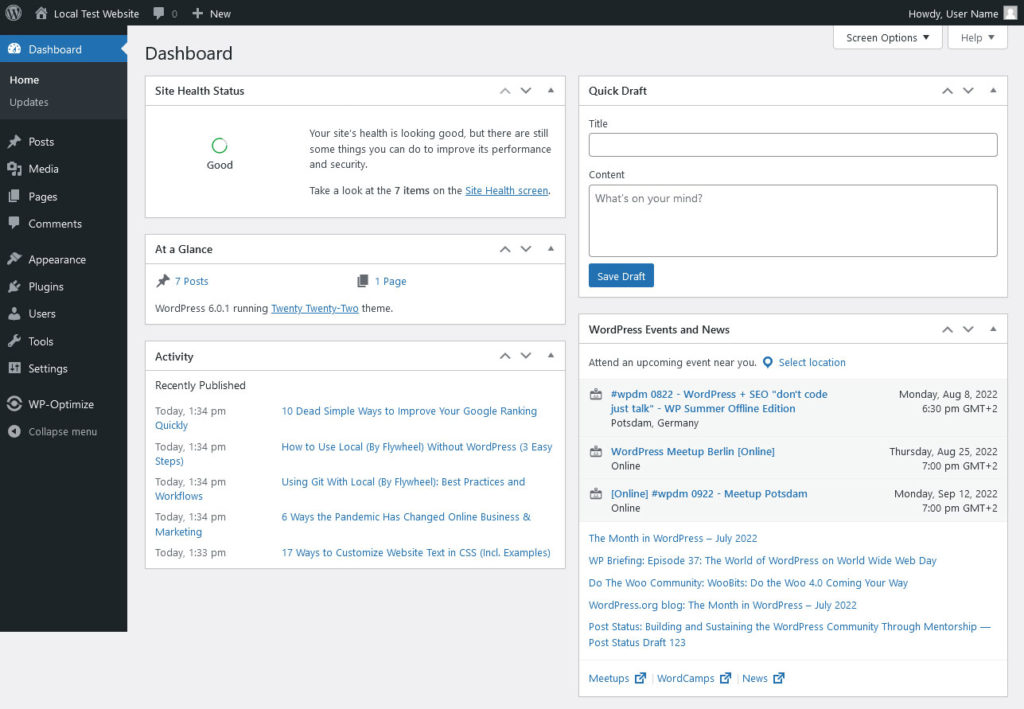
Here, too, you can make decision what stays and what goes. In many places of the back end, you get access to the screen options via a button with the same name in the upper right corner.
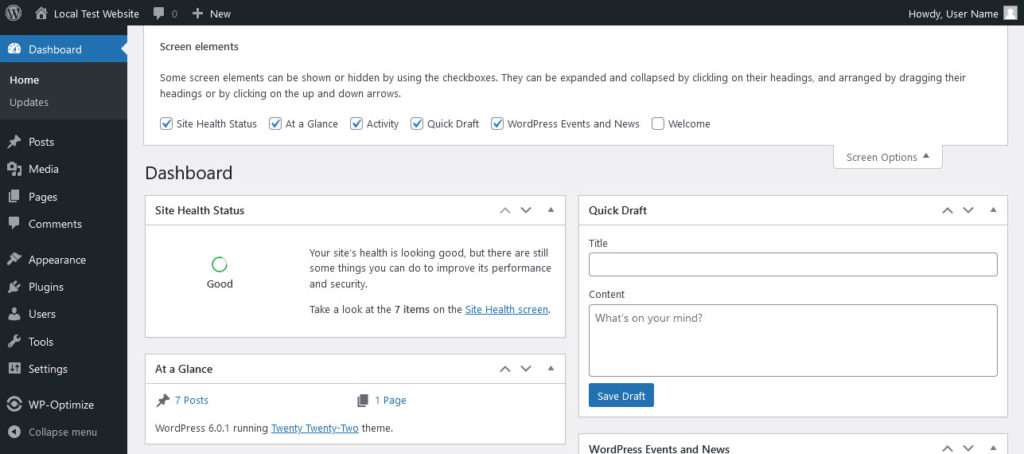
It allows you to configure the information visible on the screen via simple checkboxes. When using the Gutenberg editor, you find similar options under Preferences via the menu in top right corner.
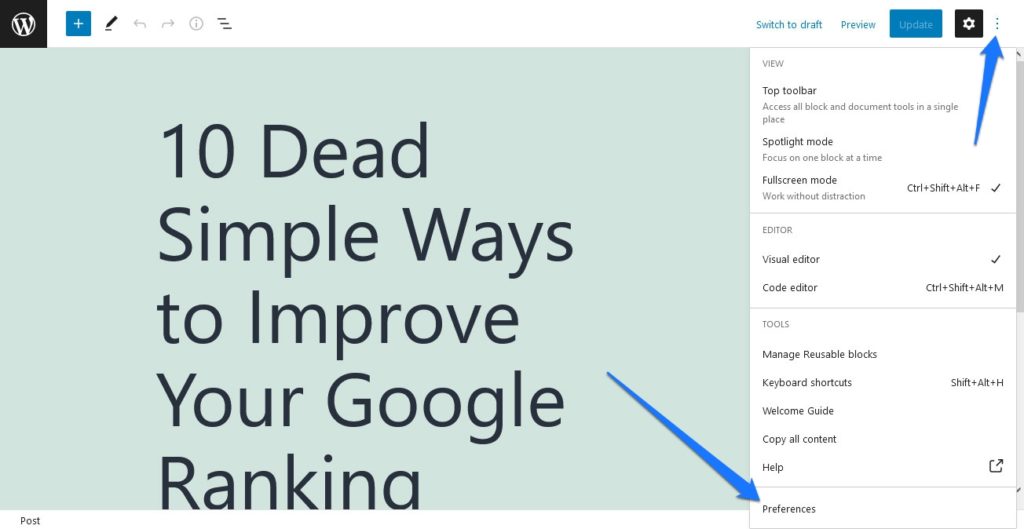
Here, you are able to configure not only the panels that are accessible to you but also the blocks available in the block inserter.
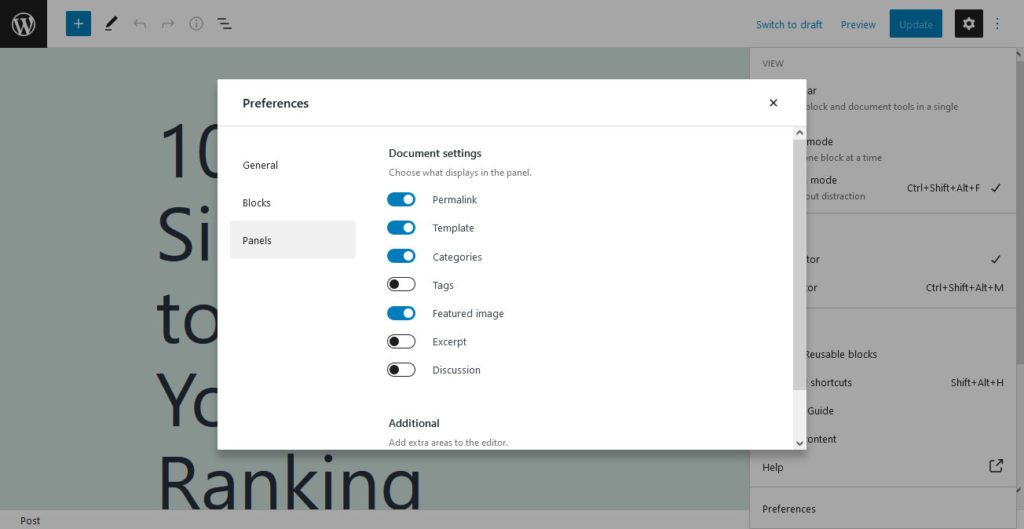
Take a moment to go through each screen, check the options, and see what may be on the screen that reduces your enjoyment of using it. Use the setting to get rid of what you don’t need and leave only what you really use and helps you administer your site. After that, embrace the new serenity that an emptier screen provides.
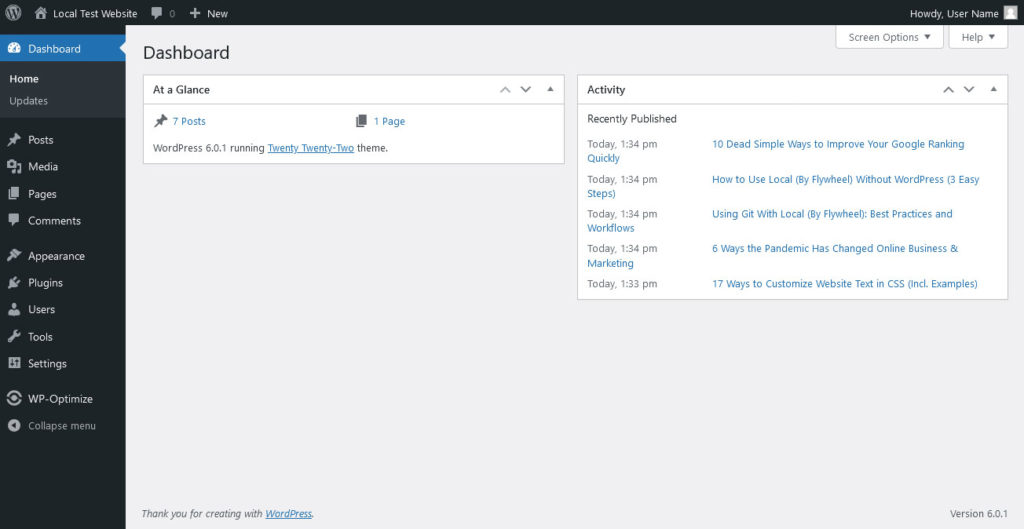
5. Polishing Up the Plugin Section
Plugins are another one of those parts where WordPress does both the collecting and sorting for you. All plugins are situated under the Plugins menu and ordered by active, inactive, must-use, and drop-in.
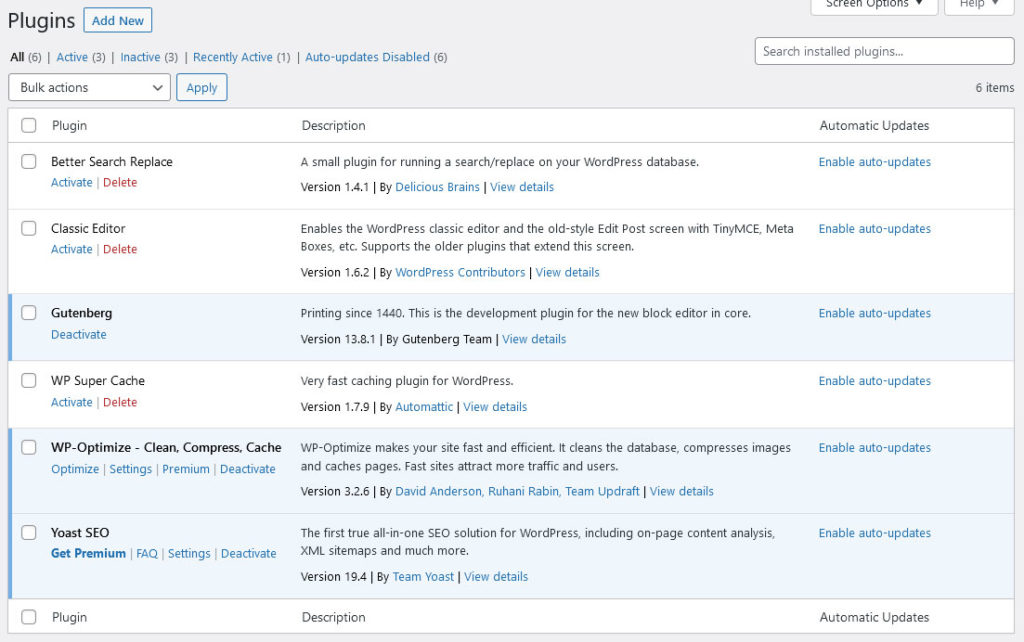
The menu also shows you whether they have automatic updates enabled or not.
Sorting Through the List
So, how do you know whether a plugin sparks joy or not? Ask yourself the following questions:
- Does it make your website palpably better either by improving your own life or that of your users? This can be due to greatly simplifying your workflow or adding features that provide a better user experience.
- Is it worth the potential security risks to keep it around? This is especially true for inactive plugins or plugins that you are not actually using. They might not provide functionality but are still a potential entry path for hackers.
- Does it improve performance? Sometimes plugins do have some functionality we like but are coded in a way that impede site performance. That neither sparks joy in you nor your website visitors. In order to figure this out, you need to learn how to speed test your site.
If the answer is no to all of the above, it’s probably best to discard the plugin in question. You know the drill by now: thank it for its service and let it go with gratitude.
If you have found a plugin that does improve your site but impedes on security or performance, make sure to replace with a better or leaner version or to add it to your list of things to do.
Organizing Your WordPress Plugins
Part of organizing your plugins Marie Kondo style is also to make sure you update them to the latest version. The Queen of Clean would surely look down on a virtual closet full of dusted up and uncared for items.
Not even a single spark of joy there!
Therefore, be sure to update your plugins to the latest version and check your site if everything works as it should afterwards.
6. Tidying Up Your Themes
Decluttering your themes works pretty much the same way as plugins. WordPress helpfully stores all of them in the Themes menu.

Your job here is to go through them while listening to your instincts on whether or not they contribute to the overall quality of your site. If your inner spark detector says no, time to hit the Delete button.
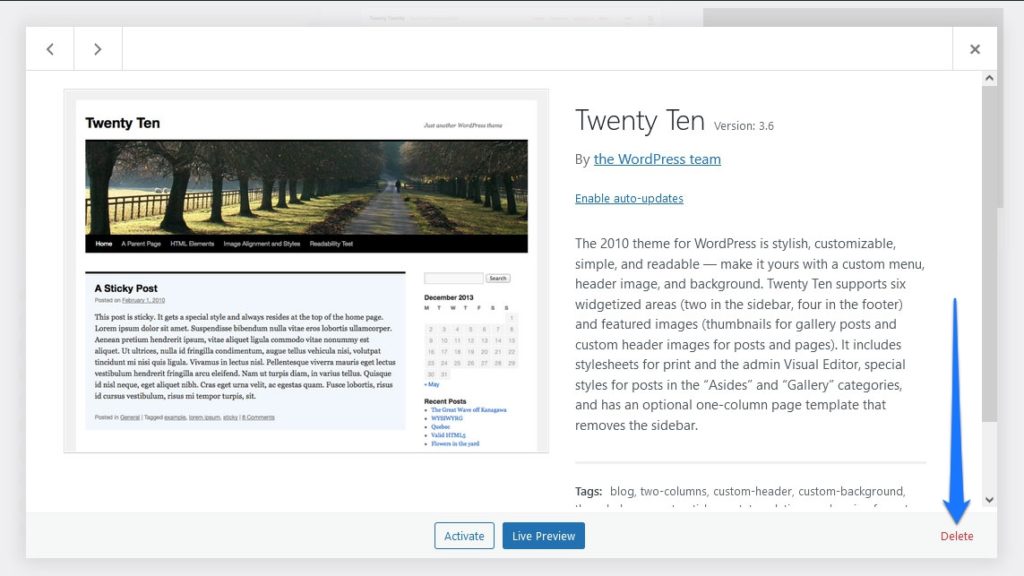
For the remainders, make sure to update them to the latest version. Also, pro tip: it’s a good idea to keep one of the WordPress default themes (whose names start with Twenty, like Twenty Twenty Two) around. In case your main theme malfunctions and becomes unusable, WordPress will automatically fall back to the default theme.
7. Mopping the Media Library
The media library is an easy place for clutter to accumulate, especially since WordPress creates several size versions of each image that you upload. Even when deleting content, images that belonged to it stay in your library, even if no longer visible on your site. This takes up space on your server, can slow down your site, and make it hard to back up. Does that spark joy? Didn’t think so.
Sorting and Cleaning Your Visuals
Again, WordPress does a good job at collecting all items of this category in a single place, under the Media menu.
It also offers different ways of filtering what is there to make it easier to sort through them. For example, you can choose Unattached from the All media items drop-down menu to see those not in use anywhere. However, this is not always reliable, as it also shows files like your logo that are not present in a post or page.
To help you with sorting, it’s better to use a plugin like Media Cleaner that will show images that are not in use in a separate dashboard.
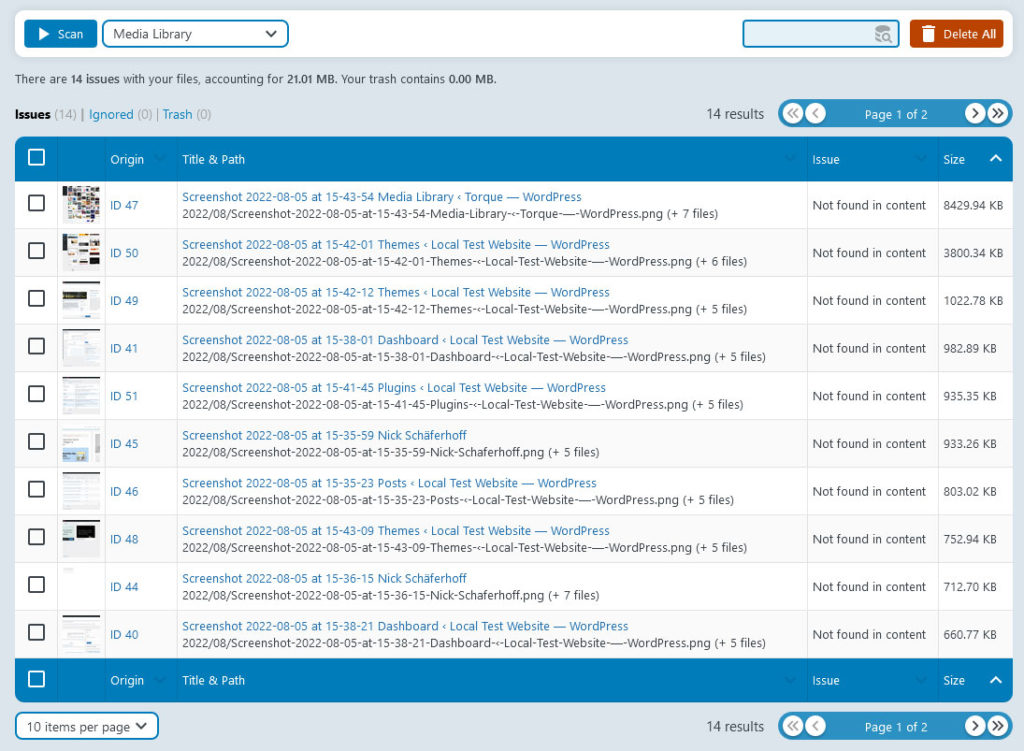
From here, it’s easy to make decisions which ones you want to keep around and which can go. After that, for the images that are permitted to stay on your site, there are a number of plugins to help you organize your media library, such as creating folders and more.
8. Cauterizing Your Comments
Moving on in our decluttering journey to the Comments menu.
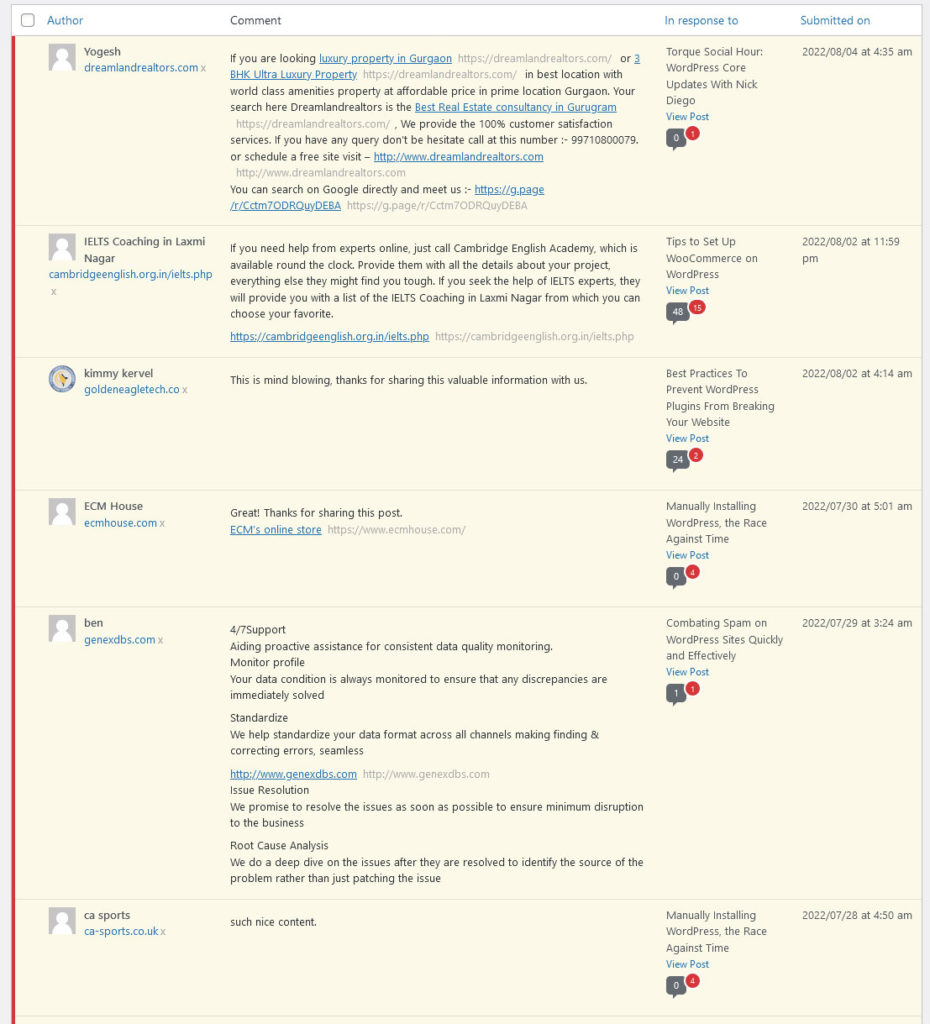
Applying the KonMari method here is pretty easy. Work your way through the list of comments to decide which ones spark joy and which don’t. The latter can go to Spam or Trash.
For the rest, make sure to process them by approving and/or answering them until the Pending queue is empty. Finish off by emptying both the Spam and Trash folder. Take a deep breath, breathe a sigh of relief, and move on.
9. Uncluttering Your Users
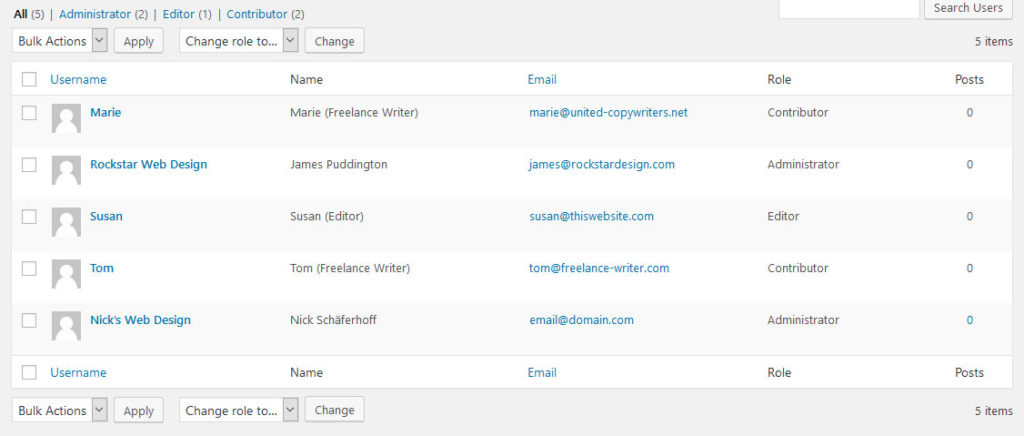
Sorting through your Users menu should be a relatively quick affair. When examining the list of users registered on your site, ask yourself these two questions:
- Am I happy with this person having access to my site at all? This is especially true for outdated users like former employees or one-time accounts for freelancers.
- Am I happy with the level of access this person has? Those users that do have a place on your site should have the least necessary amount of permissions. Remember, not everyone needs to be an administrator.
With these questions in mind, work your way through your users. Delete who deserves to go and adjust permissions as necessary until looking at it makes you feel joyful.
10. Disinfecting the Database
The database is the foundation of every WordPress website, which is why no cleanup is complete without including it. This is especially true because, after getting rid of unnecessary plugins earlier, you might have leftover tables and data in there.
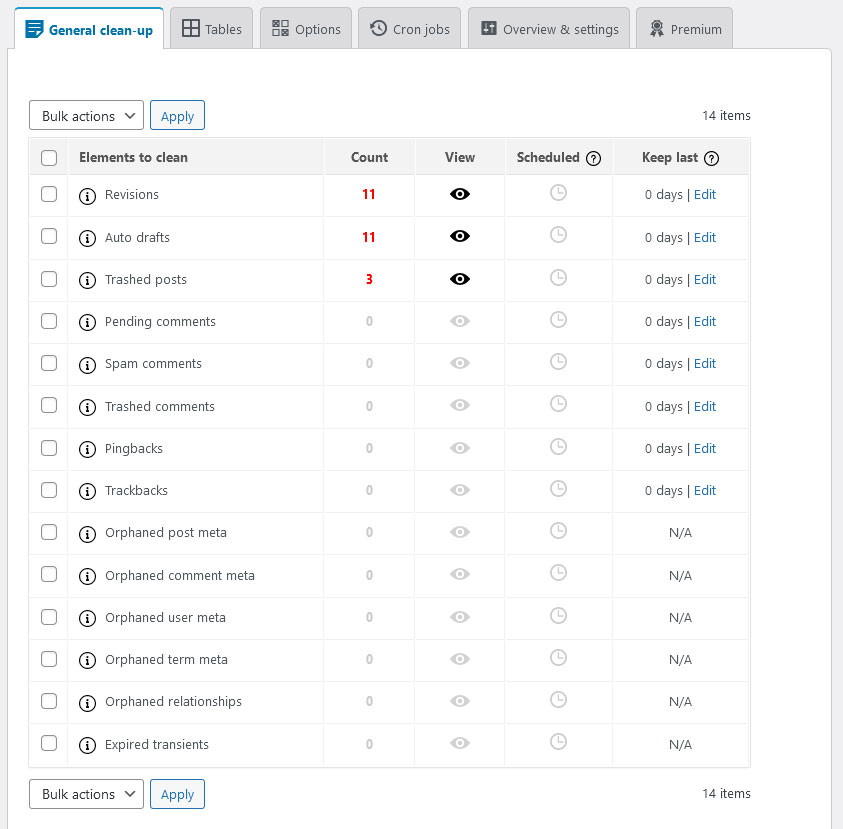
In order to tackle that, it’s a good idea to use a specialized tool to assist you in your cleanup efforts. For example, Advanced Database Cleaner allows you to get rid of a lot of unnecessary information in your database like post revisions, orphaned or duplicate data, and more. It can also repair and optimize database tables.
Then, there is Plugins Garbage Collector. This plugin specifically looks for database tables left by uninstalled plugins that are no longer in use and allows you to remove them.
Both plugins first tell you which data they want to get rid off so you can choose if you want them to. Go thorough the process step by step for a squeaky clean database. After that, the only thing that is left is to set up the first plugin to run through the cleanup process automatically on schedule.
11. Going Through Your List of Improvements
Once finished with collecting and discarding all of the above, it’s time to organize. You should now have a potentially long list of site improvements from design over content updates to plugin replacements. It’s time to go through it step by step and make whatever changes you need.
You can use the same order as above to go through each part of your website that needs a bit more effort to really shine it up and improve it. If you can do that, I promise you will end up with a website that will spark joy by simply logging on and seeing it.
Rediscovering Your Website’s Spark
The life-changing magic of tidying up is not reserved to making your house sparkle, you can do the same with your most important digital asset – your website.
Above, we have gone over how to apply the KonMari principles to making your website the best it can be by getting rid of clutter and deciding on what your really want and need on there. You can apply this to other parts of your web presence such as performance (learn to reduce HTTP requests) or security and backups.
Just like cleaning up your house, this should give you a good basis from which to keep it in order permanently.
Which part of the cleanup process sparked the most joy while you were performing it? Did you find other ways to apply the Marie-Kondo-way-of-tidying-up to your WordPress site? Please share in comments below.


No Comments