Local WordPress environments are perfect for developing new projects, testing updates, and debugging sites. Depending on which type of local environment you use, you might even get access to debugging tools that your web host doesn’t provide. However, you may not know how to use them effectively if you’re just getting started.
Free options like Local offer useful resources that can enable you to troubleshoot your WordPress website. It gives you access to tools for testing outbound email functionality, live reloading, and even a link checker.
In this article, we’ll explain why you may want to use a local environment when debugging your WordPress website. Then, we’ll show you how to complete three basic WordPress debugging tasks using Local. Let’s get to it!
Why You May Want to Use a Local Environment for WordPress Debugging
If you manage a WordPress website, you’ll likely run into errors sooner or later. That’s not because WordPress is a poorly-coded piece of software, but because it’s a complex one. Add heavy traffic; multiple plugins and themes; custom code; complex server configuration, and issues are bound to pop up from time to time.
Therefore, debugging your website is crucial if you want to make sure it remains running smoothly. However, WordPress troubleshooting on a live website can be tricky. In many cases, you may need to temporarily disable features or tweak parts of your site that will impact the user experience. Instead of doing that in a live environment, a local setup offers a safer alternative.
Local WordPress development environments are a great solution when it comes to troubleshooting. In a local environment, it doesn’t matter if you break parts of your site while trying to fix it. Plus, a local environment will likely load much faster than a staging site. You can even set up multiple copies of the same site for testing.
There are many types of local WordPress development environments to choose from. However, Local has the advantage of being free, and it includes several built-in tools for debugging. You don’t need to be a WP Engine or Flywheel user to take advantage of Local.
3 Ways to Debug Your WordPress Website With Local
Now that you know a bit more about the advantages of debugging with a local WordPress environment, you’d probably like to know how to do it. The first thing you’ll need to do is set up your Local environment. Now, let’s cover three ways you can debug WordPress using Local!
1. Analyze Local Error Logs
Local automatically sets up error logs for PHP, your local server software (either NGINX or Apache), and your MySQL databases. Those logs are available on a site-by-site basis and you can access them manually at any time.
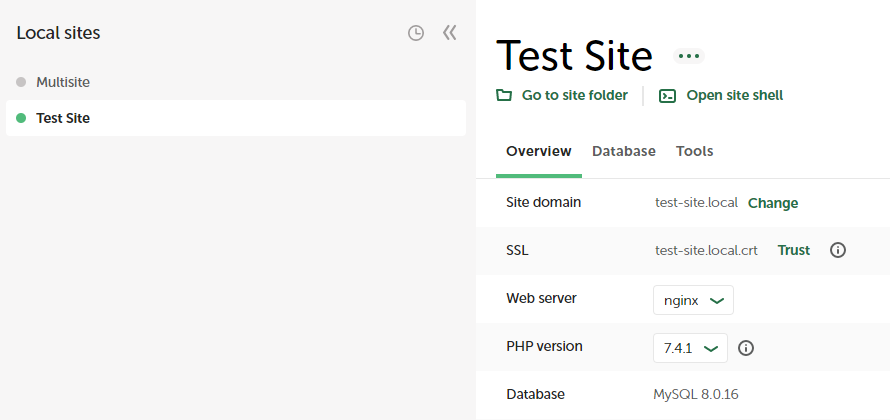
To access your web server and PHP error logs, simply select a website and click on the Go to site folder option at the top of the screen in Local:
This will open the directory that contains your test website’s root folder. To access this folder, you can go into app/public_html. However, if you want to access your site’s PHP and server logs, you’ll need to open the logs folder instead:
Inside the logs directory, you’ll find one folder for your web server and another for the PHP installation. The web server folder will either be called nginx or apache depending on the configuration you chose when setting up your local website.
Accessing either folder will lead you to different error.log text files. Open the files using your local text editor and you’ll see a comprehensive overview of all the errors Local has recorded since you set up the website:
With so much data, analyzing error logs isn’t always straightforward. Therefore, we recommend focusing on entries around the time when errors started occurring on your website.
You’ll want to read both the server and PHP error logs and see what files they point towards around those dates and times. Once you have identified errors that are causing disruptions in your site’s functionality, you’ll be able to more easily resolve them.
2. Use MailHog to Troubleshoot WordPress Email Issues
By default, WordPress uses PHP to send emails. However, PHP is not an optimal method for sending transactional emails such as registration confirmation or lost password retrieval messages. Ideally, you’ll want to use Simple Mail Transfer Protocol (SMTP) services to manage those types of important emails.
In fact, some web hosts won’t even enable you to send emails using PHP. If you run into a situation where WordPress emails aren’t arriving, you can use MailHog to find out if they’re sending correctly.
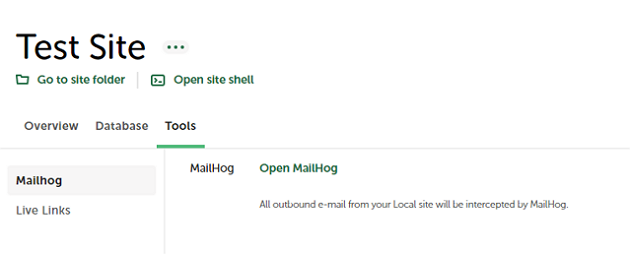
MailHog is a Local tool that ‘captures’ all outgoing emails from your website. The tool then enables you to access those emails from the Local dashboard:
To access MailHog, select a Local website and go to its Tools tab. Then, click on Open MailHog and the tool should open in your browser. From here, you can navigate and explore the MailHog inbox just as you would with any other email:
If your outgoing emails appear in the MailHog inbox but they don’t work when you’re using a live website, your web host is likely causing the problem. In that case, you may want to use a third-party email provider to handle WordPress emails.
3. Check for Broken Links Using the Link Checker Add-On
Local offers a number of add-ons, some of which you can use for debugging purposes. The Link Checker add-on enables you to check all of your site’s links and find ‘broken’ entries. That is to say, links that no longer work.
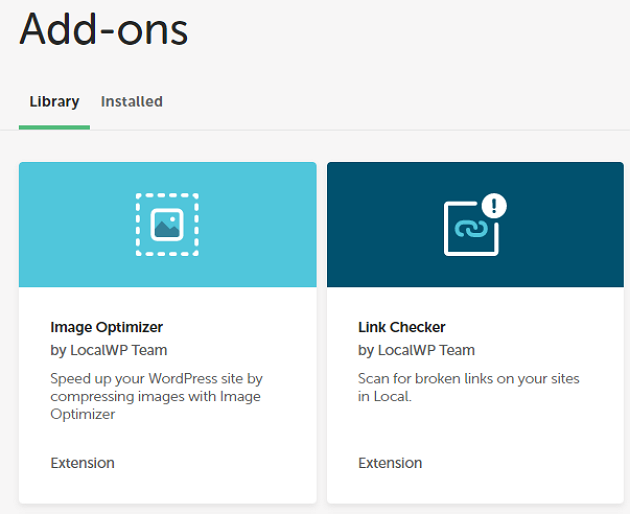
To enable the add-on, you’ll need a free Local account. Open the Local application and go to the Add-ons tab. Then, select the Link Checker option:
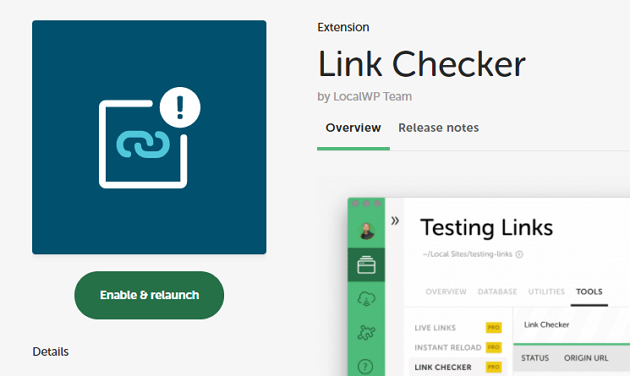
On the next page, click on Install Add-on and wait for the process to complete. Next, click on Enable & Relaunch to start the add-on:
That option will restart Local with the add-on running. To use Link Checker, select a website, start it, and then go to the Tools tab.
Now, there should be an option called Link Checker inside. Go to that tab and click on SCAN FOR LINKS. In the example below, you can see the add-on running:
The process can take a while depending on how many pages are on your site. The add-on will return a list of broken links including what pages they’re located in, so you can remove or update them if they are causing issues.
Conclusion
Using a local WordPress environment to debug a website is always a safer option than doing it in production. As far as local WordPress development tools go, few applications offer as many built-in debugging tools as Local. Plus, you don’t need to pay for the software or be a WP Engine or Flywheel customer to use it.
To review, here are three ways you can use Local to help you debug a WordPress website:
- Analyze Local error logs to identify issues.
- Use MailHog to troubleshoot WordPress email delivery failures.
- Check for broken links using the Link Checker add-on.
Do you have any questions about how to do basic WordPress debugging using Local? Ask us in the comments section below!


No Comments