WordPress shortcodes are super useful for customizing your site. Before there were blocks, that’s what people used to include complex layout elements. However, even in time of Gutenberg, shortcodes still have their place.
For example, if creating your own block is beyond your capabilities (I don’t blame you), shortcodes are a valid alternative. They are also worth diving into if you simply want to expand your WordPress skills.
In this post, you will learn everything you need to know about WordPress shortcodes: what they are, their pros and cons, how to use them, as well as how to create your own custom shortcodes by hand.
We have a lot to cover, so lets get started, shall we?
WordPress Shortcodes – What Are They?
So, first of all, what are we talking about when speaking of shortcodes? As the name already suggests, they are a shortcut to input code into a page. For example, you can add the following to the WordPress editor:
[gallery ids="316,315,372"]However, when you look at the page, it comes out like this (if there are images present on your site with these particular ids, that is):
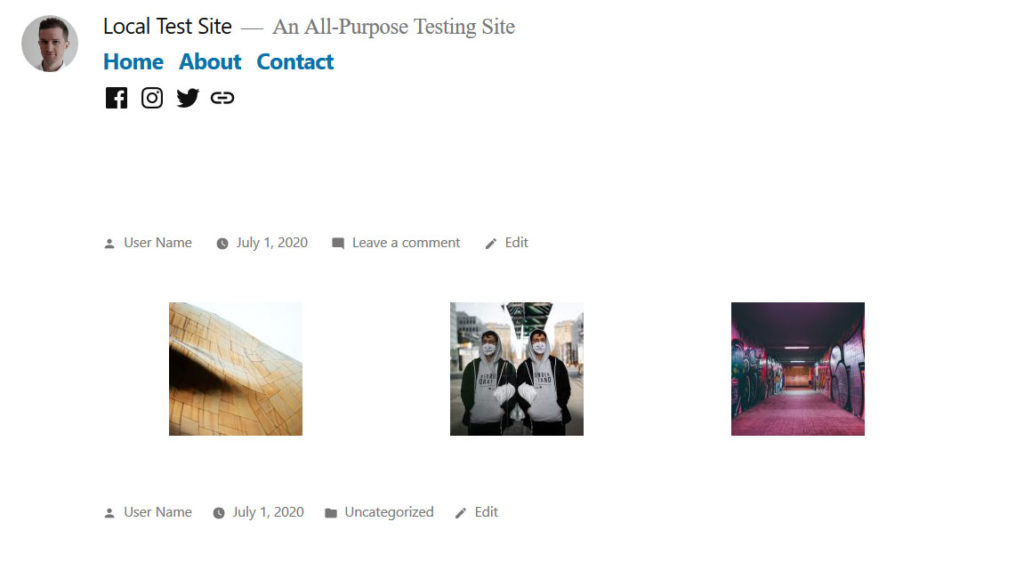
That’s exactly what a shortcode is. It’s a stand-in for larger pieces of functionality that are called into existence when executing your page in a browser.
A Short History of Shortcodes
The concept of shortcodes concept not that new. They have been around on forums for a long time and allow users to format their content without the ability to execute possibly harmful scripts and code snippets.
WordPress introduced shortcodes for the same reason in version 2.5. They quickly became the cornerstone of many themes and plugins.
For example, a lot of early page builders allowed users to create layouts by running nothing but shortcodes in the background. This was easily visible when people tried to migrate away from them and found their pages riddled with bracketed leftovers after switching them off.
Types of WordPress Shortcodes
As you have already seen in the above example, WordPress shortcodes are easy to recognize by their square brackets. They typically look like this:
[someshortcode]However, it’s important to note that WordPress knows two different types of shortcodes: self-closing and enclosing. The first type, which you can see above, is self-contained and does not need you to include a closing tag.
As you can probably guess, in contrast to that, the enclosing shortcode does require you to close it manually. These are usually shortcodes that wrap around parts of your content in some way.
[someshortcode]...[/someshortcode]It’s also important to note that many shortcodes can take attributes that modify their display or other properties.
[gallery ids="316,315,372" columns="2" size="medium"]The code above changes the look of our earlier gallery to this:

Pros and Cons of Shortcodes
So, why use shortcodes? Well, they offer many benefits:
- Flexible — Shortcodes can contain almost anything, allowing you to add all kinds of elements to your pages.
- User friendly — They are easier to include on a page than code snippets.
- Re-usable — You can set them up as plugins and re-use your shortcodes on multiple WordPress sites.
- Modifiable — As you will see below, you can create them so that users have control and can change attributes and content.
But, of course, shortcodes also come with drawbacks, most prominently:
- Functionality unclear — You can’t tell what a shortcode does just from looking at it.
- Not very intuitive — Having lots of shortcodes can look a bit messy on the page. Also, you often need to input them manually and can’t choose them from the UI like other elements.
- They can slow down your site — Every shortcode adds extra requests to your server. If you include too many, they can bring down your loading time.
Default WordPress Shortcodes
The WordPress platform comes with a number of working shortcodes out of the box, one of which you have already seen at the beginning of this post.
- audio — Allows you to embed audio files on your website with basic playback controls.
- caption — Usually used to add image captions, but can also do the same for other content.
- embed — Allows you to wrap embedded items and give them maximum dimensions.
- gallery — Already mentioned above. Display several image as a gallery and configure their display.
- playlist — Create a playlist of audio or video files. Comes with dark mode.
- video — Embed and play back video files of different formats.
In addition to these, you can add more shortcodes to your site via plugins, themes, or by creating your own. More on that soon.
How to Use WordPress Shortcodes
Shortcodes are employable in different places of your WordPress site. Depending on where you want to place them, you need to use different ways to do so.
In the WordPress Editor
The most obvious example is inputting shortcodes in your content. In Gutenberg, you have a dedicated block for for that.
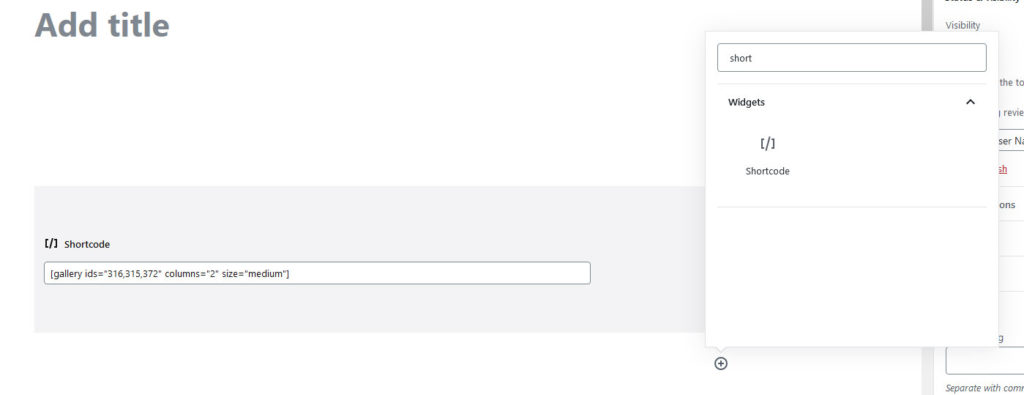
Simply input the block, fill in your shortcode and you are good to go.
If you are using the classic editor, you can include the shortcode directly.
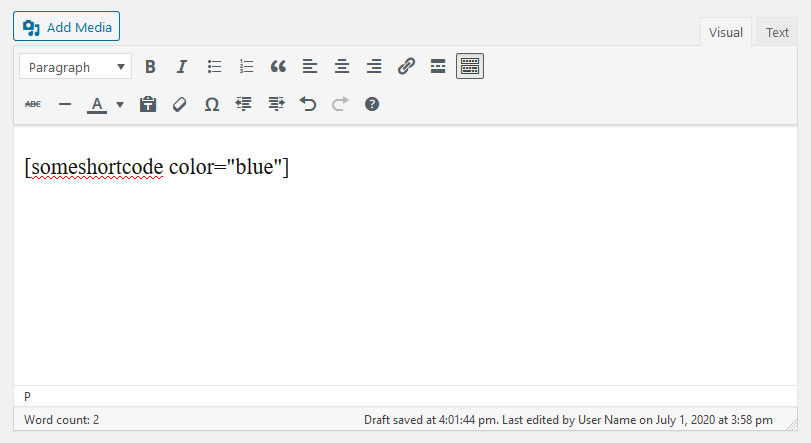
In that case, it’s also possible to create your own TinyMCE button for your shortcode as described in this tutorial.
Inside a Sidebar
If you want to use a shortcode in the WordPress sidebar or any other widgetized area, you can do so via the text widget.
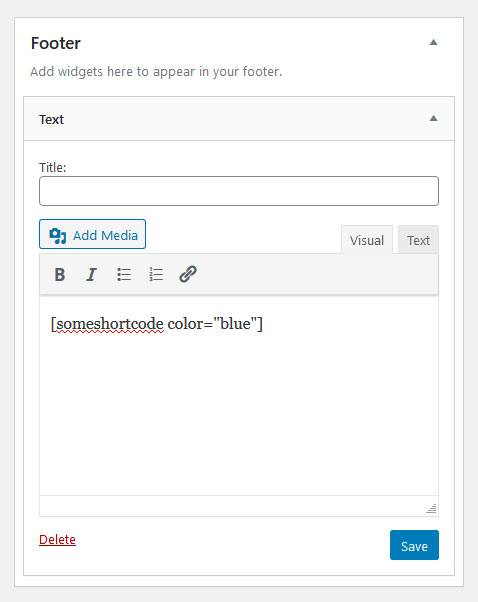
Just add it to the widget area of your choice and directly write the shortcode into the text field like you would in the classic editor. When you save, it will appear on the front end of your site.
Via PHP
Aside from that, it’s also possible to add shortcodes to page templates and theme files via PHP. WordPress comes with a dedicated function for that. Here’s how to use it:
<?php echo do_shortcode('[someshortcode]'); ?>You can input this in your header.php, footer.php, or any other theme or template file to hard code the shortcode into your theme. Be sure to include the square brackets, otherwise it won’t work!
It’s also possible to use enclosing shortcodes inside PHP files this way:
<?php echo do_shortcode('[someshortcode]' . 'Your content here' . '[/someshortcode]'); ?>How to Create Your Own WordPress Shortcodes Manually
Of course, you can also create WordPress shortcodes by hand. For that, it makes sense to be familiar with the shortcode API. It handles everything to do with shortcodes in WordPress.
Understanding the Basics
When a page created with WordPress is parsed and contains shortcodes, the shortcode API takes over and replaces the strings with their content.
Registering a shortcode is done in the following way:
add_shortcode( 'someshortcode', 'someshortcode_handler' );Here’s some explanation:
someshortcode— The tag that will appear between the brackets. It should be made up of lower-case letters, numbers, and underscores.someshortcode_handler— The function that will be executed if the shortcode exists.
The handler function is defined like this:
function someshortcode_handler( $atts, $content, $tag ){ }$atts— An array of attributes. If you don’t define any, it will be handled as an empty string by default.$content— The enclosed content (when using an enclosed shortcode). Make sure to return the value, not echo it.$tag— The shortcode’s tag value (someshortcodein the above example). Useful if more than one shortcode uses the same callback function.
Where to Place Your Functions
Shortcode scripts can be placed in functions.php, as part of a plugin, or in a theme file. In the latter case, you can run the add_shortcode() function directly, in all other cases you should wrap it in another function like so:
function shortcode_init(){
	add_shortcode( 'someshortcode', 'someshortcode_handler' );
}
add_action('init', 'shortcode_init');
This makes sure that the function only fires after WordPress is done loading. Alright, enough with the theory, let’s look at some real-life examples.
Example 1: Call-to-Action Button
The first example will be a self-closing shortcode. For that, we want to create a button that you can drop anywhere in your content and takes users to an online shop.
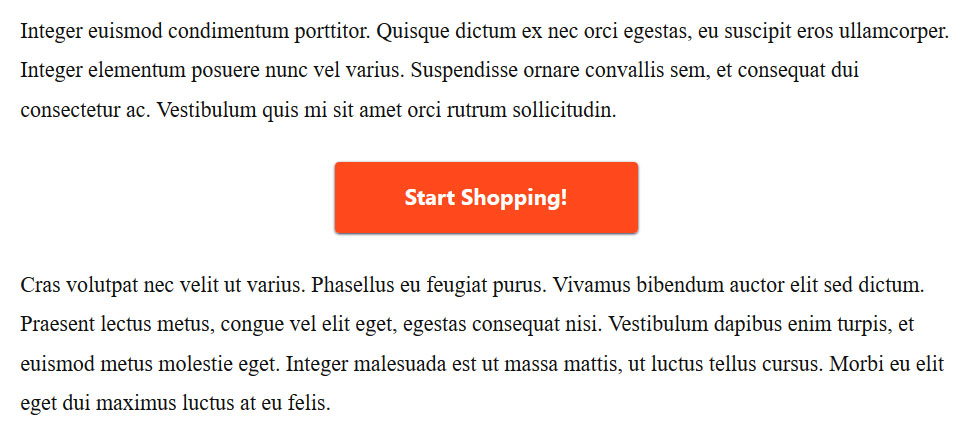
We want this to be a static asset, so we will hard code what it looks like, where it links to, and its content. For that, we can use the following function inside functions.php.
function shortcode_init(){
	add_shortcode( 'ctabutton', 'ctabutton_handler' );
}
add_action('init', 'shortcode_init');

function ctabutton_handler() {
	return '<div class="button-container"><div class="shop-cta-button"><a href="' . home_url() . '/shop" class="shop-cta-button-link">Start Shopping!</a></div></div>';
}
The first part is simply the wrapper function to register the shortcode as explained earlier. The second part establishes a div element in a container. Inside, it has a link to the site’s home URL with /shop appended to it and a defined anchor text. All elements also have CSS classes to be able to style them.
Speaking of which, in addition, place the following CSS code into your style sheet.
.shop-cta-button {
	background-color: #FF4A1C;
	border-radius: 4px;
	box-shadow: 0px 1px 3px 0px rgba(37,45,74,1);
	margin: 0 auto !important;
	padding: 0.67em 1em;
	text-align: center;
	width: 32.5%;
	-webkit-box-shadow: 0px 1px 3px 0px rgba(37,45,74,1);
	-moz-box-shadow: 0px 1px 3px 0px rgba(37,45,74,1);
}

.shop-cta-button-link {
	color: #fff;
	font-family: "Segoe UI", sans-serif;
	font-weight: bold;
	text-decoration: none;
}
After all of that is in place, you can now paste the shortcode inside the editor. When you do, the button from the beginning of this section shows up.
Example 2: A Customizable CTA
However, what if want the possibility to determine the content of the call to action, its color, and where it links to? For that, we will modify the above to become an enclosing shortcode. Here’s the modified handler function for that (the add_shortcode() function stays the same):
function ctabutton_handler( $atts ) {
	$a = shortcode_atts( array(
	'link' => '#',
	'color' => 'red',
	'size' => 'small',
	'label' => 'Click me'
	), $atts );
	return '<div class="button-container"><div class="cta-button ' . esc_attr( $a['color'] ) . ' ' . esc_attr( $a['size'] ) . '"><a href="' . esc_url( $a['link'] ) . '" class="cta-button-link">' . esc_attr( $a['label'] ) . '</a></div></div>';
}
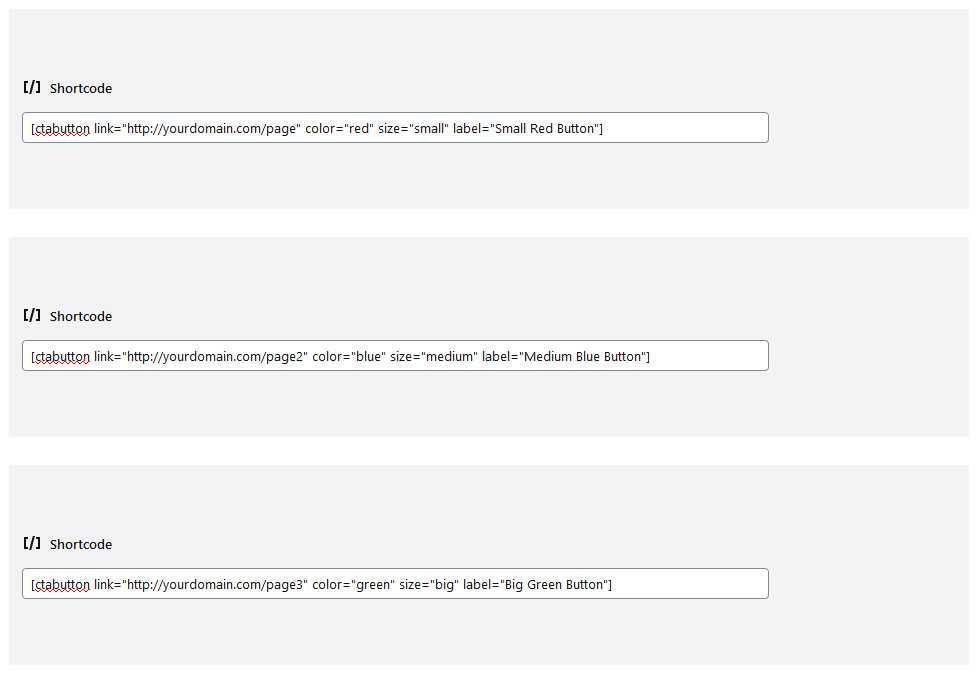
Basically, what we are doing here is define certain attributes the button can have (link target, color, size, and button label) as well as their defaults. Then, we modify the output code in such a way that these attributes are taken into account on the page. That way, you can change them by defining their value inside the shortcode.
Neat, right?
However, in order for this to work, we also have to define the design changes for the attributes we want to allow inside style.css.
.cta-button {
	border-radius: 4px;
	box-shadow: 0px 1px 3px 0px rgba(37,45,74,1);
	margin: 0 auto !important;
	text-align: center;
	-webkit-box-shadow: 0px 1px 3px 0px rgba(37,45,74,1);
	-moz-box-shadow: 0px 1px 3px 0px rgba(37,45,74,1);
}

.cta-button.red{
	background-color: #FF4A1C;
}

.cta-button.green{
	background-color: #5FB49C;
}

.cta-button.blue{
	background-color: #3F88C5;
}

.cta-button.small {
    padding: 0.27em 0.6em;
	width: 28%;
}

.cta-button.medium {
    padding: 0.67em 1em;
	width: 32.5%;
}

.cta-button.big {
    padding: 1.1em 1.8em;
    width: 38.5%;
}

.cta-button-link {
	color: #fff;
	font-family: "Segoe UI", sans-serif;
	font-weight: bold;
	text-decoration: none;
}
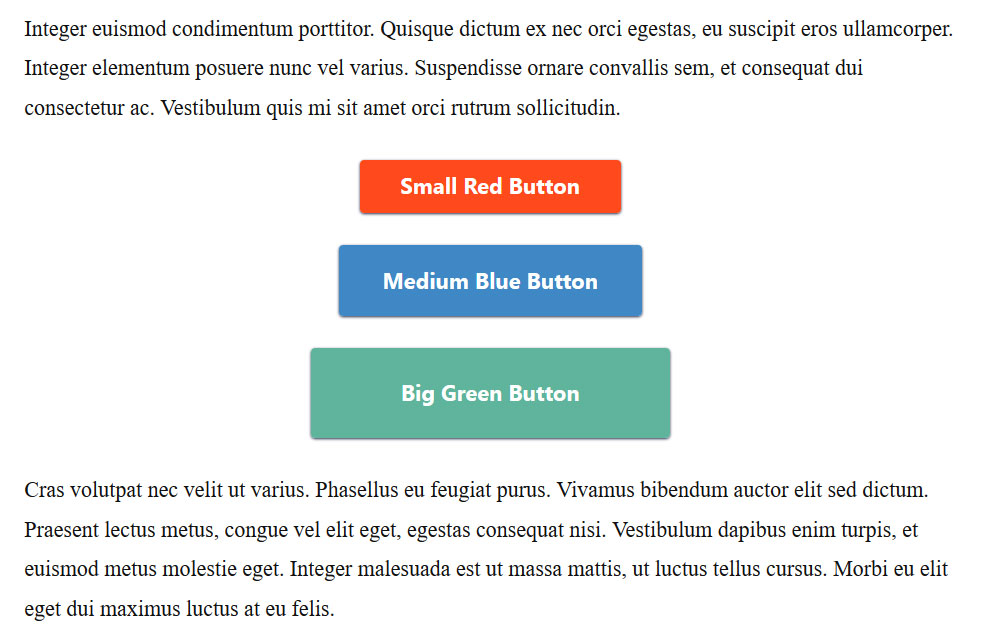
With the above, you can include customized CTAs in your content like so:
And here is how it turns out on the page:
WordPress Shortcodes in a Nutshell
WordPress shortcodes are a useful tool to have in the war chest. They allow you to input complex layout elements and code snippets into your pages via a tiny stand in.
Above, we have learned what they are, how they work, their pros and cons, how to use them on your site, and how to create your own. Of course, you also have plenty of shortcode collections you can use, if you don’t want to make them up yourself.
While in the long run, blocks will likely take over what shortcodes used to do, for now, they are still a good thing to have in your arsenal.
What’s your favorite use for WordPress shortcodes? Anything to add to the above? Let us know in the comments section below!

No Comments