WordPress is flexible enough to create just about any type of website. It’s also incredibly easy to use, which means the technical knowledge for getting started is pretty low. However, because of this, when issues occur (such as inevitable performance drops) you can be left waving the white flag.
Fortunately, there are a few steps you can take to preemptively minimize any serious harm. Depending on the makeup of your site and its content, you can optimize images, dig deeper into caching solutions, and tinker under WordPress’ hood to speed up your website’s loading times.
In this post, we’ll present five different ways you can analyze your website, such as testing its page load times, analyzing the impact plugins can have, and understanding WordPress’ background processes. However, before we begin, let’s talk about why performance optimization is important in the first place.
Why You Should Care About WordPress Performance Optimization
Nothing causes people to hit the back button as quickly as poor website performance. Not only that, but search engines are also factoring page loading times into their rankings. It’s no secret that you’ll have to stay on top of performance optimization if you wish to stay relevant in your niche. However, what does WordPress performance optimization actually mean?
WordPress performance optimization refers to improving the speed and increasing page views for a WordPress site. – Pantheon.io
A performance optimized WordPress website provides your readers with a great user experience, and it also will rank well on Search Engine Result Pages (SERPs). As such, WordPress performance optimization is vital to your site’s success for the following reasons:
- People don’t have the patience to wait a few extra seconds for your site to load. Quite simply, every second counts.
- Since search engines are taking factors such as page load times and image optimization into account, a performance optimized website is more likely to rank higher on SERPs.
- Having an optimized website increases spider crawling in search engines, which helps to index your web pages better and boosts visibility.
Fortunately, finding out how well your site performs is easy. Let’s take a look at the different area and methods available.
How To Analyze and Boost WordPress Performance
In this section, we’re going to cover the five key steps you need to take to boost your site’s performance and recommend some tools and plugins to help you get there. Since you’ll be dealing with the WordPress back-end, it’s always a good idea to create a backup of your site before you begin.
Step #1: Assess Your Website’s Speed
Before you make improvements to your website, it’s important to measure where it currently stands. From a performance optimization perspective, this would mean testing out your page load times. Regularly putting your website through speed and load tests helps you to determine how your site performs, and what measures you can take to improve its performance.
Pingdom is one of the easiest to use page speed testing tools. In addition to giving you concise scores, it also provides performance insights that help you gauge your website’s current standing, and gives you valuable suggestions you can follow to improve your performance grade. Simply enter your desired URL, click Start Test, and after a few moments, you’ll be given a comprehensive breakdown of your website’s performance.
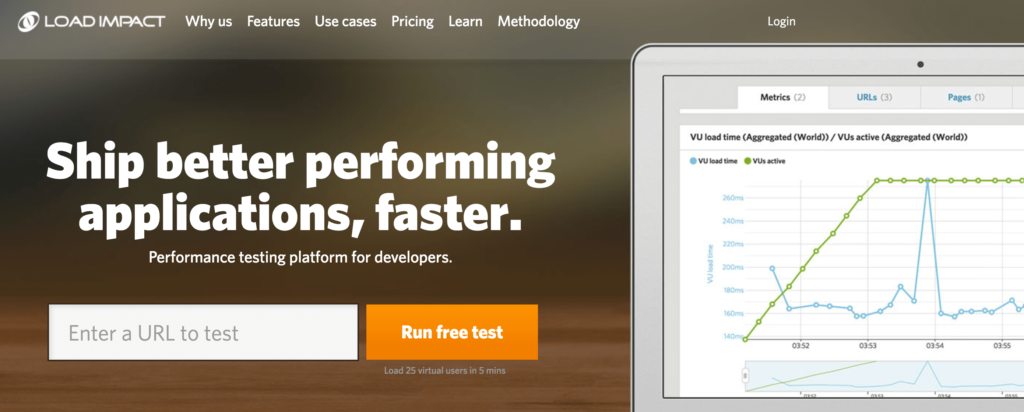
Load Impact is a tool for assessing how your site performs under multiple user load rather than a pure speed analysis.
As with Pingdom, simply enter your URL, and click Run free test. The tool will simulate 25 users hitting your website over a five minute period, and at the end, you’ll get a breakdown of the results for you to further understand how your website performs.
Using both of these tools, you’ll be able to get a fair idea of how well your site does in terms of performance. The best part is that you can go back and re-test after making the necessary modifications to see if the changes had any impact on your website’s page load time.
Step #2: Use WordPress’ Background Processes to Boost Performance
WordPress plugins often run core processes in the background such as importing and exporting files, retrieving data from APIs, and pushing data to third-party sources. These processes are called background processes, and they should ideally run asynchronously.
Understanding background processes enables you to measure the impact (if any) of each modification you make to improve your site’s performance. You can gain insight into the number of queries performed to render a page, and the impact they have on the server.
Debug Bar is a lightweight plugin for WordPress that shows helpful debugging information regarding PHP warnings, queries, and the cache. However, it lacks regular updates, so it may not work with future versions of WordPress.
Once you’ve found any bottlenecks, you’ll need to get your hands dirty to fix them. As a web developer, you’ll find that this performance analysis tool is a must-have tool for measuring and monitoring performance optimizations on your website.
Step #3: Optimize Your Images
Having unnecessarily large image files is a problem many websites face. Making image compression a part of your day-to-day workflow is incredibly important if you want to preserve server space and ensure low page load times. From a Search Engine Optimization (SEO) perspective, optimized images are ranked better by search engines in image search results.
As mobile usage continues to grow, optimizing images isn’t just a choice — it’s a necessity. Uncompressed images take longer to load and lead to poor user experience. In addition, users demand fast pages and image bloat on a website doesn’t help meet their expectations.
Thankfully, there are a wide range of image optimization tools you can leverage to deliver high-quality, compressed images to readers. Our recommended tool is TinyPNG – an online tool (with a free WordPress plugin) that helps you get the job done with smart image compression. It optimizes images with a perfect balance in quality and file size.
Step #4: Utilize the Power of a Good Caching Solution
In technical terms, a cache is a place that stores temporary data, helping to reduce the time it takes to access a file. If there’s a website you access frequently, chances are your web browser has a portion of its files stored in the cache. This way, every time you access the site it doesn’t have to load all of its files from scratch. Ultimately this means that page load times are reduced.
Setting up a caching solution on your WordPress website is as simple as installing a plugin. If you’re looking for a free caching plugin, we recommend W3 Total Cache. However, if you need advanced functionality and customer support, WP Rocket is the way to go.
Caching is vital for WordPress performance optimization and page speed, and a plugin solution enables you to easily configure page and browser caching without having to leave the WordPress admin panel.
Step #5: Analyze the Impact Themes and Plugins Have
Installing themes and plugins that don’t meet the latest standards could potentially be harmful to your WordPress website. In the worst case scenario, it could put your visitor’s security at risk — especially if you’re running an online store. When choosing themes and plugins, it’s best to select from reputable resources such as WordPress’ Theme Directory and Plugin Directory. If you’d rather go for a premium alternative, marketplaces such as ThemeForest and CodeCanyon have great offerings.
A poorly coded theme will definitely impact performance, so it’s important to carry out due diligence on any suitable candidates. Here are some key factors you should look out for:
- Number of downloads. This number signifies how many times the theme or plugin was downloaded. Go for those that have high download figures.
- Last updated. If the plugin hasn’t been updated for over a few months it means that the developers may have stopped maintaining it.
- User ratings. One way to get direct reviews is to peruse the user ratings. Read up on the poor views (one-star and two-star ratings) before you go on to install the theme or plugin.
Poorly configured plugins can cause a significant performance drop. One way to check which plugin is negatively impacting your site’s performance is by installing the P3 (Plugin Performance Profiler) plugin. It lets you analyze plugin load times, impact on site load time, and the number of queries.
This is a great tool, but although we found no issues during our testing, the plugin hasn’t been updated for over two years, meaning it may not be compatible with future versions of WordPress.
Once you find a bottleneck, you need to reduce the effects it has on your site. If the theme or plugin is vital to your workflow, you could contact the developer directly for assistance. However, you may also need to find an alternative – from a reputable resource of course.
Conclusion
By staying on top of performance optimization, you can ensure that your site ranks well, delivers optimal user experience, and runs smoothly. Building a solid foundation for your site and keeping it pristine is vital for your site’s successful growth.
Let’s recap the main points once again:
- Assess your website’s speed using tools such as Pingdom and Load Impact.
- Use WordPress’ background processes to gain insight on performance drops, and take measures to boost performance.
- Optimize all of your images to ensure blazing fast page load times.
- Utilize the power of a good caching solution to deliver an exceptional user experience with fast loading pages.
- Analyze the impact your themes and plugins have on your site using the P3 (Plugin Performance Profiler) plugin.
Do you have performance optimization tips of your own to share? Let us know in the comments section below!
Image credit: JuralMin.


3 Comments