While traditional content marketing is great for reaching a new audience, it’s not the only available method. Word of mouth from satisfied customers provides great social proof, although controlling whether it’s positive is difficult. To get the benefits of both strategies, you can launch a podcast.
Podcasting can be an ideal way to reach more people, and provides a nearly perfect method for showcasing your expertise. Fortunately, the process of launching a podcast on your site is simple – just as you would expect from a platform like WordPress.
In this article, we’ll look at how to launch a podcast using WordPress that also syncs to iTunes. However, let’s first discuss why podcasting should be part of your marketing arsenal!
Why Launching a Podcast Is a Smart Idea

In case you’re not familiar with the term ‘podcast’, let’s define it. A podcast is essentially an audio recording, much like a radio show, that’s distributed through various channels. For example, you can host it on your website, or via a dedicated audio platform such as SoundCloud. There are also podcasting-specific platforms, directories, and other curated collections such as those found on iTunes.
Podcasting is currently big business – around a quarter of people listen to one at least once a month. This means it’s something you should consider leveraging. Given that podcasts are essentially content marketing, the benefits are similar to what you get from blogging. You can reach new people, increase your industry influence, and rank more highly in search engines. For this reason, there are two kinds of people who will find podcasting most viable: those with expertise to share, and those who can influence others to share their own knowledge.
How a Podcast Is Created
Before we discuss how to launch your podcast, let’s quickly talk about how you’ll create it. A recent article over at Lifehacker summed up the process well. Creating a podcast can be boiled down to the following steps:
- Find a suitable topic.
- Collect the necessary equipment, such as a microphone and recording software.
- Record and edit your podcast.
- Add music, cover art, and other incidentals.
- Publish your podcast.
For help with the first four steps (if you haven’t started your podcast yet), check out the linked article above. Throughout the rest of this article, we’ll be covering that last step in detail, so buckle up!
How to Launch a Podcast on iTunes With WordPress (in 4 Steps)
There are only four steps you’ll need to take if you want to launch a podcast on iTunes through WordPress. Let’s begin with selecting a suitable plugin.
Step 1: Choose a Suitable Podcasting Solution (And Install It)
When it comes to hosting a podcast with WordPress, there are a few options. Many users opt for either PowerPress or Seriously Simple Podcasting, which are both quality tools. For this tutorial, we’ll be using the latter:
Seriously Simple Podcasting is a breeze to use, offers practically all the features you’ll need to get started, and provides plenty of functionality to scale with you as you grow.
The good news is that whichever solution you choose, you can install it using the same method you would for any plugin from WordPress.
Step 2: Tweak Your Solution’s Settings
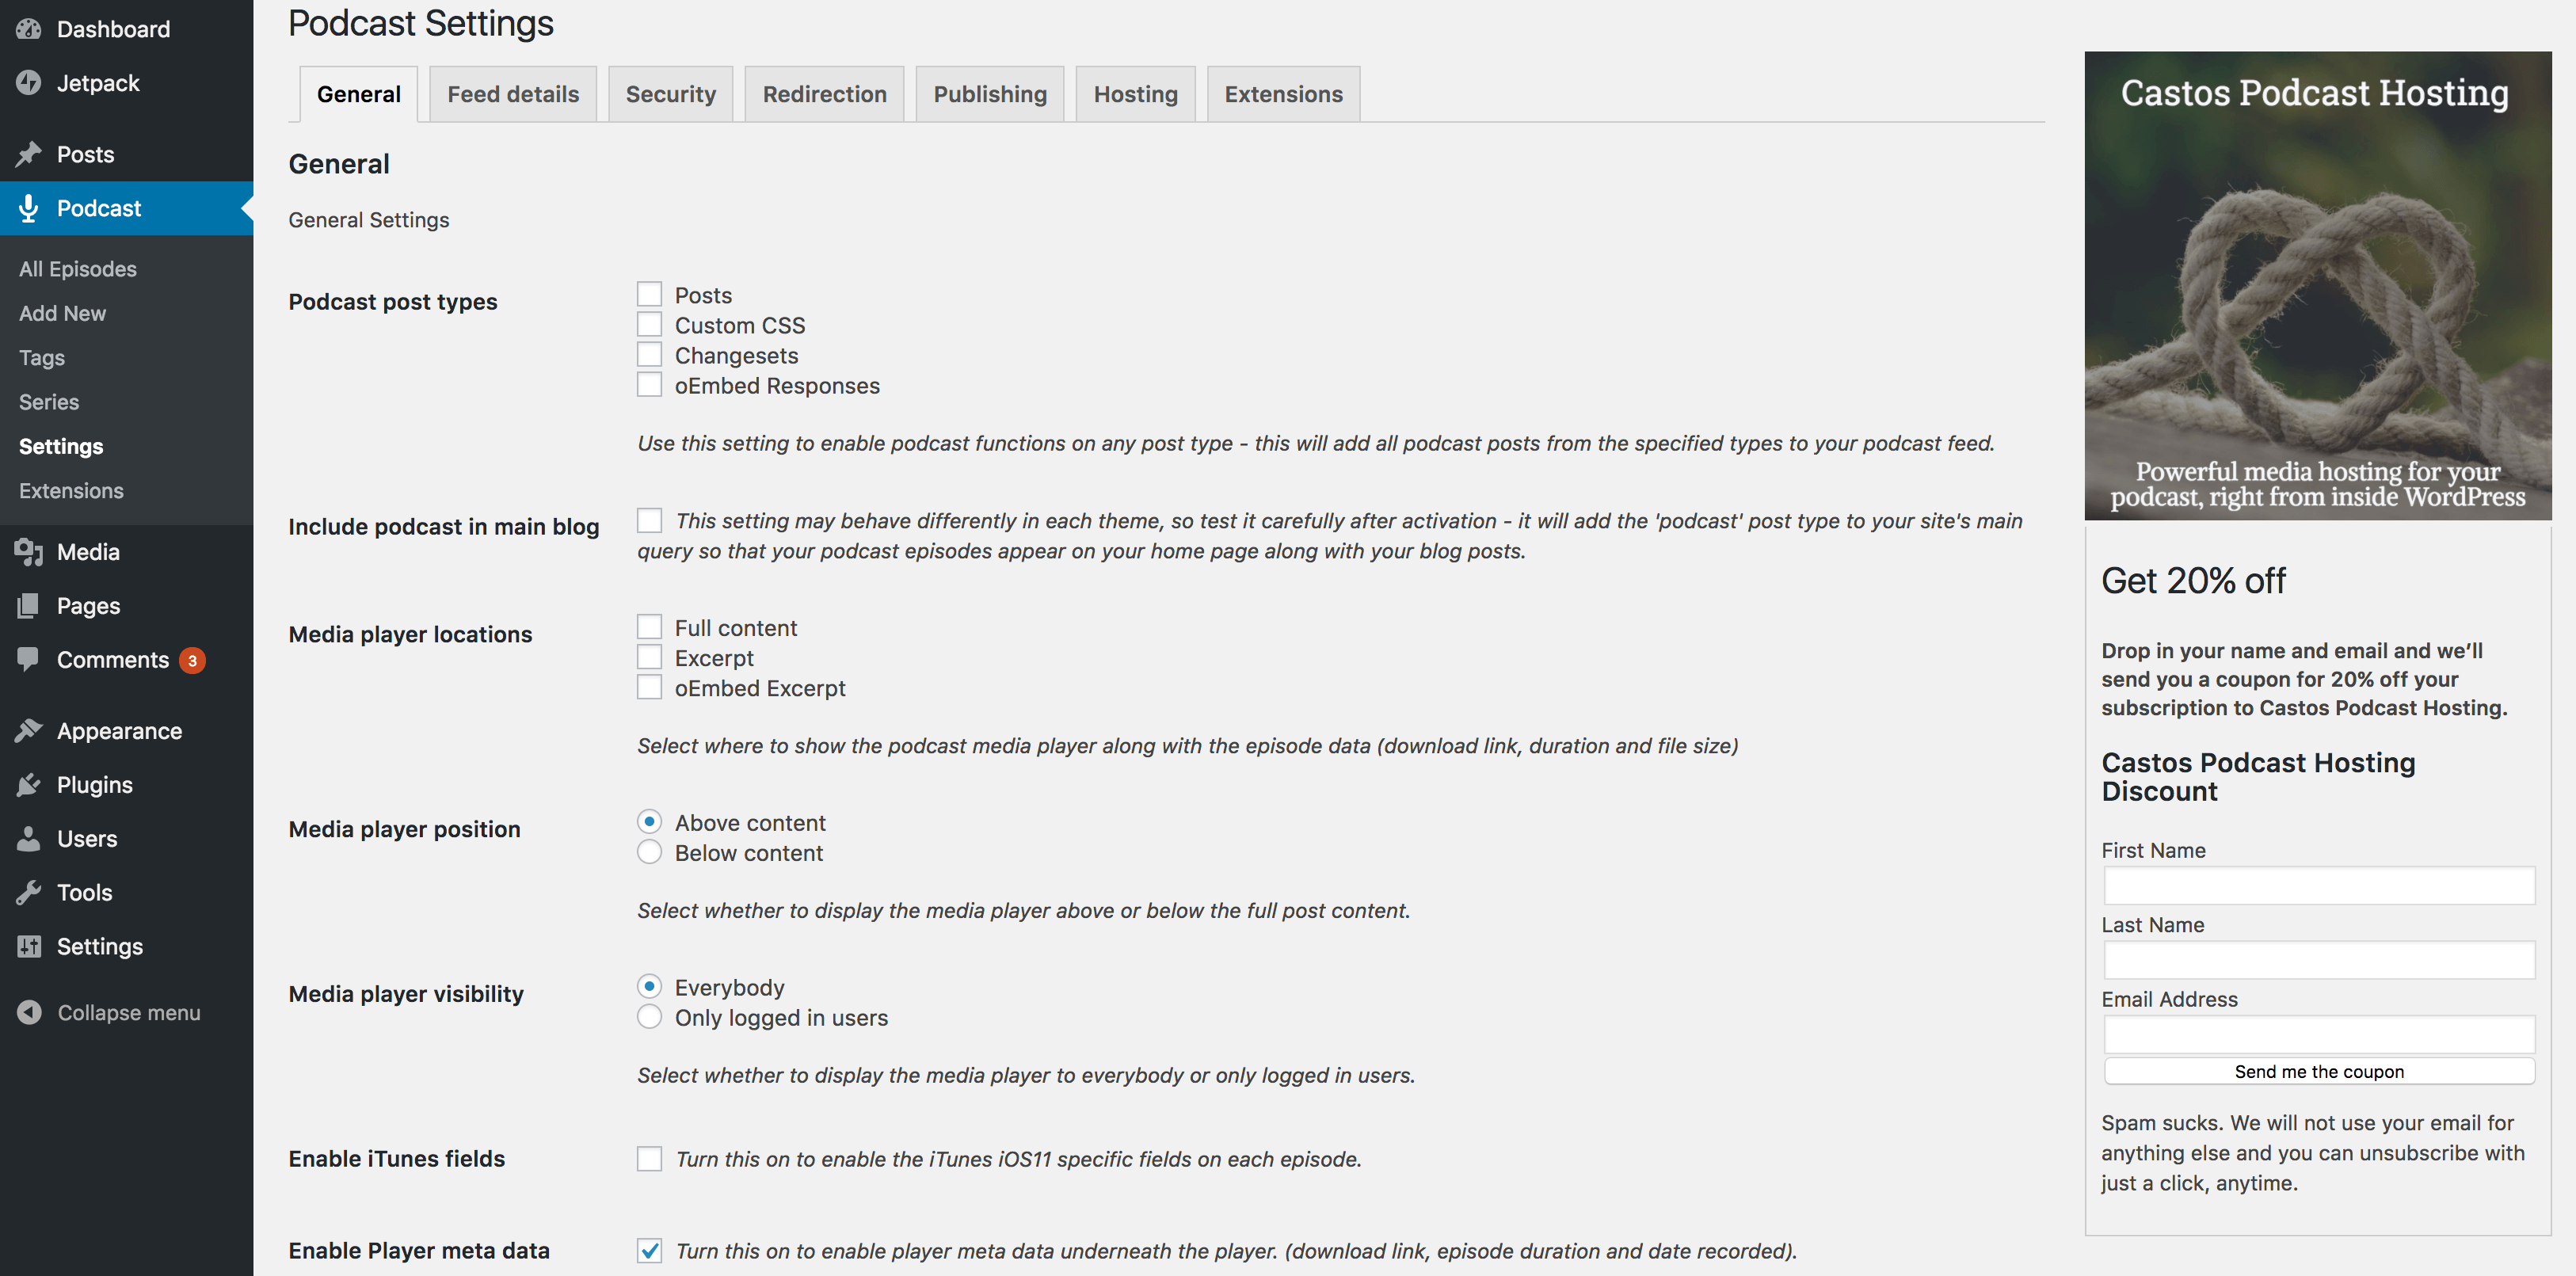
Once the plugin is installed, there will be a new Podcast tab within WordPress, accessible from the left-hand menu. Your first port of call should be to tweak the plugin’s settings, which you can do by navigating to Podcast > Settings. Inside, you’ll see an almost overwhelming set of options:
Along the top are a number of tabs that relate to different aspects of hosting and displaying your podcast. Let’s sum them up quickly:
- General: This screen enables you to choose where your podcast will display, and select the color scheme, visibility, and position of the media player.
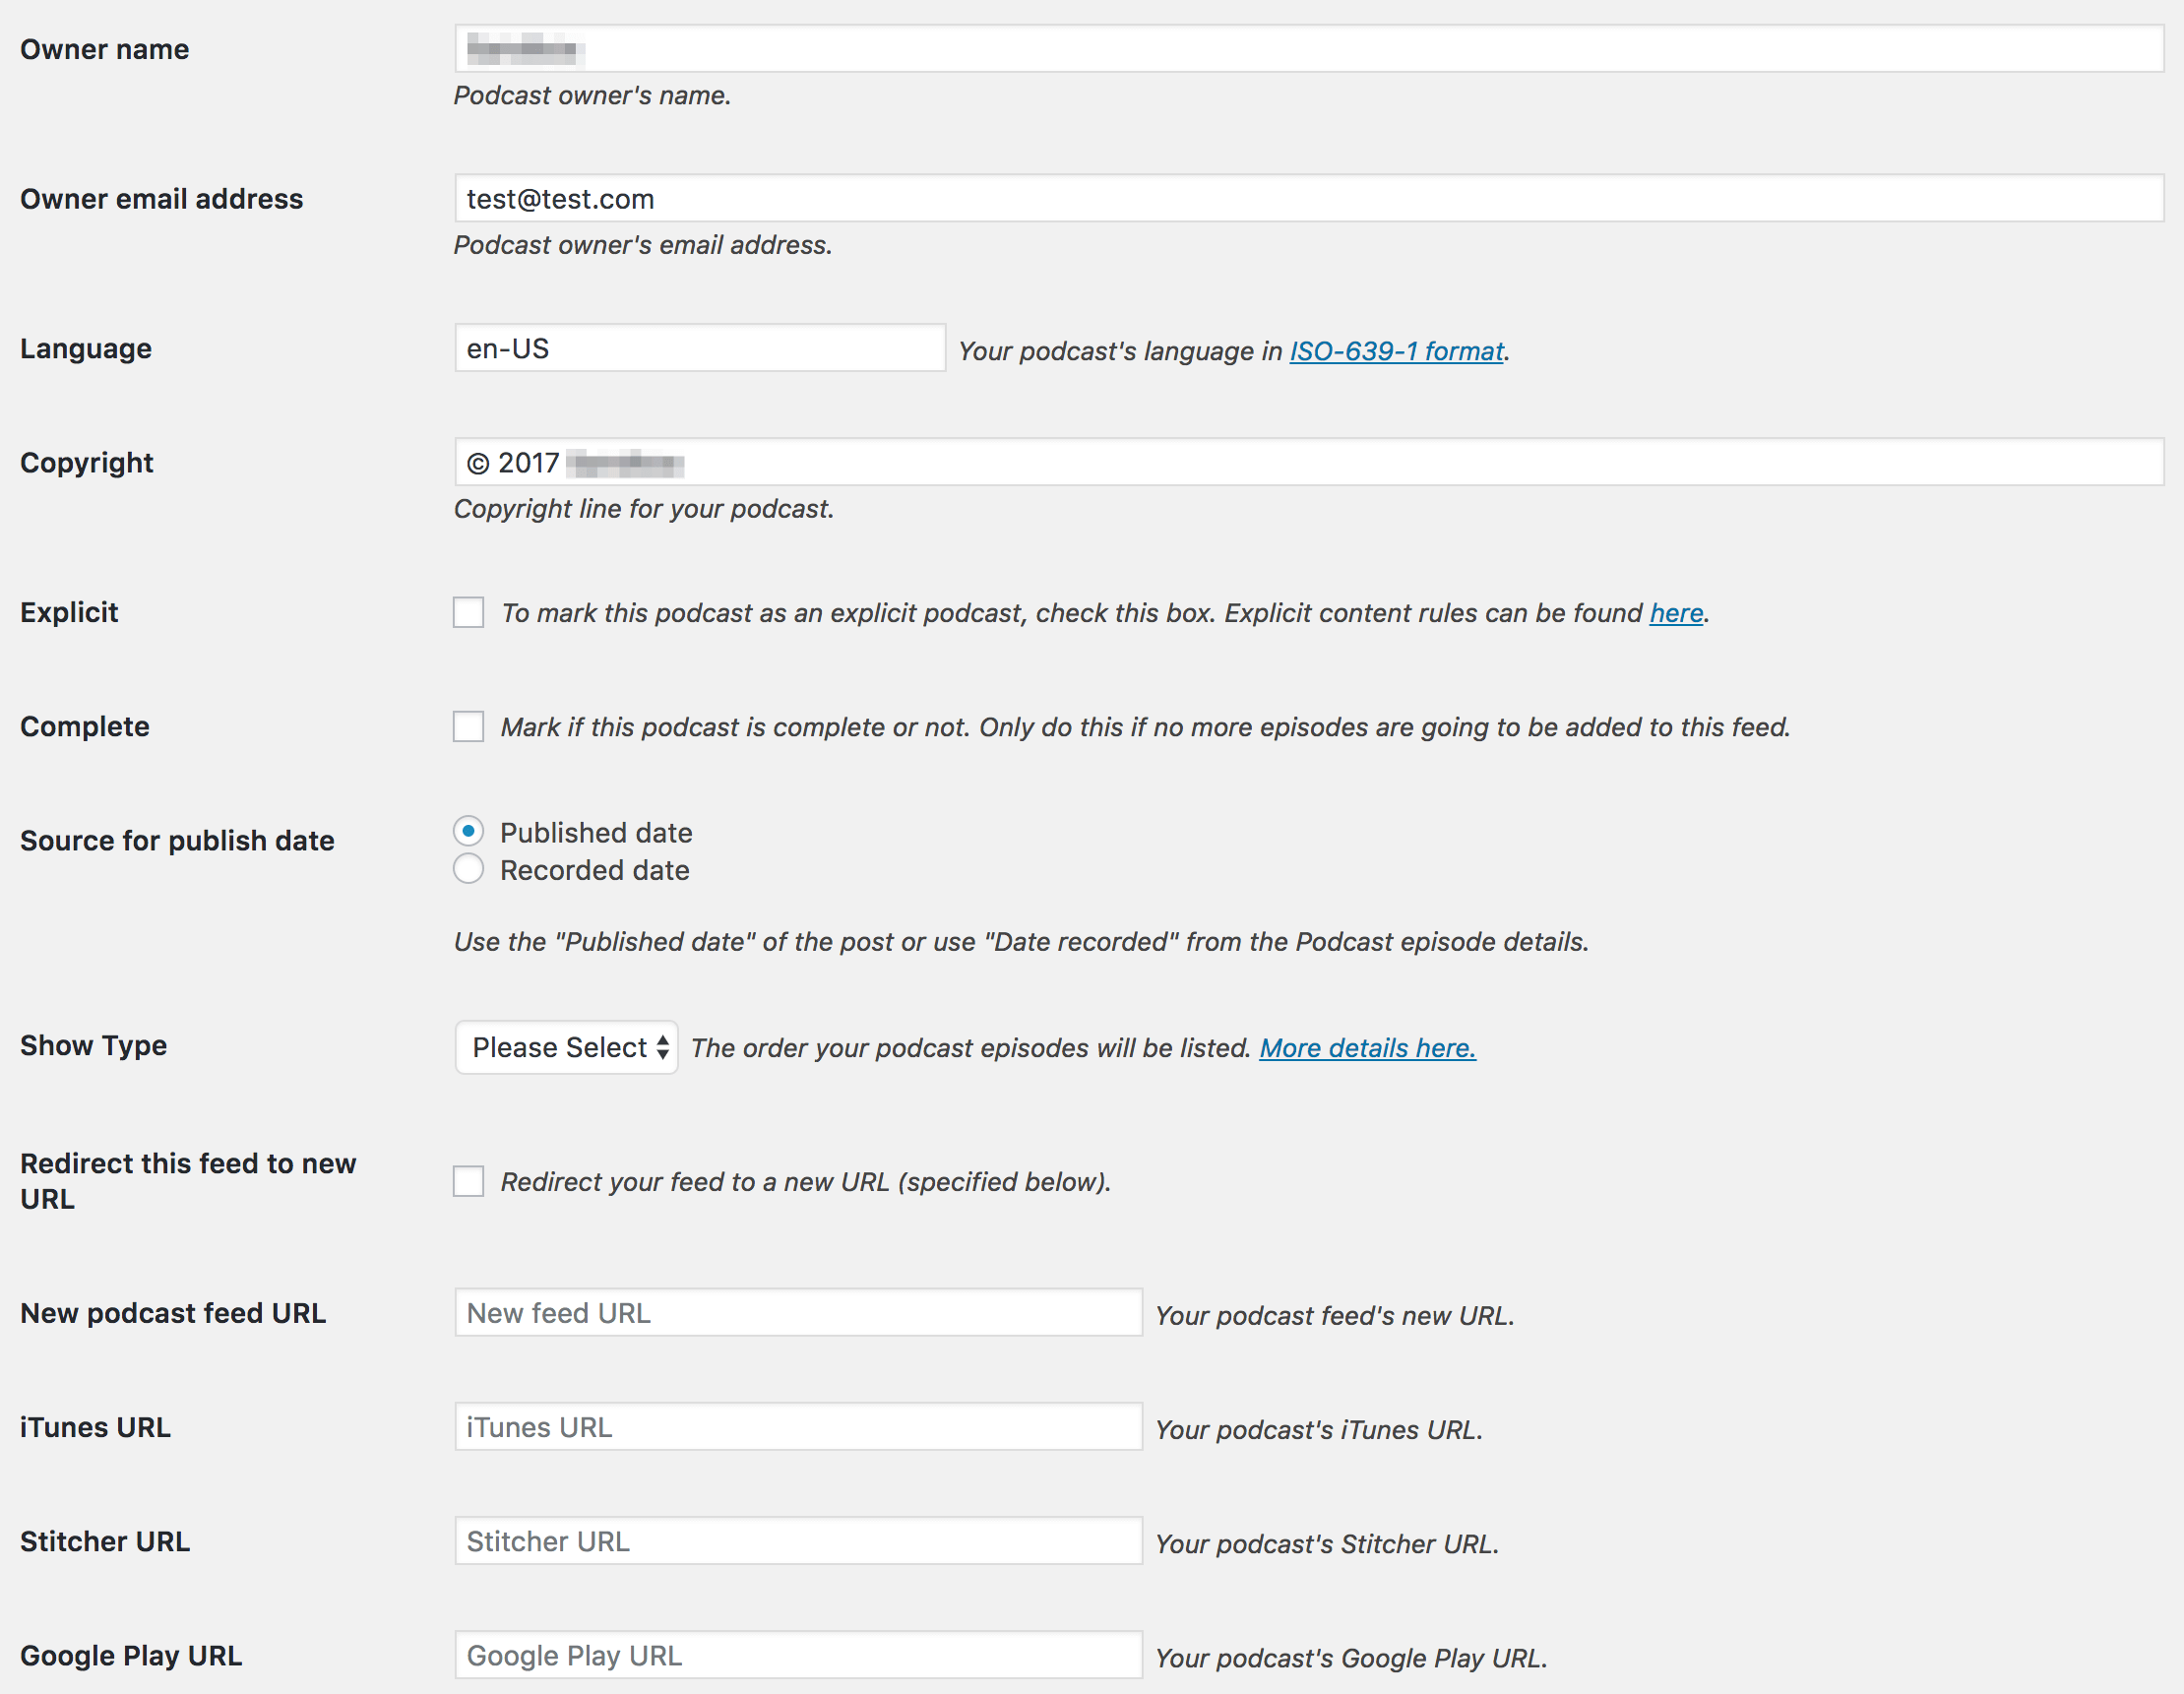
- Feed details: In this tab, you’ll add the information that will be visible to listeners when they’re browsing episodes in your feed.
- Security: If you’d like to block users from viewing your feed, and even password protect it, this tab contains the options you’ll need.
- Redirection: Once your podcast is active, this screen lets you safely move it to a new URL.
- Publishing: This screen enables you to set specific URLs for your published podcast feed.
There are two final tabs: Hosting and Extensions. Seriously Simple Podcasting provides its own hosting service, which can be set up through the former, while the latter offers a number of different extensions to enhance the functionality of your podcast and your listeners’ experience.
Step 3: Upload Your Podcast Via WordPress (And Optimize Its Settings)
Next up, you’ll need to upload your podcast through WordPress. However, before you do that, let’s discuss your hosting options. Ultimately, there are two choices: use dedicated hosting, or upload the podcast to your server. In our opinion, hosting your podcast on your own website is a recipe for disaster – just as with uploading videos.
On a technical level, podcasts take up a lot of space. If your web host imposes file size limits, you may be hamstrung before you begin. What’s more, as listener numbers increase, the impact on your bandwidth could slow your site to a crawl. Instead, we’d suggest opting for a dedicated podcast hosting service such as Castos, to give you as much flexibility and peace of mind as possible. Plus, this particular host is fully compatible with Seriously Simple Podcasting.
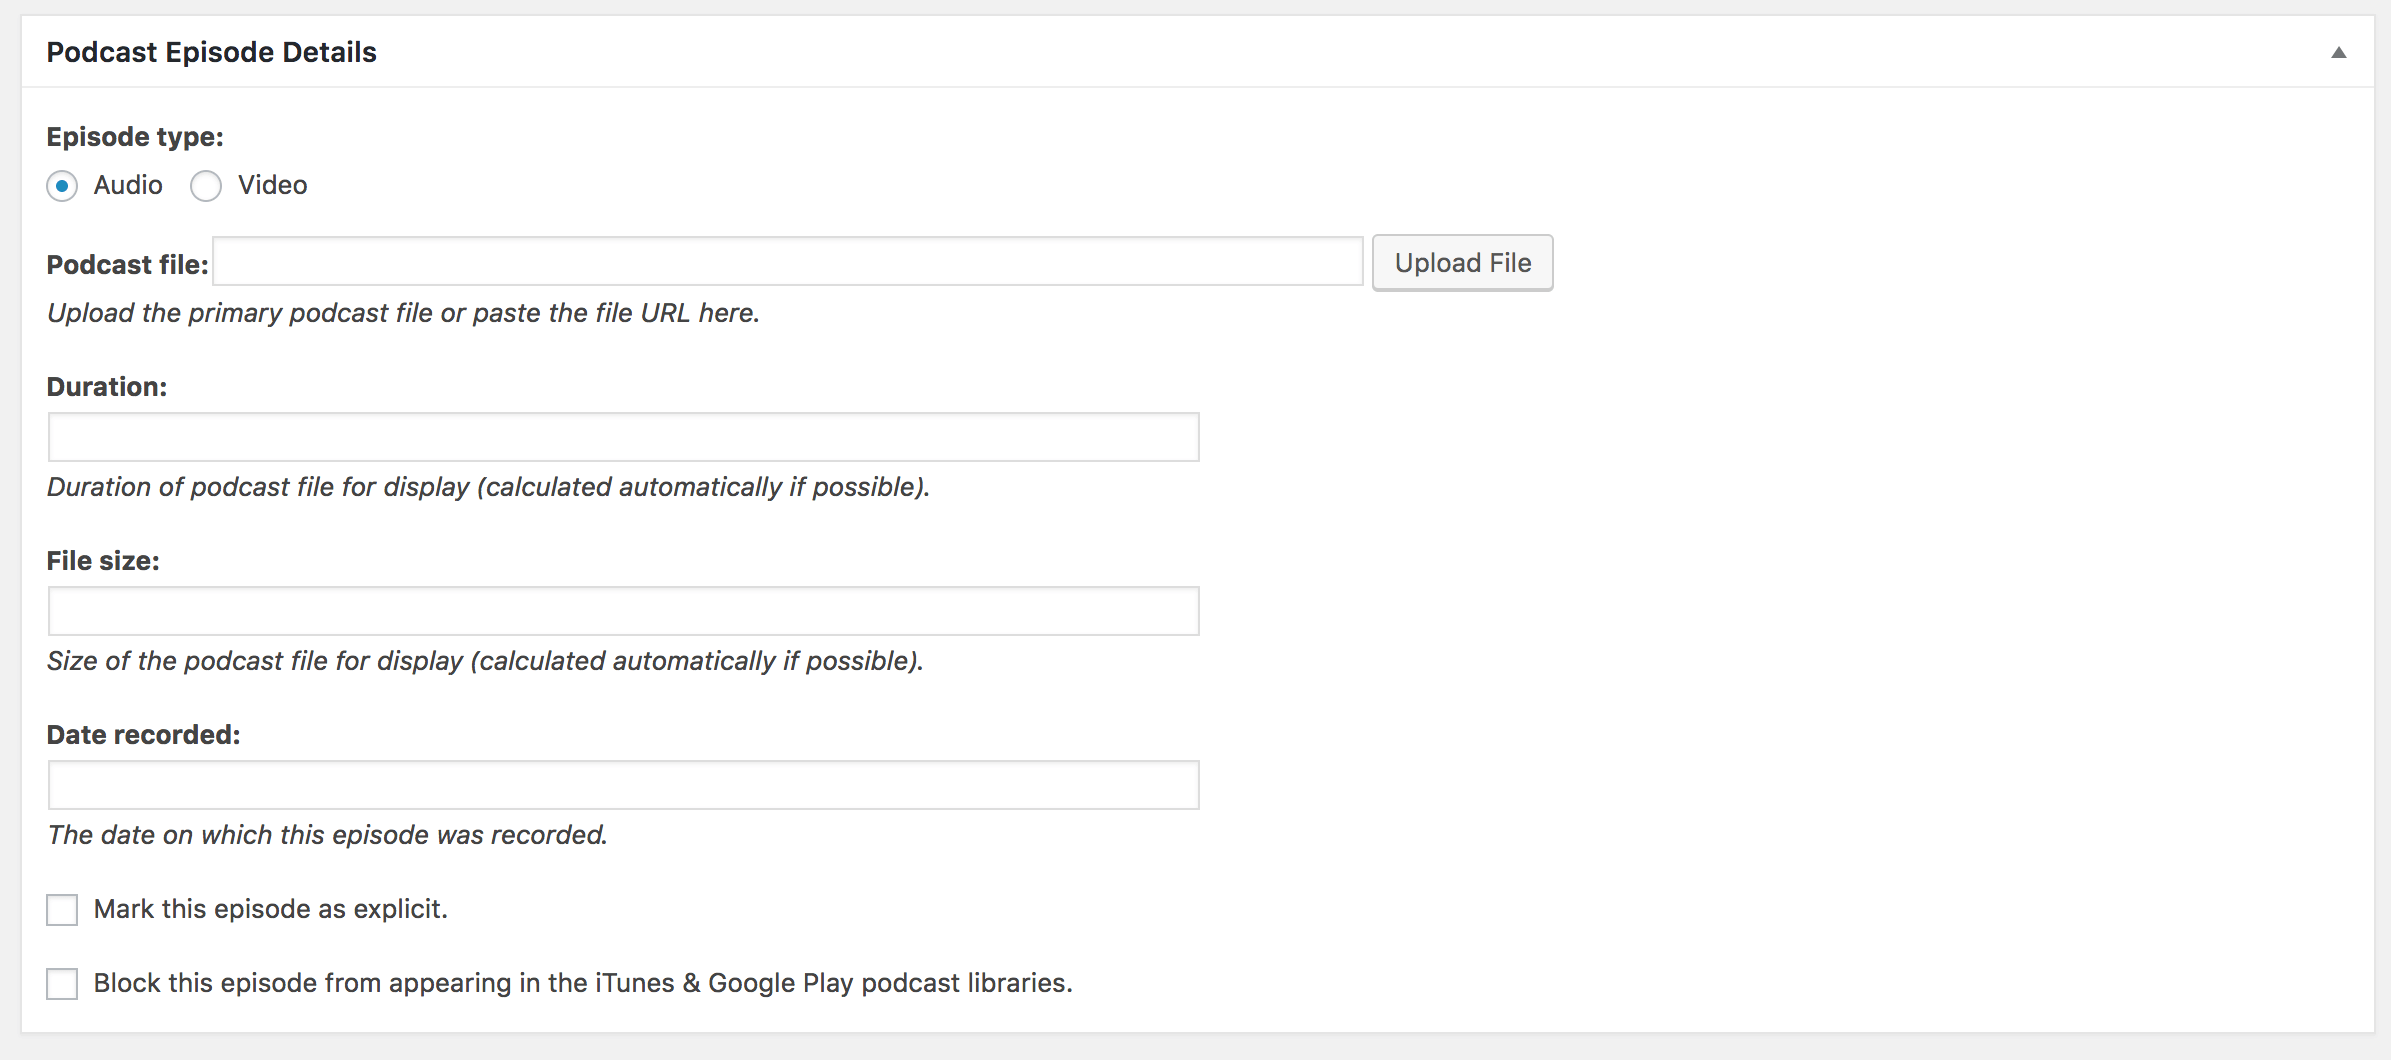
Once you have your hosting sorted out, you’re ready to actually upload your podcast. Your first step will be to navigate to the Podcast > Add New page in WordPress. Once you’re there, it will look similar to any other edit page. The main difference is the new Podcast Episode Details metabox further down the page:
Here, you’ll need to add a title and some descriptive text to the editor panel, then populate the fields in the metabox to your liking. You’ll also want to mark whether it’s audio or video, upload the file itself, and optionally add some further metadata.
Finally, there are two more checkboxes – one to mark your podcast as explicit, and another to block your podcast from appearing on iTunes and Google Play. However, you’ll likely not want to check that final box, since it will interfere with our final step.
Step 4: Submit Your Podcast to iTunes
While the previous three steps are enough to get your podcast out into the world, sharing it with the iTunes user base is a smart (and free) strategy. The developers of Seriously Simple Podcasting have a detailed article in their knowledge base explaining how to submit your podcast to iTunes. Let’s sum up the process briefly:
- Obtain your feed’s URL from the Publishing tab on the Podcast > Settings page.
- Sign into Apple’s iTunes Connect page using a valid Apple ID.
- Once inside, click the Plus (+) button and paste in your feed URL.
- Click Submit, and wait to receive an email success notification.
- When you receive your unique podcast link, head back to the Podcast > Settings page in WordPress, find the Feed details tab, and enter the iTunes URL into the relevant field at the bottom of the page.
Once you save your changes, iTunes will then crawl your feed on a regular basis and update your podcast library when new episodes are available.
Conclusion
If you’re looking for a way to reach people and increase your influence, you’d be hard-pressed to find a better method than podcasting. What’s more, combining WordPress with a solution such as Seriously Simple Podcasting means the entire process is a breeze.
This post has first looked at why podcasting is a great way to reach new business, then walked you through the steps to launch one using WordPress. Let’s recap them quickly:
- Choose a suitable solution.
- Tweak the wealth of settings to customize your podcast to your requirements.
- Decide where you’d like to host your podcast, and upload it.
- Submit your podcast to iTunes.
Do you have any questions about launching a podcast with WordPress? Let us know in the comments section below!
Featured image: Pixabay.


1 Comment